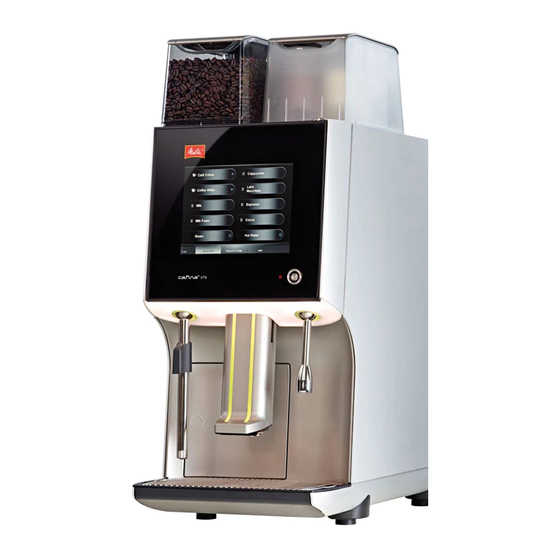
Melitta Cafina XT6 Operating Instructions Manual
Hide thumbs
Also See for Cafina XT6:
- Operating instructions manual (28 pages) ,
- Manual (2 pages) ,
- Operating instructions manual (36 pages)

Related Manuals for Melitta Cafina XT6


Summary of Contents for Melitta Cafina XT6
- Page 1 Operating Instructions Melitta Cafina ® ® Melitta Professional Coffee Solutions...
-
Page 2: Table Of Contents
Table of contents 8.3 Menu option "Selection" ����������������������������� 18 General ���������������������������������������������������������� 8�3�1 Product groups ��������������������������������������� 18 1.1 Manufacturer information ����������������������������� 4 8.3.2 Creating product groups ������������������������� 18 1.2 About these instructions �������������������������������� 4 8.3.3 Deleting product groups ������������������������� 19 1.3 Description ����������������������������������������������������� 4 8.3.4 Editing product groups ��������������������������� 19 8�3�5 Adding dispensing products ������������������� 19 Safety ... -
Page 3: General
Overview of chapters General Safety Technical data Installation Chip key Preparation Dispensing products Settings Cleaning Translation of the original operating instructions Maintenance Recycling and disposal Special accessories 26646 • 20150301... -
Page 4: Manufacturer Information
General General Safety 1�1 Manufacturer information 2�1 Purpose Melitta Professional Coffee Solutions GmbH & Co� KG This machine and all accessories are intended for the Zechenstr� 60 following operating modes: 32429 Minden • Usage by trained personnel Germany • Supervised self-service operation (self-service) Internet: www�melitta-professional�de • With fixed water connection • Pressure-free operation via freshwater and waste water canister •... - Page 5 Safety CAUTION CAUTION Risk of burning due to hot liquids! Machine damage! There is a risk of scalding when hot liquids are issued� The machine may be damaged by penetrating water� This occurs in the following situations: • Never position the machine on damp surfaces or ͵ After switching on, operate or store it in a damp environment�...
-
Page 6: Technical Data
͵ 1 removal tool ͵ 1 discharge holder Grounds drawer capacity For approx. 50 portions ͵ 1 microfiber cloth ͵ 1 tin of Melitta® Cafina® Combi-Tabs (art. no. 24719) Operating data ͵ 10 bags of Melitta® Cafina® AMC cleaner (art. no. 25363) Output per hour 20-25 l hot water ͵ 1 coffee measure of 6 g Permitted ambient + 5-30 °C ͵... -
Page 7: Electrical Connection
Installation 4�1�2 Electrical connection Distances The supply voltage must match the details on the Toward the back At least 5 cm nameplate� Upward At least 20 cm The supply lead must be fuse-protected by the customer with a ground fault circuit breaker (max. 30 mA). In self-service mode, the machine and all accessory units must be installed so that they can be supervised at all For connection via a mains plug, the socket must be times by trained personnel�... -
Page 8: Chip Key
Chip key Follow the points given below for installation to use Chip key canister operation: Included with the machine are two green user chip keys and one yellow manager chip key� 5�1 Green user chip keys The green user chip keys can be used to carry out the following actions: •... -
Page 9: Preparation
Preparation Preparation 6�1�2 One coffee supply container If your machine has a supply container, run the following The initial commissioning process is carried out by steps: customer services� If you want to put the machine itself • Open the cover on the bean container� back into operation after a standstill, run a cleaning ͵... -
Page 10: 6�1�4 Filling The Instant Powder
Preparation 6�1�4 Filling the instant powder 6�2 Switching on 1� Check that the water tap is open� CAUTION 2� Open the grounds drawer door (see Chapter 6.6 on Damage to the instant container cover! page 12). The cover on the instant container cover is not removable� 3� Switch the machine on using the main switch on the Attempting to remove the cover could damage the left. -
Page 11: Switching Off
Preparation 1� Hold one of the chip keys (1) in front of the contact 6�3�1 Waiter operation surface on the machine (see) so that the contacts are You can switch off the machine in waiter operation� fully in contact� Carry out the following steps: ͵ The question "Switch on unit?" is shown on the display� Fig� 7: Switching off the machine 1� On the display, touch the "Unit" button (3). 2� Select an option from the following menu options: Fig�... -
Page 12: Lock Product Selection
Preparation 6�4 Lock product selection 2� Select the "Filling" function (6). 3� Select one of the following options: You can lock product dispensing temporarily� To do this, • Press the required "" button over the following carry out the following steps: displays to mark the container as full: ͵ Front left bean container (1) corresponds to 1� On the display, press the "Unit" button. "Bean container 1"... -
Page 13: System Message
Preparation 6�7 System message 6�7�1 Messages in waiter operation In waiter operation, system messages are displayed such as missing product material (e.g. "Bean container empty") directly on the display. 6�7�2 Messages in self-service operation In self-service operation, system messages are indicated by a notice symbol (1). Fig� 9: Emptying the grounds drawer Empty the grounds drawer into normal household waste� To do this, carry out the following steps: 1�... -
Page 14: Dispensing Products
Dispensing products Dispensing products After each steam outlet, press the steam button again to clear the steam line� This prevents the steam nozzle becoming blocked� Once the machine has been heated up, the products that can currently be dispensed are shown on the display� Also wipe the steam tube after every use on the outside using a clean and damp cloth to remove milk residues�... -
Page 15: 7�4 Canceling The Product Dispensing
Dispensing products Dispensing variants and product groups are identified 7�6 Batch mode using the following symbols: Batch mode can be used to preselect multiple products • The "≡" symbol identifies a product group (1). and dispense them in sequence� ͵ Open this by tapping the group� • Press the "" symbol to dispense the product shown (3). -
Page 16: Product Dispensing Via Product Filter
Dispensing products Deleting products in batch mode To remove or add products from the batch during ongoing product dispensing, press the "Pre-set batch input" button (2). Delete the products in the dispensing batch by selecting the product on the display and press the cancel button "X" (2) (see Fig. 15 on page 15) as follows: •... -
Page 17: Manual Coffee Addition
Settings 7�8 Manual coffee addition Settings There is the option of adding coffee powder into the The machine is preset so that it can be used straight machine by hand� To prepare the product, the beans away for normal user operation� are not taken from the bean containers but instead the machine waits for the addition of the coffee powder with The functions described here are only accessible if they dosage spoon�... -
Page 18: 8�2 Carrying Out Inputs
Settings Some keys are also assigned with special characters (e.g. key "S"). Press the keys for a longer time to display the special characters� 8�3 Menu option "Selection" Here you can set which pre-programmed products are displayed for dispensing� Products can be grouped into product groups� For self-service and waiter mode, you can manage or create different dispensing products and product groups�... -
Page 19: Deleting Product Groups
Settings 3� Press the "Release" button (2) to confirm the created 8�3�5 Adding dispensing products group for dispensing� Self-service and waiter operation modes ͵ If no confirmation is given, the group will not be displayed on the dispensing interface� 1� Select for the self-service and waiter operation modes a product group where you want to add a 9 The new product group is created� dispensing product�... -
Page 20: Menu Option "Product Filter
Settings 8�4 Menu option "Product filter" 8�4�3 Editing main criteria Here you can set the selection criteria for filtering dis- Here you can edit the main criteria by assigning different pensing products available in waiter mode� filters� A list of all possible main criteria can be found in For this carry out the following steps: Chapter 7�7 on page 16�... -
Page 21: Duplicating A Product
Settings 8�6 Menu option "Unit" Note Products identified with a * in the ID cannot be Here you have the option of cleaning the machine and edited� These products are pre-programmed adjusting the fill levels� in the basic settings for the machine� 7�... -
Page 22: Menu Option "Maintenance
Settings 8�6�2 Menu option "Maintenance" 8�7 Menu option "Operation" Here you have the option of cleaning the machine or Here you can read off the consumption and product switching it off� There is also information available on statistics and carry out settings on the machine� when the last cleaning operation was carried out�... -
Page 23: Machine Settings
Settings 8�7�2 Machine settings Cleaning time Set cleaning time "1 or "2" for the automatic cleaning prompt on the display; With only one cleaning time, cleaning times "1" and "2" must be identical. Display Set display brightness� brightness Display brightness Set display brightness in stand-by (stand-by) mode� Dispensing light- Set the brightness of the dispensing lighting. Front light color Set the color of the front lights�... -
Page 24: Cleaning
• After each use of the steam lance, steam must be for the automatic cleaning program: issued for approx� two seconds and then clean the • Melitta® Cafina® Combi-Tabs (art. no. 24719). steam lance using a clean, damp cloth� • Melitta® Cafina® AMC cleaner (art. no. 25363). • Daily cleaning is required for all systems that have been used at least once, and the coffee grounds drawer must also be emptied daily. -
Page 25: Daily Cleaning
Cleaning • If necessary, also clean the filter mesh in the fresh CAUTION water canister� To do this, turn and remove the cap Machine damage! and rinse out the strainer� The machine may be damaged by penetrating water� • Ensure that the fresh water canister is filled with •... -
Page 26: Starting The Cleaning Program
Cleaning 9�4�2 Starting the cleaning program Button Function The cleaning program for the machine runs mainly Clean and switch Cleans the milk and brewing automatically� The following points should be carried out off full system system; then the machine nevertheless: switches off 1� Clean the milk tube protruding from the machine Clean full system Cleans the milk and brewing with a damp cloth�... -
Page 27: Cleaning The Instant System
Cleaning When "Cleaning agent brewing system" appears on the After the cleaning process is finished, the machine display, perform the following steps: switches off or returns to dispensing standby – depending on your selection� If you want to continue operating the machine, place a container of milk in the fridge and insert the milk tube into the milk container�... -
Page 28: Removing The Mixer Unit
Cleaning 9�5�1 Removing the mixer unit Fig� 36: Mixer impeller 6� Remove the mixer impeller (6) from the axle. 9 The mixer unit has been removed� 9�5�2 Cleaning the mixer unit Follow the steps below to clean the mixer unit: 1� Clean all parts thoroughly with hot water and a cleaner suitable for milk products� ͵... -
Page 29: Cleaning The Bean Container
Cleaning 9�6 Cleaning the bean container Switch the machine off and allow it to cool down� Carry out the following steps once cooled down: Fig� 39: Cleaning the bean container 1� Remove the cover from the bean container� 2� Turn the lever (1) counter clockwise to release the bean container�... -
Page 30: Cleaning The Touch Screen
Cleaning 9�8 Cleaning the touch screen 9�9 External cleaning Cleaning is required if there is any visible dirt� Note Carry out the following steps for the cleaning process: Do not use abrasive cleaning agents or sharp objects� 1� In waiter operation, press the "Unit" button. 2� Press the "Clean touch screen" button. For external cleaning, carry out the following steps: ͵... -
Page 31: Maintenance
Maintenance Maintenance 10�2 When faults occur If you have any questions regarding servicing, main- WARNING tenance or disposal, please contact your local branch� Malfunctions! Repair and maintenance work is only permitted to be In the event of visible damage or detected malfunctions, carried out by customer services or by personnel autho- important safety functions may be interrupted�... -
Page 32: Recycling And Disposal
This unit is intended for installation and use with the 11�3 Disposal of cleaning agents coffee machine Melitta® Cafina® XT6 in enclosed, dry The cleaning agents recommended in these instructions areas� conform to legal requirements when used correctly and for this reason are permitted to drain into the normal... -
Page 33: Special Accessories
Special accessories Preparation Cleaning The unit should be switched on for about an hour before Clean the entire unit observing the following points: use, so that the refrigerator has cooled down sufficiently� • Before the first use. If you have moved the refrigerator beforehand, allow it •... -
Page 34: Xt6 Cw
• Never position the unit on damp surfaces or operate This unit is intended for installation and use with the or store it in a damp environment� coffee machine Melitta® Cafina® XT6 in enclosed, dry • Clean the surfaces of the unit using a damp cloth� areas� • The device is not suitable for positioning on a surface where a jet of water may be used�... - Page 35 Special accessories Filing the cup cupboard Cleaning Turn the machine off and allow it to cool down� Note DANGER The surface of the glass shelves can become scratched� Danger of death due to electrical voltage! • Remove and position cups and glasses There is a danger of death if live parts are touched� carefully�...
- Page 36 Melitta macht Kaffee zum Genuss ® Melitta Professional Coffee Solutions GmbH & Co. KG • Zechenstr. 60 • 32429 Minden • GERMANY Phone: +49 571 5049-0 • Fax: +49 571 5049-233 • professional@melitta.de • www.melitta-professional.de...
Need help?
Do you have a question about the Cafina XT6 and is the answer not in the manual?
Questions and answers