Table of Contents
Advertisement
Quick Links
Advertisement
Table of Contents

Related Manuals for Tannoy VSXNET Series


Summary of Contents for Tannoy VSXNET Series
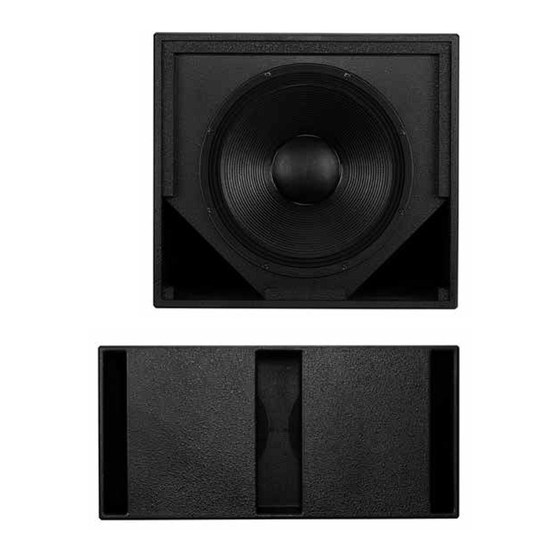
- Page 1 VSXNET SERIES High-performance subwoofers Operation Manual...
- Page 2 Important Safety Instructions The lightning ash with arrowhead symbol within an equilateral triangle, is intended to alert the user to the Important Safety Instructions presence of uninsulated "dangerous voltage " within the product's enclosure that may be of su cient magnitude to constitute a risk of electric shock to persons.
-
Page 3: Table Of Contents
Table of Contents Table of Contents 2. Introduction ............................... 4 3. Unpacking ................................4 4. Preliminary Recommendation ........................4 5. Interface Panel ..............................5 6. Operation ................................6 6.1 AC power requirements ..........................6 6.2 Cooling ................................6 6.3 LED functions ..............................7 6.4 Limiters ................................7 6.5 Audio Connections ............................7 6.6 User DSP On/Off . -
Page 4: Introduction
2. Introduction 2. Introduction Designed, engineered and built in the United Kingdom, the VSXNET Series from Tannoy comprises of one band-pass and two direct-radiating subwoofers for demanding professional and commercial sound applications. Within the VSXNET Series, system designers can choose from a variety of sizes, power levels and low frequency characteristics to suit particular requirements. As indicated by their respective suffixes, the VSXNET 12.2BP is a band-pass device, while the VSXNET 15DR and VSXNET 18DR are direct radiating models. The three band-pass model incorporates Tannoy’s latest engineering philosphies in band-pass enclosure design, optimising tonal balance and harmonic output through precisely engineered enclosure geometry and innovative transducer design. For ease of installation, connections are on integrated, recessed termination panels equipped with both NL4 speakON and barrier strip connectors. The speakON connectors are angled and recessed to allow flush ® mounting to a wall or ceiling. All VSXNET Series subwoofers are housed in rugged, durable birch ply enclosures with ergonomic Integrip™ carry handles and an integrated pole-mount recess. Coupling VSXNET Series subwoofers to VX and VXP Series full-range loudspeakers via the optional VTH pole mount facilitates portable PA applications without need for tripod stands. 3. Unpacking Each Tannoy VSXNET Series subwoofer is carefully tested and inspected prior to shipment. After unpacking, please check for any exterior physical damage, and save the carton and any relevant packaging materials in case the unit again requires packing and shipping. In the event that damage has been sustained in transit, notify your dealer and the shipping carrier immediately. 4. Preliminary Recommendation VSXNET Series subwoofers can produce high sustained output levels for long periods of time. If users are in close proximity, these levels could lead to permanent hearing damage. Because Tannoy loudspeakers have a natural-sounding, flat frequency response and very low distortion, users may not be aware of the potential hazard. For continuous exposure to high levels, we recommend use of a sound level meter to ensure noise levels are within safety limits. The meter should be capable of integrating levels over a period of exposure in conformance with noise control standards. VSXNET Subwoofer Operation Manual rev 2.0.0... -
Page 5: Interface Panel
A user DSP ON/OFF A green signal present LED, • FUSE HOLDER — Replace only with 10A 230 V switch operating at -50 dB relative anti-surge fuse. Tannoy part Number 3461 0919. In the OFF position this will to the minimum input level return the loudspeaker to the factory default settings • AC MAINS CONNECOR — Neutrik Powercon... -
Page 6: Operation
6. Operation 6. Operation The range of products are fully integrated designs, all speaker management functions which include driver EQ, dynamic limiting, & crossover functions are carried out within the DSP, therefore the need for external amplification, active crossovers and limiters is not required. The only input from the user is crossover between full range cabinets & subwoofers, and room equalization (if necessary). When routing audio, units may be daisy chained together by linking the Input/link XLR connectors. It is necessary to have power local to each speaker, as it is not possible to daisy chain the AC power connectors. 6.1 AC power requirements VNET products are equipped with Neutrik Powercon mains connectors which mate with the Neutrik NAC3FCA Cable connector, quick lock with a securing lever for power-in. This AC mains connector is supplied with each VNET product. The amplifier operates between the ranges of 100 to 240 Volts; the auto ranging power supply detects the mains voltage automatically and configures accordingly. Replace the mains fuse only with the same T10A HBC type supplied by Tannoy under part number 3461 0919. 6.2 Cooling Do not install this equipment in an enclosed space. Do not limit free ventilation and movement of air around the back panel. Ensure that there is at least 100 mm (4”) of space around all sides of the product for ventilation. An efficient switch mode power supply has less weight, less current draw and more efficient mechanical cooling; meaning that no fans are required. In an area with a relatively high ambient temperature the heatsink can reach temperatures of up to 65 degrees C, this is perfectly normal.. VSXNET Subwoofer Operation Manual rev 2.0.0... -
Page 7: Led Functions
6. Operation 6.3 LED functions On switch on all of the LED’s will illuminate instantaneously. The first to go off is the green signal LED after about 1 second. The red limit LED will flash for 5-10 seconds, this is the unit performing a self diagnostic test. During this initial few seconds the audio is muted until the red LED stops flashing & the blue power LED is the only LED left illuminated. After the self diagnostic test is performed, the unit is ready to pass audio. When audio is detected the green signal LED will illuminate. If at any time the Red LED flashes this indicates that the DSP is taking corrective action by applying limiting to either the LF or HF channels (or both). Regular flickering of the Limit LED is perfectly acceptable; do not allow the limit LED to stay on constantly for any sustained length of time (reduce the gain). Fast regular flashing of the red LED indicates that the DSP is taking protective action; the input will be automatically attenuated to avoid over driving, if this occurs the operator should reduce the input gain from the source. If the gain is not reduced the unit will eventually be shut down by the DSP. The blue ‘Network Find’ LED on the front of the cabinet (behind the grill) can only be illuminated by activation from within the software interface. When activated the LED will flash intensely as an aid to locate and identify loudspeakers connected on the network. The red limit LED on the back panel also doubles as a network find LED duplicating the function of the blue front mounted LED. 6.4 Limiters The limiters are carefully set-up to preserve the loudspeakers dynamic headroom by allowing short term transients to pass; audible degradation in sound will only become apparent when the limit indication is on constantly. The limiting functions will protect the amplifier from long term overheating by attenuating the driving voltage to the drive units. If used irresponsibly (constant hard clipping) sound quality will be compromised. In extreme cases drive units may also be damaged. 6.5 Audio Connections The signal input & link connectors are fully balanced. SIGNAL XLR CONNECTOR When connecting a balanced signal be sure to wire Hot (+) Pin 2 to the following standard:- Cold (-) Pin 3 Shield (GND) Pin 1 In a standard balanced interconnection there are two signal conductors and a shield. The shield is normally... -
Page 8: User Dsp On/Off
6. Operation 6.6 User DSP On/Off A user DSP On/Off switch is provided on the amp panel. This miniature switch is recessed and can be easily activated with a small screwdriver. The switch in the ‘OFF’ position will return the VNET loudspeaker back to the original factory settings, this basically means that any parameter edited in software (EQ, Crossover, Mute, Delay) can be defeated by activating this switch. This can be a very useful feature. Example:- In a large corporate production the networked loudspeakers are been used by an operator who has been using the Podware software for editing EQ & gain & delay; at the end of the performance he mutes the loudspeakers from within the software and the loudspeakers are returned to ‘hire stock’ after the performance. Next day there is a rush for a small hire comprising only a couple of VNET loudspeakers. The speakers are taken to the small gig where the operator is not making use of the Networking, or Podware software in this particular instance. He realizes that he muted the loudspeakers the night before, and this particular pair had 100 ms of delay applied!! All he has to do is flick the ‘USER DSP’ switch to the ‘OFF’ position (assuming he is carrying his Leatherman) and any of the USER editable parameters in Podware are defeated. VSXNET Subwoofer Operation Manual rev 2.0.0... -
Page 9: Network Connections
7. Network Connections 7. Network Connections Interconnection between the network computer and the speakers is very straight forward, using twisted pair cable and simple connectors. The RS485 interface operates on a shared bus so that a single computer can control any amplifier on the bus, and the computer may gather status information from any device on the bus. Each module contains a unique address so that no user input will be required to configure network nodes. It is only data that is carried over the network to control setup functions & ongoing system diagnostics, therefore if a network fault occurs, audio can still be delivered. This alleviates the problem of total system failure through a single system controller going down. As each loudspeaker controls it own DSP functions any unforeseen failure would be isolated to only that particular ‘node’. example network VSXNET Series VSXNET Series RS485 link RS485 3rd party RS232/ RS485 link USB to RS485 interface VSXNET Series VSXNET Series RS485 link RS-485 is standard for sending serial data. It uses a pair of wires to send a differential signal over distances up to 4000 feet (1200 m) without a repeater. The differential signal makes it very robust, RS-485 is one of the most popular communications methods used in industrial applications where it s noise immunity and long-distance capability are a perfect fit. -
Page 10: Linking Cabinets
7. Network Connections Connections from the RS485 device to the speaker is as follows:- From RS485 Device RJ45 to VNET Network Pin 1 Pin 2 Pin 5 Network connections between nodes are via rugged Neutrik ‘ethercon’ connectors; these are high quality and are compatible with standard RJ45 plugs. Node connections are made using standard RJ45 connectors and CAT5 cable. Long runs should be solid core, but standard is fine. The implication is that stranded is more robust and less prone to breakage, it is therefore suggested that solid should be used for install applications while stranded is better suited to rental applications. Cabinets can be’daisy chained’ or linked in a ‘star’ configuration, or a combination of both. Quality termination of all connectors at each node is essential for the network to function correctly. 7.1 Linking Cabinets The table below shows the standard ‘straight-through’ convention for CAT5 patch cables (clip down) . These can be used between network nodes. Bear in mind though that only Pins 1, 2, & 5 are used to link the network together. P1 (pin No.) P2 (pin No.) Colour White/Orange Orange White/Green Blue White/Blue Green White/Brown Brown To aid the construction of very large networks each speaker provides a source of power (+12 Volts) on the network ‘Link’ connector that can be used to seamlessly power network extenders or repeaters that large networks may... -
Page 11: Software Installation
8. Software Installation 8. Software Installation The enclosed disc contains the Podware software package; a comprehensive editor, interface, & diagnostics tool for the VNET range of loudspeakers. Check the Tannoy website for any updates http://www.tannoypro.com The disk should ‘AUTORUN’, if not open the Podware folder & double click on the ‘Setup.exe’ icon. Your PC will need to have the Windows .NET Framework installed. If it does not, you will be directed to the necessary location to do so http://msdn.microsoft.com/netframework/downloads/framework1_1/ The .NET Framework is also on your installation CD. What is the .NET Framework? The .NET Framework is an integral Windows component for building and running the next generation of software applications and Web services. The .NET Framework: Supports over 20 different programming languages. Manages much of the plumbing involved in developing software, enabling developers to focus on the core business logic code. Makes it easier than ever before to build, deploy, and administer secure, robust, and high-performing applications. The .NET Framework is composed of the common language runtime and a unified set of class libraries. You can check to see if you already have the .NET Framework 1.1 installed by clicking ‘Start’ on your Windows desktop, selecting ‘Control Panel’, and then double-clicking the ‘Add or Remove Programs’ icon. When that window appears, scroll through the list of applications. If you see Microsoft .NET Framework 1.1 listed, the latest version is already installed and you do not need to install it again. PodWare is a powerful application capable of running many complex windows concurrently.It therefore requires a computer with reasonable levels of resources. For acceptable performance, the computer must have at least: • PC with >450 MHz Pentium processor • 32-bit Windows tm operating system (NT, 2000, XP, Vista, Win7) • 128 MB RAM • CD-ROM drive or Internet access • RS232 or USB port VSXNET Subwoofer Operation Manual rev 2.0.0... - Page 12 8. Software Installation Hardware requirements:- Required Recommended Required Recommended Scenario Processor Processor Client (Windows Pentium Forms and Pentium 90 MHz or faster 32 MB* 96 MB or higher 90 MHz* Windows Services) Pentium Server Pentium 133 MHz or faster 128 MB* 256 MB or higher 133 MHz* *Or the minimum required by the operating system, whichever is higher. Installing the software from the CD 1. Exit all running programmes & insert the CD. 2. Select your destination Folder. Click <Next> Open the CD contents & Double click on the Setup.exe icon. The welcome screen will appear. Click <Next> VSXNET Subwoofer Operation Manual rev 2.0.0...
- Page 13 8. Software Installation 3. Confirm Installation. Click <Next> 4. If you accept the license agreement check ‘I Agree’. Then Click <Next> 5. The programme will begin installing 6. Installation Complete VSXNET Subwoofer Operation Manual rev 2.0.0...
- Page 14 8. Software Installation Menus The menu system is arranged like so:- File Open Opens a file which contains parameters for the device Saves the current settings in the current file name Save Save As Saves the current settings under a new file name Exit Closes the application Device Update Update device firmware (requires loader utility) Network Go Online Allows communication with devices on the network Stops communication with devices on the network Go Offline Port Allows you to select which serial COM port you wish to use Help Help Topics Opens the help file (in your HTML viewer) About this application Shows copyright and version information Some of these menu items have short-cuts using toolbar buttons. See Toolbar Toolbar The toolbar provides the following one-click functions: Open...
- Page 15 8. Software Installation PodWare communicates with VNET using a serial ‘COM’ port as a ‘network’ connection. When a network connection is open and actively connected to a compatible device, the system is said to be ‘On Line’.Whilst On-line, you can control the connected device in ‘real time’, and continuously receive status information from the device. When going online, the application will take a few seconds while it copies the settings in the device to the control panel. (See Parameter Synchronisation) ̊ To go On-line, you can either select Device/Online from the menu, or press the Online toolbar button, which is a red triangle. If all is well, the triangle will turn green, indicating that you are ‘On-line’. You can however operate your system without going On-line. You can send the current controls settings to a device using Device/Send (See Menus), or by clicking the Send toolbar button (see Toolbar). These actions clearly still require a network connection to be present. Parameter Synchronisation PodWare aims to always ensure that the control settings in the virtual control panel are always a faithful representation of the settings in the connected device. To achieve this, the parameters in the device are copied to the control panel when going online. This takes a few seconds to complete (see Communications). Whilst online, any changes to the control settings will result in changes in the stored parameters in the devices, thus retaining synchronisation. When a file is opened online, the new settings are not only set in the control panel; they are also transferred to the device. Controlling Devices When ‘online’ the tree menus will show the connected VNET speakers on the network. Double clicking on the model on the tree view will open the control panel for each respective device. Each ‘open’ panel will also appear on the tree view under panels . When online, Podware gathers information from the connected devices. Any parameters which have been adjusted by the user in previous sessions will be shown. Each control panel can be positioned on the screen to represent its actual location position in the venue. When saving data the control panels co-ordinates are also saved so that it appears in the same location on the screen when data is recalled (see Saving &...
- Page 16 8. Software Installation The control panel shows the model name (not editable), and firmware version for the device. The device properties panel also have an editable Configuration Name, and Loudspeaker name, the latter will appear in the tree menu after editing. Each panel will in addition have a complete set of controls relating to the adjustable parameters within the device (press the EQ/DELAY tab to access this section). Each control will contain the current parameter value (see Parameter Synchronisation). Single parameters may be adjusted ‘live’ whilst ‘On-line’. Controls have standardised properties that allow them to work in a consistent way across various control panels for different devices. Many controls will allow the mouse wheel to be used for fine adjustments, or the keyboard as an alternative (see Keyboard Shortcuts). When using the keyboard or the mouse wheel, it is necessary to have the control in question ‘in focus’. You can bring a control into focus either by tabbing to it (using the Tab key), or by clicking on it with the mouse. Focus is often shown as a dotted rectangle around part of the control. Drop-Down Selector Boxes These are for selecting one item from a number of possibilities in a list. Click the arrow on the right-hand end of the control to cause it to display a list of the options. Click on the text for that option to select it. If there are many options to choose from, a scroll-bar will be shown, allowing you to scroll up and down the list by clicking the scroll arrows. Note that once the control is highlighted, the PGUP, PGDWN and Arrow keys or the mouse wheel may also be used to change the selection. Spin Boxes The value would normally be adjusted by clicking on the top button to increase the displayed value, or on the bottom button to reduce the displayed value. Holding the mouse button whilst on a button will after a short delay cause the repeat mechanism to repeatedly increment or decrement the value. Alternatively, values may be typed into the value box directly. To do this, click in the value box and type in the new value. The value you type in may include a minus sign, a decimal point, and/or an engineering multiplier, such as ‘k’ to signify a multiplication of 1000. This may appear at the end of the typed string, or may be used instead of a decimal point (such as 6k2 to mean 6200). For the value to be accepted,...
- Page 17 8. Software Installation VNET Control Panel The control panel for VNET allows VNET parameters to be viewed and adjusted. The panel is organised into a monitoring area (at the top left of the panel) where the status of VNET may be viewed, and a control area where all the controls to adjust parameters are located. Note that Parameter adjustments are automatically stored in the DSP section of each VNET - it is not possible to do temporary changes then store them separately. Parameters which can be adjusted by the user are: Crossover/Delay, EQ (Equalisation), Gain & Power. The Crossover/Delay tab allows you to adjust the crossover frequencies, crossover shapes & delays. The EQ sections (8 bands) allow you to adjust the frequency and level (boost/cut) for each of the equalisation filters, and the bandwidth (Q) of the bell equalisers. The latter controls allow the responsiveness of the filters to be adjusted either as bandwidth (Octaves) or Q. The up/down buttons will change the values. Values may be typed into either the bandwidth or Q part of the box. A ‘Frequency Response’ curve shows the shape of each filter individually (by colour), and the combined effect of all equalisation (in white). There are also High & Low shelving filters. Speaker Properties At the top of the panel there are several pieces of information about the connected device (which are only activated when going On-line to a device):- Model Name The VNET model number Loudspeaker name To uniquely identify the speaker (i.e. delay 3) Configuration Name A name of up to 12 characters that you may enter as a name for the current set of parameters. Firmware Version A 4-digit hexadecimal number, acting as a signature for the current set of parameters. This may be used as a quick check that the parameters loaded into an X-Pod are as they should be. Also see Controls and Control Panels Keyboard Shortcuts Podware supports the following ‘shortcuts’:- Tab...
- Page 18 8. Software Installation Audio Processing VNET provides the following processing options: Crossover filtering with frequency variable over the range 10 Hz to 25 kHz (and Out ) with the following alignments: • 1st order • 12 dB/Octave Bessel • 12 dB/Octave Butterworth • 12 dB/Octave Linkwitz-Riley • 18 dB/Octave Bessel • 18 dB/Octave Butterworth • 24 dB/Octave Bessel • 24 dB/Octave Butterworth • 24 dB/Octave Linkwitz-Riley The Low band has a low-pass crossover filter, and the High band has a high-pass and a low-pass crossover filter. • A 2nd order low-shelf filter with frequency variable over the range 10 Hz to 25 kHz, and boost/cut from -15 to +15 dB. • A 2nd order high-shelf filter with frequency variable over the range 10 Hz to 25 kHz, and boost/cut from -15 to +15 dB. • Eight bands of bell (parametric) equaliser, each band having frequency variable over the range 10 Hz to 25 kHz, bandwidth variable from 0.1 to 5 octaves, and boost/cut from —15 to +15 dB.
- Page 19 8. Software Installation Protection (factory optimised) Comprehensive protection features preserve the longevity of the amplifier by continuously monitoring several critical parameters, and reducing the gain, or muting the amplifier either temporarily or permanently depending on the nature and seriousness of the fault or misuse. The amplifier will recover and restart if at all possible, but will remain shutdown if a serious fault persists (such as a permanent short circuit on the output). Minor faults are dealt with by slowly ‘dimming’ the amplifier, reducing the level to a sufficient degree and for a sufficient time that the amplifier is able to recover gracefully without any user interaction. When the fault condition has passed, the amplifier will slowly fade up to normal. More serious faults may cause the amplifier to mute while it recovers, after which it will automatically re-energise and fade up, again without user interaction. If such a fault is found to be persistent however, the amplifier is shut down permanently, flashing its limiter indicators rapidly in unison. A power cycle by the user is then required. Any time the amplifier is being protected, the limiter indicator will flash rapidly. During power-up, VNET will keep the amplifier muted for a short time while checks are made that all is well. During this time, the indicators will both be solidly on. The signal is then gently faded up, accompanied by rapidly flashing indicators. Smooth Adjustment Whenever a parameter is changed, VNET will assess the likely impact on the signal path, and will intelligently smoothly ramp to the new value, or mute for a short time if the change could otherwise cause any undesirable sound to be reproduced. Power ON & OFF At the bottom left hand corner of the control panel there is a power button. Activating this button will shut down the amplifier. The DSP section remains active. Saving & Recalling Data Device Data may be saved to disk or opened from disk. PodWare Device Data files (with file extension .dse) contain all the data necessary to restore a device to exactly the same state as when the file was saved. If the current settings have been changed since the last file save or file open, the Save Icon on the toolbar will be shown in solid colour. If the settings are already safe, the Save icon appears grey. If a file is opened when on-line to devices, the new data will be sent to the device, overwriting whatever was in the device. A warning will be given before this is done. Data saved from one device can be reopened in another to save time inputting data. (Assuming settings are to be duplicated) Podware will always try to protect your data, warning you if you are attempting an action that could cause loss of data.
-
Page 20: Updating Firmware
8. Software Installation 8.1 Updating Firmware Occasionally it may be necessary to update the devices firmware (with file extension .dfw); this may be due to added features or amendments to the VNET product. Check with your dealer/distributor or (www.tannoypro.com) for any applicable updates. Firmware can be updated over the network (no need to disconnect speakers from the network). A firmware update will be common to all VNET products (one file for all models). Updating a devices firmware is straight forward:- 1. Download and save the new firmware file to disk. 2. From the toolbar select ‘Device’ & ‘Start Firmware’ Loader. 3. The following message will appear. 4. Click ‘OK’. 5. Browse to the new firmware file & select. The following message will appear stating the old version number & the replacement version number. 6. Click ‘OK’. 7. In order for the new firmware to take effect the unit has to be switched off & back on again. This can be done automatically after the update. Click ‘OK’ to confirm. VSXNET Subwoofer Operation Manual rev 2.0.0... - Page 21 8. Software Installation 8. At the bottom right hand side of the screen a blue bar will show the progress of the firmware update. 9. After the download is complete the following message appears. The DSP is updating at this point. Do not power down the unit or disconnect any network cable at this point. During the update a red bar will show the progress of the firmware update (bottom right of screen). 10. The device will then power cycle automatically. The loudspeaker is now ready for normal operation. VSXNET Subwoofer Operation Manual rev 2.0.0...
-
Page 22: Equalisation
9. Equalisation 9. Equalisation VSXNET loudspeakers are designed to need no equalisation or correction to overcome system limitations. As a result, they will only need equalisation to compensate for difficult acoustic environments. Over equalisation can reduce system headroom, and introduce phase distortion resulting in greater problems than cures. If equalisation is required then it should be applied gently and smoothly. VNET full range loudspeakers are point source, phase coherent designs and violent equalisation will be detrimental to the overall sound quality. When a loudspeaker is used in close proximity to another, comb filtering effects can create coverage problems; comb filtering creates an uneven frequency response across the coverage area due to constructive and destructive interference effects between the sources. The amount of comb filtering is affected by the spacing of the relative sound sources. Minimising this effect cannot be cured by equalisation (see the following section for more details). VSXNET Subwoofer Operation Manual rev 2.0.0... -
Page 23: Rigging And Safety Procedures
10. Rigging and Safety Procedures 10. Rigging and Safety Procedures The Tannoy Professional hardware covered in this guide has been designed to offer quick, simple, cost effective and secure solutions for mounting specific Tannoy Professional loudspeakers. This hardware has been designed and manufactured with a high safety load factor for its specific role. To ensure the safest possible use of the hardware covered in this guide, it must be assembled in strict accordance with the instructions specified. The information in these Operation Manuals relating to the assembly and the safe use of these accessories must be understood and followed. The installation of Tannoy Professional loudspeakers - using the dedicated hardware - should be carried out only by fully qualified installers, in accordance with all the required safety codes and standards that apply at the place of installation. WARNING: As the legal requirements for mounting, suspending, hanging, flying or rigging equipment change from country to country, please consult your local safety standards office before installing any product. We also recommend that you thoroughly check any laws and bylaws prior to installation. Tannoy Professional hardware has been designed for use with specific Tannoy Professional loudspeakers, and is not designed or intended for use with any other Tannoy Professional products, or any other devices. Using Tannoy Professional hardware for any purpose other than that indicated in this guide is considered to be improper use. Such use can be very dangerous: overloading, modifying, damaging, or assembling in a manner other than that clearly stated in the Operation Manual will compromise safety. The component parts of any Tannoy Professional hardware device must only be assembled using the accessory kits supplied and in strict compliance with the Operation Manual. The use of other accessories or non-approved methods of assembly may result in an unsafe hardware system by reducing the load safety factor. Welding, or any other method of permanently fixing hardware components together or to the integral fixing points in the cabinet, should never be used. Whenever a Tannoy Professional loudspeaker is fixed to a surface using a Tannoy Professional hardware device, the installer must ensure that the surface is capable of safely and securely supporting the load. The hardware employed must be safely and securely attached both to the loudspeaker and also to the surface in question in accordance with the Operation Manual, using only the fixing holes provided as standard and covered in the manual. Secure fixings to the building structure are vital. Seek help from architects, structural engineers or other specialists if in any doubt. All loudspeakers flown in theatres, nightclubs, conference centres or other places of work and entertainment must be provided with an independent, correctly rated and securely attached secondary safety restraint in addition to the principal hardware device. This secondary safety restraint must prevent the loudspeaker from dropping more than 150 mm (6”) should the principal hardware device fail. -
Page 24: Secur Et - Veb Eyebolt
11. SECUR ET – VEB Eyebolt 11. SECUR ET – VEB Eyebolt Tannoy VSX subwoofers can be flown with high quality VEB M10 eyebolts with collar to BS4278:1984. The loudspeaker is equipped with internal angle plates, which also double as the flying points, and directly accept VEB M10 eyebolts. To install the VEB M10 eyebolts, remove the original M10 counter sunk screws from the locations where VEB M10 eyebolts are to be installed. Replace these counter sunk M10 screws with the VEB M10 eyebolts. Important: It is imperative for safety reasons that two eyebolts, each linked to two independently fixed straps, are used per cabinet. VEB eyebolts should be installed into the fly points as indicated in the following illustrations. Never suspend one enclosure from another to form an array or cluster using these fittings. Never attempt to use formed eyebolts (formed from a steel rod and bent into an eye). 12. Dimensions VSXNET 12.2BP 830.0 Fly Points [32.68"] 750.0 [29.53"] 450.0 720.0 [17.72"] [28.35"] Fly Points 400.0 320.0 [15.75"] [12.60"]... - Page 25 12. Dimensions VSXNET 15DR Fly Points 580.0 [22.83"] 494.0 [19.45"] 43.0 [1.69"] 580.0 [22.83"] 250.0 [9.84"] 422.0 508.0 Fly Points [16.61"] [20.00"] VSXNET 18DR Fly Points 650.0 [25.59"] 43.0 [1.69"] 650.0 [25.59"] 564.0 [22.20"] 290.0 [11.42"] 588.0 Fly Points [23.15"] VSXNET Subwoofer Operation Manual rev 2.0.0...
- Page 26 12 x M10 Flying inserts (portrait 12 x M10 Flying inserts (portrait 12 x M10 Flying inserts (portrait or landscape mounting) or landscape mounting) or landscape mounting) 2 x Integrip carrying handles 4 x Integrip carrying handles 2 x Integrip carrying handles Blanking plate for optional VTH Blanking plate for optional VTH Blanking plate for optional VTH pole mount pole mount pole mount Dimensions H: 400 mm (15.7”) H: 508 mm (20”) H: 588 mm (23.1”) W: 830 mm (32.7“) W: 580 mm (22.8“) W: 650 mm (25.6“) D: 720 mm (28.3”) D: 580 mm (22.8”) D: 650 mm (25.6”) Weight 45 kg (99 lbs) 40 kg (88 lbs) 49 kg (108 lbs) 1. Average over stated bandwidth. Measured at 1 metre on axis. 2. Unweighted pink noise input, measured at 1 metre in half-space. A full range of measurements, performance data, and Ease™ Data can be downloaded from www.tannoypro.com New materials or manufacturing methods introduced through Tannoy’s policy of continuous research and development may result in variances; however, performance will meet or exceed published specifications, which Tannoy reserves the right to alter without prior notice. VSXNET Subwoofer Operation Manual rev 2.0.0...
-
Page 27: Technical Specifications
13. Technical Specifications VSXNET 12.2BP VSXNET 15DR VSXNET 18DR Electronics Efficiency > 85% typically > 85% typically > 85% typically Damping Factor 120 ref 8 Ω 120 ref 8 Ω 120 ref 8 Ω Distortion < 0.05% @ 1 kHz -3 dB output < 0.05% @ 1 kHz -3 dB output < 0.05% @ 1 kHz -3 dB output (22 kHz handwidth) (22 kHz handwidth) (22 kHz handwidth) Input Impedance 5.6 k Ω unbalanced, 5.6 k Ω unbalanced, 5.6 k Ω unbalanced, 11.2 k Ω balanced 11.2 k Ω balanced 11.2 k Ω balanced Output Power (Programme) 1200 W 1200 W 1200 W Input Sensitivity 1.4 V (+5.5 dBu) 1.4 V (+5.5 dBu) -
Page 28: Service Parts & Accessories
14. Warranty 14. Warranty No maintenance of the VSXNET Series loudspeakers is necessary. As part of the MUSIC Group, Tannoy is committed to providing the highest quality products, service and user experience for our customers. One element of this commitment is our after sales support which now incorporates our extended Limited Warranty. In the event of any concern that is not addressed by this extended Limited Warranty we would ask you to contact us at care@music-group.com For full warranty details including the extended Limited Warranty, please visit http://www.music-group.com/warranty.aspx and register your purchase online at www.music-group.com or www.tannoy.com VSXNET Subwoofer Operation Manual rev 2.0.0... -
Page 29: Eu Declaration Of Conformity
2011/65/EU Restriction of the use of certain hazardous substances (RoHS) Hereby declare that: Type of equipment Professional loudspeakers Range name VSXNET Models VSXNET 12.2BP, VSXNET 15DR, VSXNET 18DR Is/are in conformity with the requirements of the following documents: Ref. No Title Edition BS EN 55103-1 Electromagnetic compatibility. Product family standard for audio, video, audio-visual and entertainment lighting control apparatus 2009 for professional use. Emissions BS EN 55103-2 Electromagnetic compatibility. Product family standard for audio, video, audio-visual and entertainment lighting control apparatus 2009 for professional use. Immunity Name: Philippe Robineau Position: Director of Engineering Done at: Coatbridge Date: 25/11/2015 Director of Engineering Tannoy 25 Novemeber 2015 VSXNET Subwoofer Operation Manual rev 2.0.0... - Page 30 16. Notes 16. Notes VSXNET Subwoofer Operation Manual rev 2.0.0...
- Page 31 17. Notes 17. Notes VSXNET Subwoofer Operation Manual rev 2.0.0...
- Page 32 Tannoy operates a policy of continuous research and development. The introduction of new materials or manufacturing methods will always equal or exceed the published specifications. All specifications are subject to change without notice. Copyright (c) 2015 Music Group Innovation SC Ltd. All rights reserved.
Need help?
Do you have a question about the VSXNET Series and is the answer not in the manual?
Questions and answers