
Related Manuals for suprema FaceStation 2


Summary of Contents for suprema FaceStation 2
-
Page 1: Installation Guide
INSTALLATION GUIDE FaceStation 2 English Version 1.00 EN 101.00.FS2 V1.00A... -
Page 2: Table Of Contents
Contents Safety instructions .................... 3 Introduction ...................... 5 Components ..............................5 Name and function of each part ....................... 6 Cables and connectors ..............................8 Correct face registration and authentication method................9 Cautions for registering a face ............................9 Cautions for authenticating a face ..........................9 Installation ..................... -
Page 3: Safety Instructions
• If the proper power is not used, the product may not operate normally. Use a separate power supply for Secure I/O 2, electric lock and FaceStation 2 respectively. • If connecting and using the power supply to these devices together, the devices may malfunction. - Page 4 Otherwise, a product failure may occur. FaceStation 2 uses capacitive buttons. If the environment is moist from wet weather or the product surface is smeared with a lot of water, wipe off the product with a dry towel before using it.
-
Page 5: Introduction
Introduction Introduction Components PVC anchor (4 EA) Diode Wall bracket FaceStation 2 (1 EA) Fixing screw Ferrite core Connection cable (4 EA) (1 EA) (2 pins 1 EA, 3 pins 1 EA, 4 pins 4 EA) 120 Ω resistor Quick guide... -
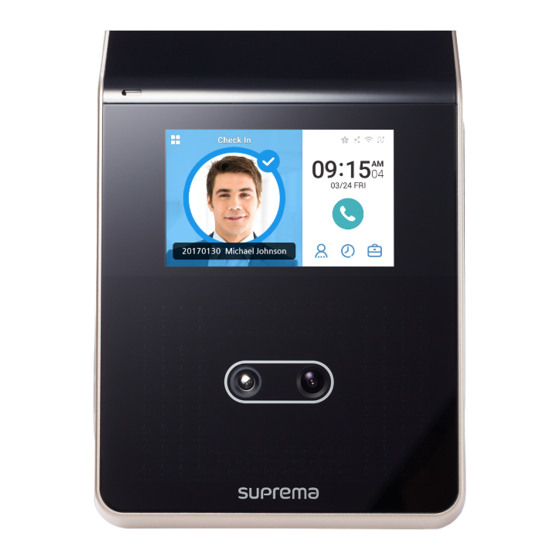
Page 6: Name And Function Of Each Part
Introduction Name and function of each part RF card authentication Microphone unit LCD screen IR Camera Camera TTL input (4 pins) RS-485 (4 pins) Relay (3 pins) Wiegand input (4 pins) Power supply (2 pins) Wiegand output (4 pins) Ethernet USB memory slot Mini USB cable slot Speaker... - Page 7 Introduction Power supply (2 pins) Connect the power supply cable. Ethernet Connect the Ethernet cable. Wiegand input (4 pins) Connect the Wiegand input cable. Wiegand output (4 pins) Connect the Wiegand output cable.
-
Page 8: Cables And Connectors
Introduction Cables and connectors Power supply Name Color PWR +VDC Red (white stripe) PWR GND Black (white stripe) Relay Name Color RLY NO White RLY COM Blue RLY NC Orange RS-485 Name Color 485 TRXP Blue 485 TRXN Yellow 485 GND Black SH GND Gray... -
Page 9: Correct Face Registration And Authentication Method
Introduction Correct face registration and authentication method Cautions for registering a face • When registering a face, maintain a distance of 40cm to 80cm between the device and the face. • Be careful not to change the facial expression. (smiling face, drawn face, wink, etc.) •... -
Page 10: Installation
Adjust the installation position so that the face is not exposed to direct sunlight when a user tries to authenticate. Fix the bracket firmly using fixing screws through the bracket to the position where FaceStation 2 will be installed. Note •... - Page 11 Distance Wall thickness Distance 100 mm 173 mm 120 mm 160 mm 150 mm 132 mm Install FaceStation 2 onto the fixed bracket. Wall Connect FaceStation 2 to the bracket by rotating the product fixing screw of FaceStation 2. Wall...
-
Page 12: Power Supply Connection
• Be aware of the distance between the FaceStation 2 and the power supply when using a separate power supply. The power supply should be installed as close as possible to the device. If not properly connected, the device may malfunction. We recommend that use 16 AWG or 18 AWG cables if the distance between the device and the power supply is too far. -
Page 13: Network Connection
You can connect the product to a hub using a general type CAT-5e cable. FaceStation 2 LAN connection (connecting to a PC directly) FaceStation 2 has an automatic MDI/MDIX function so that it can be connected to a PC directly using a normal straight type CAT-5e cable or a cross cable. FaceStation 2 Note •... -
Page 14: Ttl Input Connection
Installation TTL input connection Cable shield (optional) Door sensor Door button 1 - TTL IN0 2 - TTL IN1 Yellow FaceStation 2 3 - TTL GND Black 4 - SH GND Gray... -
Page 15: Relay Connection
Take caution of the installation direction of the diode. Install the diode close to the door lock. • Use a separate power supply for FaceStation 2 and the door lock. Fail Secure Lock In order to use the Fail Secure Lock, connect N/O relay as shown in the figure below There is normally no current flowing through the relay for the Fail Secure Lock. -
Page 16: Automatic Door Connection
Installation Automatic door connection 1 - RLY NO White 2 - RLY COM Blue Door button Detection sensor Automatic door control device Door lock FaceStation 2... -
Page 17: Connecting As A Standalone
If FaceStation 2 is the master device and a different slave device has been added already, FaceStation 2 cannot be added as a slave device. • When you connect FaceStation 2 as a slave device while FaceStation 2 is the master device, only one FaceStation 2 can be added as a slave device. •... -
Page 18: Connecting To Secure I/O 2
If FaceStation 2 is the master device and a different slave device has been added already, FaceStation 2 cannot be added as a slave device. • When you connect FaceStation 2 as a slave device while FaceStation 2 is the master device, only one FaceStation 2 can be added as a slave device. •... -
Page 19: Wiegand Connection
1 - WG D0 Green 2 - WG D1 White 3 - WG GND Black 4 - SH GND Gray FaceStation 2 Use as a Wiegand output device Cable shield (optional) Controller 1 - WG D0 Green 2 - WG D1 White... -
Page 20: Product Specifications
Product specifications Product specifications Category Feature Specification Biometric Face • FS2-D: 125kHz EM & 13.56Mhz MIFARE, MIFARE Plus, DESFire/EV1, FeliCa, NFC RF Option • FS2-AWB: 125kHz EM, HID Prox & 13.56Mhz MIFARE, MIFARE Plus, DESFire/EV1, FeliCa, Credential iCLASS SE/SR, NFC, BLE RF read range MIFARE/DESFire/iCLASS: 50 mm / EM/HID Prox/Felica: 30 mm, BLE: 50 mm Supported... -
Page 21: Dimensions
Product specifications Dimensions (Unit: mm) -
Page 22: Fcc Compliance Information
EU Declaration of Conformity (CE) This product is CE marked according to the provisions of the R&TTE Directive(1999/5/EC). Hereby, Suprema Inc. declares that this product is in compliance with the essential requirements and other relevant provisions of Directive 1999/5/EC. This device is Class 1 radio equipment under the European Radio and Telecommunications Terminal Equipment (R&TTE) Directive (1999/5/EC). -
Page 23: Appendix
• Do not use the product of Suprema under the situations related to medical, rescue of human lives, or maintenance of life, as a person may get injured or lose his/her life due to product malfunction. If an accident occurs while a consumer is using the product under the... - Page 24 www.supremainc.com www.supremainc.com...
Need help?
Do you have a question about the FaceStation 2 and is the answer not in the manual?
Questions and answers