Table of Contents
Advertisement
Quick Links
Advertisement
Table of Contents

Related Manuals for Abus TVIP11561


Summary of Contents for Abus TVIP11561
-
Page 1: User Guide
TVIP11561 / TVIP21560 / TVIP41560 / TVIP61560 User guide You can find important information and FAQs about this and other products online at: www.abus.com Version 1.0 Firmware: 5.4.4 Build 170502 English translation of the original German user manual. Retain for future reference. - Page 2 ABUS Security-Center GmbH is not liable or responsible for direct or indirect damage resulting from the equipment, performance and use of this product. No guarantee is made for the contents of this...
-
Page 3: Intended Use
English Explanation of symbols The triangular high voltage symbol is used to warn of the risk of injury or health hazards (e.g. caused by electric shock). The triangular warning symbol indicates important notes in this user manual which must be observed. This symbol indicates special tips and notes on the operation of the device. - Page 4 English Power supply Only operate this device through a power source which supplies the mains power specified on the type plate. If you are unsure of the power supply available to you, contact your energy provider. Disconnect the device from the power supply before carrying out maintenance or installation work.
- Page 5 English Installation location/operating environment Do not place any heavy objects on the device. The device is only designed for operation in spaces with appropriate temperatures or humidity (e.g. bathrooms), or excessive accumulation of dust. Please refer to the individual devices' technical data for more detailed information.
- Page 6 English Start-up Observe all safety and operating instructions before operating the device for the first time. Warning When installing the device in an existing video surveillance system, ensure that all devices have been disconnected from the mains power circuit and low-voltage circuit. Warning Improper or unprofessional work on the mains network or domestic installations puts both you and others at risk.
-
Page 7: Table Of Contents
4.3. TVIP41560 ..........................16 4.4. TVIP61560 ..........................16 5. Initial start-up ............................. 17 6. First access............................18 6.1. First access with ABUS IP Installer .................... 18 6.2. Password assignment - Activation ..................... 18 6.3. Login ............................19 6.4. Video plug-in ..........................19 7. - Page 8 English 11.2.6. UPnP ..........................34 11.2.7. SMTP / e-mail ........................34 11.2.8. NAT ............................ 35 11.2.9. HTTPS ..........................35 11.3. Security ............................ 36 11.3.1. IP Address Filter ......................... 37 11.3.2. Authentication ........................37 11.3.3. Security Service ......................... 37 11.4. Text ............................38 11.5.
-
Page 9: Scope Of Delivery
English 1. Scope of delivery TVIP11561 TVIP21560 Wi-Fi 1080p indoor camera with alarm Wi-Fi 720p pan/tilt indoor camera with function alarm function Mount Ceiling bracket Power supply unit (EU, AU, UK) Power supply unit (EU, AU, UK) ... -
Page 10: Description Of Hardware
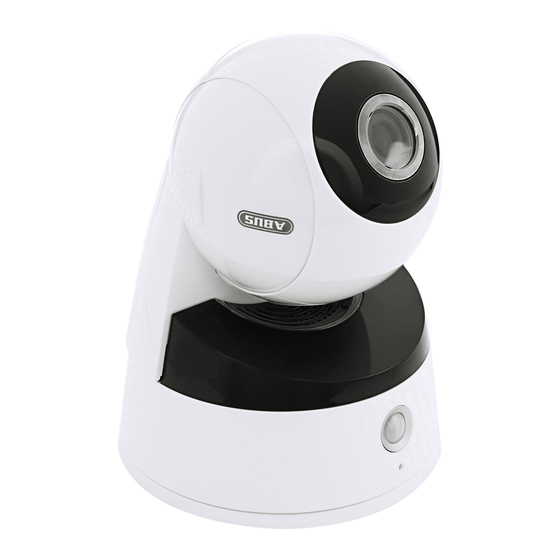
English 2. Description of hardware 2.1. TVIP11561 microSD card slot Lens PIR – Passive Infrared Sensor Microphone Status LEDs Photo sensor IR LED LAN (PoE-enabled) WPS/Reset button Alarm input/output 12 V DC power supply connection 2.2. TVIP21560 WPS button & microSD card slot... -
Page 11: Tvip41560
English 2.3. TVIP41560 Base plate IR LEDs Photo sensor Lens Internal microSD card slot & WPS/Reset button (TVIP41560 only) 2.4. TVIP61560 Camera holder Covered microSD card slot & WPS/Reset button (TVIP61560 only) Lens Photo sensor IR LEDs Sun shield... - Page 12 English Connections (TVIP41560 / TVIP61560) 12 V DC power supply connection (round plug 5.5x2.1 mm) Network access (RJ45, PoE-compatible) The network access includes a cover, which can be used if necessary. This cover provides additional protection by preventing moisture from entering the equipment. When using the cover, the network cable must only be connected (crimped) to the network plug once it has been passed through the cover.
-
Page 13: Description Of Hardware Functions
English 3. Description of hardware functions 3.1. Status LEDs TVIP11561 Status Description Lights A camera schedule is active Alarm LED Lights blue No camera schedule is active Lights blue Camera has a malfunction LED status Camera does not have a malfunction... -
Page 14: Reset
Sensor: Connect your sensor to the output and earth. Actuator: Connect your actuator to the output and earth. Note for TVIP11561 The earth can be used simultaneously for a sensor (input + earth) and an actuator (output + earth). -
Page 15: Mounting/Installation
The camera must be disconnected from the power supply during installation. Note You will find installation illustrations in the quick start guide for the camera in question. 4.1. TVIP11561 Mounting the camera Use the accompanying drilling template or mount for drilling the mounting holes. -
Page 16: Tvip41560
English 4.3. TVIP41560 Mounting the camera Loosen the fixing screws for the camera dome and remove them. Use the accompanying drilling template for drilling the mounting holes. Secure the base plate with the screws and dowels provided. Use the fixing screws to screw the camera dome back on to the camera. Adjust the orientation of the camera before doing this. -
Page 17: Initial Start-Up
English 5. Initial start-up The network camera automatically detects whether a direct connection between the PC and camera should be established. A crossover network cable is not required for this. You can use the supplied patch cable for direct connection for initial start-up. Connecting the network camera directly to a PC/laptop 1. -
Page 18: First Access
When the IP Installer is started, your network will automatically be scanned for ABUS IP cameras. Double-click the camera you wish to set up in order to open the camera’s web interface. Alternatively, you can use the “Enable”... -
Page 19: Login
English 6.3. Login When you open the web interface again, you will now be prompted to enter your user name and your password for the login. 6.4. Video plug-in An ActiveX plug-in is used for displaying video. This plug-in must be installed in the browser. You will be asked to confirm the installation directly after entering your username and password. -
Page 20: Live View
English 7. Live view 7.1. Menu bar You can use the menu bar to access the various menus for the camera. The selected menu will be highlighted in white. Live view Help page Info page Setup wizard Advanced camera settings Log out The live view will be closed and you will be taken to the login. -
Page 21: Live View - Buttons
English 7.2. Live view – buttons You can use the buttons on the bar at the bottom to perform various live operations. If you click on a button, it will light up. Depending on the camera type, some buttons may not be visible or cannot be used. Instant image function This function saves an instant image from the current video stream in JPEG format (see Local Configuration for save location). -
Page 22: Live View - Ptz Control
English 7.3. Live view – PTZ control You can use PTZ control to control your camera or access preset positions and patrols. Depending on the camera type, the control and accessing of preset positions and patrols may be limited. PTZ control Enable PTZ control by pressing the PT button. -
Page 23: Info Page
English 9. Info page The info page displays general information about the camera, e.g. installed firmware version or MAC address of the camera. 9.1. System status The info bar also shows you the system status. System is running correctly All parameters such as system temperature and processor usage are fine. All functions in use are working correctly. -
Page 24: Setup Wizard
English 10. Setup wizard The setup wizard navigates you through the most important menu options for the initial setup of a camera. The following menu options are dealt with: Network DDNS Text Date/Clock Installer Save/Restart For more information on each settings option see the section “Advanced camera settings”. -
Page 25: Advanced Camera Settings
You will find a list under the screenshot of the menu option tab with the corresponding support for the individual cameras. 11.1. Video Menu Camera type supported Image TVIP11561, TVIP21560, TVIP41560, TVIP61560 Privacy mask TVIP11561, TVIP21560, TVIP41560, TVIP61560 Video stream settings TVIP11561, TVIP21560, TVIP41560, TVIP61560... -
Page 26: Image
English 11.1.1. Image Scheduled Image Settings: Configure whether you wish to set a common profile for day and night mode, use an automatic separate day and night profile or a time- controlled separate day and night profile. Brightness, contrast: Adjust these values to suit the ambient conditions. Saturation, hue: Adjust these values to suit the ambient conditions. -
Page 27: Privacy Mask
English Enable or disable the camera’s IR LEDs in night mode IR light: Note The effective IR range will depend on the installation location. If there are surfaces that absorb light or no objects that reflect IR light in the field of view, the IR range will be reduced and/or the video image will be too dark. -
Page 28: Video Stream Settings
English 11.1.3. Video stream settings Select the first, second or – if it is available for your camera model – the Stream: third video stream for configuration. Type: Select whether video or video & audio should be transmitted. Resolution: Choose the resolution for the video stream. Bit rate: Select the streaming method: Constant bitrate: keeps the bitrate constant at the set value, regardless... -
Page 29: Network
English 11.2. Network Menu Camera type supported IPv4/IPv6 TVIP11561, TVIP21560, TVIP41560, TVIP61560 Port TVIP11561, TVIP21560, TVIP41560, TVIP61560 DDNS TVIP11561, TVIP21560, TVIP41560, TVIP61560 TVIP11561, TVIP21560, TVIP41560, TVIP61560 Wi-Fi TVIP11561, TVIP21560, TVIP41560, TVIP61560 UPnP TVIP11561, TVIP21560, TVIP41560, TVIP61560 SMTP / e-mail TVIP11561, TVIP21560, TVIP41560, TVIP61560... -
Page 30: Ipv4/Ipv6
English 11.2.1. IPv4/IPv6 Select NIC: choose whether the Ethernet or Wi-fi interface (if available) should be configured. NIC type: selection of the speed for the LAN adapter. DHCP: the IP address, subnet mask, gateway (default router) and address for the DNS server are obtained automatically from a DHCP server. An activated DHCP server must be present in the network in this case. -
Page 31: Port
User name: user account identification with the DDNS service provider Password: account password with the DDNS service provider Note Further information on the "ABUS SERVER" can be found on the help page at the following address: https://www.abus-server.com/faq.html... -
Page 32: Ftp
English 11.2.4. FTP Server Address: IP address of the FTP server Port: FTP server port User name: user name for the FTP server account Anonymous: anonymous access to the FTP server (server must support this) Password: password for the FTP server account Confirm: Password confirmation Directory Structure:... -
Page 33: Wi-Fi
English 11.2.5. Wi-Fi Enable: Enable or disable Wi-Fi. Wi-Fi list: Available Wi-Fi networks are displayed here. Click in a row to select a network. SSID: (Service Set Identifier) Enter the name of the wireless network here. Network mode: Infrastructure Describes a network in which a central instance (wireless access point/router) carries out the coordination and data transmission for all network components. -
Page 34: Upnp
English 11.2.6. UPnP Enable UPnP: enables or disables the UPnP function. Name: assigning a UPnP name, which the camera uses to appear on the network via UPnP. 11.2.7. SMTP / e-mail The SMTP/email function must be configured beforehand, so that the camera is able to send emails if certain events occur. -
Page 35: Nat
English 11.2.8. NAT Port Mapping Mode: Manual: manual assignment of all ports Auto: automatic assignment of all ports 11.2.9. HTTPS Activate HTTPS: enables the HTTPS function. This enables a secure connection with connection certificate. Please note that further steps are necessary for configuring the HTTPS function. -
Page 36: Security
English 11.3. Security Menu Camera type supported IP Address Filter TVIP11561, TVIP21560, TVIP41560, TVIP61560 Authentication TVIP11561, TVIP21560, TVIP41560, TVIP61560 Security Service TVIP11561, TVIP21560, TVIP41560, TVIP61560... -
Page 37: Ip Address Filter
English 11.3.1. IP Address Filter Enable IP address filter: enables the IP address filter function for IPv4 addresses. Only IP addresses are allowed when inputting the addresses (no domain names). IP address filter type: choice between forbidden and allowed addresses. You can only set either forbidden or allowed addresses. -
Page 38: Text
English 11.4. Text Menu Camera type supported Text TVIP11561, TVIP21560, TVIP41560, TVIP61560 Date: Enable the displaying of the date. Text: Enable the displaying of the camera name. Camera name: enter the camera name here (max. 32 characters). Time format: select a display format (24-hour or 12-hour) for the time. -
Page 39: Date & Time
11.5. Date & time Menu Camera type supported Date & time TVIP11561, TVIP21560, TVIP41560, TVIP61560 Time zone: here, select the time zone in which the camera is located. NTP: enable NTP to synchronise the date and time of the camera with an NTP time server. -
Page 40: System
English 11.6. System Menu Camera type supported General TVIP11561, TVIP21560, TVIP41560, TVIP61560 Firmware/restart TVIP11561, TVIP21560, TVIP41560, TVIP61560 Log file TVIP11561, TVIP21560, TVIP41560, TVIP61560... -
Page 41: General
Firmware/remote upgrade: This function can be used to update the camera's firmware. First, download the current firmware from the ABUS website. The "Search" button can be used to select this file for updating. Press the "Upload" button to start the update. -
Page 42: Log File
English 11.6.3. Log file Log file: data relevant to the system is recorded in the log file. This can help with troubleshooting, for example. Export: exporting the log file into another file... -
Page 43: Ptz
English 11.7. PTZ Menu Camera type supported Preset / Tour / Pattern TVIP21560... -
Page 44: Preset / Tour / Pattern
English 11.7.1. Preset / Tour / Pattern Note Depending on the camera model, only selected functions will be available. On the TVIP21560, the control keys are limited to left, up, right and down. Control keys: Control keys for orientation of the PTZ camera head (left, right etc.) Zoom + / Zoom -: not used Focus + / Focus -:... -
Page 45: Event
English 11.8. Event Menu Camera type supported Motion detection TVIP11560, TVIP21560, TVIP41560, TVIP61560 Alarm input TVIP11560, TVIP21560 Alarm output TVIP11560, TVIP21560 PIR Alarm TVIP11560, TVIP21560... -
Page 46: Motion Detection
English 11.8.1. Motion detection Enable motion detection: enables motion detection. Enable dynamic analysis for motion: if enabled, changes to the video image content are displayed graphically in the preview. Note The Live Indicator function in the local settings decides whether this should also be displayed in the live image. -
Page 47: Alarm Input
English 11.8.2. Alarm input Alarm input processing enable: Enable or disable the alarm input. Alarm Input No.: Select the alarm input to be configured here (number depends on camera model). Alarm Type: the alarm type determines the idle and triggered statuses. NO: normally open (normal status open) NC: normally closed (normal status closed) Alarm name:... -
Page 48: Pir Alarm
English 11.8.4. PIR Alarm Enable: Enable or disable the PIR alarm Alarm name: enter the name here. -
Page 49: Alarm Manager
English 11.9. Alarm manager Menu Camera type supported Alarm manager TVIP11560, TVIP21560, TVIP41560, TVIP61560 Add: Add a new alarm rule. Edit: Change a selected alarm rule. Delete: Delete a selected alarm rule. -
Page 50: Add / Edit Alarm Rule
English 11.9.1. Add / edit alarm rule an alarm rule consists of a trigger, a schedule for applying the rule and an action. Trigger: Select a trigger for the alarm rule from the list. Only one trigger can be configured for each rule. Schedule: an alarm rule can be enabled in 30 minute intervals. -
Page 51: Storage
English 11.10. Storage Menu Camera type supported Record Schedule TVIP11560, TVIP21560, TVIP41560, TVIP61560 Storage Management TVIP11560, TVIP21560, TVIP41560, TVIP61560 TVIP11560, TVIP21560, TVIP41560, TVIP61560 Snapshot TVIP11560, TVIP21560, TVIP41560, TVIP61560... -
Page 52: Record Schedule
English 11.10.1. Record Schedule Enable record schedule: after enabling and configuration, video data are either saved constantly or at certain times and if necessary when an event occurs. The schedule can be configured using the Edit button. Drop-down mode: Select the desired recording mode. You can use drag and drop to select the desired time period in the day. -
Page 53: Storage Management
English 11.10.2. Storage Management Device list: indicates the available storage media in the camera (SD card). Format: formats the selected storage medium (Attention: all data are deleted). Quota: shows more storage medium information. Percentage of Picture: Set the percentage of memory that is to be reserved for recorded images. -
Page 54: Nas
English 11.10.3. NAS NAS: configure up to 8 NAS devices. Click in a row to specify server address, file path, server type, user name and password. HDD No.: Number of the connected NAS (max. 8). Server address: IP address of your NAS. File Path: The file path of the sharing folder of your NAS. -
Page 55: Snapshot
English 11.10.4. Snapshot After enabling and configuration, single frames can be saved on the SD card. The single frames can be saved in a time-controlled and/or event-controlled manner. Timing Snapshot Enable: enables time-controlled storage. Format: Set the format of the single frames. Resolution: Set the resolution of the single frames. -
Page 56: Audio
English 11.11. Audio Menu Camera type supported Record Schedule TVIP11560, TVIP21560 Audio encoding: select the audio encoding for audio transmission here (G.722.1, G.711ulaw, G.711alaw, MP2L2, G.726). Audio input: enables the audio input (only for cameras with built-in microphone and microphone input). Input Volume: adjustment of the input amplification for the microphone. -
Page 57: User
English 11.12. User Menu Camera type supported User TVIP11560, TVIP21560, TVIP41560, TVIP61560 Note The user “installer” can only be edited and cannot be added or deleted. Add: Add a new user. Edit: Change a selected user. Delete: Delete a selected user. User name: Enter the user names here (max. -
Page 58: Local Configuration
English 11.13. Local Configuration Menu Camera type supported Local Configuration TVIP11560, TVIP21560, TVIP41560, TVIP61560 Protocol: Setting the transmission protocol (default: TCP) Live View Performance: Select the priority for display in the browser here (priority on image stream or image quality). Live indicator: Display of all event animations in the live image (e.g. -
Page 59: Playback
English 11.14. Playback Menu Camera type supported Playback TVIP11560, TVIP21560, TVIP41560, TVIP61560 11.14.1. Playback time management Playback bar with time and date display (display depends on temporal zoom factor). The recorded data are displayed colour-coded by record type in the playback bar. -
Page 60: Playback Operations
English 11.14.2. Playback operations Stop playback Slow playback (forwards) Pause, run playback Fast playback (forwards) Playback volume (if recording contains audio data) Frame forwards Save single frame (save location, see local configuration) Start/stop the video cutting function. The cut video is saved after you press stop (save location, see local configuration).
Need help?
Do you have a question about the TVIP11561 and is the answer not in the manual?
Questions and answers