Table of Contents
Advertisement
Quick Links
Advertisement
Table of Contents

Related Manuals for Russell Hobbs RHMF10


Summary of Contents for Russell Hobbs RHMF10
- Page 1 INSTRUCTIONS AND WARRANTY MODEL NO. RHMF10 RUSSELL HOBBS 18” MIST FAN...
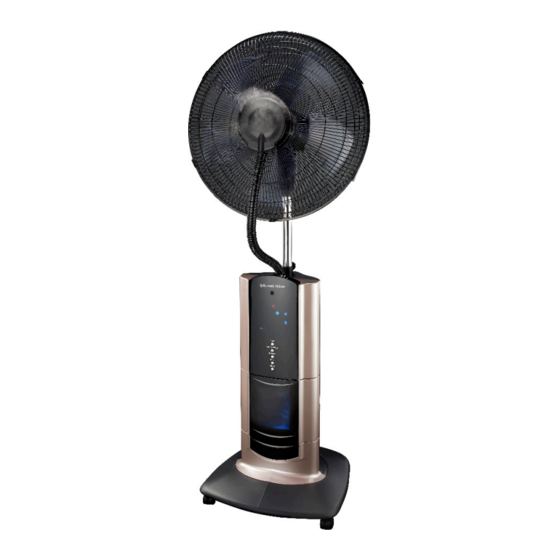
- Page 2 Introduction Thank you for purchasing this product. Please read this instruction manual thoroughly before operating it in order to use the fan correctly and efficiently. Working Elements The Electric Mist Fan uses ultrasonic vibration elements, atomizes the water to 1-5 micro ultra-particles, and spreads the mist to the air through wind. This increases the cool humidity which makes you feel cool in a single room or entire home. Assembly Chart and Technical Specifications 1. Front guard ornament 2. Front guard 3. Blade cap 4. Blade 5. Guard mounting nut 6. Rear guard 7. Motor 8.
- Page 3 Assembling the Rear Guard 1. Take out the blade cap from the shaft turning it clockwise. 2. Take out the rear guard mounting nut turning it anti-clockwise. 3. Insert the rear guard into the motor matching 3 rods on the front side of the motor (the handle will direct upwards) to 3 holes of the rear guard. 4. Fasten the rear guard tightly by turning the guard mounting nut clockwise. Assembling the Fan Blade 1. Insert the blade to the shaft and ensure the pin enters the blade slot. 2. Tighten the blade using the blade cap turning anti-clockwise in the direction” TIGHT” arrow on it. Note: Proper assembly of the blade is of great importance. Otherwise, the blade spins in the air and damages the appliance. Assembling the Front Guard 1. Fix the front guard with the logo in the upright position on the rear guard. Make sure that they are connected from the upper side. 2.
- Page 4 Operating the Water Tank According to the six steps below, firmly place the mist fan on the ground and add water inside the water tank. Note: Do not take out the water tank before unplugging the power cord, hot water (40℃ and above) is not allowed to be added in the water tank. Note: Do not add dirty or chalky water in your tank, instead, add air-conditioned water or fresh water to ensure longer life for your fan. Operating the Fan 1. Insert plug to the electrical outlet, make sure that the indicator light is on as shown above. 2. Press “OFF” button, to turn off the fan. 3. Press “ON/SPEED” button, to choose the wind speed-Low, Med, High that matches the light on the control panel.
- Page 5 Note: When the mist function is on, an apparent mist will be observed. Such an emission is quite normal and should not change the settings your appliance. Press “TIMER” button to set the time using the timer function. Sets the time between 1 to 15 hours and switches the fan off after the preset time. There are 4 indicator lights of automatic timing. To set a time of 1 hour you need to press the button once and to set 15 hours of running time you need to press 15 times and all the 4 indicator lights will light up. WARNING Do not take out the plastic tube on the front of your fan. Remote Control: must be aimed at the infra-red port (as shown in the picture) when using it. If the remote control doesn’t work, please first check the inside battery and change to new batteries if needed. Notes: Change the batteries with new and same types, otherwise your remote control may not operate properly. Remove the batteries out of the remote control if you won’t use the remote control for a long time. Old batteries may damage your remote control. Safety Precautions 1. Make sure the fan and the power cord is not damaged before operating your fan. In case of damage, consult your authorized technical service provider.
- Page 6 8. Unplug your fan from the electric outlet when not operating, moving it from one room to another, installing or uninstalling it’s parts and before cleaning. 9. Supervision is needed when this product is used anywhere near children. The appliance is not intended for use by children or other persons without assistance or supervision if their physical, sensory or mental capabilities prevent them from using it safely. 10. For safety reasons, please disconnect the plug from the electrical outlet. Do not pull the plug while the power is on. Always ensure that the plug is fully inserted into the electric outlet. 11. Never handle the power cord with wet hands as this could result in fire or electric shock. 12. Do not disassemble, repair or modify this product on your own. Warranty will be voided if repair is carried out by an unauthorized person/agency.
- Page 7 PLEASE AFFIX YOUR PROOF OF PURCHASE/RECEIPT HERE IN THE EVENT OF A CLAIM UNDER WARRANTY THIS RECEIPT MUST BE PRODUCED. W A R R A N T Y Home of Living Brands (Pty) Limited (“Home of Living Brands”) warrants to the original purchaser of this product (“the customer”) that this product will be free of defects in quality and workmanship which under normal personal, family or household use and purpose may manifest within a period of 1 (one) year from the date of purchase (“warranty period”). Where the customer has purchased a product and it breaks, is defective or does not work properly for the intended purpose, the customer must notify the supplier from whom the customer bought the product (“the supplier”) thereof within the warranty period. Any claim in terms of this warranty must be supported by a proof of purchase. If proof of purchase is not available, then repair, and/or service charges may be payable by the customer to the supplier.
Need help?
Do you have a question about the RHMF10 and is the answer not in the manual?
Questions and answers