Table of Contents
Advertisement
Quick Links
Advertisement
Table of Contents

Related Manuals for Russell Hobbs RHMPF4


Summary of Contents for Russell Hobbs RHMPF4
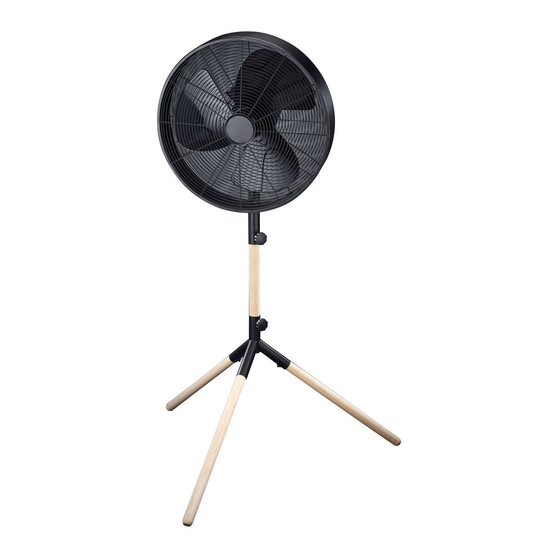
- Page 1 INSTRUCTIONS & WARRANTY MODEL NO: RHMPF4 RUSSELL HOBBS METAL PEDESTAL FAN...
-
Page 2: Important Safeguards
Congratulations on purchasing our Russell Hobbs Pedestal Fan. Each unit is manufactured to ensure safety and reliability. Before using this appliance for the first time, please read the instruction manual carefully and keep it for future reference. FEATURES OF THE RUSSELL HOBBS METAL PEDESTAL FAN •... - Page 3 10. Do not immerse appliance in water or other liquids. Do not use near sinks, baths and showers 11. This appliance uses natural untreated wood. Do not allow the wood to get wet as this can cause the wood to deteriorate, stain, develop mould or fungus. Keep the wood away from any heat source as it is a flammable material.
-
Page 4: Parts Diagram
29. In case of technical problems, switch off the machine and do not attempt to repair it yourself. Return the appliance to an authorised service facility for examination, adjustment or repair. Always insist on the use of original spare parts. Failure to comply with the above mentioned pre-cautions and instructions, could affect the safe operation of this machine. - Page 5 Assembly Instructions The fan has been packaged unassembled to minimise packaging waste. Each part is designed to fit together and be disassembled easily for cleaning or storage. To assemble you will need a screw driver and the supplied Allen key. Start with the tripod leg assembly as follows: Using the Allen key, unscrew all three grub screws from the leg/post coupling until they are sticking out approximately 4mm from the top of the nuts as shown below.
- Page 6 Insert the wooden post into the top of the tripod Ensure the slot is at the top and the small hole in the side at the bottom of the wooden post is aligned with the post securing knob as shown and then push all the way down. This is very important as it ensures the head of the fan is positioned over a leg for maximum stability.
- Page 7 Next, loosen the height adjustment knob by turning it anti-clockwise and then slide it over the wooden post as shown below. NOTE: Ensure the height adjustment knob is on the side where the slot is located in the wooden post. Turn the height adjustment knob clockwise so that the screw thread is located inside the slot.
- Page 8 NOTE: It is important that the post and fan head are in the correct orientation when assembled. The top section of the post has a small horizontal open slot one side and a small horizontal depression on the other as shown The side with the open slot is for the small tilt range screw to screw into The side with the small depression is for the tilt range knob to tighten up onto.
- Page 9 Screw in the tilt range knob as shown and just nip it up. Using a screwdriver, screw in the small tilt range screw and tighten it. Next, screw on the tilt adjustment knob as shown and just nip it up. OPERATING INSTRUCTIONS Remove the cable tie and unravel the cord set before operation.
- Page 10 Head Tilt The fan and motor assembly can be tilted up and down to your desired angle. To adjust the tilt angle, loosen both the larger tilt adjustment knob and the smaller tilt range knob, then tilt the head to the desired angle and then re-tighten the knobs tight. To adjust the height of the fan head, loosen the height adjustment knob enough to allow the head to slide up and down the wooden post (within the slot).
-
Page 11: Cleaning And Maintanance
Oscillation Press the clutch knob down to activate the oscillating function. The fan head will swing from side to side whilst blowing air. To stop oscillation, allow the fan head to move into the desired position and then pull the clutch knob up. CLEANING AND MAINTANANCE 1. -
Page 12: Storing The Appliance
STORING THE APPLIANCE • Unplug the unit from the wall outlet and clean all the parts as instructed above. Ensure that all parts are dry before storing. • Store the appliance in its box or in a clean, dry place. •... - Page 13 Connect a three-pin plug as follows: The wires in this mains lead are coloured in accordance with the following code: Green/Yellow = Earth Blue = Neutral Brown = Live ...
-
Page 14: Warranty
PLEASE AFFIX YOUR PROOF OF PURCHASE/RECEIPT HERE IN THE EVENT OF A CLAIM UNDER WARRANTY THIS RECEIPT MUST BE PRODUCED. W A R R A N T Y Home Of Living Brands (Pty) Limited warrants to the original purchaser of this product (“the customer”) that this product will be free of defects in quality and workmanship which under normal personal, family or household use and purpose may manifest within a period of 1 (one) year from the date of purchase (“warranty period”).
Need help?
Do you have a question about the RHMPF4 and is the answer not in the manual?
Questions and answers