Table of Contents
Advertisement
Advertisement
Table of Contents

Related Manuals for Cook's Companion CCAF16M


Summary of Contents for Cook's Companion CCAF16M
- Page 1 COOK’S COMPANION 1.6QT AIR FRYER MODEL CCAF16M...
-
Page 2: What's Included
CONGRATULATIONS! The air fryer makes cooking quick, convenient and most importantly—healthy. By using rapid hot air convec<on cooking technology, the air fryer evenly circulates hot air to cook fresh or frozen foods, giving them the same crunchy bite and moist interiors produced by conven<onal deep fryers. Food is never submerged in cooking oils or fats while cooking. The air fryer can bake, broil and steam a wide variety of foods, such as meats, vegetables, pizzas and even cakes. Get started with the great recipes that follow and enjoy! WHAT’S INCLUDED Basket and Crisping Insert Instruction Manual & Air Fryer Recipes... -
Page 3: Important Safegaurds
IMPORTANT SAFEGAURDS READ ALL INSTRUCTIONS BEFORE USE: • This appliance is designed for household use only. • Do not place the appliance against a wall or against another appliance. Leave at least 5 inches of free space on the back and sides and 5 inches of free space above the appliance. • Do not place anything on top of the appliance. • Do not use the appliance for any purpose other than described in this manual. • Do not leave the unit unaHended when in opera<on. • Any accessible surfaces may become hot during use. • Do not place the appliance on or near combus<ble materials, such as a tablecloth or curtain. • The appliance needs approximately 30 minutes to cool down before safely handling or cleaning. • Do not cover the air inlets and air outlets when the appliance is working. • Do not immerse the housing in water or rinse under the tap due to the electrical and hea<ng components. • Never use the air fryer without the cooking chamber in place. • Keep all ingredients in the cooking chamber to prevent any contact with the appliance’s hea<ng elements. Do not overfill the basket. • During hot air frying, hot steam is released through the air outlets. Keep your hands and face at a safe distance from the steam and from the air outlets. Also be careful of hot steam and air when you remove the pan from the appliance. - Page 4 • Do not touch the inside of the air fryer during or immediately aQer use, as it will be very hot. Only hold the cooking chamber by its handle. Always use oven miHs. Unit is hot! • Keep all cords away from hot surfaces. • Keep the appliance and its cords out of the reach of children. • Do not use any unauthorized person to replace or fix a damaged main cord. • Do not use the appliance if there is any damage to the plug, cord or other parts. • Check that the voltage indicated on the appliance fits the voltage for your outlet. • Do not connect appliance to an external <mer switch. • Immediately unplug the appliance if you see dark smoke coming out of the appliance. Wait for the smoke emission to stop before you remove the cooking chamber from the appliance. • Do not let any liquid enter the appliance (aside from cooking liquids added to the pan) to prevent electric shock or short- circui<ng. • Do not use with an extension cord, it must be plugged into a wall outlet. • Always unplug the appliance when not in use. • SAVE THESE INSTRUCTIONS.
-
Page 5: Automatic Switch-Off
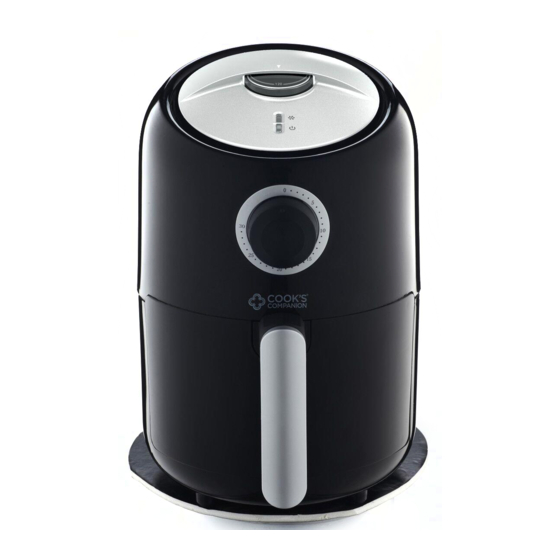
AUTOMATIC SWITCH-OFF The appliance has a built-in <mer. It will automa<cally shut off the appliance when it has counted to zero. You can manually switch off the appliance by turning the <mer knob counter- clockwise to zero. PARTS IDENTIFICATION 1. Air Fryer 8. Air Inlet 2. Cooking Chamber 9. Air Vent Openings 3. Handle 10. Power Cord 4. Green Power Light 5. Red Heating Light 6. Timer 7. Temperature Control Knob... -
Page 6: Before First Use
BEFORE FIRST USE 1. Remove all packaging materials, s<ckers and labels. 2. Clean the cooking chamber with hot water, dishwashing liquid, and a non-abrasive sponge. 3. Wipe the inside and outside of the appliance with a cloth. USING THE APPLIANCE 1. Place the appliance on a stable, horizontal and even surface. 2. Remove the cooking chamber from the air fryer. Place crisping insert in the boHom of the Air Fryer. (See figure 2 & 3. Place the ingredients in the cooking chamber, if desired spritz with cooking oil for a crispier finish. NOTE: Do not overfill the cooking chamber (for amounts, see cooking chart on page 11), as it may affect the quality of the food. Slide the cooking chamber back into the air fryer. - Page 7 5. Turn the temperature control knob to the proper temperature (See figure 5). See cooking chart on page 11. Determine the required prepara<on <me for the ingredient. 7. To switch on the appliance, turn the <mer knob to the required prepara<on <me (See figure 6). 8. The GREEN power light and the RED hea<ng light will go on, the air fryer quickly begins the cooking process. The <mer will start coun<ng down the set prepara<on <me. During the cooking cycle, the RED hea<ng light will turn off from <me to <me. This indicates that the hea<ng element is maintaining the set temperature. TIP: Add 3 minutes to prepara<on <me if the appliance is cold. If desired, you can preheat the appliance without any ingredients inside. Turn the <mer knob for more than 3 minutes and wait un<l the RED hea<ng light goes out (aQer about 3 minutes). Then fill the cooking chamber and turn the <mer knob to the required prepara<on <me.
- Page 8 9. Some ingredients require shaking halfway during the prepara<on <me (see the cooking chart on page 11). At the halfway point, pull the cooking chamber out of the air fryer by the handle and shake it (See figure 4). Then slide the cooking chamber back into the air fryer. 10. When you hear the <mer bell, the set prepara<on <me has elapsed. Pull the cooking chamber out of the appliance and place it on a heat-proof surface. NOTE: You can also switch off the appliance manually by turning the <mer knob to 0. 11. Check to make sure the ingredients are ready. If the ingredients are not fully cooked, simply slide the cooking chamber back into the appliance and set the <mer for a few extra minutes. WARNING: The cooking chamber and the ingredients are hot aQer hot air frying. Depending on the moisture content of the ingredients in the fryer, steam may escape from the cooking chamber. 12. To remove ingredients, liQ the ingredients out of the cooking chamber using tongs (not included). CAUTION: There may be excess liquid at the boPom of the cooking chamber aUer cooking cycle is complete. Do not turn the cooking chamber upside down.
- Page 9 CLEANING 1. Remove the main plug from the wall socket and let the appliance cool down for at least 30 minutes. 2. Clean the appliance aQer every use. Do not clean the inside of the appliance with any metal kitchen utensils or abrasive cleaning materials, as this may damage the non-s<ck coa<ng. 3. Wipe the outside of the appliance with a moist cloth. 4. Clean the cooking chamber and crisping insert with hot water, some liquid detergent and a non-abrasive sponge. You can remove any remaining food residue with degreasing liquid. 5. Clean the inside of the appliance with hot water and a non- abrasive sponge. 6. Clean the hea<ng element with a cleaning brush to remove any food residue. STORAGE 1. Unplug the cord. 2. Make sure all parts are clean and dry.
-
Page 10: Cooking Advice
COOKING ADVICE • Smaller ingredients usually require a slightly shorter cooking <me than larger ingredients. • Shaking smaller ingredients halfway during the prepara<on <me op<mizes the end result and can help prevent unevenly fried ingredients. • Never overfill, as this will damage the air fryer. Use cau<on when removing the cooking chamber from the unit, as contents will be very hot. • A small amount of water (3–4 tbsp.) can be added to the cooking chamber for steaming food. Use cau<on when removing the cooking chamber from the unit, as ingredients and any remaining steam or water will be very hot. • Because the rapid air technology reheats the air inside the appliance instantly, pulling the cooking chamber out of the appliance briefly during hot air frying barely disturbs the process. • Frozen foods, such as fries, chicken nuggets and fish s<cks can be prepared by following the cooking chart on page 11. • Snacks that can be prepared in an oven can also be prepared in the air fryer. • Place an oven-safe dish in the air fryer cooking chamber when baking a cake or quiche. • For a crispy texture, spritz vegetable, olive or non-s<ck oil over ingredients in the cooking chamber. • You can also use the air fryer to reheat ingredients by semng the temperature to 300°F for up to 10 minutes. -
Page 11: Cooking Chart
COOKING CHART INGREDIENTS SUGGESTED TEMP (°F) TIME ADDITIONAL AMOUNT (MINUTES) INFORMATION Thin frozen fries 1 pound 15 minutes Spritz with oil, Shake 2 times Thick frozen fries 1 pound 20 minutes Spritz with oil, Shake 2 times Potato wedges 1 pound 25 minutes Spritz with oil, turn once Hamburger... - Page 12 RECIPES Fried Shrimp Serves 2 Ingredients ½ cup milk ½ cup buHermilk 1 tablespoons hot sauce ½ cup self- rising flour ¼ cup self-rising corn meal ¼ tablespoons black pepper ¼ tablespoons salt ½ -pound medium shrimp, peeled, deveined with tails leQ on Oil for spraying Prepara<on In a shallow baking dish, whisk together milk, buHer milk and hot sauce. In a separate shallow baking dish whisk together flour, cornmeal, salt and pepper. Pat dry shrimp with paper towels, dredge in dry mixture first, then wet mixture, then dry mixture again. Spray on all sides with oil, place on parchment lined pan and refrigerate for 15 minutes. Spray shrimp again with oil and place in a single laying into air fryer basket. Set temperature for 400 degrees, and set <mer for 5 minutes. When cooking is complete, open basket, turn shrimp and spray again. Set <mer for an addi<onal 5 minutes. Serve warm.
- Page 13 Fried Cod Serves 2 Ingredients 2 3oz. cod filets ¼ teaspoon sea salt ¼ teaspoon black pepper ½ cup all-purpose flour 1 cup panko bread crumbs 1 large egg, beaten Oil for spraying Prepara<on In a shallow bowl, combine salt, pepper and flour. Place beaten egg in another shallow bowl, and place panko in a third bowl. Dredge each cod piece into flour mixture, coat well and shake off excess. Dip cod into egg, shake off excess, roll and press cod into panko. Spray fillets with oil on both sides and place in the air fryer basket. Set temperature for 400 degrees and <mer for 5 minutes. When cooking is complete, turn fillets and spray again with oil. Set <mer for an addi<onal 5 minutes, should be golden brown. Serve warm.
- Page 14 Bacon Wrapped Juicy Lucy Serves 4-10 Ingredients 1-pound ground chuck 4 slices cheddar cheese 10 thin slices bacon ¼ teaspoon sea salt ¼ teaspoon freshly ground black pepper Prepara<on Using a mini ice cream scoop, measure out 20 balls of ground beef. Place balls on a clean work surface and press each ball flat. Stack cheese slices and cut into 10 por<ons. Place a cheese por<on on top of 10 of the mini burgers and cover with the other 10 mini burgers. Crimp sides of each burger, wrap each with a slice of bacon and secure with a toothpick. Set temperature for 400 degrees and set <mer for 5 minutes. Turn burgers, set <mer for addi<onal 5 minutes. Serve warm.
- Page 15 Chicken Wings Serves 2 Ingredients 1- pound chicken wings (8-10 pieces) 1 tablespoon baking powder 1 tablespoon sea salt Oil for spraying 2 tablespoons buHer, melted ¼ cup Frank’s Hot Sauce 1 teaspoon cider vinegar ½ teaspoon soy sauce 1 tablespoon ketchup Prepara<on In a large bowl, place chicken wings, add baking powder and salt and toss un<l well coated. Spray wings all over with oil and place in basket. Set temperature for 400 degrees and set <mer for 10 minutes. Meanwhile, in a large mixing bowl, combine buHer hot sauce, vinegar, soy sauce and ketchup When cooking is complete, shake basket, spray wings with oil and set <mer to cook for an addi<onal 15 minutes. When cooking is complete, open basket and remove wings to sauce; toss well to coat.
- Page 16 Fried Chicken Tenders Serves 2 Ingredients 1 pound boneless, skinless chicken tenders 2 large eggs, lightly beaten 1 cup self-rising flour ½ teaspoon salt ½ teaspoon black pepper 1 ½ cups panko bread crumbs oil for spraying Prepara<on In shallow bowl, place beaten eggs. In a separate shallow bowl, whisk together flour, salt and black pepper and place panko in a third bowl. Dredge chicken tenders into flour and shake off excess. Dip the chicken strips into the egg mixture, lemng the excess drip back into the bowl and roll and press into panko. Spray each tender with oil and place into air fryer basket. Set temperature for 400 degrees and <mer for 20 minutes. Halfway through the cooking process, turn chicken tenders and spray again with oil. Serve immediately.
- Page 17 Fried Chicken Serves 2 Ingredients 3 eggs ½ cup hot sauce 3 chicken legs or 1 large chicken breast, or two thighs ¼ teaspoon sea salt ¼ teaspoon freshly ground black pepper ¼ teaspoon granulated garlic 1 cup all-purpose flour Oil for spraying Prepara<on In a medium sized bowl, beat the eggs together with the hot sauce. Season the chicken with salt, pepper and granulated garlic. Dip the seasoned chicken in the egg mixture, then coat well with flour. Place on a baking tray lined with parchment paper, spray each piece of chicken on all sides with oil and refrigerate 15 minutes. Spray chicken pieces again with oil, set into air fryer basket. Set temperature for 350 degrees, and <mer for 15 minutes. When cooking is complete, turn the chicken, and spray again. Set <mer for 15 minutes. When cooking is complete, and chicken has reached an internal temperature of 165 degrees, remove to a serving plaHer and serve warm.
- Page 18 French Fries Serves 1-2 Ingredients 2 cups water 1 tablespoon white vinegar 2 large russet potatoes Avocado oil for spraying Sea salt for sprinkling Prepara<on In a small sauce pan, combine water and vinegar and bring to a boil. Meanwhile, cut potatoes into ¼-inch French fries. When water is boiling, place cut potatoes into saucepan and cook for 5 minutes. Place potatoes into a strainer then pat dry with paper towels to remove as much moisture as possible. Working in 2 batches place ½ cut potatoes into air fryer basket, spray well with oil, sprinkle with salt, shake and spray again to coat potatoes well. Set temperature at 400 degrees and set <mer for 10 minutes. Open basket, shake, spray with oil, sprinkle with salt and set <mer to cook for an addi<onal 10 minutes. Remove French fries to a bowl to keep warm and repeat with remaining potatoes. Serve immediately.
- Page 19 French Onion Mushrooms Serves 2-4 Ingredients 8-ounces baby Portabella mushrooms, cleaned and stems removed 1 large onion, thinly sliced Oil for spraying 1 tablespoon extra-virgin olive oil ½ teaspoon sea salt ½ teaspoon freshly ground pepper ½ teaspoon Worcestershire sauce 2-3 slices Gruyere cheese Prepara<on Preheat a large skillet over medium heat for 4-5 minutes, add oil and heat. Add onions and cook un<l a deep caramel color, about 10-15 minutes depending on your skillet. Add salt and Worcestershire sauce and simmer for 1-2 minutes. Cut a small slice across the top of each mushroom cap to enable it to sit flat. Spray each mushroom with oil and fill each one with an equal amount of onion mixture. Working in batches, place mushrooms into basket, being careful not to overcrowd. Top each mushroom with a 1-inch por<on of cheese. Set temperature at 400 degrees and set <mer for 5 minutes. Remove stuffed mushrooms to a plaHer to keep warm and repeat with remaining mushrooms.
- Page 20 Garlic Mashed Potatoes Serves 1-2 Ingredients 12 Dutch yellow potatoes 1 clove garlic, minced ½ teaspoon fresh thyme leaves ½ teaspoon kosher sea salt ½ teaspoon black pepper 1 tablespoon freshly grated Parmesan cheese parchment paper Prepara<on In a medium-sized bowl, place potatoes, garlic, thyme leaves, salt and pepper, mix well to coat potatoes. Cut a piece of parchment paper to fit boHom of air fryer and place it in air fryer basket. Place potatoes into air fryer basket. Set temperature for 400 degrees and set <mer for 30 minutes. When cook <me is complete, open basket and smash each potato with the back of a wooden spoon. Sprinkle each potato with Parmesan cheese, close basket, set temperature for 400 degrees and set <mer for 2 minutes. When cook <me is complete remove potatoes and serve immediately.
- Page 21 Grilled Cheese Sandwich Serves 1 Ingredients 2 slices bread, your favorite ½ tablespoons mayonnaise 2 slices mild cheddar cheese 2 slices mozzarella cheese Prepara<on Preheat air fryer at 400 degrees for 5 minutes. Spread ½ of mayo on one side of one slice of bread and place mayo-side down into air fryer. Place cheese slices on top of bread slice, spread other slice of bread with remaining mayo on one side and place mayo-side up onto sandwich.
-
Page 22: Recipe Notes
RECIPE NOTES _____________________________ _____________________________ _____________________________ _____________________________ _____________________________ _____________________________ _____________________________ _____________________________ _____________________________ _____________________________ _____________________________ _____________________________ _____________________________ _____________________________ _____________________________ _____________________________... - Page 23 RECIPE NOTES _____________________________ _____________________________ _____________________________ _____________________________ _____________________________ _____________________________ _____________________________ _____________________________ _____________________________ _____________________________ _____________________________ _____________________________ _____________________________ _____________________________ _____________________________ _____________________________...
-
Page 24: Limited One-Year Warranty
This warranty covers the original retail purchaser or giU recipient. During the applicable warranty period within normal household use, we will repair or replace, at our discre]on, any mechanical or electrical part which proves defec]ve, or replace unit with a comparable model. Shipping and handling costs are not included for warranty replacements and are the responsibility of the customer. To obtain service under the terms of this warranty, call our customer care department at 312-526-3760 (Monday- Friday 10am-6pm CST), or send an email to customercare@alliedrich.net. Please provide the model number listed on the boPom of this page when contac]ng us. THIS LIMITED WARRANTY COVERS UNITS PURCHASED AND USED WITHIN THE UNITED STATES AND DOES NOT COVER: • Damages from improper installa]on. • Damages in transit. • Defects other than manufacturing defects. • Damages from misuse, abuse, accident, altera]on, lack of proper care and maintenance, or incorrect current or voltage. • Damage from service by other than authorized dealer or service center. • Shipping and handling costs. • This warranty gives you special legal rights and you may also have other rights to which you are en]tled which may vary from state to state. Manufacturer does not assume responsibility for loss or damage for return shipment. We recommend that you keep your original packaging should you require repair service. Before returning product please contact our customer care department for return authoriza]on. When returning product for repair please include your full name, return address, and day]me phone number. Also include a brief descrip]on of the problem you are experiencing and a copy of your sales receipt or other proof of purchase in order to validate warranty status. MODEL CCAF16M...
Need help?
Do you have a question about the CCAF16M and is the answer not in the manual?
Questions and answers