
Subscribe to Our Youtube Channel
Related Manuals for REMKO ML 522 DC


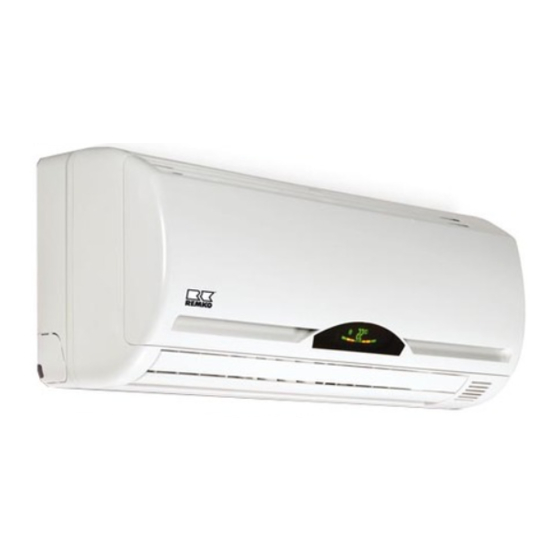
Summary of Contents for REMKO ML 522 DC
- Page 1 REMKO ML ML 262 DC, ML 352 DC, ML 522 DC Inverter wall mounted units in split design and frost protection function Operation · Technology · Spare parts Edition GB – W11...
-
Page 3: Table Of Contents
These instructions are an integral part of the system and must always be kept near or on the device. This operating manual is a translation of the German original. Made by REMKO Subject to modifications; No liability accepted for errors or misprints! -
Page 4: Safety Notes
■ is to be adapted to the put into operation and returned it The user bears the sole risk in such to REMKO GmbH & Co. KG. cases. requirements of the equipment. The warranty conditions are Using the equipment as intended The operational safety of listed in the "General Business... -
Page 5: Transport And Packaging
Filter dryer Capillary tube throttle element Equipment description Refrigerant circuit diagram for the indoor unit The ML 262-522DC room air conditioning units have a REMKO Vaporiser fan ML...DC AT outdoor component as well as an ML...DC IT indoor unit. Connection to... -
Page 6: Operation
REMKO ML...DC Operation The indoor unit is easily operated using the standard infrared remote control. The indoor unit beeps to acknowledge the correct transmission of data. If it is not possible to program the indoor unit using the remote control, it can also be manually operated. - Page 7 2. Cooling mode 30 minute intervals within the Buttons on the remote control In this mode, the warm room following 24 hours. air is cooled to the desired temperature. "TIMER OFF" button This button serves to program 3. Dehumidification mode the automatic shut-off time In this mode in 0.5 h intervals within the...
-
Page 8: Remote Control Display
REMKO ML...DC Remote control display Indicator arrows will be displayed according to the settings. Display on indoor unit Automatic operation Cooling mode Dehumidifying mode Fan speed Heating mode Temperature display Button functions A symbol is shown on the display to indicate that the settings are being transferred. - Page 9 Using the button, the target temperature can be adjusted up or down by ▲/▼ Buttons 1°C. The temperature range lies between 17°C and 30°C ▼ ▲ Cooling mode ▼ ▲ Automatic mode Use the MODE button to select between individual operating modes. MODE Button 5 modes are available: 1.
- Page 10 REMKO ML...DC It is recommended that the target temperature be set to 24 ° in DEHUMIDIFICATION MODE dehumidifying mode. Due to the low temperature of the refrigerant, the dew point of the air at the condenser is undercut. The excess moisture in the air is condensed by the vaporiser, the room is dehumidified.
- Page 11 A programming function is activated using this button, which increases SLEEP Button the target temperature in cooling mode by 1 °C after one hour and by 2 °C after 2 hours. In heating mode, the target temperature is decreased by 1 °C after one hour by 2 °C after 2 hours. The unit switches off automatically after 8 hours.
-
Page 12: Decommissioning
Clean the fins on the indoor ■ unit and outdoor component REMKO GmbH & Co. KG or your prior to long shutdown periods. contractual partner will be pleased to provide a list of specialist companies near you. - Page 13 Cleaning the housing of the indoor unit Type of task 1. Disconnect the supply voltage Checks/Maintenance/Inspections to the equipment. 2. Open and fold the air inlet guard on the front side • • General upwards. • • Measure voltage and current •...
-
Page 14: Troubleshooting And Customer Service
REMKO ML...DC Troubleshooting and customer service The equipment and components are manufactured using state-of-the-art production methods and tested several times to verify their correct function. If malfunctions should occur, please check the functions as detailed in the list below. Please inform your dealer if the unit is still not working correctly after all the functional checks have... -
Page 15: Installation Instructions For Qualified Personnel
Problem display by blinker code Display Cause Required action EEPROM error Contact specialty company Communication error between outdoor component and Disconnect from mains for 2 min, check wiring indoor unit Wiring fault L/N/Pe/S Check wiring, replace IT circuit board Vaporiser fan speed too low Check wiring, check motor voltage Outdoor temp. - Page 16 REMKO ML...DC Wind Selection of the installation Wall openings location If the unit is being installed in Interior unit A wall opening of at least ■ windy areas, ensure that the 70 mm diameter and 10 mm warm outlet air discharges in the...
-
Page 17: Minimum Clearances
Air intake Air intake ML 226 DC AT ML 352 DC AT ML 522 DC AT 150 mm 1500 700 mm Air outlet 400 mm 1700 Air outlet... -
Page 18: Installation
REMKO ML...DC Installation Oil return measures Connecting the refrigerant NOTE lines Installation may only be If the outdoor component is performed by authorised installed at a higher level than The on-site connection of the specialists. the indoor unit, suitable oil return refrigerant lines is carried out at measures must be taken. -
Page 19: Installation
5. Verify that the shape of the are adequately fastened and 12. Ensure that structure-borne flange is correct(figure 8). take measures for the oil return, sound is not transferred to if necessary! the building. Use vibration 6. First connect and hand-tighten dampers to reduce the effects the refrigerant connections 10. -
Page 20: Monitoring For Leaks
REMKO ML...DC Monitoring for leaks Condensate connection Once all the connections have Due to undercutting of the Slope of the condensation line been established, the pressure dew point at the vaporiser, gauge station is attached as condensation forms during follows to the Schrader valve (if... -
Page 21: Electrical Connection Diagram
Connecting the outdoor component Connecting the indoor unit Control cable and voltage supply to the outdoor unit Cover Terminal block Electrical connection diagram Connection ML 262 DC to ML 522 DC Outdoor Indoor unit Indoor unit Mains cable component Exterior conductor Neutral conductor... -
Page 22: Electrical Circuit Diagram
S1 = Condenser feeler S2 = Air-intake sensor S3 = Heated gas sensor S4 = Compressor sensor (Klixon) V1 = Reverse flow valve F1 = Condenser fan LP = Power board ST = Control board GL = Rectifier ML 522 DC AT... - Page 23 Electrical circuit diagram ML 262-522 DC IT Display Manual On/Off to outdoor component M1 = Swing motor M2 = Fan motor T1 = Transformer S1 = Air circulation sensor S2 = Vaporiser sensor V1 = Board display F1 = Manual On/Off...
-
Page 24: Before Commissioning
REMKO ML...DC Before Add refrigerant Commissioning Function test and test run ATTENTION Wear protective clothing when After the tightness check has Check the following points: handling refrigerant. been successfully completed, Leak tightness of refrigerant connect the vacuum pump via ■... -
Page 25: Unit Dimensions
Unit dimensions ML 262 DC AT to ML 352 DC AT ML 262 DC IT / ML 352 DC IT ML 522 DC AT ML 522 DC IT All values in mm We reserve the right to modify the dimensions and constructional design as part of the ongoing technical development process. -
Page 26: Exploded View
REMKO ML...DC Exploded view ML 262 DC IT to ML 522 DC IT We reserve the right to modify the dimensions and constructional Spare parts list design as part of the ongoing technical development process. Designation ML 262 DC IT... -
Page 27: Exploded View
Exploded view ML 262 DC AT to ML 522 DC AT Spare parts list Designation ML 262 DC AT ML 352 DC AT ML 522 DC AT 802B8001... 808B8001... 809B8001... From Serial number 1111190 1111230 1111231 Front panel 1111193 1111232... -
Page 28: Performance Datas
REMKO ML...DC Performance data ML 262 DC Leistungskurve Heizen Cooling Heating 2.74 2.68 2.62 2.56 2.50 2.44 2.38 2.32 0,84 0.84 0.82 0.83 0.80 0.82 0.78 0.81 0.76 0.80 0.74 0.72 0.78 35 37 Outdoor temperature Outdoor temperature Performance data ML 352 DC... -
Page 29: Performance Datas
ML 522 DC Performance data ML 522 DC Cooling Heating 6.10 6.00 5.90 5,80 5.70 5.60 5.50 5.40 1.72 1.70 1.60 1.68 1.50 1.64 1.40 1.60 1.30 1.56 1.20 1.52 1.10 1.48 25 27 29 31 33 35 37 39 41 43 Außentemperatur... -
Page 30: Technical Data
3/8 (9,52) 3/8 (9,52) 1/2 (12,70) (mm) Max. operating pressure 4200 / 4200 ML 262 DC IT ML 352 DC IT ML 522 DC IT Corresponding indoor unit Serial number 802B5000 -... 808B5000 -... 809B5000 -... Adjustment range, room temperature °C... -
Page 31: Ec-Declaration Conformity
We hereby declate that the devices described in the following section conform to the require- ments of the specified applicable EC directives due to their design and type in the version as marketed by us. Name of Manufacturer: REMKO GmbH & Co. KG Klima- und Wärmetechnik Im Seelenkamp 12 D - 32791 Lage Name of Authorised Agent: REMKO GmbH &... - Page 32 Customer service Our equipment operates precisely and reliably. However, in the event of a fault, REMKO customer service is quickly on REMKO GmbH & Co. KG the scene. Our comprehensive Air conditioning and heating technology...
Need help?
Do you have a question about the ML 522 DC and is the answer not in the manual?
Questions and answers