Table of Contents
Advertisement
Advertisement
Table of Contents

Related Manuals for Salus EP210


Summary of Contents for Salus EP210
- Page 1 Model: EP210 Dual channel programmable controller Installation Manual...
-
Page 2: Table Of Contents
Safety Information ....................Box content ........................4 Features .......................... 5 Installation ........................5 Button functions ....................... 7 LCD icons ........................8 Operations ........................9 Functions ........................18 Factory Reset ....................... 21 Technical Info ......................22 Warranty ......................... 23 02 EP210 Installation Manual... -
Page 3: Introduction
By using the EP210 controller you can manage the commands sent to your boiler, motorized valves used in your system or to your thermostat. You can set the EP210 programmable controller to a 12 or 24 hour format, the Daylight saving Time (DST) being automatically enabled. The program mode is also selectable between a 5-2 (Monday-Friday and Saturday-Sunday) or 24 hour format. -
Page 4: Product Compliance
Always isolate the AC Mains supply before installing or working on any components that require 230 VAC 50Hz supply. Box content The box includes the EP210 controller, 2X screws and plugs and the Quick Guide installation manual. EP210 Controller 2x screws and plugs... -
Page 5: Features
Terminal Description Backplate Mains Neutral Mains Live Hot Water Off N L 1 2 3 N L 1 2 Central Heating Off Hot Water On Central Heating On Earth Parking (no electrical connection) (off) (off) (on) (on) EP210 Installation Manual... - Page 6 Note: Changes to the jumper setting should only be made by the engineer carrying out the installation or another qualified person. The installer should select the jumper positions required if changes need to be made to the factory default settings. These jumpers are found on the rear of the controller. 06 EP210 Installation Manual...
-
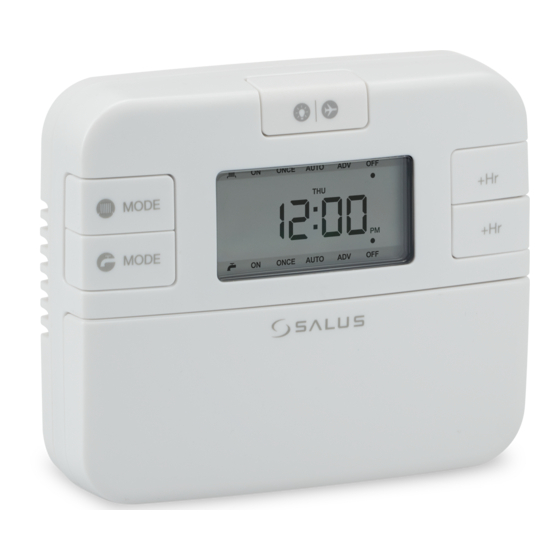
Page 7: Button Functions
Press to decrease clock/day, press and hold to enter fast Down arrow advance. Press to activate backlight. Hardware reset Press and hold button for 3 seconds to activate Holiday mode. Press and hold buttons to enter clock setting mode. Select + Set EP210 Installation Manual... -
Page 8: Lcd Icons
Days of the week OFF Mode Clock ADV Mode On Heating zone AUTO Mode On Boost hours for heating ONCE Mode On Holiday Mode On Mode Boost hours for hot water DST On/Off AM/PM Program number 08 EP210 Installation Manual... -
Page 9: Operations
Status after Reset Operation Mode Normal mode Clock 12:00 AM AM/PM indicator Date January 1, 2016 Daylight Saving Time(DST) Program Factory default 5+2 Program Number indicator SET indicator PROG indicator Mode indicator(s) “Off“ Output Relay CH/HW indicator(s) EP210 Installation Manual... - Page 10 Press Select to confirm. set the year. MODE MODE MODE MODE MODE MODE SELECT SELECT SELECT Press Up or Down Press Select to confirm. Press Up or Down to set the month. to set the date. 10 EP210 Installation Manual...
- Page 11 Operating Modes EP210 can operate in 5 different modes, applicable to the CH, HW or CH+HW. The operation modes are the same for CH and HW and can be set individually, or together. If you want to choose the mode for the CH, press Mode key.
- Page 12 MODE MODE SELECT SELECT Press for CH mode. Press for HW mode. Pressing the Mode key 3 times activates the AUTO. In AUTO mode, the controller gives the boiler the ON/OFF command depending on your schedule. 12 EP210 Installation Manual...
- Page 13 12:00. If ADV occurred at 10:30 the relay will be ON from 10:00, OFF from 10:30 (ADV) to 14:00 if no +1Hr Override. During ADV, if at 10:45 +1Hr (Boost) is pressed, the relay will go ON again at 10:45 (boost starts), OFF at 11:45 (Boost ends) until ends at 14:00, then ON again at 14:00. EP210 Installation Manual...
- Page 14 Total: 12 settings/week Total: 42 settings/week EP210 is a dual channel controller, that gives the possibility to control both Central Heating and Hot Water. You can choose which one you would like to control, by simply pressing the Mode key for Central Heating, Mode key for hot Water, or you can use both.
- Page 15 The CH icon and Mon-Fr Press Select to start entering a setting programs . will start flashing. Press up start time for the program and arrow 2 times. then follow the same steps as above from 3-11. EP210 Installation Manual...
- Page 16 SELECT Press Select. Use up/down arrows Press Select. to select minutes. MODE MODE MODE MODE MODE MODE SELECT SELECT SELECT Use up/down arrows Select an end time for Press Select. to select minutes. the first program. 16 EP210 Installation Manual...
- Page 17 Press Set to enter setting The CH icon and Mon will start Press Select to start entering programs . flashing. Press up arrow 2 times. a start time for the program and then follow the same steps as above from 3-11. EP210 Installation Manual...
-
Page 18: Functions
The number of boost hours Press +1Hr to enter To exit boost override, press Boost override. will be displayed. mode button until number +x disappears. Boost Override (+1Hr override) can be available for CH and HW at the same time. 18 EP210 Installation Manual... - Page 19 ADV Override for Hot Water MODE MODE MODE MODE SELECT SELECT Long press Mode while in Auto or Short press Mode while in ADV to Once to enter ADV override Mode. exit mode back to auto or Once. EP210 Installation Manual...
- Page 20 Press for 3 seconds. Controller in current mode. LCD Backlight If AC is powered, LCD backlight is activated when or any key is pressed. The backlight will be turned off in 15 seconds after all keys are released. 20 EP210 Installation Manual...
-
Page 21: Factory Reset
If you want to return to the factory settings please press the Reset button once (use a pin for this action). MODE MODE MODE MODE SELECT SELECT Press reset button. LCD will turn OFF. MODE MODE MODE MODE SELECT SELECT All icons will be displayed. Software version. MODE MODE SELECT Normal Mode. EP210 Installation Manual... -
Page 22: Technical Info
Yes, max 9 hours(selectable by software) Holiday Override Yes, max 31 days (selectable by software) Clock Clock Format 12 or 24 hour (selectable by software) Clock Accuracy +/-1 min/month Daylight Saving Time (DST) Yes, Clock automatically adjusted if DST is enabled. 22 EP210 Installation Manual... -
Page 23: Warranty
Warranty SALUS Controls warrants that this product will be free from any defect in materials or workmanship, and shall perform in accordance with its specification, for a period of two years from the date of installation. SALUS Controls sole liability for breach of this warranty will be (at its option) to repair or replace the defective product. - Page 24 SALUS Controls is a member of the Computime Group Maintaining a policy of continuous product development, SALUS Controls plc reserves the right to change specification, design and materials of products listed in this brochure without prior notice. For the latest PFD Instruction Manual, go to www.salus-manuals.com...
Need help?
Do you have a question about the EP210 and is the answer not in the manual?
Questions and answers