
Related Manuals for Salus SP220


Summary of Contents for Salus SP220
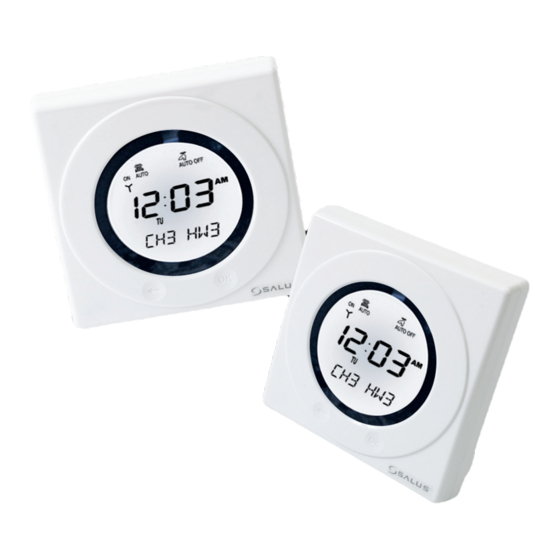
- Page 1 Dual Channel Controller Dual Channel Controller Model No SP220 Instruction Manual...
- Page 2 SP220 INSTRUCTION MANUAL...
-
Page 3: Product Compliance
EC Marking directive 93/68/EEC SAFETY INFORMATION These instructions are applicable to the Salus Controls model stated on the front cover of this manual only, and must not be used with any other make or model. These instructions are intended to apply in the United Kingdom only, and should be followed along with any other statutory obligations - if you are in any doubt, please contact the Salus Controls technical helpline. - Page 4 230V AC heating applications. The use of the revolutionary Touch Ring technology makes for simple usage, and is coupled with a unique, smart design and the ‘one touch’ operation makes the SP220 easy to operate. FEATURES •...
-
Page 5: Installation
The SP220 should be mounted in a location where it will not come into contact with moisture or condensation, as this can affect the Touch Ring operation. -
Page 6: After Installation
All the indicators on the display and the backlight will be turned on for a few seconds. The internal firmware version will then be displayed for a few seconds, and the SP220 will then operate in Normal mode (controller output OFF). -
Page 7: User Interface And Controls
USER INTERFACE AND CONTROLS The status and operation of the SP220 can be clearly seen on the large backlit Liquid Crystal Display (LCD) - this display allows the user to see at a glance the current status of the heating system. - Page 8 There are few user controls for the SP220, making the controller very easy to operate. The controls are a Touch Ring (which surrounds the user display), two touch sensitive buttons, a reset button and a slide operated switch mounted on the side of the controller.
-
Page 9: Operation
Pressing the Arrow key will return the SP220 to NORMAL mode. The controller will also return to NORMAL mode after 10 seconds if no Key is pressed or if no movement is detected on the Touch Ring. -
Page 10: Boost Menu
Increasing the setting beyond this level will roll the setting back to 0 and disable the temporary override. Confirm the heating setting by pressing the OK key, and then change the hot water setting in the same way. SP220 INSTRUCTION MANUAL... - Page 11 Gravity Operation: Although the BOOST mode operates in a similar way when the controller is configured for gravity operation, the central heating cannot be operated without the hot water. The override duration for hot water MUST be equal to or longer than the setting for central heating. When configured for gravity operation, increasing the central heating override setting will automatically increase...
-
Page 12: Program Menu
SP220 with your own settings is a very straightforward operation. To start programming the SP220, press the OK key twice when in NORMAL mode, and scroll using the Scroll Ring to select the PROGRAM menu - press the OK key once more to start the programming process. - Page 13 OK key. Following this sequence you will have set up Programme 1 – the SP220 display will then move on to Programme 2. Continue to add your desired settings for each of the programmes through to Programme 3 in the same way as Programme 1 (hour and minutes).
- Page 14 Pressing the Arrow key at any time will return the SP220 to the previous screen. Once all the days have been programmed, the SP220 will revert to NORMAL mode.
-
Page 15: Mode Selection
MODE SELECTION The SP220 operating mode is selected with the controller in NORMAL mode by touching the Touch Ring (but not the ARROW or OK keys). There are four operating modes for the controller: ON, ONCE, AUTO and OFF By default, the first modes displayed are for the central heating (CH) function. Each mode can be selected when the controller is in NORMAL mode by scrolling the Touch Ring in an ANTICLOCKWISE direction. - Page 16 (G), the central heating cannot be operated without hot water. Central Heating (CH) Selectable Modes for Hot Water (HW) ONCE ON, ONCE AUTO ON, ONCE, AUTO ON, ONCE, AUTO, OFF SP220 INSTRUCTION MANUAL...
-
Page 17: Holiday Menu
HOLIDAY MENU Entering the HOLIDAY menu allows you to turn on the holiday override mode of the SP220. The HOLIDAY mode allows the user to override all the current Programme settings and turn off the heating system between two dates entered by the user. - Page 18 When in HOLIDAY mode, pressing will display CANCEL HOLIDAY alternately shown below: Pressing the OK key again will cancel HOLIDAY mode and return the SP220 to AUTO mode. Pressing the Arrow key leaves the controller in HOLIDAY mode. SP220 INSTRUCTION MANUAL...
-
Page 19: System Menu
Gravity (G) mode. On entering the menu, use the Touch Ring to scroll to the preferred option (P or G), and confirm the choice using the OK button. Use the Arrow key to return to the previous screen display. SP220 INSTRUCTION MANUAL... - Page 20 – this is set in exactly the same way as previously described for the time. Press the Arrow key to return to the previous screen display, or do nothing for 10 seconds and the SP220 will return to NORMAL mode. SP220 INSTRUCTION MANUAL...
-
Page 21: Service Menu
Use the Touch Ring to scroll through the Menus, and press the OK key to select the SERVICE menu. You will be prompted to turn SERVICE mode OFF or ON (by default, SERVICE mode is OFF): SP220 INSTRUCTION MANUAL... - Page 22 SERVICE mode on or off. The default service code is set to 000. If you forget the code, then you will need to contact Salus Controls technical support. Once the code has been entered, the next menu screen allows you to set the next service date for the system. Set the date in the order day, month and year: Confirm the setting using the OK key, or press the Arrow key to return to the previous screen display.
- Page 23 OK key. Once set as described, the SERVICE indicator will appear on the display 30 days before the set date, and the status message will change in the sequence shown here: SP220 INSTRUCTION MANUAL...
- Page 24 At seven days before the set date, the SERVICE indicator will flash: SP220 INSTRUCTION MANUAL...
- Page 25 If you want to deactivate SERVICE mode before the set date has arrived, select the SERVICE menu. Once back in SERVICE mode, you can edit the telephone number, set a new servicing date, or turn SERVICE mode ON or OFF in exactly the same way as described earlier. SP220 INSTRUCTION MANUAL...
-
Page 26: Radio Controlled Clock
12:00am or 2am every day, therefore when the time changes twice a year, so will the SP220. Please be aware that the signal received by the RCC is similar to a mobile phone signal; some areas will not obtain a signal. If you happen to be located in a poor RCC reception area, then the time and date can be set manually in the settings menu. -
Page 27: Daylight Saving
RESET BUTTON The Reset Button is provided as a way to restore the heating controller to its default factory settings. Pressing this button will delete any previously entered settings, except when the SP220 is in SERVICE mode. The default factory settings for the SP220 are:... -
Page 28: Maintenance
AC MONITORING The SP220 monitors the presence of mains power. If the mains supply is not detected, all settings are saved to the internal memory and all controller functions are paused. The controller output will also be turned off. During periods of mains failure, the clock will continue to operate in... -
Page 29: Product Specification
Default Setting: P mode DEFAULT PROGRAMMES (HEATING AND HOT WATER) Programme Output Weekday Weekend 6:00 AM 6:00 AM 8:00 AM 8:00 AM 10:00 AM 10:00 AM 12:00 PM 12:00 PM 6:00 PM 6:00 PM 10:00 PM 10:00 PM SP220 INSTRUCTION MANUAL... - Page 30 230V AC / 50Hz Switching Current: 3A resistive, 1A inductive Contact Type: Single Pole Double Throw (SPDT) Number of Relays: Two (2) ENVIRONMENT Operating Temperature: 0 ºC to + 40 ºC Storage Temperature: - 20 ºC to + 60 ºC SP220 INSTRUCTION MANUAL...
- Page 31 Salus Controls sole liability for breach of this warranty will be (at its option) to repair or replace the defective product.
- Page 32 Email: sales@salus-tech.com Tel: 01226 323961 Sales Email: tech@salus-tech.com Tel: 01226 323961 Technical Salus Controls plc, Salus House, Dodworth Business Park South, Whinby Road, Dodworth, Barnsley S75 3SP...
Need help?
Do you have a question about the SP220 and is the answer not in the manual?
Questions and answers
The red indicator on the boiler unit is constantly flashing and the control module doesn’t seem to work
A constantly flashing red SERVICE indicator on a Salus SP220 boiler unit means that the service date has been reached and the service is now due. When this happens, all outputs from the controller are turned OFF, regardless of any programmed settings.
To temporarily restore heating and hot water, you can activate the SERVICE BOOST mode:
1. Press the OK key.
2. Select SERVICE BOOST mode.
3. The outputs will turn on for 1 hour (this time cannot be extended).
To fully restore normal function, the service condition must be cleared, which may require service completion and resetting the controller.
This answer is automatically generated