Keysight U1271A User Manual
Handheld
Hide thumbs
Also See for U1271A:
- Quick start manual (193 pages) ,
- User manual (167 pages) ,
- Service manual (63 pages)
Table of Contents
Advertisement
Quick Links
Download this manual
See also:
Service Manual
Advertisement
Table of Contents

Related Manuals for Keysight U1271A


Summary of Contents for Keysight U1271A
- Page 1 Keysight U1271A/U1272A Handheld Digital Multimeter User’s Guide...
-
Page 3: Restricted Rights Legend
U1271-90010 ity and fitness for a particular purpose. age to the product or loss of Keysight shall not be liable for errors or for Edition important data. Do not proceed incidental or consequential damages in... -
Page 4: Safety Symbols
Category III 1000 V overvoltage protection 1000 V CAT IV Earth (ground) terminal Category IV 600 V overvoltage protection 600 V Equipment protected throughout by Caution, risk of hazardous voltage (icon double insulation or reinforced appears on the instrument screen) insulation U1271A/U1272A User’s Guide... -
Page 5: Safety Considerations
Safety Considerations Read the information below before using this multimeter. The descriptions and instructions in this manual apply to the Keysight U1271A and U1272A Handheld Digital Multimeters (hereafter referred to as the multimeter). The model U1272A appears in all illustrations. - Page 6 • Do not operate the multimeter with the battery cover or portions of the cover removed or loosened. • To avoid false readings, which may lead to possible electric shock or personal injury, replace the battery as soon as the low battery indicator appears and flashes. U1271A/U1272A User’s Guide...
-
Page 7: Environmental Conditions
–40 °C to 70 °C Altitude Up to 2000 meters Pollution degree Pollution degree II The U1271A/U1272A Handheld Digital Multimeter complies with the following N O T E safety and EMC requirements: • EN/IEC 61010-1:2001 • ANSI/UL 61010-1:2004 • CAN/CSA-C22.2 No. 61010-1-04 •... - Page 8 The CSA mark is a registered substance elements are expected to trademark of the Canadian Standards leak or deteriorate during normal use. Association. Forty years is the expected useful life of the product. U1271A/U1272A User’s Guide...
- Page 9 “Monitoring and Control Instrument” product. The affixed product label is as shown below. Do not dispose in domestic household waste. To return this unwanted instrument, contact your nearest Keysight Service Centre, or visit www.keysight.com/environment/product for more information.
- Page 10 Declaration of Conformity (DoC) The Declaration of Conformity (DoC) for this instrument is available on the Keysight Web site. You can search the DoC by its product model or description at the Web address below. http://regulations.products.keysight.com/DoC/search.htm If you are unable to search for the respective DoC, please contact your N O T E local Keysight representative.
-
Page 11: Table Of Contents
Connecting the IR-USB cable Power-on options Your Multimeter in Brief Dimensions Overview Rotary switch Keypad Display screen Input terminals Cleaning Your Multimeter Making Measurements Crest Factor Measuring AC Voltage Using the LPF (Low Pass Filter) Function for AC measurements U1271A/U1272A User’s Guide... - Page 12 Measuring AC and DC Signals (U1272A only) Using the LPF (Low Pass Filter) Function for AC+DC measurements Making dB Measurements (U1272A only) Using Z for Voltage Measurements (U1272A only) Using Qik-V for Voltage Measurements (U1271A only) Measuring Resistance Measuring Conductance Testing for Continuity Ω Using Smart...
- Page 13 Changing the % scale range Changing the thermocouple type (U1272A only) Changing the minimum measurable frequency Changing the baud rate Changing the data bits Changing the parity check Enabling and disabling the backlight alert Enabling smooth mode U1271A/U1272A User’s Guide...
- Page 14 Temperature specifications Frequency specifications Duty cycle and pulse width specifications Frequency sensitivity specifications Peak hold specifications Decibel (dB) specifications for U1272A Measurement rate (approximate) Shift Functions Using the Shift Key Dual Display Combinations Using the Dual Key U1271A/U1272A User’s Guide...
- Page 15 Figure 1-2 Start-up display 26 Figure 1-3 Input warning display 29 Figure 1-4 Tilt-stand adjustment and IR cable connection 30 Figure 1-5 Keysight GUI Data Logger Software 31 Figure 1-6 Width dimensions 33 Figure 1-7 Height and depth dimensions 34...
- Page 16 Figure 3-9 View display 122 Figure 3-10 Empty view display 122 Figure 4-1 bEEP display 130 Figure 4-2 FiLtEr display 133 Figure 4-3 AHOLd display 134 Figure 4-4 d-LoG display 135 Figure 4-5 L-tiME display 136 Figure 4-6 dCibEL display 137 U1271A/U1272A User’s Guide...
- Page 17 Figure 4-14 bAUd display 144 Figure 4-15 dAtAb display 145 Figure 4-16 PAritY display 146 Figure 4-17 A-bLit display 147 Figure 4-18 SMootH display 148 Figure 4-19 SMootH display 149 Figure 4-20 rESEt display 150 Figure 4-21 t-Unit display 151 U1271A/U1272A User’s Guide...
- Page 18 THIS PAGE HAS BEEN INTENTIONALLY LEFT BLANK. U1271A/U1272A User’s Guide...
- Page 19 Table 4-5 Firmware version 2.04 or newer 132 Table 5-1 DC specifications 158 Table 5-2 U1271A true rms AC voltage specifications 161 Table 5-3 U1271A true rms AC current specifications 162 Table 5-4 U1272A true rms AC voltage specifications 163...
- Page 20 Table 5-17 U1272A decibel accuracy specifications for DC voltage measurements 173 Table 5-18 Measurement rate (approximate) 174 Table A-1 U1271A default and shift functions 176 Table A-2 U1272A default and shift functions 177 Table B-1 U1271A dual display combinations 180 Table B-2 U1272A dual display combinations 182 U1271A/U1272A User’s Guide...
- Page 21 U1271A/U1272A Handheld Digital Multimeter User’s Guide Introduction About This Manual 22 Documentation map 22 Safety notes 22 Preparing Your Multimeter 23 Check the shipment 23 Install the batteries 23 Turn on your multimeter 26 Automatic power-off 26 Enabling the backlight 27...
-
Page 22: Introduction
• Quick Start Guide. Printed copy for outdoor use, included with shipment. • Service Guide. Free download at the Keysight Web site. • Keysight GUI Data Logger Software, Help, and Quick Start Guide. Free download at the Keysight Web site. -
Page 23: Preparing Your Multimeter
Included Accessories list located at the side of the box. 3 For any question or problems, refer to the Keysight contact numbers on the back of this manual. Install the batteries Your multimeter is powered by four 1.5 V AAA alkaline... -
Page 24: Figure 1-1 Installing The Batteries
Figure 1-1 Installing the batteries The battery level indicator in the lower left- hand corner of the display indicates the relative condition of the batteries. Table 1- 1 describes the various battery levels the indicator represents. U1271A/U1272A User’s Guide... -
Page 25: Table 1-1 Battery Level Indicator
To avoid instruments being damage from battery leakage: C A U T I O N • Always remove dead batteries immediately. • Always remove the batteries and store them separately if the multimeter is not going to be used for a long period. U1271A/U1272A User’s Guide... -
Page 26: Turn On Your Multimeter
(default). Pressing any key will turn the multimeter back on after it is powered off automatically. To change the timeout period or completely disable the automatic power- off, refer to “Changing the auto power- off and backlight timeouts” on page 138. U1271A/U1272A User’s Guide... -
Page 27: Enabling The Backlight
If autoranging is enabled, press to enter the manual range mode. Each additional press of sets the multimeter to the next higher range, unless it is already in the highest range, at which point the range switches to the lowest range. U1271A/U1272A User’s Guide... -
Page 28: Alerts And Warnings During Measurement
The multimeter emits a continuous beep and displays when the test lead is inserted into the input terminal but the rotary switch is not set to the correct current position. U1271A/U1272A User’s Guide... -
Page 29: Figure 1-3 Input Warning Display
Introduction Preparing Your Multimeter Figure 1-3 Input warning display This warning is intended to stop you from attempting to measure voltage, continuity, resistance, capacitance, diode, or temperature values when the leads are plugged into a current terminal. U1271A/U1272A User’s Guide... -
Page 30: Adjusting The Tilt Stand
Connecting the IR-USB cable You can use the IR communication link (IR communication port, located at the rear panel) and the Keysight GUI Data Logger software to control your multimeter remotely, perform data logging operations, and transfer the contents of your multimeter’s memory to a PC. -
Page 31: Figure 1-5 Keysight Gui Data Logger Software
The Keysight GUI Data Logger software and its supporting documents (Help and Quick Start Guide) are available for free download at http://www.keysight.com/find/hhTechLib. You may purchase a U1173A IR- USB cable from a Keysight Sales Office nearest to you. U1271A/U1272A User’s Guide... -
Page 32: Power-On Options
138. Simulates the Auto Power-Off (APO) mode. Press any key to turn the multimeter back on and resume normal operation. Backlight test. LCD backlight is activated. Press any key to exit this mode. Setup U1271A/U1272A User’s Guide... -
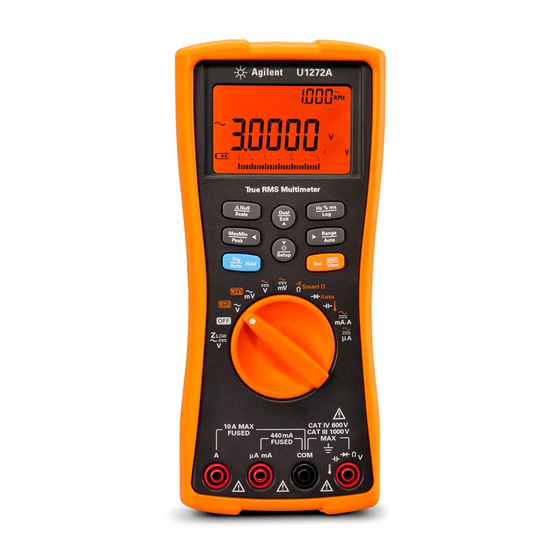
Page 33: Your Multimeter In Brief
Introduction Your Multimeter in Brief Your Multimeter in Brief Dimensions Front view 92 mm Figure 1-6 Width dimensions U1271A/U1272A User’s Guide... -
Page 34: Figure 1-7 Height And Depth Dimensions
Introduction Your Multimeter in Brief Rear and side view 59 mm 207 mm Figure 1-7 Height and depth dimensions U1271A/U1272A User’s Guide... -
Page 35: Overview
Figure 1-8 Front panel Table 1-3 Front panel parts Legend Description Learn more on: Display screen page 45 Keypad page 41 Rotary switch for U1271A page 38 Terminals page 51 Rotary switch for U1272A page 39 U1271A/U1272A User’s Guide... -
Page 36: Figure 1-9 Rear Panel
Figure 1-9 Rear panel Table 1-4 Rear panel parts Legend Description Learn more on: Test probe holders IR communication port page 30 Battery and fuse access cover page 23 Tilt stand page 30 U1271A/U1272A User’s Guide... -
Page 37: Rotary Switch
• Smart Ω (offset compensation) measurements, • Auto- diode test, and • AC+DC voltage and current measurements. The U1271A has one differing rotary switch function: • Qik- V test. Click the respective “Learn more” pages for more information on each function. -
Page 38: Figure 1-10 U1271A Rotary Switch
Introduction Your Multimeter in Brief Figure 1-10 U1271A rotary switch Each position of the U1271A rotary switch (shown in Figure 1- 10) is described in Table 1- Table 1-5 U1271A rotary switch functions Legend Description Learn more on: page 25... -
Page 39: Figure 1-11 U1272A Rotary Switch
Introduction Your Multimeter in Brief Table 1-5 U1271A rotary switch functions (continued) Legend Description Learn more on: page 86 Capacitance or Temperature measurement page 88 AC or DC current measurement page 93 AC or DC current measurement (up to microamperes) - Page 40 80 Diode test or Auto-diode test Auto page 84 page 86 Capacitance or Temperature measurement page 88 AC, DC, or AC+DC current measurement page 93 page 64 AC, DC, or AC+DC current measurement (up to microamperes) U1271A/U1272A User’s Guide...
-
Page 41: Keypad
Turning the rotary switch to another position resets the current operation of the key. Click the respective “Learn more” pages for more information on each function. Figure 1-12 Keys U1271A/U1272A User’s Guide... -
Page 42: Table 1-7 Keypad Functions
• Press for more than 1 second to exit this mode. exit this mode. Switches between the dual-combination Exits the Hold, Null, MaxMin, Peak, Dual page 179 Exit displays (if available). frequency test, and dual display modes. U1271A/U1272A User’s Guide... -
Page 43: Learn More On
1 second will enter the event data logging mode, where data is logged each time a triggering condition is satisfied. • Press for more than 1 second to exit the automatic or event data logging mode. U1271A/U1272A User’s Guide... - Page 44 122 Setup • Press for more than 1 second to to the regular measurement function. clear all the logged data for the selected logging mode. • Press for more than 1 second to exit this mode. U1271A/U1272A User’s Guide...
-
Page 45: Display Screen
Learn more on: Remote control enabled page 30 Offset compensation (Smart Ω) for resistance page 77 measurement enabled Data logging in progress page 116 Scale transfer enabled page 110 View mode for reviewing previously logged page 122 data U1271A/U1272A User’s Guide... - Page 46 Maximum reading shown on primary display Minimum reading shown on primary display page 112 Averaged reading shown on primary display Present reading shown on primary display Relative (Null) enabled page 108 Audible continuity test selected page 74 U1271A/U1272A User’s Guide...
- Page 47 • Capacitor is discharging (during capacitance measurement) • Negative slope for pulse width (ms) and duty cycle (%) measurements Primary measurement display Measuring units for the primary display page 49 Measurement range selected page 27 Battery capacity indication page 25 U1271A/U1272A User’s Guide...
- Page 48 APO (Auto Power-Off) enabled page 26 Tone enabled Analog bar graph page 50 Autoranging enabled or Auto-diode enabled page 27 Diode test selected page 80 page 32 Smooth mode enabled page 148 Overload (the reading exceeds the display range) U1271A/U1272A User’s Guide...
-
Page 49: Table 1-9 Measurement Units Display
Hertz units for frequency measurement Millisecond, unit for pulse width measurement Percent, unit for duty cycle measurement °C Degree Celsius, unit for temperature measurement °F Degree Fahrenheit, unit for temperature measurement Seconds, unit for Peak and Recording mode elapsed time U1271A/U1272A User’s Guide... -
Page 50: Table 1-10 Analog Bar Graph Display
An unstable bar graph and unmatched primary display when measuring DC voltage usually means the presence of AC voltages in the circuit. [1] The analog bar graph measurement rate is approximately 50 times/second for DC voltage, current, and resistance measurements. U1271A/U1272A User’s Guide... -
Page 51: Input Terminals
Ensure that the terminal connections are correct for that particular WA R N I N G measurement function before starting any measurement. To avoid damaging this device, do not exceed the rated input limit. C A U T I O N Figure 1-14 Connector terminals U1271A/U1272A User’s Guide... -
Page 52: Table 1-11 Terminal Connections For Different Measuring
Table 1-11 Terminal connections for different measuring functions Rotary switch position Input terminals Overload protection U1271A U1272A Qik-V 1000 Vrms 1000 Vrms for short circuit <0.3 A Smart Auto 11 A/1000 V, fast-acting fuse 440 mA/1000 V, fast-acting fuse U1271A/U1272A User’s Guide... -
Page 53: Cleaning Your Multimeter
2 Turn the multimeter over and shake out any dirt that may have accumulated in the terminals. Wipe the case with a damp cloth and mild detergent — do not use abrasives or solvents. Wipe the contacts in each terminal with a clean swab dipped in alcohol. U1271A/U1272A User’s Guide... - Page 54 Introduction Cleaning Your Multimeter THIS PAGE HAS BEEN INTENTIONALLY LEFT BLANK. U1271A/U1272A User’s Guide...
-
Page 55: Making Measurements
Using the LPF (Low Pass Filter) Function for AC+DC measurements 65 Making dB Measurements (U1272A only) 66 Using Z for Voltage Measurements (U1272A only) 68 Using Qik-V for Voltage Measurements (U1271A only) 70 Measuring Resistance 71 Measuring Conductance 73 Testing for Continuity 74 Using Smart Ω... -
Page 56: Crest Factor
Voltage range Crest factor Maximum input (V peak 30 mV +/– 90 mV 300 mV +/– 900 mV +/– 9 V 30 V +/– 90 V 300 V +/– 900 V 1000 V +/– 1500 V U1271A/U1272A User’s Guide... -
Page 57: Measuring Ac Voltage
Appendix B, “Dual Display Combinations Using the Dual Key,” starting on page 179 to learn more. • Press to enable the frequency test mode for voltage measurements. See “Frequency Test Mode” on page 101 to learn more. U1271A/U1272A User’s Guide... -
Page 58: Figure 2-2 Measuring Ac Voltage
Making Measurements Measuring AC Voltage Figure 2-2 Measuring AC voltage U1271A/U1272A User’s Guide... -
Page 59: Using The Lpf (Low Pass Filter) Function For Ac Measurements
Then, select the filter function if required for measurement stability and response speed. The low pass filter can improve measurement performance on composite sine waves that are typically generated by inverters and variable frequency motor drives. U1271A/U1272A User’s Guide... -
Page 60: Measuring Dc Voltage
Appendix B, “Dual Display Combinations Using the Dual Key,” starting on page 179 to learn more. • Press to enable the frequency test mode for voltage measurements. See “Frequency Test Mode” on page 101 to learn more. U1271A/U1272A User’s Guide... - Page 61 • To avoid possible electric shock or personal injury, enable the Low Pass Filter to verify the presence of hazardous DC voltages. Displayed DC voltage values can be influenced by high frequency AC components and must be filtered to assure an accurate reading. U1271A/U1272A User’s Guide...
-
Page 62: Figure 2-5 Measuring Dc Voltage
Making Measurements Measuring DC Voltage Figure 2-5 Measuring DC voltage U1271A/U1272A User’s Guide... -
Page 63: Using The Filter Function For Dc Measurement
DC voltage values can be influenced by high frequency AC components and must be filtered to assure an accurate reading. • Do not enable any of the dual display options when performing measurements to verify the presence of hazardous DC voltages. (U1272A only) U1271A/U1272A User’s Guide... -
Page 64: Measuring Ac And Dc Signals (U1272A Only)
Appendix B, “Dual Display Combinations Using the Dual Key,” starting on page 179 to learn more. • Press to enable the frequency test mode for voltage measurements. See “Frequency Test Mode” on page 101 to learn more. U1271A/U1272A User’s Guide... -
Page 65: Using The Lpf (Low Pass Filter) Function For Ac+Dc Measurements
2 Rotate the multimeter’s rotary switch to 3 Your multimeter continues measuring in the AC+DC mode, but now the signal diverts through a filter that blocks unwanted voltages above 1 kHz Figure 2-8 Low Pass Filter(LPF) for AC+DC voltage measurements U1271A/U1272A User’s Guide... -
Page 66: Making Db Measurements (U1272A Only)
Exit a dBm value, as shown in Figure 2- Figure 2-9 dBm display Dual Press for more than 1 second to exit the dBm function. Exit Selecting the frequency test mode, also cancels the dBm function. U1271A/U1272A User’s Guide... -
Page 67: Figure 2-10 Dbv Display
“Changing the decibel display (U1272A only)” on page 136 to learn more. Dual Press for more than 1 second to exit the dBV function. Exit Selecting the frequency test mode, also cancels the dBV function. U1271A/U1272A User’s Guide... -
Page 68: Using Zlow For Voltage Measurements (U1272A Only)
2 Probe the test points and read the display. The AC voltage measurement is shown in the primary display and the DC voltage measurement is shown in the secondary display. Dual Press to exchange the AC and DC voltage indication Exit on the primary and secondary displays. U1271A/U1272A User’s Guide... -
Page 69: Figure 2-11 Zlow Display
Use this simple and quick test to determine if a battery has enough voltage capacity to support regular activities. Prolonged used of the Z function will consume the capacity of the N O T E battery-under-test. U1271A/U1272A User’s Guide... -
Page 70: Using Qik-V For Voltage Measurements (U1271A Only)
Making Measurements Using Qik-V for Voltage Measurements (U1271A only) Using Qik-V for Voltage Measurements (U1271A only) Use the Qik- V function to help you check for the presence of either or both AC and DC voltages before you set a precise range for a more accurate reading. -
Page 71: Measuring Resistance
To remove lead resistance from the measurement, hold the test lead tips together and press . Now the resistance at the probe tips will be subtracted from all future display readings. U1271A/U1272A User’s Guide... -
Page 72: Figure 2-14 Measuring Resistance
The resistance function can produce enough voltage to forward- bias silicon diode or transistor junctions, causing them to conduct. If this is suspected, press to apply a lower current in the next higher range. Smart Figure 2-14 Measuring resistance U1271A/U1272A User’s Guide... -
Page 73: Measuring Conductance
(nS unit shown). Probe the test points and read the display. High- resistance readings are susceptible to electrical noise. Use averaging to smooth out most of the noisy readings. Refer to “Capturing Maximum and Minimum Values (MaxMin)” on page 112. U1271A/U1272A User’s Guide... -
Page 74: Testing For Continuity
<120 ± 60 kΩ You can set the beeper to sound and the backlight to flash as a continuity indication whether the circuit- under- test is less than (short) or more than or equal to (open) the threshold resistance. U1271A/U1272A User’s Guide... -
Page 75: Figure 2-15 Continuity Operation
4 Probe the test points and read the display. The continuity function detects intermittent shorts and opens lasting as short as 1 ms. A brief short or open causes the multimeter to emit a short beep and flash. U1271A/U1272A User’s Guide... -
Page 76: Figure 2-16 Testing For Continuity
Setup. See “Changing the beep frequency” on page 130 “Enabling and disabling the backlight alert” on page 147 for more information on the audible and visual alert options. (open) (closed) Smart Figure 2-16 Testing for continuity U1271A/U1272A User’s Guide... -
Page 77: Using Smart Ω For Resistance Measurements (U1272A Only)
2 Probe the test points and read the display. The resistance measurement and the bias voltage measurement is shown in the primary and secondary displays respectively. Dual Press to switch between the leakage (μA) and bias Exit (mV) display. U1271A/U1272A User’s Guide... -
Page 78: Figure 2-17 Smart Ω (With Bias Voltage) Display
It is useful to measure the resistance of a thermocouple temperature sensor. The thermovoltage is proportional to the temperature and the impact of the resistance measurement. Using the Smart Ω function will help you achieve precise readings regardless of the temperature. U1271A/U1272A User’s Guide... -
Page 79: Figure 2-18 Measuring Leakage Current
1 nA or 0.1 nA or a precision shunt, you can measure the leakage current using the Smart Ω function with just a resistor from 100 kΩ to 300 kΩ. Smart Figure 2-18 Measuring leakage current U1271A/U1272A User’s Guide... -
Page 80: Testing Diodes
Connect the red test lead to the positive terminal (anode) of the diode and N O T E the black test lead to the negative terminal (cathode). The cathode of a diode is indicated with a band. Figure 2-19 Diode display U1271A/U1272A User’s Guide... -
Page 81: Figure 2-20 Open Diode Display
If the beeper is enabled during diode test, the multimeter will beep briefly for a normal junction and sound continuously for a shorted junction, below 0.050 V. See “Changing the beep frequency” on page 130 to disable the beeper. U1271A/U1272A User’s Guide... -
Page 82: Figure 2-21 Testing Forward Bias Diode
Making Measurements Testing Diodes Auto Figure 2-21 Testing forward bias diode U1271A/U1272A User’s Guide... -
Page 83: Figure 2-22 Testing Reverse Bias Diode
Making Measurements Testing Diodes Auto Figure 2-22 Testing reverse bias diode U1271A/U1272A User’s Guide... -
Page 84: Using Auto-Diode For Diode Tests (U1272A Only)
• is shown briefly (along with a single beep) on the secondary display if the diode is in a good condition. • is shown briefly (along with two beeps) if the diode is out of the thresholds. U1271A/U1272A User’s Guide... -
Page 85: Figure 2-23 Auto-Diode Display - Good Status
Making Measurements Using Auto-diode for Diode Tests (U1272A only) Figure 2-23 Auto-diode display - Good status Figure 2-24 Auto-diode display - nGood status U1271A/U1272A User’s Guide... -
Page 86: Measuring Capacitance
Figure 2-25 Capacitance display To improve measurement accuracy of small value capacitors, press N O T E with the test leads open to subtract the residual capacitance of the multimeter and leads. U1271A/U1272A User’s Guide... -
Page 87: Figure 2-26 Measuring Capacitance
For measuring capacitance values greater than 1000 μF, discharge the N O T E capacitor first, then select a suitable range for measurement. This will speed up the measurement time and also ensure that the correct capacitance value is obtained. Figure 2-26 Measuring capacitance U1271A/U1272A User’s Guide... -
Page 88: Measuring Temperature
°C or °F (you must first change the temperature unit to switch between °C and °F or °F and °C). See “Changing the default temperature unit” on page 90 for more information. U1271A/U1272A User’s Guide... -
Page 89: Figure 2-28 Measuring Surface Temperature
National laws of your region. Shorting the terminal to the terminal will display the temperature N O T E at the multimeter’s terminals. Type K Thermocouple Probe Figure 2-28 Measuring surface temperature U1271A/U1272A User’s Guide... - Page 90 °C and °F. • - Temperature measured in °F. • - During temperature measurements, press to switch between °F and °C. 3 Press to save the changes. Press and hold until Setup the multimeter restarts. U1271A/U1272A User’s Guide...
- Page 91 1 hour as the multimeter is using a non- compensation transfer adapter with miniature thermal probe. • For quick measurement, use the compensation to view the temperature variation of the thermocouple sensor. The compensation assists you in measuring relative temperature immediately. U1271A/U1272A User’s Guide...
-
Page 92: Figure 2-29 Temperature Measurement Without Ambient Compensation
3 After a constant reading is obtained, press to set the reading as the relative reference temperature. 4 Touch the surface to be measured with the thermocouple probe and read the display. Figure 2-29 Temperature measurement without ambient compensation U1271A/U1272A User’s Guide... -
Page 93: Measuring Ac Or Dc Current
400 mA. See Figure 2-33 test lead connections and function selection. Refer to the “Input warning” section for information on the alerts the multimeter uses when leads are not used correctly for current measurements. U1271A/U1272A User’s Guide... -
Page 94: Figure 2-30 Dc Current Display
Appendix B, “Dual Display Combinations Using the Dual Key,” starting on page 179 to learn more. • Press to enable the frequency test mode for voltage measurements. See “Frequency Test Mode” on page 101 to learn more. U1271A/U1272A User’s Guide... -
Page 95: Figure 2-31 Measuring Dc Current
This happens because the resistance through the multimeter's current terminals are very low, resulting in a short circuit. LOAD Figure 2-31 Measuring DC current U1271A/U1272A User’s Guide... -
Page 96: Figure 2-32 Measuring Ac Current
Making Measurements Measuring AC or DC Current LOAD Figure 2-32 Measuring AC current U1271A/U1272A User’s Guide... -
Page 97: Figure 2-33 Current Measurement Setup
Making Measurements Measuring AC or DC Current Figure 2-33 Current measurement setup U1271A/U1272A User’s Guide... -
Page 98: Scale Of 4-20 Ma Or 0-20 Ma
Probe the test points and read the display. Figure 2-34 4-20 mA % Scale display The analog bar graph displays the current measurement value. (In the example above, 8 mA is represented as 25% in the 4- 20 mA % scale.) U1271A/U1272A User’s Guide... -
Page 99: Table 2-3 % Scale Measurement Range
Press and hold until Setup the multimeter restarts. Use the % scale with a pressure transmitter, a valve positioner, or other output actuators to measure pressure, temperature, flow, pH, or other process variables. U1271A/U1272A User’s Guide... -
Page 100: Figure 2-35 Measuring Dc Current Using The 4-20 Ma % Scale
Making Measurements Measuring AC or DC Current Pressure transmitter Figure 2-35 Measuring DC current using the 4-20 mA % scale U1271A/U1272A User’s Guide... -
Page 101: Frequency Test Mode
Your multimeter allows simultaneous monitoring of real- time voltage or current with frequency, duty cycle, or pulse width measurements. Figure 2- 36 highlights the primary functions allowing frequency measurements in your multimeter. U1271A U1272A Figure 2-36 Functions allowing frequency measurement U1271A/U1272A User’s Guide... -
Page 102: Measuring Frequency
Figure 2- To obtain the best measuring results for frequency measurements, please N O T E use the AC measuring path. 2 Press . Probe the test points and read the display. U1271A/U1272A User’s Guide... -
Page 103: Figure 2-38 Frequency Display
In general, the lowest frequency displayed is the correct one. Press to cycle through the frequency, pulse width, and duty cycle measurements. Dual Press for more than 1 second to exit the frequency Exit measurement function. U1271A/U1272A User’s Guide... -
Page 104: Measuring Pulse Width
The pulse width polarity is displayed to the left of the duty cycle value. indicates a positive pulse width and indicates a negative pulse width. To change the polarity Dual being measured, press Exit Press to cycle through the frequency, pulse width, and duty cycle measurements. U1271A/U1272A User’s Guide... -
Page 105: Measuring Duty Cycle
The duty cycle percentage of the input signal is shown in the primary display. The voltage or ampere value of the signal is shown in the secondary display. The bar graph does not indicate duty cycle but indicates the voltage or ampere value of the input signal. U1271A/U1272A User’s Guide... - Page 106 To change the polarity being measured, Dual press Exit Press to cycle through the frequency, pulse width, and duty cycle measurements. Dual Press for more than 1 second to exit the duty cycle Exit measurement function. U1271A/U1272A User’s Guide...
-
Page 107: Multimeter Features
U1271A/U1272A Handheld Digital Multimeter User’s Guide Multimeter Features Making Relative Measurements (Null) 108 Making Scale Transfers (Scale) 110 Capturing Maximum and Minimum Values (MaxMin) 112 Capturing Peak Values (Peak) 114 Freezing the Display (TrigHold and AutoHold) 115 Recording Measurement Data (Data Logging) 116... -
Page 108: Making Relative Measurements (Null)
For any measurement function, you can directly measure and store the null value by pressing with the test leads open (nulls the test lead capacitance), shorted (nulls the test lead resistance), or across a desired null value circuit. U1271A/U1272A User’s Guide... -
Page 109: Figure 3-2 Null Operation
Short the test leads and press when the displayed value is stable to zero-adjust the display. Press to enable the Null function. Display returns to normal after Press 3 seconds Press again to disable the Null function. Figure 3-2 Null operation U1271A/U1272A User’s Guide... -
Page 110: Making Scale Transfers (Scale)
3 seconds, the conversion will begin (with the specified ratio and unit shown on the primary display). 5 Press and hold for more than 1 second to cancel the Scale operation. U1271A/U1272A User’s Guide... -
Page 111: Figure 3-3 Scale Operation
Scale operations. Press Dual to enable the frequency Exit N O T E test mode for voltage and current measurements during Scale operations. Press Dual Press Exit Press or after 3 seconds of inactivity. Figure 3-3 Scale operation U1271A/U1272A User’s Guide... -
Page 112: Capturing Maximum And Minimum Values (Maxmin)
This function is applicable to all measurements except for continuity and N O T E diode tests. 1 Press to enable the MaxMin operation. 2 Press again to cycle through the Max, Min, Avg, or present (MaxMinAvg) input values. U1271A/U1272A User’s Guide... -
Page 113: Figure 3-4 Maxmin Display
The true average value displayed is the arithmetic mean of all readings taken since the start of recording. The average reading is useful for smoothing out unstable inputs, calculating power consumption, or estimating the percentage of time a circuit is active. U1271A/U1272A User’s Guide... -
Page 114: Capturing Peak Values (Peak)
At the same time, the elapsed time since the peak recording session was started is stored as the recorded value’s time stamp. The APO (auto power-off) function is disabled when Peak is enabled. N O T E U1271A/U1272A User’s Guide... -
Page 115: Freezing The Display (Trighold And Autohold)
Press and hold until Setup the multimeter restarts. If the reading value is unable to reach a stable state (when exceeding the N O T E preset variation), the reading value will not be updated. U1271A/U1272A User’s Guide... -
Page 116: Recording Measurement Data (Data Logging)
Maximum capacity for saving Data logging option U1271A U1272A Manual ( Interval ( 10000 Event ( Shares the same memory with Interval logging Before starting a recording session, set up the multimeter for the measurements to be recorded. U1271A/U1272A User’s Guide... -
Page 117: Performing Manual Logs (Hand)
The display will return to normal after a short while (around 1 s). Figure 3-6 Manual log display 2 Repeat step 1 again to save the next input signal value. U1271A/U1272A User’s Guide... -
Page 118: Performing Interval Logs (Auto)
1 second to start interval log mode. and the log entry number are displayed at the top of the display. Subsequent readings are automatically recorded into the multimeter’s memory at the interval specified in the Setup mode. U1271A/U1272A User’s Guide... -
Page 119: Figure 3-7 Interval Log Display
The interval and event log share the same memory buffer (total combined: 10000 entries for U1272A and 200 entries for U1271A). Increased usage of the interval log entries will lead to the decrease of the maximum entries for the event log, and vice versa. -
Page 120: Performing Event Logs (Trig)
1 second to start event log mode. and the log entry number are displayed at the top of the display. Subsequent readings are automatically recorded into the multimeter’s memory every time the trigger condition specified in Table 3- 3 is satisfied. U1271A/U1272A User’s Guide... -
Page 121: Figure 3-8 Event Log Display
The event and interval log share the same memory buffer (total combined: 10000 entries for U1272A and 200 entries for U1271A). Increased usage of the event log entries will lead to the decrease of the maximum entries for the interval log, and vice versa. -
Page 122: Reviewing Previously Recorded Data (View)
View mode. Press again to cycle through the manual (H), interval (A), or event (E) previously stored records. Figure 3-9 View display If nothing has been recorded, , or will be displayed instead. Figure 3-10 Empty view display U1271A/U1272A User’s Guide... - Page 123 The index Setup number decreases by one. v Press for more than 1 second to clear all entries for the selected log type. 3 Press for more than 1 second to exit the View mode. U1271A/U1272A User’s Guide...
- Page 124 Multimeter Features Reviewing Previously Recorded Data (View) THIS PAGE HAS BEEN INTENTIONALLY LEFT BLANK. U1271A/U1272A User’s Guide...
-
Page 125: Multimeter Setup Options
U1271A/U1272A Handheld Digital Multimeter User’s Guide Multimeter Setup Options Using the Setup Menu 126 Editing numerical values 127 Setup Menu Summary 128 Setup Menu Items 130 Changing the beep frequency 130 Enabling and disabling the Filter 131 Changing the variation count 133... -
Page 126: Using The Setup Menu
While the menu item is flashing, press save your changes. While the menu item is flashing, press discard your changes. U1271A/U1272A User’s Guide... -
Page 127: Editing Numerical Values
Exit • Press to decrement the digit. Setup When you have completed your changes, save the new numerical value by pressing . (Or alternatively, if you wish to discard the changes you made, press U1271A/U1272A User’s Guide... -
Page 128: Setup Menu Summary
Set the multimeter’s % scale selection (0-20 mA/4-20 mA) page 98 mA, or or off. Default is 4-20 mA. page 141 U1272A only — Set the multimeter’s thermocouple type page 88 (type J or type K). Default is type K. page 142 U1271A/U1272A User’s Guide... - Page 129 149 (no unit)/V. Default is (1000.0) V/V. Reset the multimeter to its factory default settings. page 150 Set the multimeter’s temperature unit (Celsius, page 88 , or Celsius/Fahrenheit, Fahrenheit, Fahrenheit/Celsius). page 151 Default is °C (Celsius). U1271A/U1272A User’s Guide...
-
Page 130: Setup Menu Items
Figure 4-1 bEEP display Dual 3 Press to change the beep frequency. Select Exit Setup to disable the beeper feature. 4 Press to save your changes or press discard your changes. U1271A/U1272A User’s Guide... -
Page 131: Enabling And Disabling The Filter
When either LPF is enabled, the measurement speed (response time) will be impacted. The DC Filter cannot be used when the dual display mode is enabled N O T E where AC and DC voltages are measured. U1271A/U1272A User’s Guide... -
Page 132: Table 4-3 Filter (Lpf) Options
To avoid possible electric shock or personal injury, enable the Filter(LPF) to C A U T I O N verify the presence of hazardous DC voltages. Displayed DC voltage values can be influenced by high frequency AC components and must be filtered to assure an accurate reading. U1271A/U1272A User’s Guide... -
Page 133: Changing The Variation Count
This setting is used with the multimeter’s AutoHold feature (see page 115). When the variation of the measured value exceeds the value of the variation count, the AutoHold feature will be ready to trigger. Parameter Range Default setting AHoLd (50 to 9999) counts 500 counts U1271A/U1272A User’s Guide... -
Page 134: Changing The Recording Option
Changing the recording option This setting is used with the multimeter’s Data Logging feature (see page 116). There are three available recording options for the multimeter’s Data Logging feature. Parameter Range Default setting d-LoG HAnd, AUto, or TriG HAnd U1271A/U1272A User’s Guide... -
Page 135: Changing The Sample Interval Duration
This setting is used with the multimeter’s Interval Data Logging feature (see page 118). The multimeter will record a measurement value at the beginning of every sample interval. Parameter Range Default setting L-tiME (1 to 99999) s U1271A/U1272A User’s Guide... -
Page 136: Changing The Decibel Display (U1272A Only)
You can enable the multimeter to display voltage as a dB value, either relative to 1 milliwatt (dBm) or a reference voltage of 1 volt (dBV). Parameter Range Default setting dCibEL On dBm, On dBV, or Off On dBm U1271A/U1272A User’s Guide... -
Page 137: Setting A Custom Dbm Reference Impedance (U1272A Only)
This setting is used with dB measurements (see page 66). The dBm function is logarithmic, and is based on a calculation of power delivered to a reference impedance (resistance), relative to 1 mW. Parameter Range Default setting (1 to 9999) Ω 50 Ω dbrEF U1271A/U1272A User’s Guide... -
Page 138: Changing The Auto Power-Off And Backlight Timeouts
27) features use timers to determine when to turn off the backlight and when to automatically turn the multimeter off. Parameter Range Default setting (1 to 99) minutes or Off 15 minutes bLit (1 to 99) s or Off 15 s U1271A/U1272A User’s Guide... -
Page 139: Figure 4-8 Apo Display
Select Exit Setup to disable the timeout feature. 4 Press to save your changes or press discard your changes. 5 Press and hold until the multimeter restarts to return Setup to normal operation. U1271A/U1272A User’s Guide... -
Page 140: Enabling And Disabling The Overvoltage Alert
Select Exit Setup to disable the overvoltage alert feature. 4 Press to save your changes or press discard your changes. 5 Press and hold until the multimeter restarts to return Setup to normal operation. U1271A/U1272A User’s Guide... -
Page 141: Changing The % Scale Range
% scale range. Select Exit Setup to disable the % scale readout. 4 Press to save your changes or press discard your changes. 5 Press and hold until the multimeter restarts to return Setup to normal operation. U1271A/U1272A User’s Guide... -
Page 142: Changing The Thermocouple Type (U1272A Only)
Figure 4-12 CoUPLE display Dual 3 Press to change the thermocouple type. Exit Setup 4 Press to save your changes or press discard your changes. 5 Press and hold until the multimeter restarts to return Setup to normal operation. U1271A/U1272A User’s Guide... -
Page 143: Changing The Minimum Measurable Frequency
Figure 4-13 FrEq display Dual 3 Press to change the frequency value. Exit Setup 4 Press to save your changes or press discard your changes. 5 Press and hold until the multimeter restarts to return Setup to normal operation. U1271A/U1272A User’s Guide... -
Page 144: Changing The Baud Rate
Figure 4-14 bAUd display Dual 3 Press to change the baud rate. Exit Setup 4 Press to save your changes or press discard your changes. 5 Press and hold until the multimeter restarts to return Setup to normal operation. U1271A/U1272A User’s Guide... -
Page 145: Changing The Data Bits
Figure 4-15 dAtAb display Dual 3 Press to change the data bit. Exit Setup 4 Press to save your changes or press discard your changes. 5 Press and hold until the multimeter restarts to return Setup to normal operation. U1271A/U1272A User’s Guide... -
Page 146: Changing The Parity Check
Figure 4-16 PAritY display Dual 3 Press to change the parity check. Exit Setup 4 Press to save your changes or press discard your changes. 5 Press and hold until the multimeter restarts to return Setup to normal operation. U1271A/U1272A User’s Guide... -
Page 147: Enabling And Disabling The Backlight Alert
3 Press to enable or disable the backlight alert Exit Setup feature. 4 Press to save your changes or press discard your changes. 5 Press and hold until the multimeter restarts to return Setup to normal operation. U1271A/U1272A User’s Guide... -
Page 148: Enabling Smooth Mode
Figure 4-18 SMootH display Dual 3 Press to set the Smooth refresh rate. To Exit Setup permanently enable Smooth, change the last digit shown from (disabled) to (enabled). 4 Press to save your changes or press discard your changes. U1271A/U1272A User’s Guide... -
Page 149: Changing The User Scale Conversion Value And Unit
Figure 4-19 SMootH display Dual 3 Press to set the scale conversion value. Move Exit Setup the cursor to the unit indicator (right- most) to change the scale conversion unit. U1271A/U1272A User’s Guide... -
Page 150: Resetting The Multimeter's Setup Options
Figure 4-20 rESEt display 3 Press and hold for more than 1 second to perform the reset. The multimeter will beep once and return to the first setup menu item ( U1271A/U1272A User’s Guide... -
Page 151: Changing The Temperature Unit
2 Press for more than 1 second until shown on the secondary display. Figure 4-21 t-Unit display Dual 3 Press to change the temperature unit. Exit Setup 4 Press to save your changes or press discard your changes. U1271A/U1272A User’s Guide... - Page 152 Setup multimeter restarts to return to normal operation. Always set the temperature unit display per the official requirements C A U T I O N and in compliance with the National laws of your region. U1271A/U1272A User’s Guide...
-
Page 153: 5 Characteristics And Specifications
Duty cycle and pulse width specifications 169 Frequency sensitivity specifications 171 Peak hold specifications 172 Decibel (dB) specifications for U1272A 173 Measurement rate (approximate) 174 This chapter lists the characteristics, assumptions, and specifications of the U1271A and U1272A handheld digital multimeters. -
Page 154: Product Characteristics
Product Characteristics Product characteristics specified in the table below are applicable for both N O T E U1271A and U1272A models unless stated otherwise. POWER SUPPLY Battery type: • 4 × 1.5 V Alkaline battery (ANSI/NEDA 24A or IEC LR03), or •... - Page 155 NORMAL MODE REJECTION RATIO (NMRR) >60 dB at 50/60 Hz ± 0.1% DIMENSIONS (W × H × D) 92 × 207 × 59 mm WEIGHT • U1271A: 518 grams (with batteries) • U1272A: 520 grams (with batteries) WARRANTY Please refer to http://www.keysight.com/go/warranty_terms •...
-
Page 156: Specification Assumptions
20 minutes for thermal impact to cool before proceeding with any other measurement. Measurement Category The Keysight U1271A/U1272A Handheld Digital Multimeters have a safety rating of CAT III, 1000 V and CAT IV, 600 V. Measurement category definition... - Page 157 Measurement CAT IV are measurements performed at the source of the low- voltage installation. Examples are electricity meters and measurements on primary over current protection devices and ripple control units. U1271A/U1272A User’s Guide...
-
Page 158: Electrical Specifications
1 The accuracy of the 30 mV to 300 mV range is specified after the Null function is used to subtract the thermal effect (by shorting the test leads). 2 For Z measurements, autoranging is disabled and the multimeter’s range is set to 1000 V in the manual ranging mode. U1271A/U1272A User’s Guide... - Page 159 6 The temperature coefficient of the 100 MΩ and 300 MΩ range is 0.1 × (specified accuracy)/°C (from –20 °C to 18 °C or 28 °C to 55 °C) 7 The accuracy for ranges <50 nS is specified after the Null function is used on an open test lead. U1271A/U1272A User’s Guide...
- Page 160 4 Specification for 10 A range: 10 A continuous. Add 0.3% to the specified accuracy when measuring signals >10 A to 20 A for 30 seconds maximum. After measuring currents >10 A, cool down the multimeter for twice the duration of the measured time before proceeding with low current measurements. U1271A/U1272A User’s Guide...
-
Page 161: Ac Specifications
Characteristics and Specifications Electrical Specifications AC specifications AC specifications for U1271A Table 5-2 U1271A true rms AC voltage specifications Accuracy Function Range Resolution 30 Hz to 45 Hz 5 kHz to 45 Hz to 65 Hz 1 kHz to 5 kHz... -
Page 162: Table 5-3 U1271A True Rms Ac Current Specifications
Characteristics and Specifications Electrical Specifications Table 5-3 U1271A true rms AC current specifications Accuracy Function Range Resolution Burden voltage 45 Hz to 2 kHz 300 μA 0.01 μA 0.9% + 25 <0.04 V 3000 μA 0.1 μA 0.9% + 25 <0.4 V... -
Page 163: Table 5-4 U1272A True Rms Ac Voltage Specifications
1000 V in the manual ranging mode. 5 For 20 kHz to 100 kHz accuracy: Three counts of the LSD per kHz of additional error is to be added for frequencies >20 kHz and signal inputs <10% of range. U1271A/U1272A User’s Guide... -
Page 164: Table 5-5 U1272A True Rms Ac Current Specifications
4 Specification for 10 A range: 10 A continuous. Add 0.3% to the specified accuracy when measuring signals >10 A to 20 A for 30 seconds maximum. After measuring currents >10 A, cool down the multimeter for twice the duration of the measured time before proceeding with low current measurements. U1271A/U1272A User’s Guide... -
Page 165: Ac+Dc Specifications For U1272A
2 Input impedance: 10 MΩ (nominal) in parallel with <100 pF. 3 For 20 kHz to 100 kHz accuracy: Three counts of the LSD per kHz of additional error is to be added for frequencies >20 kHz and signal inputs <10% of range. U1271A/U1272A User’s Guide... -
Page 166: Table 5-7 U1272A True Rms Ac+Dc Current Specifications
4 Specification for 10 A range: 10 A continuous. Add 0.3% to the specified accuracy when measuring signals >10 A to 20 A for 30 seconds maximum. After measuring currents >10 A, cool down the multimeter for twice the duration of the measured time before proceeding with low current measurements. U1271A/U1272A User’s Guide... -
Page 167: Capacitance Specifications
1 Overload protection: 1000 Vrms for short circuits with <0.3 A current. 2 The accuracy of for all ranges is specified based on a film capacitor or better, and after the Null function is used to subtract the residual values (by opening the test leads). U1271A/U1272A User’s Guide... -
Page 168: Temperature Specifications
Keeping the multimeter close to the output terminal of calibrator will help reduce the deviation. 6 The temperature calculation is specified according to the safety standards of EN/IEC-60548-1 and NIST175. U1271A/U1272A User’s Guide... -
Page 169: Frequency Specifications
AC couplings, the duty cycle range can be measured within the range of 10% to 90% for signal frequencies >20 Hz. 2 The range of the duty cycle is determined by the frequency of the signal: {10 μs × frequency × 100%} to {[1 – (10 μs × frequency)] × 100%}. U1271A/U1272A User’s Guide... -
Page 170: Table 5-12 Duty Cycle And Pulse Width Calculation Example
{10 μs × frequency × 100%} to {[1 – (10 μs × frequency)] × 100%}. 2 The accuracy of the duty cycle is determined from this equation: [0.3% × (frequency kHz)] + 0.3% 3 The accuracy of the pulse width is determined from this equation: (duty cycle accuracy/frequency) + 0.01 ms. U1271A/U1272A User’s Guide... -
Page 171: Frequency Sensitivity Specifications
2 Hz to 30 kHz 300 μA 100 μA 3000 μA 70 μA 30 mA 1.2 mA Notes for frequency sensitivity specifications for current measurements: 1 Maximum input for specified accuracy, refer to “AC specifications” on page 161. U1271A/U1272A User’s Guide... -
Page 172: Peak Hold Specifications
Peak hold specifications Table 5-15 Peak hold specifications for DC voltage and current measurements Signal width Accuracy for DC voltage and current Single event >1 ms Specified accuracy + 400 Repetitive >250 μs Specified accuracy + 1000 U1271A/U1272A User’s Guide... -
Page 173: Decibel (Db) Specifications For U1272A
300 mV –36.48 –10.46 0.06 0.07 0.09 0.32 –16.48 +9.54 0.06 0.09 0.14 0.19 0.32 30 V +3.52 +29.54 0.06 0.09 0.14 0.19 0.32 300 V +23.52 +49.54 0.06 0.09 0.14 0.19 1000 V +33.98 0.06 0.09 0.14 U1271A/U1272A User’s Guide... -
Page 174: Measurement Rate (Approximate)
Capacitance DC A (μA, mA, or A) AC A (μA, mA, or A) Temperature Frequency 2 (>10 Hz) 2 (>10 Hz) Duty cycle 1 (>10 Hz) 1 (>10 Hz) Pulse width 1 (>10 Hz) 1 (>10 Hz) U1271A/U1272A User’s Guide... -
Page 175: Shift Functions Using The Shift Key
U1271A/U1272A Handheld Digital Multimeter User’s Guide Appendix A Shift Functions Using the Shift Key Table A-1 U1271A default and shift functions 176 Table A-2 U1272A default and shift functions 177 The tables below list the function shown in the primary display when the key is pressed, with respect to the multimeter’s rotary switch position. -
Page 176: Table A-1 U1271A Default And Shift Functions
Shift Functions Using the Shift Key Table A-1 U1271A default and shift functions Rotary switch position Function shown in the primary display: U1271A Default When is pressed AC voltage measurement; DC voltage measurement shown on secondary display Qik-V (AC/DC V) -
Page 177: Table A-2 U1272A Default And Shift Functions
% (0-20 or 4-20) mA terminal AC current measurement (AC A) AC+DC current measurement (AC+DC A) With the positive probe DC current measurement (DC A) inserted into the % (0-20 or 4-20) A terminal U1271A/U1272A User’s Guide... - Page 178 AC+DC current measurement (AC+DC μA) [1] Press Dual to switch the function shown in the primary display (AC V) with the function shown in the secondary display Exit (DC V). Press Dual again to switch back the displays. Exit U1271A/U1272A User’s Guide...
- Page 179 U1271A/U1272A Handheld Digital Multimeter User’s Guide Appendix B Dual Display Combinations Using the Dual Key Table B-1 U1271A dual display combinations 180 Table B-2 U1272A dual display combinations 182 The tables below list the function shown in the secondary Dual display when the...
-
Page 180: Table B-1 U1271A Dual Display Combinations
Dual Display Combinations Using the Dual Key Table B-1 U1271A dual display combinations Rotary switch position Function shown (when is pressed) in the: Dual Exit U1271A Primary display Secondary display AC voltage measurement (AC V) DC voltage measurement (AC V) - Page 181 Dual Display Combinations Using the Dual Key Table B-1 U1271A dual display combinations (continued) Rotary switch position Function shown (when is pressed) in the: Dual Exit U1271A Primary display Secondary display DC coupling frequency measurement (Hz) DC current measurement (DC A)
-
Page 182: Table B-2 U1272A Dual Display Combinations
AC voltage measurement (AC mV) with low AC coupling frequency measurement (Hz) pass filter (LPF) AC voltage decibel display (dBm) with low AC voltage measurement (AC mV) with low pass filter (LPF) is enabled when Dual Exit pass filter (LPF) pressed. U1271A/U1272A User’s Guide... - Page 183 AC coupling frequency measurement (Hz) AC+DC voltage measurement (AC+DC mV) AC voltage measurement (AC mV) DC voltage measurement (DC mV) AC+DC voltage decibel display (dBm) is AC+DC voltage measurement (AC+DC V) enabled when is pressed. Dual Exit U1271A/U1272A User’s Guide...
- Page 184 With the positive probe AC coupling frequency measurement (Hz) inserted into the terminal AC+DC current measurement (AC+DC A) AC current measurement (AC A) DC current measurement (DC A) % (0-20 or 4-20) DC A DC current measurement (DC A) U1271A/U1272A User’s Guide...
- Page 185 [1] In this measurement mode, the icon will not appear on the screen regardless of voltage. [2] Alternative dual display combination not available for this function. Dual [3] When is pressed, temperature measurement without ambient compensation ( ) is enabled. Exit U1271A/U1272A User’s Guide...
- Page 186 Dual Display Combinations Using the Dual Key THIS PAGE HAS BEEN INTENTIONALLY LEFT BLANK. U1271A/U1272A User’s Guide...
- Page 187 (tel) (65) 6375 8100 (fax) (65) 6755 0042 Or visit Keysight World Wide Web at: www.keysight.com/find/assist Product specifications and descriptions in this document are subject to change without notice. Always refer to the English version on the Keysight Web site for the latest revision.
- Page 188 This information is subject to change without notice. © Keysight Technologies 2010 - 2014 Edition 12, December 22, 2014 *U1271-90010* U1271-90010 www.keysight.com...
Need help?
Do you have a question about the U1271A and is the answer not in the manual?
Questions and answers