Table of Contents
Advertisement
Quick Links
MITSUBISHI ELECTRIC
CAUTION:
Before servicing this chassis, it is important that the service person read the "SAFETY INFORMATION" section in
this manual.
For details, refer to "Important symbols for good services".
MITSUBISHI DIGITAL ELECTRONICS AMERICA, INC.
9351 Jeronimo Road, Irvine, CA 92618-1904
Copyright © 2005 Mitsubishi Digital Electronics America, Inc.
All Rights Reserved
Ser
Ser
vice
vice
Ser vice
vice
Ser
Ser
vice
Manual
Manual
Manual
Manual
Manual
PLASMA DISPLAY PANEL
PD-4265
PD-5065
2005
2005
2005
2005
2005
Advertisement
Table of Contents

Related Manuals for Mitsubishi Electric PD-4265


Summary of Contents for Mitsubishi Electric PD-4265
- Page 1 2005 2005 Manual Manual Manual Manual Manual MITSUBISHI ELECTRIC PLASMA DISPLAY PANEL PD-4265 PD-5065 CAUTION: Before servicing this chassis, it is important that the service person read the "SAFETY INFORMATION" section in this manual. For details, refer to "Important symbols for good services".
-
Page 2: Safety Information
SAFETY INFORMATION This service manual is intended for qualified service technicians ; it is not meant for the casual do- it-yourselfer. Qualified technicians have the necessary test equipment and tools, and have been trained to properly and safely repair complex products such as those covered by this manual. Improperly performed repairs can adversely affect the safety and reliability of the product and may void the warranty. - Page 3 Insulation Resistance Check PRODUCT SAFETY NOTICE With the AC plug removed from an AC power source, place a Many electrical and mechanical parts in PIONEER set have jumper across the two plug prongs. Turn the AC power switch on. special safety related characteristics. These are often not evident (Case of PD-5065/4265, AC power is always on.) from visual inspection nor the protection afforded by them Using an insulation tester (DC 500V), connect one lead to the...
- Page 4 SAFETY SERVICE 7 Safety cautions The matters to be observed without fail are explained below. These matters are indispensable for the preventi on of an accident during the maintenance servicing, the [security of products] after the completi on of servicing work, and the [prevention of the repeated occurrence of similar fault.] (1) The degree of danger and material damage, caused as a result of wrong use by disregarding the contents of the display”...
- Page 5 CAUTION • Observe the caution matter, without fail • The caution matters of given in the delivery specifications, etc., must be observed, without fail. • Do not give shocks and vibration. • The panel surface (display plane) of the PDP module is made of glass. If any shocks or vibration is applied, it may be broken and the scattered glass chips will be a cause of injury •...
- Page 6 [Important Check Points for Good Servicing] In this manual, procedures that must be performed during repairs are marked with the below symbol. Please be sure to confirm and follow these procedures. 1. Product safety Please conform to product regulations (such as safety and radiation regulations), and maintain a safe servicing environment by following the safety instructions described in this manual.
-
Page 7: Table Of Contents
CONTENTS SAFETY INFORMATION............................2 1. SPECIFICATIONS.............................8 1.1 SPECIFICATIONS .............................8 1.2 FRONT PANEL ............................14 2. DIAGNOSIS ..............................17 2.1 TROBLESHOOTING..........................17 2.2 DIAGNOSIS..............................18 3. ADJUSTMENT ..............................33 3.1 ADJUSTING CONDITIONS........................33 3.2 ADJUSTING ITEMS ..........................33 4. EXPLODED VIEWS AND PARTS LIST......................63 4.1 PACKING ..............................63 4.2 DISASSEMBLY............................69 4.3 PARTS LIST............................110 5. -
Page 8: Specifications
1. SPECIFICATIONS 1.1 SPECIFICATIONS • PD-5065 Specifications Screen Size 43.5"(H) x 24.5"(V) inches 1106(H) x 622(V) mm diagonal 50" Aspect Ratio 16 : 9 Resolution 1365(H) x 768(V) pixels Pixel Pitch 0.032"(H) x 0.032"(V) inches 0.81(H) x 0.81(V) mm Color Processing 4,096 steps, 68.7 billion colors Signals Synchronization Range Horizontal : 15.5 to 110 kHz... - Page 9 • PD-4265 Specifications Screen Size 36.1"(H) x 20.4"(V) inches 918(H) x 518(V) mm diagonal 42" Aspect Ratio 16 : 9 Resolution 1024(H) x 768(V) pixels Pixel Pitch 0.036"(H) x 0.027"(V) inches 0.897(H) x 0.675(V) mm Color Processing 4,096 steps, 68.7 billion colors Signals Synchronization Range Horizontal : 15.5 to 110 kHz...
- Page 10 TABLE OF SIGNAL SUPPORTED Supported resolution (PD-5065) • When the screen mode is NARROW, each signal is converted to a 1024 dots 768 lines signal. (Except for * • When the screen mode is STANDARD, each signal is converted to a 1365 dots 768 lines signal. (Except for * Computer input signals supported by this system Sync Polarity Presence...
- Page 11 *1 Only when using a graphic accelerator board that is capable of displaying 852 x 480. *2 The picture is displayed in the original resolution. *3 The aspect ratio is 5:4. This signal is converted to a 960 dots x 768 lines signal. *4 Normally the RGB select mode suite for the input signals is set automatically.
- Page 12 Supported resolution (PD-4265) • When the screen mode is NARROW, each signal is converted to a 768 dots 768 lines signal. (Except for * • When the screen mode is STANDARD, each signal is converted to a 1024 dots 768 lines signal.
- Page 13 *1 Only when using a graphic accelerator board that is capable of displaying 852 x 480. *2 The picture is displayed in the original resolution. The picture will be compressed for other signals. *3 The aspect ratio is 5:4. This signal is converted to a 720 dots x 768 lines signal. *4 Normally the RGB select mode suite for the input signals is set automatically.
-
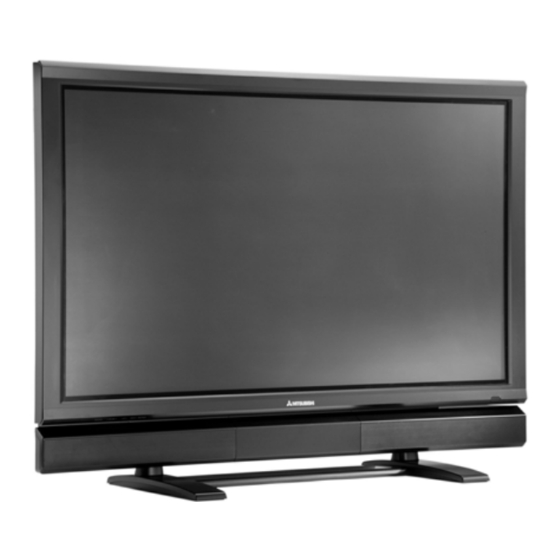
Page 14: Front Panel
1.2 FRONT PANEL Part Names and Function Front View MENU/ENTER VOLUME LEFT/- RIGHT/+ INPUT/EXIT MENU/ENTER VOLUME LEFT/ - RIGHT/ + INPUT/EXIT 1 REMOTE SENSOR WINDOW 5 VOLUME Receives the signals from the remote control. Adjusts the volume. Functions as the ADJUST ( / ) buttons in the On-Screen Menu mode. - Page 15 Side View Rear View A AC IN F RGB2 / COMPONENT2 Connect the included power cord here. COMP2: You can connect DVDs, High Definition sources, Cable Boxes, etc. B EXT SPEAKER L and R here. Maintain the correct polarity. The (positive) speaker This input can be set for use with an wire is connected to the...
-
Page 16: Remote Control
6 ADJUST ( Remote Control Use these buttons to select items or settings and to adjust settings or switch the display patterns. 7 EXIT Press this button to exit the MAIN MENU. Press this button during the display of the sub menu to return to the previous menu. -
Page 17: Diagnosis
2. DIAGNOSIS 2.1 TROUBLESHOOTING • Problems in the power supply, such as "Failure in Power ON" or "LED flashing or lighting (alarm display)" → 1. Go to Power failure (P18). • Problems in the images, such as "No pictures available" →... -
Page 18: Diagnosis
2.2 DIAGNOSIS 1. Power failure (1) Power failure (Caution) If any abnormality is sensed in such a manner that the LED flashes or lights, all the power lines other than those of 7Vdc (M+7V) and (1)The power supply is 5Vdc (M+5V) are automatically turned off in about 10 seconds. not turned on. - Page 19 (2) Blinking in green 1 Alarm of temperature sensor error Blinking in green (intervals of 2 seconds) Disconnect the power cord. Connect the power cord. Pressing the [MENU] key of the product, turn on the main power supply to cancel alarming.
- Page 20 Pin 3 of the FA and side where a 3.3Vdc output is FB, FC connectors? generated. Is there a voltage output of 11.3Vdc for PD-4265, 11.2Vdc for PD-5065 respectively, at Pin 1 of the FA, FB, and FC connectors? The MAIN PWB is fault.
- Page 21 (3) Blinking in red (Alarm of temperature error) Since the internal temperature is too high in the product, the temperature protector has been actuated. In such a case, the following actions should be taken immediately: 1. Turn off the main power supply and pull out the power cord from the wall outlet. 2.
- Page 22 (4) Alternation blinking in red and green (Alarm of PDP error) (Caution) How to reset the alarming condition. Pressing the [INPUT/EXIT] key of the product, turn on the main power supply of the main unit. In this state, keep pressing the [Input Select] key for more than 2 seconds until alarming is canceled.
- Page 23 (5) Lighting in green, and then in red (Alarm of power voltage error) Unlike [lighting in red] in the STANDBY mode, [lighting in green] continues for about 30 seconds without any output of images and audio signals. Since then, the mode turns into [lighting in red]. Lighting in red Disconnect the power cord.
- Page 24 2. Image errors (Caution) Typical abnormal images are shown below. All errors do not always fall on these error samples. (1) Image burn and deterioration in brightness Residual images are seen without signal entry. This is not a fault. No signal Deterioration in brightness This is not a fault.
- Page 25 (3) Pixel defect Pixel defect Bright defect Are there many defective pixels exceeding the pixel defect standard? This is not a fault. (Fig. 1) All-Black Signal The PDP is fault. (To the separate PDP service manual) Dark defect (Fig. 2) All-White Signal PD-5065...
- Page 26 (4) Wrong lighting Wrong lighting The PDP is fault. (To the separate PDP service manual) All-black signal Dot errors change with no continuity. All-black signal (5) Dark images [Other than the deterioration in brightness as per (1) above] The images are dark even with an all-white input The PDP is fault.
- Page 27 All-white signal All-white signal Defect in the block unit The PDP is fault. (To the separate PDP service manual) All-white signal All-white signal PD-5065...
- Page 28 (7) Defect in vertical lines Defect in vertical lines The PDP is fault. (To the separate PDP service manual) All-white signal All-white signal All-white signal Block defect The PDP is fault. (To the separate PDP service manual) All-white signal PD-5065...
- Page 29 All-white signal All-white signal PD-5065...
- Page 30 (8) No pictures [(Caution) The voltage outputs of Vs = 170V and Vd = 64V, 5Vdc are always generated, but the LED is not flashing or lighting for alarming. However, the voltage values can differ according to the MODULE.] No picture is displayed. Disconnect the power cord.
- Page 31 3. Audio errors (Caution) In regard to the method of audio input setting, refer to the specifications and the instruction manual to confirm that all the setting is free from errors. Since then, troubleshooting can be carried out. It must be noted that the protector functions and no audio output is available if the opposing electrodes of the speaker output or the speaker output and the ground (GND) are short-circuited.
- Page 32 4. Remote control is not effective. The wireless remote control is not effective. When the RS connector is disconnected, Is there a 0Vdc output at Pin 12 of the is there a 0Vdc output at Pin 12 of the RS RS connector? connector in the MAIN PWB? The 232C PWB or the RS...
-
Page 33: Adjustment
ADJUSTMENT 3.1 ADJUSTING CONDITIONS Adjustments should be carried out in the procedures of A to C specified below. However, any adjustments other than the items A to C below are not required. When the "PDP module " is replaced, adjustments should conform to the adjusting items of [1 and 2] specified below. - Page 34 2. Adjustment of the power unit (Using a screwdriver for general-purpose adjustments) • PD-5065 2-1. Adjustment of the Vs voltage Enter a color bar input by means of either video signal of VIDEO input, or DVD/HD input, or RGB input, and turn on the power switch of the main unit.
- Page 35 * Top view of the power unit (Adjustment VR location) • PD-5065 D.GND Adjustment of 5V Adjustment of the Vs voltage Vs ADJ Adjustment of the Vd voltage PD-5065...
- Page 36 • PD-4265 2-1. Adjustment of the Vs voltage Enter a color bar input by means of either video signal of VIDEO input, or DVD/HD input, or RGB input, and turn on the power switch of the main unit. Turn the volume control (VS ADJ VR151) in the power unit and make adjustments until the voltages of Vs and D, GND of the power unit attain the voltage values specified for the PDP (Vs value of the voltage regulation indicator label on below the figure) ±1V.
- Page 37 * Top view of the power unit (Adjustment VR location) • PD-4265 Adjustment of 5V D.GND Vd ADJ Adjustment of the Vs voltage Adjustment of the Vd voltage Vcc ADJ PD-5065...
- Page 38 3. Adjustments after the replacement of the MAIN PWB (Using the remote control) 3-1. Product serial No. registration Press the keys in the order of [MENU/ENTER] → [MUTE] → [EXIT] → [SLEEP] → [EXIT] in order to enter the factory adjustment menu. Press the [MENU/ENTER] key to select the [MONITOR INFORMATION] No.
- Page 39 (Example) When entering a serial number of [DISS00001XX] Move the POSITION/CONTROL keys of [ ] and [ ] to select [D]. MONITOR INFORMATION MODEL NAME : PD-5065 SERIAL/NUMBER SOFT WARE VERSION : F 123 USAGE TIME : 00000H T1 025 T2 025 T3 025 T4 - -...
- Page 40 3 Repeat the procedures of 1 and 2 above, and enter all inputs of [DISS00001XX] from the left side. M O N I T O R I N F O R M A T I O N MODEL NAME PD-5065 SERIAL/NUMBER DISS00001XX SOFT WARE VERSION...
- Page 41 2. Field menu initial setup values (applicable in common to all models) MENU SHIP PSC-LIMIT LIMIT-PC U-SCAN SERVICE V-FREQ OT AUTO V-FREQ VD AUTO SYNCLEVEL1 SYNCLEVEL2 SUB-ORB *1 1*. MONITOR INFORMATION PIC FREEZE *1 PD-4265 : PD-4265 MONITOR MODEL NAME PD-5065 : PD-5065 INFORMATION PD-5065...
- Page 42 3. Initial setting values for the Factory shipment setting menu The table shown below specifies only the items that can be changed in the factory adjusting mode. Therefore, any setting values of the items not specified below cannot be modified. A,AW MENU FUNCTION...
- Page 43 [Materia ls for reference] 1. Signal generator (1) Digital RGB , Component signal generator • Equivalent to the VIDEO GENERATOR LT1615 (made by LEADER) • Equivalent to the PANEL LINK ADAPTER LT9217 (made by LEADER) • Equivalent to the VIDEO ENCODE R LT1606 (made by LEADER) (2) NTSC signal generator •...
- Page 44 4. RGB inputs 1) Horizontal sync period Video signal 0.7Vp-p Sync signal TTL level Positive/negative polarity 2) Vertical sync period Video gnasil 0.7Vp-p Sync signal TTL level Positive/negative polarity For the respective inspection signals, the above "a" to "j" shall be listed on the next page and thereafter. PD-5065...
- Page 45 5. RGB/PC signal timing table (Caution 1) For HDCP non-application products, the signals of the PC mode 1 ~ 89 can be received. For HDCP application products, the signals of the PC mode 1 ~ 98 can be received. (Caution 2) The received PC mode number specified below is displayed in the memory column of the user menu "Information."...
- Page 46 PC mode mode Signal name MAC@13" VESA VESA VESA 480@72Hz 480@75Hz 480@85Hz Definition 640*480 640*480 640*480 640*480 Dot clock frequency 30.24 31.5 31.5 36.0 (MHz) H frequency (kHz) 37.861 37.5 43.269 V frequency (Hz) 66.667 72.809 85.008 H total (uS) 28.571 26.413 26.667...
- Page 47 PC mode mode Signal name VESA VESA VESA VESA VESA 600@56Hz 600@60Hz 600@72Hz 600@75Hz 600@85Hz Definition 800*600 800*600 800*600 800*600 800*600 Dot clock frequency 49.5 56.25 (MHz) H frequency (kHz) 35.156 37.879 48.077 46.875 53.674 V frequency (Hz) 56.25 60.317 72.188 85.061 H total (uS)
- Page 48 PC mode mode Signal name I/O data wide VESA VESA wide MAC@16" (NEC1) Definition 832*624 852*480 848*480 Dot clock frequency 57.2832 34.006 33.75 (MHz) H frequency (kHz) 49.725 31.722 31.02 V frequency (Hz) 74.55 59.966 H total (uS) 20.111 31.524 32.237 (dots) 1152...
- Page 49 PC mode mode Signal name VESA wide VESA VESA (NEC4) 768@60Hz 768@70Hz Definition 1360*768 1024*768 1024*768 Dot clock frequency 85.5 (MHz) H frequency (kHz) 47.712 48.363 56.476 V frequency (Hz) 60.015 60.004 70.069 H total (uS) 20.959 20.677 17.707 (dots) 1792 1344 1328...
- Page 50 PC mode mode VESA VESA MAC@19" VESA VESA Signal name 768@75Hz 768@85Hz 1024@60Hz 1024@75Hz Definition 1024*768 1024*768 1024*768 1280*1024 1280*1024 Dot clock frequency (MHz) 78.75 94.5 H frequency (kHz) 60.023 68.677 60.24 63.981 79.976 V frequency (Hz) 75.029 84.997 74.93 60.02 75.025 16.66...
- Page 51 PC mode mode Signal name TV(480P) DTV(720P) IDC-3000G IDC-3000G HDTV-JD PAL 625P NTSC 525P Definition 768*576 640*480 1920*1035 644*483 1280*720 Dot clock frequency 29.687 24.39 74.25 24.37 74.25 (MHz) H frequency (kHz) 31.389 31.47 33.75 31.469 45.000 V frequency (Hz) 59.9 59.94 H total (uS)
- Page 52 PC mode Signal name HDTV-W MAC@21" VESA 1024@85Hz Definition 1920*1080 1152*870 1280*1024 Dot clock frequency (MHz) 74.25 157.5 H frequency (kHz) 33.75 68.681 91.146 V frequency (Hz) 75.062 85.024 H total (uS) 29.630 14.560 10.971 (dots) 2200 1456 1728 H display period (uS) 25.859 11.520 8.127...
- Page 53 PC mode Signal name I/O data I/O data I/O data I/O data I/O data 480@100Hz 480@120Hz 600@100Hz 600@120Hz 768@100Hz Definition 640*480 640*480 800*600 800*600 1024*768 Dot clock frequency 42.506 51.008 66.022 79.942 111.987 (MHz) H frequency (kHz) 51.089 61.307 62.998 75.703 80.451 V frequency (Hz)
- Page 54 PC mode Signal name I/O data I/O data RCA-STB DTV(570P) 768@120Hz 1024@100Hz 4800@71Hz 1080A Definition 1024*768 1280*1024 1280*1024 1920*1034 768*576 Dot clock frequency (MHz) 132.953 190.908 29.538 H frequency (kHz) 95.512 108.47 75.12 33.75 31.25 V frequency (Hz) 119.39 100.06 71.204 H total (uS) 10.47...
- Page 55 PC mode Signal name VESA I/O data I/O wide VESA VESA 864@75Hz W_XGA@56Hz 1200@60Hz 1200@65Hz Definition 1152*864 1280*768 1376*768 1600*1200 1600*1200 Dot clock frequency (MHz) 76.064 87.34 175.5 H frequency (kHz) 67.5 45.064 48.307 81.25 V frequency (Hz) 56.187 59.934 H total (uS) 14.815 22.192...
- Page 56 PC mode Signal name VESA VESA VESA 1200@70Hz 1200@75Hz 1200@85Hz 1024@72Hz 900@66Hz Definition 1600*1200 1600*1200 1600*1200 1280*1024 1152*900 Dot clock frequency (MHz) 202.5 229.5 92.941 H frequency (kHz) 87.5 93.75 106.25 78.130 61.796 V frequency (Hz) 72.009 65.95 H total (uS) 11.429 10.667 9.412...
- Page 57 PC mode Signal name VESA VESA VESA 900@76Hz 768@60Hz 960@60Hz 960@60Hz 1050@60Hz Definition 1152*900 1024*768 1280*960 1280*960 1400*1050 Dot clock frequency (MHz) 105.561 148.5 H frequency (kHz) 71.710 49.716 85.938 63.981 V frequency (Hz) 76.047 60.043 85.002 60.020 H total (uS) 13.945 20.114 16.667...
- Page 58 PC mode 66~74 Signal name Definition Dot clock frequency (MHz) H frequency (kHz) V frequency (Hz) H total (uS) (dots) H display period (uS) (dots) H front porch (uS) (dots) H sync pulse width (uS) (dots) H back porch (uS) NOT USED (dots) V total (mS)
- Page 59 PC mode Signal name 1080I W_XGA 400H 350H 50Hz Definition 1920*1080 1280*768 720*400 720*350 Dot clock frequency (MHz) 74.25 81.0 28.3 28.3 H frequency (kHz) 28.125 47.99 31.5 31.5 V frequency (Hz) 59.34 70.1 70.1 H total (uS) 35.556 20.84 31.78 31.78 (dots)
- Page 60 PC mode Signal name 720P 1080P 720P 1080I 24Hz 24Hz 50Hz 48Hz Definition 1280*720 1920*1080 1280*720 1920*1080 Dot clock frequency (MHz) 74.176 74.176 74.25 74.1758 H frequency (kHz) 17.982 26.973 37.5 26.973 V frequency (Hz) 23.976 23.976 37.074 H total (uS) 55.611 37.704 26.667...
- Page 61 PC mode Signal name 480i(60Hz) DTV(480P) DTV(480P) DTV(720P) Definition 720*480 640*480 720*480 1280*720 Dot clock frequency (MHz) 27.000 25.175 27.000 74.250 H frequency (kHz) 15.734 31.469 31.469 45.000 V frequency (Hz) 59.94 59.940 59.94 60.000 H total (uS) 16.555 31.777 31.777 22.222 (dots)
- Page 62 PC mode Signal name HDTV-W Definition 1920*1080 Dot clock frequency (MHz) 74.250 H frequency (kHz) 33.750 V frequency (Hz) 60.000 H total (uS) 29.629 (dots) 2200 H display period (uS) 25.859 (dots) 1920 H front porch (uS) 1.185 (dots) H sync pulse width (uS) 0.592 (dots) NOT USED...
-
Page 63: Exploded Views And Parts List
Accommodated in the wrapped style. PK22 CORE,FERRITE SFT-72SNB 6S170003 x 2pcs. PD-5065 Only PK32 SPACER(KGPS-6S) PK19 CORE,FERRITE SFT-72SNB 29C02261 6S170003 x 2pcs. PD-4265 Only PK47 BAND(L200) PK19 CLAMP(RST-1N) 29C01511 x 5pcs. 29C01462 x2 pcs. PD-5065 Only PD-4265 Only PK31 CLAMP(FCN-6010) - Page 64 C) ACCESSORY BOX (W) SUPPLEMENT SHEET SHT006 SUPPLEMENT SHEET SHT005 Front paper: SUPPLEMENT SHEET Align its direction SHT004 and put it in. NOTICE SHEET SHT003 SHT002 R.CARD 5050/6150 7S801641 SHT001 OWNER’S GUIDE 4265/5065 7S801621 PSC POWER CORD U3 L3.0M L 7S552005 (Contained in the bagged state.) PK17 REM-T HAND UNIT RM-PDP5...
- Page 65 D) COVER CABLES ASSY PK33 COVER CABLE: PD-5065 PK35 COVER CABLE: PD-4265 29F01292 PK42 CBIPS*4*10*15BFE PD-5065 Only 29N01761 x 3pcs PK36 HOOK COVER CABLE PD-4265 Only 29F01382 x 3pcs PD-4265 Only PD-5065 Only No use these screw holes for PD-4265's cable cover.
- Page 66 E) PACKING OF COVER CABLES ASSY PK39 PROTECTION SHEET(COVER): PD-5065 PK41 PROTECTION SHEET(COVER): PD-4265 29M02331 COVER CABLE SASSY Turn the protection sheet to the back side Fasten with an adhesive tape. PK37 CARTON(COVER CABLE): PD-5065 PK40 CARTON(COVER CABLE): PD-4265 29M02061...
- Page 67 F) SPACER, PILLAR, CARTON BOX PK11 CARTON BOX T(PD-5065) 29M01791 PK16 CARTON BOX T(PD-4265) 29M01831 The plane with the "front" indication shall be made to coincide with PK13 PILLAR T(PD-5065) the monitor front. 29M01811 PK39 PILLAR T(PD-4265) PK07 CUSHON TR(PD-5065)
- Page 68 The required items shall be printed on the serial label (PD-5010) 29L02952 See 28.Contents SERIAL LABEL printout-1 (108) SERIAL LABEL (PD-5010) PK29 CARTON LABEL (PD-5065) 29L02952 29L07991 PK29 CARTON LABEL (PD-4265) 29L08001 H) Adhesion of the CARTON LABEL PK11 CARTON BOX T 29M01791(PD-5065) 29M01831(PD-4265) The upper marks of the carton box...
-
Page 69: Disassembly
4.2 DISASSEMBLY 1. Outlined method of disassembly PD-5065... - Page 70 2.COVER CABLE (1)COVER CABLE ASSY To detach the COVER CABLE ASSY PD-5065...
- Page 71 Push the red and black button and pull out the four cables. • PD-5065 FL1 FERRITE CORE ZCAT2032-930 6S170005 LUG(L60) • PD-4265 Push the red and black button and pull out the four cables. FL1 FERRITE CORE ZCAT2032-930 6S170005 Please remove the bundle band and remove the ferrite core.
- Page 72 (2)MONITOR ASSY (2)MONITOR ASSY (3)STAND/SPEAKER ASSY (3)STAND/SPEAKER SASSY (1)SRW40 JB-A 6*18*15KFE 29N02401 *4p • PD-4265 Remove the four screws indicated and slide the monitor upper direction indicated by arrow. (2)MONITOR ASSY (2)MONITOR ASSY (3)STAND/SPEAKER SASSY (3)STAND/SPEAKER SASSY (1)SRW39 JB-A 6*18*15KFE...
- Page 73 29L02871 (4)M84 LUG(L60) (4)M84 LUG(60) (3)SRW32 PL-CPIMS*3*10*15KFE (3)SRW32 PL-CPIMS*3*10*15KFE 29C01471 *1p 29C01471 *1p 29N01431 *9p 29N01431 *9p • PD-4265 M06 SERIAL LABEL M06 SERIAL LABEL 29L07101 29L07101 M61 NAME PLATE (4)BACK COVER ASSY M61 NAME PLATE (4)BACK COVER ASSY (Caution) This is not a service part.
- Page 74 6.CHASSIS ASSY • PD-5065 (9)SRW07 CBIPS*4*12*15KFE 29N01401 *11p 29N01401 *11p (9)SWR07 CBIPS*4*12*15KFE • PD-4265 (4)M84 LUG(L60) (4)M84 LUG(60) (1) SRW10 CBIPS*4*12*15KFE (1) SRW10 CBIPS*4*12*15KFE 29C01471 *1p 29C01471 *1p 29N01401 *4 p 29N01401 *2p (8) SRW32 SCREW PL-CPIMS*3*10*15KFE (8) SRW32 SCREW PL-CPIMS*3*10*15KFE...
- Page 75 7.PDP • PD-5065 • PD-4265 (3)CONNECTOR *2p (3)CONNECTOR *2p A ferrite core is fixed in an attached wire harness bandage. FL05 CORE,FERRITE TFT-081813N 6S170004 CN-AD CABLE 31P L390 7S530036 SCREW (Caution) A modular screw Basis (4) P01 PDP-NP42H5MF01 (4) P01 PDP-NP42H5MF01...
- Page 76 8.CHASSIS ASSY / PDP (3)SRW06 CBIPS*4*12*15KFE*10p • PD-5065 (5)SRW13 CBIPS*4*12*15KFE*1p (2)SW cable (1)LD cable /PW cable (4)SRW07 CBIPS*4*12*15KFE*6p • PD-4265 (3)SRW32 PL-CPIMS*3*10*15KFE*2p (5)SRW27 P-CPIMS*3*6*3KF *1p (1)LD cable/PW cable (2)SW cable (4)SRW13 TP-M3*6*3KF *4p PD-5065...
- Page 77 • PD-5065 • PD-4265 M14 LUG(L60) M14 LUG(L60) 29C01471 29C01471 SRW17 TP-M3*6*3KF SRW17 TP-M3*6*3KF 24N04581 24N04581 (Caution) For use, remove these eight blocks that are (Caution) For use, remove these eight blocks that are attached to the maintenance PDP. attached to the maintenance PDP.
- Page 78 9.BRACKET FILTER • PD-5065 BRACKET FILTER • PD-4265 (4)SRW26 TP-M3*4*3KF (11)M36 BRACKET FILTER C (4)SRW26 TP-M3*4*3KF (11)M36 BRACKET FILTER C 29N01191 *36p 29H02311 29N01191 *36 29H02311 (5)M36 BRACKET FILTER C (5)M36 BRACKET FILTER C (12)M60 FILTER(42B) (12)M60 FILTER(42B) 29H02311 29H02311...
- Page 79 10. FILTER • PD-5065 • PD-4265 BRACKET FILTER SHIELDING TAPE 960mm Edge side M30 BRACKET FILTER T(PD-4265) 29H04171 560mm Front side M56 CUSHION(720*8*T0.4) 29J01111 Attention) Paste it according to the attention edge side. FILTER(42B)29KS0251 M31 BRACKET FILTER SIDE L 29H02161 M52 CUSHION(420*20*T0.4)
- Page 80 (4) M10 SUB FRONT(PD-5030)29D00651 (4) M10 SUB FRONT( PD-5030) BRACKET FILTER • PD-4265 (2)SRW31 SCREW PL-CPIMS*3*10*15KFE 29N01431*4P (4)M22 CORNER PIECE TR (4)M22 CORNER PIECE (7)M30 BRACKET FILTER T (PD-4265) (7)M30 BRACKET FILTER T 29F00581 (3)M21 CORNER PIECE TL 29F00581 (3)M21 CORNER PIECE 29H04171...
- Page 81 M62 ORNAMENT BOTTOM (PD-5065) 29D00791 M62 ORNAMENT BOTTOM (PD-5065) 29D00791 29P01701 29P0170 • PD-4265 Positioning boss M84 ORNAMENT TOP (PD-4265) Positioning hole 29P01711 M83 LENS(PD-5065) M50 INSULATOR(T0.4) 29F01321 29J01921*4P Right and left boss four places The positioning hole at the FRONT center...
- Page 82 13.TERMINAL PANEL M SUB ASSY • PD-5065 • PD-4265 (7) SRW04 CBIPS*3*8*3KF (7) SRW04 CBIPS*3*8*3KF 24N03691 *2p 24N03691 *2p (4) M37 SHIELD COVER MAIN (4) M37 SHIELD COVER MAIN (6) CONNECTOR *11p 29H03571 (6) CONNECTOR *11p 29H03571 (1) SRW10 CBIPS*4*12*15KFE...
- Page 83 (4)M27 TERMINAL PANEL M(50XR4) (4)M27 TERMINAL PANEL M(50XR4) 29H03491 (3) M43 TERMINAL SHEET M(PD-5050) 29H03491 (3) M43 TERMINAL SHEET M(PD-5050 29K00691 29K00691 • PD-4265 (5)A01 MAIN PWB ASSY (5)A01 MAIN PWB ASSY GKT02 GASKET(L70*10*T1) GKT02 GASKET(L70*10*T1) 937Q1M01 29C00361 29C00361 (Caution) Stick it in alignment with the end face.
- Page 84 29K0701 29K0701 (7)M28 TERMINAL PANEL S(50XM3) (7)M28 TERMINAL PANEL S(50XM3) 29H02561 29H02561 PLATE 232C ASSY / 232C PWB • PD-4265 (4) M37 SHIELD COVER MAIN (4) M37 SHIELD COVER MAIN 29H03571 29H03571 (1) SRW10 CBIPS*4*12*15KFE (7) SRW01 SCREW(UNC4-40/4-40) (1) SRW10 CBIPS*4*12*15KFE...
- Page 85 (2)M13 COVER PWR BUTTON(PD-5065) (2)M13 COVER PWB BUTTON(PD-5065) 29F01341*1p 29F01341*1p • PD-4265 (1) SRW30 TP-M3*6*3KF (1) SRW30 TP-M3*6*3KF 24N04581 *2p 24N04581 *2p M90 COVER PWR BUTTON(PD-4265) M90 COVER PWR BUTTON(PD-4265) 29F01352 29F1352 PD-5065 and PD-4265 don't have POWER PWB. PD-5065...
- Page 86 17.TERMINAL PANEL B SUB ASSY • PD-5065 • PD-4265 M57 SILICONE SHEET M78 SILICONE SHEET (AUDIO) T (AUDIO) T 29J01291 29J01291 (1)CONNECTOR 3p (1)CONNECTOR 3p Peel off the separator that is Peel off the separator that is stuck to the rear side of the...
- Page 87 (5)AC INLET ASSY (4)A09 AUDIO PWB ASSY (4)A09 AUDIO PWB ASSY 937Q1SH1 937F0SH1 (2)SRW15 TP-M3*6*3KF (2)SRW15 TP-M3*6*3KF 24N04581 *2p 24N04581 *4p (1)SRW33 CPIMS*NO.6-32UNC*8*3GF (1)SRW33 CPIMS*NO.6-32UNC*8*3GF 29N01131 *2p 29N01131 *2p (3)M64 TERMINAL PANEL B(PD-4265) (3)M64 TERMINAL PANEL B(PD-4265) 29P01831 29P01831 PD-5065...
- Page 88 19.AC INLET AC INLET • PD-5065 • PD-4265 FL33 FL32 FL31 PD-5065...
- Page 89 20.POWER UNIT • PD-5065 (2)PSU POWER UNIT (2)PSU POWER UNIT (1)SRW14 TP-M3*6*3KF (1)SRW14 TP-M3*6*3KF 24N04581 *10p 24N04581 *10p • PD-4265 (2)P_UNIT POWER UNIT (1)SRW16 TP-M3*6*3KF (1)SRW16 TP-M3*6*3KF 3S110234 3S110234 24N04581 *10p 24N04581 *10p PD-5065...
- Page 90 937Q0SG1 937Q0SG1 (6)A07 SENC PWB ASSY (6)A07 SENC PWB ASSY 937Q0SF1 937Q0SF1 (8)E01 FAN MOTOR 9A0912M4D07 (8)E01 FAN MOTOR 9A0912M4D07 • PD-4265 3S170013 *2p 3S170013 *2p (7)SRW22 CFIMS3*30*15KFE (7)SRW22 CFIMS3*30*15KFE 29N01481 *4p 29N01481 *4p (2) A06 SENB PWB ASSY (2) A06 SENB PWB ASSY...
- Page 91 22. BRACKET & SHIELD • PD-5065 Only PD-5065...
- Page 92 23.FRAME • PD-5065 Only PD-5065...
- Page 93 24. MISCELLANEOUS PARTS • PD-4265 Only PD-5065...
- Page 94 25.WIRE CLAMP • PD-5065 M06 CLAMP(MWC-2S) 29C01401 *15p M07 CLAMP(WS-2W-V0) 29C01421 *16p • PD-4265 CABLE SPACER(CBT-4S) 29C02011 PD-5065...
- Page 95 • PD-5065 GKT03 GASKET(L20*5*T1) GKT03 GASKET(L20*5*T1) • PD-4265 29C00511 *2 29C00511 *2 GKT05 GASKET(L300*5*T1) GKT05 GASKET(L300*5*T1) M64 TERMINAL PANEL B(PD-4265) 29C01481 29C01481 M64 TERMINAL PANEL B(PD-4265) 29P01831 29P01831 (Caution) Stick it in alignment with this end. GKT04 GASKET(L20*5*T1) GKT04 GASKET(L20*5*T1)
- Page 96 Half cut 4.The printing color isblack. 1 pair of 2 labels • PD-4265 *The bar code shall be printed out at the upper stage. *The serial number shall be printed out at the lower stage. The numbering system for the serial number shall conform to the following:...
- Page 97 *The model name shall be printed out at the upper stage. *The serial number shall be printed out at the lower stage. The numbering system for the serial number shall conform to the following: Model No. PD-4265 Serial No. 570000001 Model No. PD-4265 Serial No.
- Page 98 • PD-5065 • PD-4265 Stick the labels in the positions on the back cover illustrated below. Dimensions indicated are approximate figures. However, the presence of bends and air bubbles shall be reduced to a minimum. NAME PLATE(PD-4265) Caution This is not service parts.
- Page 99 30.cable • PD-5065 Connect direct LD and PW. CABLE • PD-4265 Connect direct LD and PW. PD-5065...
- Page 100 31.STAND/SPEAKER ASSY • PD-5065 • PD-4265 PD-5065...
- Page 101 32.STAND/SPEAKER ASSY • PD-5065 (2)SPEAKER ASSY (3)STAND ASSY (1)SRW39, JCB-B 6*30*15KFE 29N02391 *4p • PD-4265 (2)SPEAKER ASSY (1)SRW38, JCB-B 6*30*15KFE 29N02391 *4p (3)STAND ASSY PD-5065...
- Page 102 33.SPEAKER ASSY • PD-5065 • PD-4265 PD-5065...
- Page 103 29F01491 *1p (1)M74 CBIPS*4*10*15BFE (5)M83 SPEAKER UNIT R 29N01761 *4p 29BS0681 *1p (6)FRAME SUB ASSY (2)M75 CBIMS*5*10*15KFE 29N02361 *8p • PD-4265 (4)M105 SPEAKER UNIT L 29BS0671 (3)M91 CENTER COVER 42 29F01501 (5)M106 SPEAKER UNIT R 29BS0681 (1)M97 CBIPS*4*8*3KF 29N00521 *4p...
- Page 104 35.FRAME SUB ASSY • PD-5065 (2)M70 CORE SPEAKER(PD-5065) 29H03863 *2p (3)M81 FRAME SPEAKER(PD-5065) (1)M77 HEX BOLT 6*12*15BFE 29P01652 29N02371 *8p • PD-4265 (2)M94 CORE SPEAKER(PD-4265) 29H03893 *2p (1)M99 HEX BOLT 6*12*15BFE 29N02371 *8p (3)M104 FRAME SPEAKER(PD-4265) 29P01682 PD-5065...
- Page 105 36.STAND ASSY • PD-5065 • PD-4265 PD-5065...
- Page 106 • PD-5065 (3)BASE STAND R SUB ASSY (4)STAND CENTER SUB ASSY (2)BASE STAND L SUB ASSY (1)78 CFIMS 5*10*15BFE 29N02381 *4p • PD-4265 (3)BASE STAND R SUB ASSY(C) (4)STAND CENTER SUB ASSY (2)BASE STAND SUB ASSY(C) (1)M101 CFIMS 5*10*15BFE 29N02381 *4p...
- Page 107 38.STAND CENTER SUB ASSY • PD-5065 (1)M73 CBIPS 4*10*15BFE 29N01761 *6p (2)M68 BRACKET STAND C(PD-5065) 29H03841 (3)M65 COVER STAND C(PD-5065) 29F01281 • PD-4265 (1)M96 CBIPS 4*8*3KF 29N00521 *6p (2)M92 BRACKET STAND C(PD-4265) 29H03871 (3)M89 COVER STAND C(PD-4265) 29F01311 PD-5065...
- Page 108 29H03852 *2p (2)M64 COVER STAND BASE(PD-5065) 29F01271 *2p • PD-4265 BASE STAND R SASSY (1)M73 CBIPS 4*10*15BFE (3)M76 HEX BOLT 6*12*15BFE 29N01761 *12p 29N02371 *8p (5)BASE STAND L SASSY (4)M69 CORE STAND(PD-4265) 29H03882 *2p (2)M64 COVER STAND BASE(PD-4265) 29F01301 *2p PD-5065...
- Page 109 40.BASE STAND L/R ASSY • PD-5065 (2)M72 FOOT STAND 20*2 29J01621 *16p (1)M80 BASE STAND R(PD-5065) 29P01641 M79 BASE STAND L(PD-5065) 29P01631 • PD-4265 (2)M95 FOOT STAND 20*2 29J01621 *14p (1)M103 BASE STAND R(PD-4265) 29P01671 M102 BASE STAND L(PD-4265) 29P01661 PD-5065...
-
Page 112: Parts List
4.4 PARTS LIST PD-5065 Parts List Part Number Description 937Q0M01 PWB-MAIN (PD5065) (T/A REQ) 937Q0SA1 PWB-232C (PD5065) 937Q0SB1 PWB-CTL (PD5065) 937Q0SD1 PWB-LED (PD5065) 937Q0SE1 PWB-SENB (PD5065) 937Q0SF1 PWB-SENC (PD5065) 937Q0SG1 PWB-SEND (PD5065) 937Q0SH1 PWB-AUDIO (PD5065) 3S110243 PWB-POWER UNIT (PD-5065) T/A REQ 3S170014 FAN-MOTOR (9G1212M4D03) 29D00791... - Page 113 937Q1SD1 PWB-LED (PD4265) 937Q1SE1 PWB-SENB (PD4265) 937Q1SF1 PWB-SENC (PD4265) 937Q1SG1 PWB-SEND (PD4265) 937Q1SH1 PWB-AUDIO (PD4265) 3S110234 PWB-POWER UNIT (PD-4265) T/A REQ 3S170013 FAN-MOTOR (9A0912M4D07) 29G00461 BUTTON-CONTROL (PD-4265) 29KS0251 SCREEN-SHIELD (FILTER) PD-4265 (T/A REQ) 956R0651 COVER-BACK (PD4265) 29F01301 COVER STAND BASE(PD-4265)
-
Page 114: Block Diagram And Schematic Diagram
5. BLOCK DIAGRAM AND SCHEMATIC DIAGRAM 5.1 CONECTION DIAGRAM 5.1.1 OVERALL CONNECTION DIAGRAM Connection Diagram TEMP-SENSOR3 TEMP-SENSOR2 TEMP-SENSOR1 SENC PWB SEND PWB SENB PWB PCB-5042F PCB-5042G PCB-5042E SCL5 SCL5 SCL5 SCL5 SDA5 SDA5 SDA5 SDA5 VDD+3.3V VDD+3.3V VDD+3.3V VDD+3.3V AU:SHIELD-WIRE 1,3,5,6,7pin:shield MAIN PWB PCB-5040... - Page 115 11 RG+ 12 RG- 13 RF+ 14 RF- 15 GND 16 RE+ 17 RE- 18 RD+ AU:SHIELD-WIRE 19 RD- 20 RCLK+ AC INLET AUDIO PWB AU-L PCB-5042H PD-4265,PD-5065: AU-R 10DKDG3S(Y1) MUTE SCL7 SDA7 SPEAKER_OUT CTL PWB CTL1 PCB-5042B CTL2 PD-5065...
-
Page 116: Connector Pin Explanation
5.1.2 CONNECTOR PIN EXPLANATION PD-4265 / PD-5065 PD-4265 / PD-5065 (Caution)The operating voltages specified below are used in common irrespective of the presence of signals.In this case,however,part of the operating voltages (red characters)may change according to the signal conditions when the main power supply is turned on (POWER button ON). - Page 117 Data not Data not exchanged: exchanged: 3.3Vdc 3.3Vdc 11.5Vdc 11.5Vdc FAN-CTL Voltage- PD-4265 MAIN→FAN during high- during high- controllable speed speed power supply revolution revolution (Fan mode H); (Fan mode H); 8.5Vdc during 8.5Vdc during medium speed...
- Page 118 Basic operation (Numerical unit: Vdc; except for the case when units are individually indicated) Main power ON (POWER button ON) AC power AC power ON OFF(Power (Power Pin NO name Pin name Function Power Main power Signal direction cord pulled cord connected Standby management...
- Page 119 Basic operation (Numerical unit: Vdc; except for the case when units are individually indicated) AC power ON Main power ON (POWER button ON) AC power (Power OFF(Power name Pin NO Pin name Function Main power Signal direction cord connected Power cord pulled management Standby...
- Page 120 Basic operation (Numerical unit: Vdc; except for the case when units are individually indicated) Main power ON (POWER button ON) AC power AC power ON OFF(Power (Power Pin NO name Pin name Function Power Main power Signal direction cord pulled cord connected Standby management...
-
Page 121: Block Diagram
5.2 BLOCK DIAGRAM 5.2.1 OVERALL BLOCK DIAGRAM PD-5065/PD-4265 Series PD-5065... -
Page 122: Cpu Block
5.2.2 CPU BLOCK PD-5065... - Page 123 PD-5065...
-
Page 124: Pcb Diagam
6. PCB DIAGAM 6.1 MAIN PWB PD-5065... - Page 125 PD-5065...
-
Page 126: Clt And Led Pwb
6.2 232C, CLT and LED PWB 232C PWB CLT PWB LED PWB PD-5065... -
Page 127: Senb, Senc, Send And Audio Pwb
6.3 SENB, SENC, SEND and AUDIO PWB SENB PWB SENC PWB SEND PWB AUDIO PWB PD-5065...
Need help?
Do you have a question about the PD-4265 and is the answer not in the manual?
Questions and answers