Avigilon 1.0-H3M-DO1 Installation Manual
High definition h.264 ip
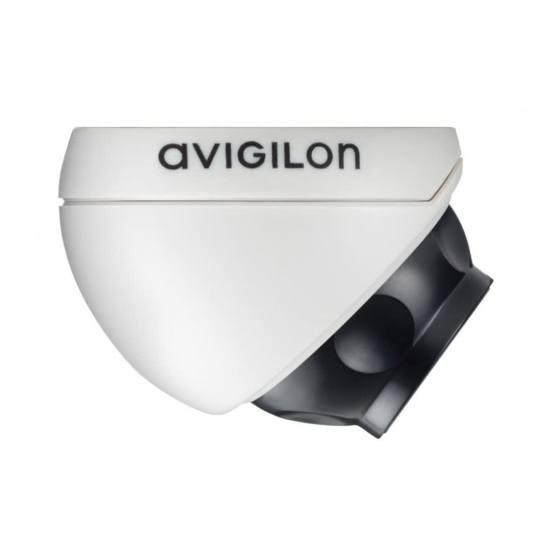
micro dome camera
Hide thumbs
Also See for 1.0-H3M-DO1:
- Installation manual (20 pages) ,
- Installation manual (138 pages)

Related Manuals for Avigilon 1.0-H3M-DO1


Summary of Contents for Avigilon 1.0-H3M-DO1
-
Page 1: Installation Guide
Installation Guide Avigilon High Definition H.264 IP Micro Dome Camera Models: 1.0-H3M-DO1 and 2.0-H3M-DO1 920-0067A-Rev2... - Page 3 Important Safety Information This manual provides installation and operation information and precautions for the use of this dome camera. Incorrect installation could cause an unexpected fault. Before installing this equipment read this manual carefully. Please provide this manual to the owner of the equipment for future use.
- Page 4 (such as from a liquid spill or fallen objects), has been exposed to rain or moisture, does not operate normally, or has been dropped. • Do not use strong or abrasive detergents when cleaning the device body. • Use only accessories recommended by Avigilon.
-
Page 5: Fcc Notice
Changes or modifications made to this equipment not expressly approved by Avigilon Corporation or parties authorized by Avigilon Corporation could void the user’s authority to operate this equipment. Disposal and Recycling Information... - Page 6 The contents of this manual and the specifications of this product are subject to change without notice. Avigilon reserves the right to make changes without notice in the specifications and materials contained herein and shall not be...
-
Page 7: Table Of Contents
Table of Contents Overview ......1 Front View ....... . 1 Top View . -
Page 9: Overview
Overview Front View HD Micro Dome Cable Assembly Camera Connection Status Link LED Ethernet Port Horizon Markers Feature Description Connection Status LED Provides information about device operation. See LED indicators for more information. Link LED Indicates if there is an active connection in the Ethernet port. -
Page 10: Top View
Top View Tamper Proof Screw Feature Description Tamper Proof Screw TORX tamper-resistant captive screw to fix the dome cover to the base. -
Page 11: Installation
1 1/4” Hole Saw • 3/16” drill bit for drywall or mineral fibre ceiling tile installation Camera Package Contents Ensure the package contains the following: • Avigilon HD Micro Dome Camera • Mounting hardware • Rubber boot • T10 TORX tamper resistant key •... -
Page 12: Adding The Mounting Holes
Adding the Mounting Holes The holes needed to mount the HD Micro Dome camera are very close together so it is important to complete the following steps in order to maintain the integrity of the mounting surface. Make sure the arrow on the mounting template points in the direction that the camera will face then attach the template to the mounting surface. -
Page 13: Connecting Poe
Connecting PoE The HD Micro Dome camera can only be powered by Power over Ethernet (PoE). Pull the required Ethernet cable to the camera. If you are installing the camera outdoors, slide the cable through the supplied rubber boot. Crimp the end of the cable with an Ethernet connector. Connect the crimped cable to the Ethernet Port. -
Page 14: Assigning An Ip Address
Zeroconf, the IP address is in the 169.254.0.0/16 subnet. The IP address settings can be changed using one of the following methods: • Avigilon Camera Installation Tool software application. • Camera's web browser interface: http://<camera IP address>/ •... -
Page 15: Accessing The Live Video Stream
NOTE: The default camera username is admin and the default password is admin. Accessing the Live Video Stream Live video stream can be viewed using one of the following methods: • Avigilon Camera Installation Tool software application. • Camera's web browser interface: http://<camera IP address>/. •... -
Page 16: Aiming The Hd Micro Dome Camera
Move the camera away from the mounting holes. Mounting screws Drive the supplied screws through the mounting holes and into the mounting surface. You may use other hardware that is appropriate to the mounting surface. Aiming the HD Micro Dome Camera After the camera has been mounted, place the camera into the dome cover. -
Page 17: For More Information
Additional information about setting up and using the device is available in the following guides: • Avigilon Camera Installation Tool User Guide • Avigilon Control Center Client User Guide • Avigilon High Definition H.264 Web Interface User Guide The manuals are available on the Avigilon website: http://avigilon.com/ support-and-downloads. -
Page 18: Led Indicators
LED Indicators Once the camera is connected to the network, the Connection Status LED will display the camera’s progress in connecting to the Network Video Management software. The following table describes what the LEDs indicate: Table:LED Indicators Connection Connection Description State Status LED Obtaining IP... -
Page 19: Reset To Factory Default Settings
Reset to Factory Default Settings If the camera no longer functions as expected, you can choose to restore the camera to its factory default settings. Use the firmware revert button to reset the camera. Firmware Revert Button Figure: The firmware revert button on the cable assembly. Disconnect power from the camera. -
Page 20: Setting The Ip Address Through The Arp/Ping
Setting the IP Address Through the ARP/Ping Method Complete the following steps to configure the camera to use a specific IP address: Locate and copy down the MAC Address (MAC) listed on the Serial Number Tag for reference. Open a Command Prompt window and enter the following commands: arp -s <New Camera IP Address>... -
Page 21: Specifications
Specifications Camera Lens 2.8mm, F2.0 Network Network 100Base-TX Cabling Type CAT5 Connector RJ-45 ONVIF compliance version 1.02, 2.00, Profile S (www.onvif.org) Security Password protection, HTTPS encryption, digest authentication, WS authentication, user access log Protocols IPv4, HTTP, HTTPS, SOAP, DNS, NTP, RTSP, RTCP, RTP, TCP, UDP, IGMP, ICMP, DHCP, Zeroconf, ARP Streaming Protocols RTP/UDP, RTP/UDP multicast, RTP/RTSP/TCP, RTP/RTSP/HTTP/... -
Page 22: Limited Warranty & Technical Support
Limited Warranty & Technical Support Avigilon warrants to the original consumer purchaser, that this product will be free of defects in material and workmanship for a period of 3 years from date of purchase. The manufacturer’s liability hereunder is limited to replacement of the product, repair of the product or replacement of the product with repaired product at the discretion of the manufacturer.
Need help?
Do you have a question about the 1.0-H3M-DO1 and is the answer not in the manual?
Questions and answers