Viking VESO5271 Service Manual
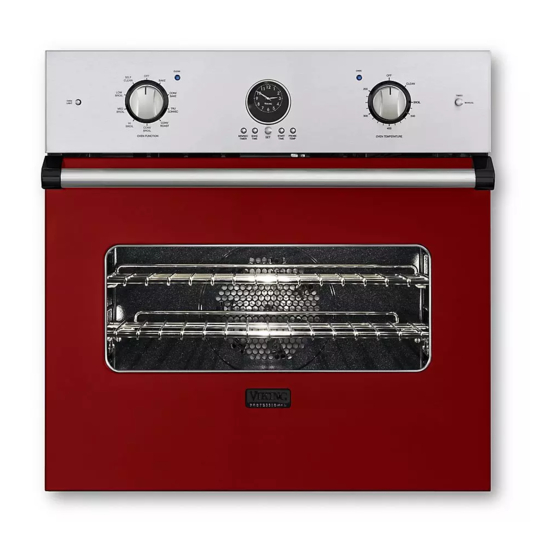
Built-in electric
wall ovens
Hide thumbs
Also See for VESO5271:
- Brochure (56 pages) ,
- User manual (24 pages) ,
- Install manual (12 pages)
Table of Contents
Advertisement
Quick Links
Service
Manual
This manual is to be used by qualified appliance technicians only. Viking
does not assume any responsibility for property damage or personal
injury for improper service procedures done by an unqualified person.
Built-In Electric
Wall Ovens
Preferred Service
This Base Manual covers general and
specific information including, but not
limited to the following models:
VESO5271
VESO5272
VEDO5271
VEDO5272
VESO5301
VESO5302
VEDO5301
VEDO5302
SMC-0034
APRIL 2013
Advertisement
Table of Contents
Troubleshooting

Related Manuals for Viking VESO5271


Summary of Contents for Viking VESO5271
- Page 1 Service Preferred Service Manual This manual is to be used by qualified appliance technicians only. Viking does not assume any responsibility for property damage or personal injury for improper service procedures done by an unqualified person. Built-In Electric This Base Manual covers general and...
-
Page 2: Table Of Contents
Door Handle Removal ..........31 Outer Door Panel Assembly Removal ....31 Outer Door Glass Removal ........32 Inner Door Glass Removal ........33 Door Hinge Removal ..........33 Door Logo Removal ..........33 Oven Rack Support Removal ........ 34 ©2013 Viking Preferred Service... -
Page 3: Important Information
All safety messages will be preceded by the safety alert symbol and the word “DANGER”, “WARNING”, or “CAUTION”. These words mean: VIKING will not be responsible for any injury or property damage from improper service procedures. If performing service on your own product, you must... -
Page 4: General Information
E S O 5 3 0 2 S S V = Professional SS = Stainless E = Electric S = Single 2 = Series D = Double 27 = 27" Wide O = Oven 30 = 30" Wide 5 = Premiere ©2013 Viking Preferred Service... -
Page 5: Operation
Operation Oven Control Panel The Viking Built-In Electric Wall Ovens are available in two control panel options. Each oven has a Function Selector and a Temperature Control. On double ovens, the Interior Oven Light Switch and Electronic Timing Center are shared. -
Page 6: Setting The Clock
2. Turn the “Set” knob until correct time is displayed on the digital clock. 3. Release hold from “min/sec timer” and “bake time” buttons. The analog clock’s time will automatically set to match the digital clock. ©2013 Viking Preferred Service... -
Page 7: Built-In Electric Oven Features
The convection element uses approximately 240V and inner broil element cycles on and off at various times to pulses on and off. The convection fan remains in low maintain the set temperature. speed and changes direction. ©2013 Viking Preferred Service... - Page 8 Heat radiates from both broil elements. The broil elements use approximately 240V and pulse on and off. Additionally, the convection fan cycles on and off, and then changes direction. This cycle then repeats. ©2013 Viking Preferred Service...
-
Page 9: Clocks And Timers (Digital Display)
These features can even be used at This is the time of day you want the food to begin the same time when both ovens are in use. However, cooking. only Bake Hours and Self-Cleaning modes shut the oven ©2013 Viking Preferred Service... -
Page 10: Clocks And Timers (Analog Clock)
2. Set the Oven Function Selector to the BAKE, CONVECTION BAKE, or TRUCONVEC™ position, depending upon the type of baking being used. 3. Set the temperature control knob to the desired temperature and allow for preheating. ©2013 Viking Preferred Service... -
Page 11: Self-Clean Cycle
Switch sides. Never use oven cleaners inside a self-cleaning back to the timer mode by pressing the “bake oven or on raised portions of the door. hours” button. ©2013 Viking Preferred Service... - Page 12 When the oven has completely cooled, remove any ash from the oven surfaces with a damp sponge or cloth. ©2013 Viking Preferred Service...
-
Page 13: Troubleshooting
Pro - Double - Premiere - 27" PE070734 PE070795 Yellow Model 3 - Pins 3 , 6 VEDO 5301 5302 Pro - Double - Premiere - 30" PE070734 PE070763 White Model 1 - Pins 5 , 6 ©2013 Viking Preferred Service... -
Page 14: Control Board Test Points
Oven Timer Selector Orange - Green Switch - Lower Oven (On Selector Switch) Orange - Grey Oven Timer Selector ∞ (Open) Orange - Green Switch - Manual Oven (On Selector Switch) *Resistance checks made with power off. ©2013 Viking Preferred Service... -
Page 15: Control Board Diagnosis
Reconnect power and using your ohmeter to check for continuity between the two relay contacts when the relay is energized. If you read infinite ohms (∞), this indicates a faulty relay and you will need to replace the control board. ©2013 Viking Preferred Service... -
Page 16: Bake Relay (Inner And Outer)
If you read infinite ohms (∞) when the relay is energized, this indicates a faulty relay and you will need to replace the control board. If you read 0 ohms, the relay contact is closing. ©2013 Viking Preferred Service... -
Page 17: Broil Relay (Inner And Outer)
If you read infinite ohms (∞) when the relay is energized, this indicates a faulty relay and you will need to replace the control board. If you read 0 ohms, the relay contact is closing. ©2013 Viking Preferred Service... -
Page 18: Convection Relay
(refer to photo below). The reading should be 120 VAC. If 0 volts are shown and the red LED is lit, then the oven control board is defective. ©2013 Viking Preferred Service... -
Page 19: Convection Fan
K6. When it is not energized (as shown To check the individual direction and speeds, perform above), power flows through the C terminal, to the N.C. the following checks: (normally closed) contact and out the FWD contact on the board. ©2013 Viking Preferred Service... -
Page 20: Testing Control Board
240 VAC and the red LED in front of the relay will be illuminated. If voltage is not present, this indicates a faulty relay and the oven control board will need to be replaced. Also check wiring to the main power supply and repair/ replace as needed. ©2013 Viking Preferred Service... -
Page 21: Door Lock Assembly
The plunger releases the door liner and opens the contact on S2. When the door is fully opened, S1 is closed by the motor cam. This will signal the board that the door is unlocked. ©2013 Viking Preferred Service... -
Page 22: Checking The Door Lock Position Switches
0 ohms. The S2 switch is N.O. and locked. will read infinite ohms (∞) when the door is unlocked. Shown below is the closed circuit in red. Shown below is the closed circuit in red. ©2013 Viking Preferred Service... -
Page 23: Rtd Sensor
If the RTD resistance is within the specifications given, it is not necessary to replace the RTD. If the RTD test resistance is within specifications and the consumer is having erratic oven temperatures, please call Viking Technical support (1-800-914-4799) for assistance. ©2013 Viking Preferred Service... -
Page 24: Selector And Thermostat Characteristics
0.70 VDC 9.22 kW 4.30 VDC Resistance checks are made on the thermostat wire harness with the thermostat wire harness disconnected from the board at location P14. The harness is connected to P14 for voltage checks. ©2013 Viking Preferred Service... -
Page 25: Troubleshooting Guide
Open thermostat. Replace thermostat. Open relay K12, K13, K14, K5, K6, Replace oven control board. or K7. Open oven control board. Replace oven control board. Defective oven wiring (shorted, Repair or replace defective wiring. open, or burned). ©2013 Viking Preferred Service... - Page 26 Replace door latch motor. Oven sensor out of calibration. Replace oven sensor. Faulty oven control board. Replace oven control board. Open relay K3. Replace oven control board. Defective oven wiring (shorted, Repair or replace defective wiring. open, or burned). ©2013 Viking Preferred Service...
-
Page 27: Led Error Codes
Cycle Light Clean Light Latch 1 second on, 1 second off 1 second on, (Oven Probe) 1 second off Model 1 second on, 1 second off 1 second on, 4 seconds off High Limit 4 flashes ©2013 Viking Preferred Service... -
Page 28: Disassembly
To avoid risk of electrical shock, personal injury, or death, disconnect electrical power source to unit, unless test procedures require power to be connected. Discharge capacitor through a resistor before attempting to service. Ensure all ground wires are connected before certifying unit as repaired and/or operational. Parts Location ©2013 Viking Preferred Service... -
Page 29: Oven Rack Removal
NOTE: To adjust the door, turn the adjustment screw clockwise to raise the door or turn it counterclockwise to lower the door. The oven must be partially removed to adjust the door. 5. Reverse procedure for installation. ©2013 Viking Preferred Service... -
Page 30: Partial Oven Removal
4. Slide the oven forward. 3. Reverse procedure for installation. NOTE: If the oven is advanced past the balance point, use appropriate bracing under the front of the oven to avoid excessive tipping. 5. Reverse procedure for installation. ©2013 Viking Preferred Service... -
Page 31: Door Gasket Removal
Outer Door Panel Assembly Removal 1. Remove oven door (see Door Assembly Removal). 2. Place the door handle side down on a protected surface. 3. Remove screws that attach the outer door panel assembly to the inner door panel assembly. ©2013 Viking Preferred Service... -
Page 32: Outer Door Glass Removal
4. Remove door insulation panel by sliding toward the bottom of the door skin. 8. Remove J mold from door skin. 5. Remove door skin insulation from door skin. 9. Reverse procedure for installation. ©2013 Viking Preferred Service... -
Page 33: Inner Door Glass Removal
Note: Use care with insulation. Make sure to replace any damaged or missing insulation. Keep vent 3. Reverse procedure for installation. on inner door panel clear of insulation. 5. Reverse procedure for installation. ©2013 Viking Preferred Service... -
Page 34: Oven Rack Support Removal
3. Remove two screws that attach the sensor to the 3. Firmly grasp the bulb and pull out. back of the oven liner. 4. Replace with a 12V-20W bulb. 5. Replace the light cover by pressing it back into place. ©2013 Viking Preferred Service... -
Page 35: Broil Element Removal
1. Remove oven door (see Door Assembly Removal). 2. Remove the two screws that hold the bake element access panel to the oven frame. 7. Install two screws that attach the sensor to the back of the oven liner. ©2013 Viking Preferred Service... -
Page 36: Convection Baffle Removal
3. Pull down the oven catalyst. 6. Remove the bake element from the oven. 4. Reverse procedure for installation. 7. Reverse procedure for installation. ©2013 Viking Preferred Service... -
Page 37: Convection Bake Element Removal
3. Disconnect two wires from the convection element. 3. Disconnect the convection fan motor wire harness. 4. Reverse procedure for installation. 4. Reverse procedure for installation. ©2013 Viking Preferred Service... -
Page 38: Convection Fan Blade Removal
4. Reverse procedure for installation. Partial Control Board Area Access 1. Partially remove the oven from the installation (see Partial Oven Removal). 2. Remove nine screws and the top front component access panel. 3. Reverse procedure for installation. ©2013 Viking Preferred Service... -
Page 39: Complete Control Board Area Access
1. Access the control panel area (see Control Panel selector. Access). 2. Disconnect the light switch wires at the connectors. 3. Remove screws and light switch from control panel. 4. Reverse procedure for installation. 5. Reverse procedure for installation. ©2013 Viking Preferred Service... -
Page 40: Oven Cycle/Clean Indicator Lights Removal
1. Access the control panel area (see Control Panel Access). 2. Remove knob from timed bake switch. 3. Disconnect the connectors from the timed bake switch. 4. Remove screws and timed bake switch from control panel. 5. Reverse procedure for installation. ©2013 Viking Preferred Service... -
Page 41: Oven Control Board Removal
2. Discharge the capacitor. 3. Remove screws and capacitor mounting plate from oven. 4. Reverse procedure for installation. 4. Disconnect two connectors from the capacitor. 5. Remove 13mm nut and capacitor from the oven. 6. Reverse procedure for installation. ©2013 Viking Preferred Service... -
Page 42: Thermal Cut-Out (Tco) Removal
2. Remove two screws and the lower door latch access panel. 3. Disconnect two connectors from the TCO. 4. Remove two screws and TCO from the oven. 5. Reverse procedure for installation. 5. Reverse procedure for installation. ©2013 Viking Preferred Service... -
Page 43: Lower Double Oven
1. Remove front component access panel (see Partial back of the oven. Control Board Area Access). 2. Remove screws from the door switch. 3. Disconnect two connectors from the door switch. 4. Reverse procedure for installation. ©2013 Viking Preferred Service... -
Page 44: Lower Double Oven
1. Completely remove the oven from the installation (see Complete Oven Removal). 2. Remove screws from the back of the oven that hold 6. Reverse procedure for installation. on the back panel. ©2013 Viking Preferred Service... -
Page 45: Door Hinge Receiver Removal
Replace any insulation that is missing NOTE: It is important to return insulation back to original or destroyed. position. Replace any insulation that is missing 6. Reverse procedure for installation. or destroyed. 5. Reverse procedure for installation. ©2013 Viking Preferred Service... -
Page 46: Wiring Diagrams
Wiring Diagrams Wiring Diagrams VESO 5271 / 5272 / 5301 / 5302 Single Ovens ©2013 Viking Preferred Service... - Page 47 Wiring Diagrams VEDO 5271 / 5272 / 5301 / 5302 Double Ovens ©2013 Viking Preferred Service...
- Page 48 Wiring Diagrams ©2013 Viking Preferred Service...
- Page 49 Wiring Diagrams ©2013 Viking Preferred Service...
Need help?
Do you have a question about the VESO5271 and is the answer not in the manual?
Questions and answers