Viking VESO1302 Use & Care Manual
5 series;
7 series
Hide thumbs
Also See for VESO1302:
- Installation manual (32 pages) ,
- Use & care manual (32 pages) ,
- Installation manual (16 pages)
Table of Contents
Advertisement
Use & Care
Professional Built-In Electric
Single and Double Ovens
VESO1302 / VESO5272 / VESO5302
VEDO1302 / VEDO5272 / VEDO5302
CVESO1302 / CVESO5272 / CVESO5302
CVEDO1302 /C VEDO5272 / CVEDO5302
Professional Built-In Electric Single
and Double French Door Ovens
VSOF730 / VDOF730
CVSOF730 / CVDOF730
Advertisement
Table of Contents

Related Manuals for Viking VESO1302


Summary of Contents for Viking VESO1302
- Page 1 Use & Care Professional Built-In Electric Single and Double Ovens VESO1302 / VESO5272 / VESO5302 VEDO1302 / VEDO5272 / VEDO5302 CVESO1302 / CVESO5272 / CVESO5302 CVEDO1302 /C VEDO5272 / CVEDO5302 Professional Built-In Electric Single and Double French Door Ovens VSOF730 / VDOF730...
-
Page 2: Table Of Contents
– or contact our consumer support center at 1-888-845-4641. We appreciate your choosing a Viking Range, LLC product and hope that you will again select our products for your other major appliance needs. For more information about the complete selection of products, visit us on vikingrange.com in the US or brigade.ca... - Page 3 Warnings WARNING If the information in this manual is not followed exactly, a fire or explosion may result causing property damage, personal injury or death. WARNING NEVER use this appliance as a space heater to heat or warm the room. Doing so may result in carbon monoxide poisoning and overheating of the oven.
-
Page 4: Important Safety Instructions
Important Safety Instructions Read before operating your oven. • Use this appliance only for its intended use as described in this manual. Never use your appliance for warming or heating the room. This is based on safety considerations. • Your unit should be installed by a qualified technician. The appliance must be installed and electrically grounded according to local codes. -
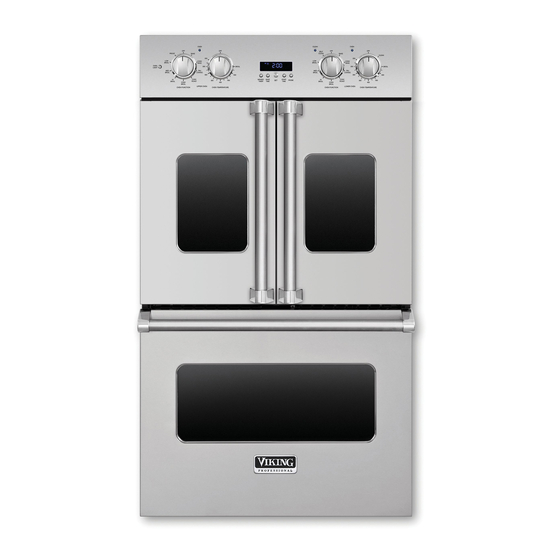
Page 5: Built-In Oven Features
Built-In Electric Oven Features CLEAN CLEAN OVEN OVEN CLEAN CLEAN OVEN OVEN CLEAN CLEAN OVEN OVEN CLEAN CLEAN CLEAN CLEAN OVEN OVEN OVEN OVEN SELF SELF SELF SELF CLEAN CLEAN BAKE BAKE CLEAN CLEAN BAKE BAKE CLEAN CLEAN CLEAN CLEAN UPPER OVEN LIGHT UPPER OVEN LIGHT SELF... -
Page 6: Oven Control Panel
Oven Control Panel (Premiere/Select Models) The Select Professional double oven control panel is shown above. - Page 7 Oven Control Panel (French Door Models)
- Page 8 Oven Control Panel (French Door Models w/Steam Clean and Night Light Feature)
-
Page 9: Setting The Clock
Setting the Clock Digital Display (Select Models) The time-of-day must be set before any other program can be used. When your oven is first connected to the power in your home, the timer display will show --:--. To program the time-of-day: 1. -
Page 10: Oven Settings & Functions
Oven Settings and Functions WARNING FRENCH DOOR MODELS Make sure control knobs are in proper place before using oven. With the knobs removed, the LED lights around the knobs are visible and may cause permanent damage to your eyes. Exposure to LED lights can cause irreparable harm to the retina of the human eye. - Page 11 Oven Settings and Functions Convection Roast* SELF CLEAN BAKE The convection element runs in conjuction with the inner and CONVEC BROIL outer broil elements.The reversible convection fan runs at a CONV. BROIL BAKE higher speed in each direction.This transfer of heat (mainly from CONV.
- Page 12 Oven Settings and Functions Proofing self- self- (French Door model only) PROOF BAKE bake clean bake clean CLEAN conv. conv. conv. conv. STEAM CONVEC bake roast bake roast This setting is designed for allowing yeast dough to rise to a temperature CLEAN BROIL conv.
-
Page 13: Clocks & Timers
Clocks and Timers (Digital Display - Select / French Door Models) Electronic Timing Center Digital Display The Electronic Timing Center is used to program and control all timing functions. It has five display and programming modes that are activated by the four push buttons and the “SET” knob. Both the Bake Time mode and the Min/Sec Timer mode can be used to time cooking periods. -
Page 14: Clocks And Timers
Clocks and Timers (Digital Display - Select / French Door Models) 2. Set the desired baking time: Once the start time is set, the display will switch to :00 and the words SET , COOK and TIME will appear on the right side of the display. You will now enter the desired baking time. - Page 15 Clocks and Timers (Analog Clock - Premiere Models) Setting the Min/Sec Timer The Min/Sec Timer is designed for accurate timing and is ideal for baking delicate items such as biscuits, cookies, and popovers, and for precise broiling. The Min/Sec timer can be used at the same time the Bake Hours or Start Time functions are in use.
-
Page 16: Probe Function
Cable Probe Function (Premiere/French Door Models) The meat probe takes the guesswork out of roasting by cooking foods to the ideal internal temperature. Your Viking oven’s built-in probe will help you prepare meats exactly as you want them. Handles Plug To Set the Automatic Probe Function 1. -
Page 17: Cooking With Your Oven
Cooking with your Oven Rack Positions Each oven is equipped with tilt-proof racks and at least one TruGlide rack. With the TruGlide rack, the bottom section remains in the oven and the top section smoothly glides outward when pulled. This reduces the chances of spills and makes removing heavy items from the oven much easier. -
Page 18: Preheat
Therefore, placing food items in the oven during preheat mode is not recommended. The Viking Rapid Ready™ Preheat System is engineered so that the oven is brought to the desired set temperature in a manner which will provide the optimum cooking environment based on the selected cooking mode in the shortest possible time. -
Page 19: Conventional Baking Chart
Conventional Baking Chart Single Rack Time Food (mins) Pan Size Position Temp BREADS Biscuits Cookie Sheet 3 or 4 375° F (191° C) 23-28 Yeast Loaf Loaf Pan 3 or 4 375° F (191° C) 30 - 35 Yeast Rolls Cookie Sheet 3 or 4 400°... -
Page 20: Convection Baking Chart
Convection Baking Chart Single Rack Time Notes Food Pan Size Position Temp (minutes) BREADS Frozen Biscuits Cookie Sheet 2 & 4 / 1, 3, & 5 350° F (177° C) 23 - 28 Yeast Loaf Loaf Pan 3 or 4 350°... -
Page 21: Solving Baking Problems
Solving Baking Problems Baking problems can occur for many reasons. Check the Baking Problem chart for the causes and recommended remedies for the most common problems. It is important to remember that the temperature setting and cooking times you are accustomed to using with your previous oven may vary slightly from those required with this oven. -
Page 22: Roasting Instructions
Roasting Instructions Always use the broiler pan and grid supplied with each oven. The hot air must be allowed to circulate around the item that is being roasted. Do not cover what is being roasted. Convection roasting seals in juices quickly for a moist, tender product. -
Page 23: Conventional Roasting Chart
Conventional Roasting Chart Internal Time Rack Food Weight Temp (min/lb) Position Temp BEEF Rib Roast Rare 3 - 6 lbs ° F (163 ° 25 - 30 ° F (60 ° Medium 3 - 6 lbs F (163 30 - 35 F (68 °... -
Page 24: Convection Roasting Chart
Convection Roasting Chart Internal Time Rack Food Weight Temp (min/lb) Position Temp BEEF Rib Roast Rare 3 - 6 lbs 325° F (163° C) 17 - 22 140° F (60° C) Medium 3 - 6 lbs 325° F (163° C) 21 - 24 155°... -
Page 25: Broiling Instructions
Broiling Instructions Broiling is a dry-heat cooking method using direct or radiant heat. It is used for small, individualized cuts such as steaks, chops, and patties. Broiling speed is determined by the distance between the food and the broil element. Choose the rack position based on desired results. -
Page 26: Broiling Chart
Broiling Chart Type and Time Cut of Meat Weight Setting Rack (minutes) BEEF Sirloin, 1" Rare 14 oz Hi Broil 8 - 10 Medium 14 oz Hi Broil 10 - 12 Well done 14 oz Hi Broil 11 - 13 T-Bone, 3/4"... -
Page 27: Cleaning And Maintenance
Cleaning & Maintenance Any piece of equipment works better and lasts longer when maintained properly and kept clean. Cooking equipment is no exception. Your oven must be kept clean and maintained properly. Oven Surfaces Several different finishes have been used in your electric oven. Cleaning instructions for each surface are given below. Your oven features a Self-Clean cycle for the oven interior. - Page 28 Cleaning & Maintenance Steam Clean (French Door models only) The Steam Clean feature is designed for light oven cleaning and works best if used as soon as possible after spills occur. If spills are allowed to dry in the oven, they will be more difficult to remove. Before starting the Steam Clean cycle, remove the oven racks, and any other items/utensils from the oven.
-
Page 29: Replacing Light
Cleaning and Maintenance To start the Self-Clean cycle: 1. Close the door completely. 2. Turn the oven selector knob clockwise to the self-clean mode. 3. Turn the temperature control knob past the clean setting until the knob stops. At this time, the clean indicator light will come on. -
Page 30: Trouble Shooting
• Name of dealer from whom purchased Clearly describe the problem that you are having. If you are unable to obtain the name of an authorized service agency, or if you continue to have service problems, contact Viking Range, LLC at 1-888-845-4641, or write to:... -
Page 31: Warranty
(2) years from the date of original retail purchase or closing date for new construction, whichever period is longer. Viking Range, LLC, warrantor, agrees to repair or replace, at its option, any part which fails or is found to be defective during the warranty period. - Page 32 Viking Range, LLC 111 Front Street Greenwood, Mississippi 38930 USA (662) 455-1200 For product information call 1-888-845-4641, or visit our web site at vikingrange.com in the US or brigade.ca in Canada F20812G EN (040116)