Table of Contents
Advertisement
Quick Links
Advertisement
Table of Contents

Related Manuals for TeleEye GN6516


Summary of Contents for TeleEye GN6516
- Page 1 GN Series HD Digital Video Recorder GN6516 / GN6816 / GN6916 User Guide...
-
Page 2: Table Of Contents
Contents 1.Introduction..........................1 1.1. Package Contents......................2 1.2.Functional Features......................3 1.3. Convention Used in This Manual..................3 1.4. Hardware Feature......................4 1.4.1. Front View......................4 1.4.2. Back View......................5 2. Hard Disk Installation, Formatting and Scanning................8 2.1. Hard Disk Installation.......................7 2.2. Hard Disk Formatting.......................10 2.3. Hard Disk Scanning......................11 3. - Page 3 5.4.3.5. Video Loss....................84 5.4.3.6. System Tamper..................85 5.4.3.7. Power Failure..................85 5.4.3.8. Disk Usage....................86 5.4.3.9. HDD Fault.....................87 5.4.3.10. System Restart...................87 5.4.4. Event Action......................87 5.4.4.1. Recording.....................88 5.4.4.2. Switch....................89 5.4.4.3. Dialback....................90 5.4.4.4. E-mail....................91 5.4.4.5. Mobile notification................92 5.4.4.6. Buzzer....................92 5.4.4.7. Event LED....................93 5.4.4.8. Live Camera..................93 5.4.4.9.
- Page 4 6.4.4.2. Alarm....................114 6.4.4.3. Motion....................115 6.4.4.4. Video Loss....................116 6.4.4.5. System Tamper..................117 6.4.4.6. Power Failure..................117 6.4.4.7. Disk Usage....................118 6.4.4.8. Disk Fault....................118 6.4.4.9. System Restart..................119 6.4.5. Event Action.......................119 6.4.5.1. Recording....................120 6.4.5.2. Switch....................120 6.4.5.3. Dialback....................121 6.4.5.4. E-mail....................122 6.4.5.5. Buzzer ....................122 6.4.5.6. Mobile notification................123 6.4.5.7. Event LED.....................123 6.4.5.8.
- Page 5 This manual is copyrighted. All rights are reserved. This manual should not be copied, reproduced or translated in whole or part without prior consent from Signal Communications Limited. TeleEye is a trademark of Signal Communications Limited and is registered in China, European Communities, Hong Kong, US and other countries.
-
Page 6: Introduction
Page 1 Section 1: Introduction TeleEye GN6608/GN6516 and GN6916 is a range of HD digital video recorders, which is specially designed for dedicated and shared network architecture. All GN models support real-time HD recording up to the maximum frame rate of 480 fps. -
Page 7: Package Contents
TeleEye GN6516 / GN6608 / GN6916 User Guide Page 2 1.1. Package Contents Make sure the following items are included within the package. 2. Registration 1. TeleEye GN HD digital 3. Mouse code sheet video recorder 4. Power Adaptor 5. Software CD 6. -
Page 8: Functional Features
Page 3 1.2. Functional Features Independent & efficient HD recording stream • 3M/4M/1080p/720p HDTV resolution • Support TeleEye MQ, MP series, IP cameras conform to ONVIF profile S • Video recording up to 400/480 fps • Configurable recording frame rate •... -
Page 9: Hardware Feature
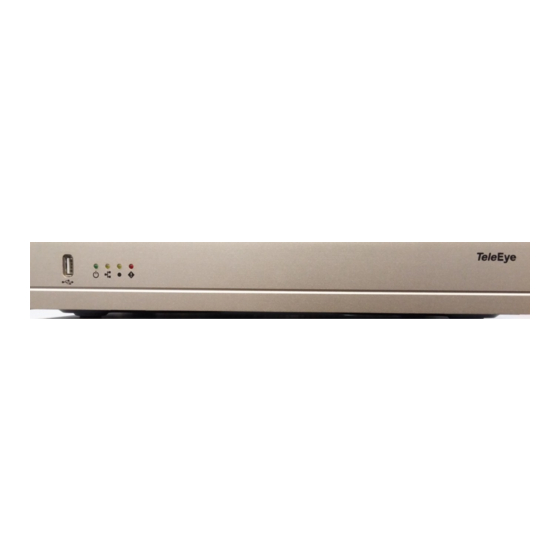
TeleEye GN6516 / GN6608 / GN6916 User Guide Page 4 1.4. Hardware Feature 1.4.1. Front View GN6516/GN6608 1. Notification LEDs Description Light up when power on Light up when network connected Light up when performing recording Blink when an event is triggered 2. -
Page 10: Back View
Power ON/OFF Reset 1.4.2. Back View GN6516 1. Power switch Switch on or off the TeleEye GN HD Digital Video Recorder • 2. Power input (12V DC) Power supply to TeleEye GN • 3. Alarm/switch port and RS-485 in/out port : 4 special inputs, Arm/disarm, security switch, system tamper, power failure •... - Page 11 TeleEye GN6516 / GN6608 / GN6916 User Guide Page 6 8. Rear USB port For mouse control, firmware upgrade, footage extraction, setting import/export • 9. Audio in/out port, PA Audio In : Connect to audio input device (e.g. amplified microphone) for recording •...
- Page 12 1. Power input (AC100-240V/3.5-2A) Power supply to TeleEye GN • 2. Power switch Switch on or off the TeleEye GN HD Digital Video Recorder • 3. Alarm/switch port and RS-485 out port : 4 special inputs, Arm/disarm, security switch, system tamper, power failure •...
-
Page 13: Hard Disk Installation, Formatting And Scanning
TeleEye GN6516 / GN6608 / GN6916 User Guide Page 8 6. E-SATA External SATA connector • 7. VGA output Standard VGA connector • 8. Audio in/out port, PA Audio In : Connect to audio input device (e.g. amplified microphone) for recording •... - Page 14 TeleEye GN6516 / GN6608 / GN6916 User Guide Page 9 4. Connect the SATA and power cable to the HDD. Step 2 Step 3 step 4 GN6916 1. Loosen the screws of cover. 2. Pull off the cover and take out hard disk holder.
-
Page 15: Hard Disk Formatting
Another purpose of disk formatting is to clean up recording space and redeem the file allocation. An unrecognized hard disk will be formatted automatically after TeleEye GN starts up. Formatting will erase all data inside the disk. Hence make sure that important data has been backed up before performing this function. -
Page 16: Hard Disk Scanning
TeleEye GN6516 / GN6608 / GN6916 User Guide Page 11 [Main Menu] [HDD/Recording] [Disk Management] Format Format the selected hard disk Format All Format all installed hard disks 2.3. Hard Disk Scanning Hard disk scanning is a maintenance function similar to the Scan Disk function provided by the operating system of a personal computer. -
Page 17: Camera
TeleEye GN6516 / GN6608 / GN6916 User Guide Page 12 Section 3: Camera There are two video network mode: Dedicated Video Network and Shared IP Network. 3.1. Camera Installation 3.1.1. Setup for Local and Remote Monitoring Dedicated Video Network GN6608... - Page 18 TeleEye GN6516 / GN6608 / GN6916 User Guide Page 13 Shared IP Network GN6516 GN6916 1. Follow above to install cameras to the video ports of TeleEye GN. 2. Power on TeleEye GN. A startup screen will appear on the connected monitor.
-
Page 19: Adding New Camera
3. Select the camera you want to add, click to edit camera information. 4. Click [OK] to connect. There are three type of cameras: TeleEye MQ, TeleEye MP and ONVIF. Please make sure that you have selected the corresponding type of cameras. -
Page 20: Camera Swapping
TeleEye GN6516 / GN6608 / GN6916 User Guide Page 15 3.2. Camera swapping In Dedicated Video Network mode, the assigned camera numbers in digital video recorder are not dependent to the port number. It is dependent to the order of inserting camera to the recorder. -
Page 21: Setup For Local And Remote Monitoring
TeleEye GN6516 / GN6608 / GN6916 User Guide Page 16 Section 4: Setup for Local and Remote Monitoring 4.1. Setup for LAN Connection GN6608 GN6516 GN6916... - Page 22 3. Connect TeleEye GN to the network switch. 4. Plug in the power adaptors to TeleEye GN. 5. If all installed hard disks are not in TeleEye GN recognized format, they would be formatted automatically when startup completes. Setup Procedures on PC Side: 1.
- Page 23 The first 3 fields of IP address of the PC should be the same as that of TeleEye GN. 6. Besides accessing through IP Setup Utility, user can also open a web browser and type the IP...
-
Page 24: Setup For Broadband Internet Connection
TeleEye GN6516 / GN6608 / GN6916 User Guide Page 19 4.2. Setup for Broadband Internet Connection GN6608 GN6516 GN6916... - Page 25 3. Connect TeleEye GN to the network switch. 4. Plug in the power adaptors to TeleEye GN and cameras. 5. If all installed hard disks are not in TeleEye GN recognized format, they would be formatted automatically when startup completes.
- Page 26 The DNS setting is used for sureLINK, time synchronization and e-mail notification. 6. Reconnect the digital video recorder to the Internet network. 7. Configure other network settings for TeleEye GN and the PC if necessary, such as router port mapping, firewall, etc. Please refer to the manual of the router.
-
Page 27: Local Operation
TeleEye GN6516 / GN6608 / GN6916 User Guide Page 22 Section 5: Local Operation 5.1. Icons Description When observing video from local monitor, icons may be shown on the screen. Each of the icons has its special meaning. A summary of their meanings can be found in the following table. -
Page 28: Osd Menu
TeleEye GN6516 / GN6608 / GN6916 User Guide Page 23 5.2. OSD Menu Most local operations are controlled through the on screen display (OSD) menu. A detail explanation on its operation and structure will be given in this section. 5.2.1. OSD Menu Operation User can connect a mouse to the USB port or use the control buttons on the front panel to perform different operations. -
Page 29: Osd Menu Structure
TeleEye GN6516 / GN6608 / GN6916 User Guide Page 24 When getting through the OSD, user will see different types of item. Their properties are listed below: Item Name Description Yes/No box: 2 options only Click on it to toggle the option... - Page 30 TeleEye GN6516 / GN6608 / GN6916 User Guide Page 25 Camera Selection Panel Show currently displaying cameras Click to display selected camera in full screen Display all cameras Mode Select the display mode Next Display next camera Sequential Start sequential mode Switch 1 –...
- Page 31 TeleEye GN6516 / GN6608 / GN6916 User Guide Page 26 Add Camera Search camera Connect camera Playback Display recording log Start video playback Switch Control the switches Change switch settings Event Handler Change event settings Footage Extraction Extract recorded video to USB flash device...
- Page 32 TeleEye GN6516 / GN6608 / GN6916 User Guide Page 27 Custom Frame Rate Set recording frame rate of individual cameras Disk Mode Set disk mode Cyclic :Remove oldest data when hard disk full • Fixed :Stop recording when hard disk full •...
- Page 33 TeleEye GN6516 / GN6608 / GN6916 User Guide Page 28 Add a new recording schedule Edit Edit the selected schedule Delete Delete selected schedule Delete Day Delete all schedules of a day as the selected schedule [Main Menu] [HDD/Recording] [Schedule Recording]...
- Page 34 TeleEye GN6516 / GN6608 / GN6916 User Guide Page 29 [Main Menu] [HDD/Recording] [Schedule Recording] [EDIT] Most settings are the same as [Add] menu. EDIT Confirm EDIT the schedule setting [Main Menu] [HDD/Recording] [Recording Retention] Enable Enable / disable recording retention...
- Page 35 TeleEye GN6516 / GN6608 / GN6916 User Guide Page 30 [Main Menu] [System Log] [Event Log] Date/Time Show event date and time Show event channel number Status Show event status Trigger :Event triggered • Reset :Event reset • Tamper :Event tampered •...
- Page 36 TeleEye GN6516 / GN6608 / GN6916 User Guide Page 31 [Main Menu] [System Log] [Connection Log] Date/Time Show connection date and time Access Show IP of the remote host Status Show connection status Remark Show type of connection Dial in :Triggered by user •...
- Page 37 TeleEye GN6516 / GN6608 / GN6916 User Guide Page 32 Date/Time Show date and time of the change Setting Show setting that is changed Show channel number of setting if available Remark Show new value of the setting Access Show IP of the remote host or “Local” for local host...
- Page 38 TeleEye GN6516 / GN6608 / GN6916 User Guide Page 33 [Main Menu] [System Log] [Event Log] [Log Option] If an event log entry is associated with the recording action, pressing enter or double clicking will enter [Log Option] menu. Enter [Search Log] menu...
- Page 39 TeleEye GN6516 / GN6608 / GN6916 User Guide Page 34 Add Camera Change dedicated network settings (In Dedicated Network) Camera Setting Change camera settings Date /Time Change date and time settings Network Change connection, throughput and 3G modem settings External Keyboard...
- Page 40 TeleEye GN6516 / GN6608 / GN6916 User Guide Page 35 [Main Menu] [System] [Camera Setting] Camera Select a camera Installed Enable / disable the video channel Name Change the name of camera Swap Position Adjust the swap position Brightness Set video brightness...
- Page 41 TeleEye GN6516 / GN6608 / GN6916 User Guide Page 36 Day Night Set the day night mode to match the environment Auto :Auto adjustment • Day :Day mode only (color) • Night :Night mode only (black and white) • Sense Up...
- Page 42 TeleEye GN6516 / GN6608 / GN6916 User Guide Page 37 [Main Menu] [System] [Network Setting] Auto IP Enable / disable auto IP from DHCP IP Address Set IP address of the digital video recorder Port Set port number of the digital video recorder...
- Page 43 TeleEye GN6516 / GN6608 / GN6916 User Guide Page 38 [Main Menu] [System] [Network Setting] [Remote Live Streaming Setting] Remote Live Profile Set remote live resolution, AUTO : Live streaming at highest achievable resolution • : Live streaming at 720p resolution •...
- Page 44 TeleEye GN6516 / GN6608 / GN6916 User Guide Page 39 [Main Menu] [System] [Network Setting] [IP Filtering] [Filtered IP Address] Show the IP filtering entry number Start IP Address Show starting IP of the filtered IP range End IP Address...
- Page 45 TeleEye GN6516 / GN6608 / GN6916 User Guide Page 40 [Main Menu] [System] [Network Setting] [IP Filtering] [Filtered IP Address] [Edit IP Filter] Press enter or double click on an existing entry to enter [Edit IP Filter] menu. Start IP Address...
- Page 46 TeleEye GN6516 / GN6608 / GN6916 User Guide Page 41 [Main Menu] [System] [Privacy Mask ] User can draw privacy mask by mouse or buttons Camera Selected video channel Mask ID Selected privacy mask id Mask Status Enable /disable current privacy mask...
- Page 47 TeleEye GN6516 / GN6608 / GN6916 User Guide Page 42 [Main Menu] [System] [Display Setting] Server Name Set name of video server Date Time Position Set the position for displaying system time Camera Name Enable Display / hide camera name...
- Page 48 TeleEye GN6516 / GN6608 / GN6916 User Guide Page 43 Hardware Support Display audio feature is supported by video server Channel Set input audio channel Channel Installed Enable /disable audio selected input channel Channel Source Select source of audio BUILT IN : use video server on board audio input •...
- Page 49 TeleEye GN6516 / GN6608 / GN6916 User Guide Page 44 [Main Menu] [System] [Import /Export] [Export] Video Export camera settings if selected Recording Export recording settings if selected Switch Export switch settings if selected Date/Time Export date/time settings if selected...
- Page 50 TeleEye GN6516 / GN6608 / GN6916 User Guide Page 45 [Main Menu] [Event Status] Alarm Trigger Show alarm trigger status Motion Show motion status Video Loss Show video loss status Arm/Disarm Tamper Show arm/disarm tamper status Security Switch Tamper Show security switch tamper status...
- Page 51 TeleEye GN6516 / GN6608 / GN6916 User Guide Page 46 [Main Menu] [Playback] Date Show date of recording log Time Show time of recording log 1, 2, ... 16 Show cameras that performed recording in yellow bars Event Select Display detail of the selected event...
- Page 52 TeleEye GN6516 / GN6608 / GN6916 User Guide Page 47 [Main Menu] [Playback] [Search By Date] Date Set the search date Time Set the search time Today Set date and time to current time Search for log closest to the date and time...
- Page 53 TeleEye GN6516 / GN6608 / GN6916 User Guide Page 48 Select the switch Name Name Change the name of switch X Source Select source of switch BUILT IN : use video server relay • CAMERA : use external camera switch •...
- Page 54 TeleEye GN6516 / GN6608 / GN6916 User Guide Page 49 [Main Menu] [Event Handler] [Arm/Disarm] Enable Enable / disable the arm/disarm control Mode Select the arm/disarm mode Arm State Select circuit open/close as system armed(Hardware Arm only) Associate Switch Associate switch 1 to arm/disarm control status...
- Page 55 TeleEye GN6516 / GN6608 / GN6916 User Guide Page 50 [Main Menu] [Event Handler] [Arm/Disarm] [Normal Arm Schedule] [Add] Weekdays Set the weekdays the new schedule applied to Start Time Set the start time of new schedule End Time Set the end time of new schedule...
- Page 56 TeleEye GN6516 / GN6608 / GN6916 User Guide Page 51 [Main Menu] [Event Handler] [Arm/Disarm] [Holiday Arm Schedule] [Add] Start Date Set the start date of new schedule End Date Set the end date of new schedule Start Time Set the start time of new schedule...
- Page 57 TeleEye GN6516 / GN6608 / GN6916 User Guide Page 52 [Main Menu] [Event Handler] [Alarm] Alarm Select an alarm Enable Enable / disable selected alarm Name Change the name of alarm Source Type Select source of alarm BUILT IN : use video server on board alarm •...
- Page 58 TeleEye GN6516 / GN6608 / GN6916 User Guide Page 53 Camera Select a camera Enable Enable / disable motion event Motion Detection Setting Set motion detection settings Zone Set the zone type: Entry Delay Set the entry delay time (Entry/Exit Zone only)
- Page 59 TeleEye GN6516 / GN6608 / GN6916 User Guide Page 54 [Main Menu] [Event Handler] [System Tamper] Enable Enable / disable system tamper event Sensor Type Select circuit open/close as normal state Action Set actions taken when system tamper is triggered...
- Page 60 TeleEye GN6516 / GN6608 / GN6916 User Guide Page 55 [Main Menu] [Event Handler] [System Restart] Enable Enable / disable the system restart available event Action Set actions taken when system restart abnormally [Main Menu] [Event Handler] Any Event [Action]...
- Page 61 TeleEye GN6516 / GN6608 / GN6916 User Guide Page 56 Enable Enable / disable event recording of that event Recording Mode Set event recording frame rate Auto :Record at highest achievable frame rate. • The storage size is large. 1 fps :Record at 1 frame per second. Storage •...
- Page 62 TeleEye GN6516 / GN6608 / GN6916 User Guide Page 57 [Main Menu] [Event Handler] Any Event [Action] [Dial Back] [Dial Back Entry] Enable Enable / disable the dialback entry IP Address Set the dialback IP address when event triggers Port...
- Page 63 TeleEye GN6516 / GN6608 / GN6916 User Guide Page 58 [Main Menu] [Event Handler] Any Event [Action] [E-mail] [SMTP Server] Server Address Set the SMTP server address Port Set the SMTP server port Authentication Is authentication required for the SMTP server...
- Page 64 TeleEye GN6516 / GN6608 / GN6916 User Guide Page 59 [Main Menu] [Event Handler] Any Event [Action] [Buzzer] Enable Enable / disable buzzer action of that event Action Delay Set the time between turning off and next turning on Duration...
- Page 65 TeleEye GN6516 / GN6608 / GN6916 User Guide Page 60 [Main Menu] [Footage Extraction] Backup Device Select device for saving the footage Device Name Show the name for selected device FORMAT Format the selected USB device Backup From Disk Select the source directory...
- Page 66 TeleEye GN6516 / GN6608 / GN6916 User Guide Page 61 Security Mode Select security mode Advanced :Log in and access right required Current User Display current log in user Add Account Add new account (Advanced mode only) Edit/Delete Account Edit or remove an account...
- Page 67 TeleEye GN6516 / GN6608 / GN6916 User Guide Page 62 [Main Menu] [User] [Edit/Delete Account] Most settings are the same as [Add Account] menu. Local Login Enable Enable / disable local log in (with remote log in right only) SAVE...
-
Page 68: Basic Operation
5.3.1. View Live Video Depends on the model of the TeleEye GN HD Digital Video Recorder, user can view up to 16 live videos at the same time. User can also choose to supervise the video channel one by one using the sequential mode function. - Page 69 TeleEye GN6516 / GN6608 / GN6916 User Guide Page 64 Schedule Recording Recording will be started and stopped according to user • defined schedules. Schedules are set on a weekly basis. When schedule recording is enabled, manual recording will be disabled.
- Page 70 TeleEye GN6516 / GN6608 / GN6916 User Guide Page 65 Image Size Set recording resolution WQHD :2048 x 1536 • 1080P :1920 x 1080 • 720P :1280 x 720 • Video Quality Set video quality Frame Rate Set recording frame rate, applied to all cameras...
- Page 71 TeleEye GN6516 / GN6608 / GN6916 User Guide Page 66 [Main Menu] [HDD/Recording] [Schedule Recording] [Add] Recording Type Type of recording schedule Normal :Record when within schedule • Motion :Record when motion detected and within • schedule Custom :Record based on individual camera setting •...
-
Page 72: Playback
TeleEye GN6516 / GN6608 / GN6916 User Guide Page 67 5.3.3. Playback TeleEye GN supports user to view recorded video while not affecting the recording process. A maximum of 4 video channels can be played at the same time. [Main Menu]... -
Page 73: Ptz
TeleEye GN6516 / GN6608 / GN6916 User Guide Page 68 [Main Menu] [Playback] [Search By Date] Date Set the search date Time Set the search time Today Set date and time to current time Search for log closest to the date and time 5.3.4. - Page 74 TeleEye GN6516 / GN6608 / GN6916 User Guide Page 69 ZOOM ZOOM Control zoom in or out RECALL PRESET:X Recall saved preset position PROGRAM PRESET:X Edit preset position AUTO PAN Start auto pan FOCUS Control focus near or far IRIS...
- Page 75 TeleEye GN6516 / GN6608 / GN6916 User Guide Page 70 [Main Menu] [System] [General PTZ Setting] Camera Selected video channel Pan Speed Set pan speed Tit Speed Set tilt speed Patrol Speed Set patrol speed Dwell Time Set dwell time for patrol...
-
Page 76: Advanced Operation
5.4.1. Install Alarm Sensors and Relay Control Port TeleEye GN supports up to 4 alarm for connecting with alarm sensors, 4 additional input sensors and 1 relay ports for control. The definitions of alarm and relay control ports are shown in the following diagram. -
Page 77: Circuit Detection
NC/NO : Select circuit open/close as system 5.4.3. Event Handling TeleEye GN HD Digital Video Recorder supports 10 types of event detection and their icons are as follows. 1. Arm/Disarm 2. Security Switch 3. - Page 78 Physical Configuration for Arm/Disarm The arm/disarm input and ground of TeleEye GN HD Digital Video Recorder needs to connect to a control unit which is commonly a switch or password panel for arm/disarm input.
- Page 79 TeleEye GN6516 / GN6608 / GN6916 User Guide Page 74 [Main Menu] [Event Handler] [Arm/Disarm] [Normal Arm Schedule] Show the schedule number Start Time Show the start time of system armed End Time Show the end time of system armed...
-
Page 80: Security Switch
TeleEye GN6516 / GN6608 / GN6916 User Guide Page 75 [Main Menu] [Event Handler] [Arm/Disarm] [Holiday Arm Schedule] Show the schedule number Start Date Show the start date of schedule End Date Show the end date of schedule Start Time... -
Page 81: Alarm
• If security switch on state is set to close, it indicates security switch on and off of TeleEye G N when the state of the circuit is closed and open respectively. Oppositely, if security switch on state is set to open, it indicates security switch on and off of TeleEye GN when the state of the circuit is open and closed respectively. - Page 82 TeleEye GN6516 / GN6608 / GN6916 User Guide Page 77 Example of Entry/Exit Zone WITH Security Switch Usage For Entry Zone: The entry delay is the period of time between entering the surveillance zone and reaching the digital video recorder. In order to disarm the system for maintenance or repair, user / installer needs to turn off the security switch and enter the surveillance zone.
- Page 83 TeleEye GN6516 / GN6608 / GN6916 User Guide Page 78 For Exit Zone: The exit delay is the period of time for leaving a surveillance zone without making false alarm (i.e. Alarm 1 to Alarm 4). The purpose is to let the user / installer have enough time to leave the surveillance zone after the digital video recorder is armed.
- Page 84 TeleEye GN6516 / GN6608 / GN6916 User Guide Page 79 Example of Entry/Exit Zone WITHOUT Security Switch Usage For Entry Zone: The entry delay is the period of time between entering the surveillance zone and reachingthe digital video recorder. In order to disarm the system for maintenance or repair, user / installer enters the surveillance zone.
- Page 85 TeleEye GN6516 / GN6608 / GN6916 User Guide Page 80 For Exit Zone: The exit delay is the period of time for leaving a surveillance zone without making false alarm (i.e. Alarm 1 to Alarm 4). The purpose is to let the user / installer have enough time to leave the surveillance zone after the digital video recorder is armed.
- Page 86 TeleEye GN6516 / GN6608 / GN6916 User Guide Page 81 Different Combination of Cases of Arm/Disarm, Security Switch and Alarm for the 3 Zone Type Initial State Step 1 Step 2 Step 3 Result Alarm Security Switch Fire Zone No trigger...
- Page 87 Page 82 Physical Configuration for Alarm The alarm input and ground of TeleEye GN HD digital video recorder need to connect to various kinds of sensors which are commonly installed at entrance or special part of the surveillance area. [Main Menu]...
-
Page 88: Motion
TeleEye GN6516 / GN6608 / GN6916 User Guide Page 83 5.4.3.4. Motion Motion detection can be triggered when motion occurs on the camera. Motion detection has different sensitivity levels, which can be set up individually on each video input channel. There are generally 4 options: high, middle, low and custom. -
Page 89: Video Loss
TeleEye GN6516 / GN6608 / GN6916 User Guide Page 84 Exit Delay Set the exit delay time (Entry/Exit Zone only) Action Set actions taken when motion is detected ENABLE/DISABLE ALL Enable / disable all motion [Main Menu] [Event Handler] [Motion]... -
Page 90: System Tamper
Physical Configuration for System Tamper The system tamper input and ground of TeleEye GN HD digital video recorder need to connect to an external cabinet which is used for protecting the digital video recorder and its accessories... -
Page 91: Disk Usage
TeleEye GN6516 / GN6608 / GN6916 User Guide Page 86 UPS provides backup power certain period and send a power failure signal to GN when the main power does not work. The UPS circuit setup above is used as an example. Not all UPS have signal output. Some UPS have self-testing for a period of time. -
Page 92: Hdd Fault
Enable / disable the system restart event Action Set actions taken when system restarted abnormally 5.4.4. Event Action TeleEye GN HD Digital Video Recorder supports 9 types of actions that can be activated by any events mentioned in above section. 1. Recording 2. Switch 3. -
Page 93: Recording
TeleEye GN6516 / GN6608 / GN6916 User Guide Page 88 7. Event LED 8. Live Camera 9. PTZ 5.4.4.1. Recording When an event is triggered, video recording will be performed on user selected cameras with selected recording mode. Pre-Event Recording Pre-event recording allows video recording before an event is triggered. -
Page 94: Switch
TeleEye GN6516 / GN6608 / GN6916 User Guide Page 89 5.4.4.2. Switch The switch action allows the digital video recorder to control 1 external relays which are defined by user. Switch Type Two types of switch are supported: Latching The switch turns on for a period of time. -
Page 95: Dialback
As a result, remote operator can recognize what situation is at the surveillance area. The Java web page can’t respond to this request, software like TeleEye sureSIGHT or sureGUARD needs to be installed to the PC to perform dialback. -
Page 96: E-Mail
TeleEye GN6516 / GN6608 / GN6916 User Guide Page 91 5.4.4.4. E-mail The e-mail action supports user to send e-mails to recipient address in order to notify the status of triggered event. [Main Menu] [Event Handler] Any Event [Action] [E-mail]... -
Page 97: Mobile Notification
TeleEye GN6516 / GN6608 / GN6916 User Guide Page 92 Network Setting Change the network settings Time Out Set the allowed time of sending an e-mail in each trial (in minute) Retry Set the number of retrial if fails to send the mail 5.4.4.5. -
Page 98: Event Led
TeleEye GN6516 / GN6608 / GN6916 User Guide Page 93 5.4.4.7. Event LED The event LED is the LED built on the front panel of TeleEye GN. If an event is triggered, the LED will keep blinking until the event is cleared. [Main Menu] [Event Handler]... -
Page 99: Footage Extraction
TeleEye GN6516 / GN6608 / GN6916 User Guide Page 94 5.4.5. Footage Extraction Video footage can be extracted to USB flash device for evidence purposes. Back up video can be played in any PC without special software. There are 2 extraction modes available:... -
Page 100: Throughput Control
TeleEye GN6516 / GN6608 / GN6916 User Guide Page 95 5.4.6. Throughput Control Video monitoring performance can be affected by network speed. Throughput control can limit the output data rate of the digital video recorder according to user setting, which should be configured to fit the network bandwidth to avoid delay or rusty video. -
Page 101: Switch Control
Switch Setting Change switch settings 5.4.8. Time Synchronization The time in TeleEye GN can be synchronized with timeserver in the network using the time synchronization function. The GN can work as a timeserver if internal time server is enabled. [Main Menu]... - Page 102 TeleEye GN6516 / GN6608 / GN6916 User Guide Page 97 [Main Menu] [System] Information Display general information of the digital video recorder Registration Checking Enable / disable remote registration check Built In Web Server Enable / disable built in web server...
-
Page 103: Import And Export
TeleEye GN6516 / GN6608 / GN6916 User Guide Page 98 5.4.9. Import and Export Configurations of the digital video recorder can be exported to an USB flash device for backup purpose, or to copy the settings to another video recorder. When something goes wrong, previously exported settings can be applied through the import function. -
Page 104: User Account
Page 99 5.4.10. User Account In TeleEye GN, advanced security mode supports multiple user accounts with flexible access rights. Users with the “User Account” access right can add new account, modify existing account, or delete an account. When system startup or local user logout, access right of local menu will follow the setting of “Power On Default Right”. - Page 105 TeleEye GN6516 / GN6608 / GN6916 User Guide Page 100 User Name User name of new account (4 – 16 characters) Local Password Password for local log in (4 – 10 characters) Retype Local Password Confirming the password Local Time Out...
-
Page 106: Sms
TeleEye GN6516 / GN6608 / GN6916 User Guide Page 101 [Main Menu] [User] [Power On Default Right] Most settings are the same as [Add Account] menu. Save Save the access rights when server startup or local user log out 5.4.11. SMS... - Page 107 TeleEye GN6516 / GN6608 / GN6916 User Guide Page 102 [Main Menu] [System] [Network Setting] [USB Modem] Manufacturer Manufacturer name Model Model Revision Firmware version Operator 3G network operator Signal Strength 3G network signal strength from 0 to 100 IP Address...
-
Page 108: Remote Operation
Internet by your gateway. To access your TeleEye GN digital video recorder outside your private LAN, you need to do port mapping for your TeleEye GN. For detail setup procedure, please refer to user manual of your router. -
Page 109: Icons Description
TeleEye GN6516 / GN6608 / GN6916 User Guide Page 104 6.2. Icons Description When monitoring using web browser, user may see different icons on the control panel or the video. A summary of their meanings can be found in the following table. - Page 110 TeleEye GN6516 / GN6608 / GN6916 User Guide Page 105 Show menu panel Menu panel 1. Server Setting 2. Audio 3. PTZ 4. View log 5. Advanced 6. Footage extraction 7. Switch On screen event status 1. Motion 2. Video loss Playback panel 1.
-
Page 111: Basic Operation
Page 106 6.3. Basic Operation 6.3.1. View Live Video With the built-in web server function enabled, user can access the TeleEye GN digital video recorder easily through web browser. 1. Enter IP address plus port number in the format http://IPAddress:PortNumber (e.g. - Page 112 TeleEye GN6516 / GN6608 / GN6916 User Guide Page 107 3. Use screen mode selection panel and camera selection panel to view video. If a cross sign is shown at the top left corner of the web page, it implies that Java JVM is not installed in the computer.
-
Page 113: Recording
TeleEye GN6516 / GN6608 / GN6916 User Guide Page 108 6.3.2. Recording According to different situations, user can select suitable recording mode. Manual Recording The start/stop operation is controlled manually by operator. Recording will be performed on all cameras once started 1. - Page 114 Page 109 Schedule Recording TeleEye GN supports 2 types of recording schedule: Normal and Motion. Motion recording records video only when motion is detected in selected surveillance area. 1. To start or stop schedule recording, click on [Recording] button on the main panel.
-
Page 115: Playback
TeleEye GN6516 / GN6608 / GN6916 User Guide Page 110 6.3.3. Playback Recorded video can be played back through web browser without affecting the recording process 1. Click on [Playback] button to show the recording log. 2. Choose a log entry and select a camera to start playback. -
Page 116: Advanced Operation
TeleEye GN6516 / GN6608 / GN6916 User Guide Page 111 6.4. Advanced Operation 6.4.1. Hard Disk Formatting Hard disk formatting is done to reconstruct the disk in recognizable format, clean up the recording space, and redeem the file allocation. Beware that formatting will erase all data within the hard disk, backup important data beforehand. -
Page 117: Event Handling
Page 112 6.4.4. Event Handling TeleEye GN digital video recorder supports different types of event detection. This section shows the configuration of event settings. Please refer to 4.4.1. Install Alarm Sensors and Relay Control Port for setup detail and 4.4.3. - Page 118 TeleEye GN6516 / GN6608 / GN6916 User Guide Page 113 3. To add or remove arm schedules, click on [Schedule Setting]. Use the tap [Normal] and [Holiday] on the top left corner to select normal schedule or holiday schedule.
-
Page 119: Alarm
TeleEye GN6516 / GN6608 / GN6916 User Guide Page 114 6.4.4.2. Alarm Alarm can be used to detect many events, such as fire and illegal entering by someone. 1. Go to [Server], select [Event Matrix] [Event] [Alarm]. 2. Click on [Alarm Setting] and select appropriate settings in the pop up menu. -
Page 120: Motion
TeleEye GN6516 / GN6608 / GN6916 User Guide Page 115 6.4.4.3. Motion Motion event is triggered when movement is detected inside the surveillance area of a camera. 1. Go to [Server], select [Event Matrix] [Event] [Motion]. 2. Click on [Setting] to pop up [Motion Setting] menu. Left click mouse and drag to select the surveillance area or right click mouse and drag to deselect the area. -
Page 121: Video Loss
TeleEye GN6516 / GN6608 / GN6916 User Guide Page 116 3. Click on [Zone Type] to change the operational zone. 6.4.4.4. Video Loss Video loss event is triggered when the digital video recorder receives no signal from the camera. A blue screen would be displayed when this happens. -
Page 122: System Tamper
TeleEye GN6516 / GN6608 / GN6916 User Guide Page 117 6.4.4.5. System Tamper System tamper prevents someone from breaking into the cabinet and destroying the digital video recorder. 1. To change the event settings, go to [Server] [Event Matrix] [Event] [System Tamper]. -
Page 123: Disk Usage
TeleEye GN6516 / GN6608 / GN6916 User Guide Page 118 6.4.4.7. Disk Usage Disk usage event is triggered if hard disk usage exceeds user specified warning level. 1. To change the event settings, go to [Server] [Event Matrix] [Event] [Disk Usage Level]. -
Page 124: System Restart
[System Restart]. 6.4.5. Event Action User can define the set of actions to be taken by TeleEye GN when an event is triggered. This section shows the configuration of action settings. Please refer to 4.4.4. Event Action for descriptions of different actions and their settings... -
Page 125: Recording
TeleEye GN6516 / GN6608 / GN6916 User Guide Page 120 6.4.5.1. Recording If an event is associated with recording action, recording will be performed on pre-selected cameras when this event is triggered. 1. To change the settings, go to [Server] [Event Matrix] [Event]. -
Page 126: Dialback
2. To enable the action, go to [Server] [Event Matrix] [Event]. Choose an event and click on [Dial Back] column. The Java web page can’t respond to dialback request, software like TeleEye sureSIGHT or sureGUARD needs to be installed to the PC to perform dialback. -
Page 127: E-Mail
TeleEye GN6516 / GN6608 / GN6916 User Guide Page 122 6.4.5.4. E-mail If an event is associated with e-mail action, a notification e-mail will be sent when this event is triggered. 1. To change e-mail settings, go to [Server] [Event Matrix] [Action] [E-mail]. -
Page 128: Mobile Notification
TeleEye GN6516 / GN6608 / GN6916 User Guide Page 123 6.4.5.6. Mobile notification If an event is associated with mobile notification action, a mobile notification will be sent when this event is triggered. 1. To change buzzer settings, go to [Server]... -
Page 129: Pan Tilt Zoom
TeleEye GN6516 / GN6608 / GN6916 User Guide Page 124 6.4.6. Pan Tilt Zoom (PTZ) PTZ operations can be performed easily when a PTZ supported camera is connected to TeleEye GN digital video recorder . 1. Go to [Menu] [PTZ] to open the PTZ control panel. - Page 130 TeleEye GN6516 / GN6608 / GN6916 User Guide Page 125 The meaning of each icon is summarized in the following table: Button Description Tile the camera up Tile the camera down Pan the camera left Pan the camera right Zoom in...
- Page 131 TeleEye GN6516 / GN6608 / GN6916 User Guide Page 126 Add or delete preset positions associated with patrol tour using the 16 numeric buttons Start the patrol operation when [Patrol1] is • clicked Stop the patrol operation when [Stop Patrol] is •...
-
Page 132: Footage Extraction
TeleEye GN6516 / GN6608 / GN6916 User Guide Page 127 6.4.7. Footage Extraction Video footage can be extracted through network. 1. Go to [Menu] [Footage Extraction] 2. When extraction completes, open the selected folder and double click “TPPlayer.exe” to view the extracted video. -
Page 133: Switch Control
TeleEye GN6516 / GN6608 / GN6916 User Guide Page 128 6.4.9. Switch Control Besides controlling through event action, user can also control the external switches directly. 1. Go to [Menu] [Switch] and click on a button to toggle the switch status. -
Page 134: Time Synchronization
TeleEye GN6516 / GN6608 / GN6916 User Guide Page 129 6.4.10. Time Synchronization The time in the digital video recorder can be synchronized with timeserver using the time synchronization function. 1. Go to [Menu] [Server Setting] [Date/Time]. 2. After changing the time settings, user can click [Time Synchronization Test] to perform testing. -
Page 135: Import And Export
TeleEye GN6516 / GN6608 / GN6916 User Guide Page 130 6.4.11. Import and Export Settings of the digital video recorder can be exported to or imported from a remote PC through network. The procedure is shown as follows: Import Note that the digital video recorder will be restarted automatically after import process is completed. -
Page 136: User Account
TeleEye GN6516 / GN6608 / GN6916 User Guide Page 131 6.4.12. User Account In advanced security mode, different users are allocated with their own account and corresponding access rights. Only accounts with the “User Account” access right have the privilege to modify the account settings. -
Page 137: Maintenance Log Backup
TeleEye GN6516 / GN6608 / GN6916 User Guide Page 132 6.4.13. Maintenance Log Backup Maintenance log of the digital video recorder can be extracted. Go to [Menu] [Server Setting] [Maintenance Log Backup], click [start] to start backup process. -
Page 138: Appendix A: Safety Instruction
TeleEye GN6516 / GN6608 / GN6916 User Guide Page 133 Appendix A: Safety Instruction Read the following instructions carefully, and save them for future reference. 1. Follow all warnings and instructions marked on the product and this user guide. 2. Do not place this product on unstable cart, stand, or table. The product may fall, causing serious damage to the product. -
Page 139: Appendix B: Limited Warranty
TeleEye. 8. Under no circumstance shall TeleEye be liable for any damages to any parties so caused by the usage of the above specified equipment or so caused during service provision. -
Page 140: Appendix C: Surelink Technology
Page 135 Appendix C: sureLINK Technology sureLINK technology is available in TeleEye GN which enables you to connect to the digital video recorder with broadband dynamic IP Internet connection. If you can only use broadband dial-up account to connect to the Internet through your computer, sureLINK provides a solution for sharing the Internet connection between your computer and the digital video recorder. - Page 141 [Reference] Registration Code is printed on the registration Code Sheet The application will be processed once we received your domain name registration. Normally, it requires about 1 working day to activate sureLINK for your TeleEye GN. You will receive a notification mail when your sureLINK service is ready.
- Page 142 Since the sureLINK (Domain name) address corresponds to a single digital video recorder, if you change from one digital video recorder to another one, you have to inform us to update our database record. To do this, you can visit our TeleEye Product Support again and follow the steps below: 1.
-
Page 143: Appendix D: Firmware Upgrade
6. Select a time period for GN to update its IP address to sureLINK server. Appendix D: Firmware Upgrade Please follow the following procedures to upgrade the TeleEye GN to a new version of firmware. User can choose to perform the upgrade locally using USB flash device, or through a remote PC. -
Page 144: Appendix E: Security Mode
Page 139 Appendix E: Security Mode In TeleEye GN, there is advanced security mode. In advanced security mode multiple user accounts with flexible access right can be created. The property of the security mode can be found in the following table:... - Page 145 By default, a preset account: ADMINISTRATOR is stored in the digital video recorder. The account ADMINISTRATOR cannot be removed. When TeleEye GN startup or local user logout, access right of local menu will follow the setting of “Power On Default Right”.
- Page 146 TeleEye GN6516 / GN6608 / GN6916 User Guide Page 141 Advanced security mode – Access right Group Features Involved Video monitoring Basic video monitoring with fixed cameras Browsing the event status ** Audio Audio monitoring ** PA with microphone, PA with pre-recorded voice clips...
-
Page 147: Appendix F: General Terms Discussion
Registration Checking When this feature of TeleEye GN is enabled, users need to do the registration in the remotely connecting software (e.g. JAVA web page, TeleEye sureSIGHT) for authorization before the digital video recorder can be used. -
Page 148: Appendix G: Audit Trail Log Description
TeleEye GN6516 / GN6608 / GN6916 User Guide Page 143 Appendix G: Audit Trail Log Description A. Audit Trail Log Description of Setting Log Event short form: [Event] Arm/disarm input Secu Switch Security switch input Alarm Alarm sensor input Motion... - Page 149 TeleEye GN6516 / GN6608 / GN6916 User Guide Page 144 OSD Font Color Change OSD font color Rec Frame Rate Change recording frame rate Schedule Rec Enabled Enable / disable schedule recording Disk Mode Change recording disk mode Video Quality...
- Page 150 TeleEye GN6516 / GN6608 / GN6916 User Guide Page 145 [Event] Rec Frame Rate Change event recording frame rate [Event] Rec Duration Change recording duration after event clear [Event] Switch Enable / disable switch action of the event [Event] Switch Mask...
- Page 151 TeleEye GN6516 / GN6608 / GN6916 User Guide Page 146 Rec Audio Src Type Change the source of audio input Audio PA Enable /disable PA Audio PA Src Type Change the source of PA output C. Operation Log Operation Column Table...
- Page 152 TeleEye GN6516 / GN6608 / GN6916 User Guide Page 147 D. Connection Log Column Table Connected Remote user connected Disconnected Remote user disconnected Failed Remote user connection fail Unauthorized Invalid remote user connection rejected Timeout Remote user connection time out...
-
Page 153: Appendix H: Specification
Appendix H: Specifications MODEL ITEM GN6608 GN6516 GN6916 VIDEO INPUT Supported HD TeleEye MQ and MP series, IP cameras conform to ONVIF profile S cameras Digital channel RJ45, 10/100 base-T VIDEO OUTPUT Digital video 1 channel, 1280x720, 1920x1080 1 channel, 1280x720, 1920x1080... - Page 154 TeleEye GN6516 / GN6608 / GN6916 User Guide Page 149 sureLINK Support Internet connection assigned with dynamic IP address Max. transmission 200fps 400fps frame rate Web server Built-in Keyboard control RS422/RS485, 1 channel input 1 @ front panel, 1 @ rear panel; USB 2.0 High speed 480Mbps (Top rear USB...
Need help?
Do you have a question about the GN6516 and is the answer not in the manual?
Questions and answers