Table of Contents
Advertisement
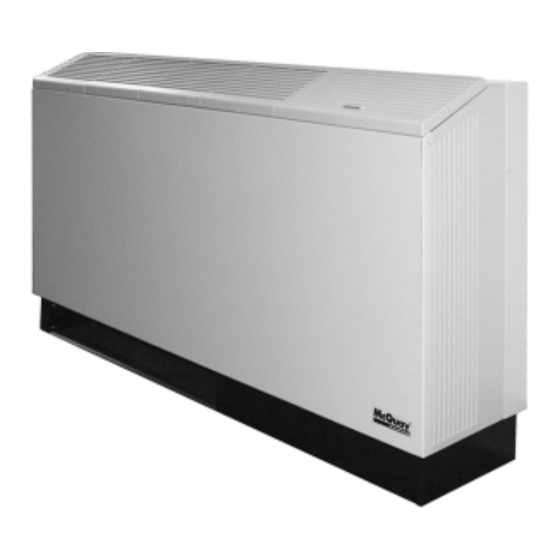
Console Water Source Heat Pump
Models WDA, WDB, WDD, WDE, WDF, WDG, WDH, WDS, WLA, WLB, WLC, WLL
WMA, WMB, WMC, WMD, WME, WMF, WMG, WMH, WMU, WMK, WML
Model Nomenclature . . . . . . . . . . . . . . . . . . . . . . . . . . . . . 2
Checking for Damage . . . . . . . . . . . . . . . . . . . . . . . . . . . . 3
Installation . . . . . . . . . . . . . . . . . . . . . . . . . . . . . . . . . . . . 3,4
Electrical Connections . . . . . . . . . . . . . . . . . . . . . . . . . . . 5
Cabinet Power Connections . . . . . . . . . . . . . . . . . . . . . . . 5
Water Connections . . . . . . . . . . . . . . . . . . . . . . . . . . . . . . 6
Piping . . . . . . . . . . . . . . . . . . . . . . . . . . . . . . . . . . . . . . . . 7
Cleaning & Flushing System . . . . . . . . . . . . . . . . . . . . . . . 7
Operating Limits . . . . . . . . . . . . . . . . . . . . . . . . . . . . . . . . 8
Electrical Data . . . . . . . . . . . . . . . . . . . . . . . . . . . . . . . . . . 8
©2006 McQuay International
Installation & Maintenance Data
Installation & Maintenance Data
Contents
Unit Operation . . . . . . . . . . . . . . . . . . . . . . . . . . . . . . . . . . 8
Wiring Diagrams - Mark IV/AC-Units . . . . . . . . . . . . . . 9,10
Control Options . . . . . . . . . . . . . . . . . . . . . . . . . . . . . . . . 11
Thermostats - Mark IV/AC-Units . . . . . . . . . . . . . . . . . . 12
Pump Restart Relay . . . . . . . . . . . . . . . . . . . . . . . . . . . . 13
MicroTech Control Units . . . . . . . . . . . . . . . . . . . . . . . 14,15
Field Installed Options . . . . . . . . . . . . . . . . . . . . . . . . . . 16
Optional Outside Air Damper . . . . . . . . . . . . . . . . . . . . . 18
Troubleshooting . . . . . . . . . . . . . . . . . . . . . . . . . . . . . . 18,19
Maintenance . . . . . . . . . . . . . . . . . . . . . . . . . . . . . . . . . . 19
IM 447-9
Group: WSHP
Part Number: 107225603
Date: June 2006
®
Advertisement
Table of Contents

Subscribe to Our Youtube Channel
Related Manuals for McQuay WDA series


Summary of Contents for McQuay WDA series
-
Page 1: Table Of Contents
Maintenance ........19 ® ©2006 McQuay International... -
Page 2: Model Nomenclature
The information in this catalog supersedes and replaces previous (bulletins) with regards to McQuay Terminal Air Conditioning products. Illustrations cover the general appearance of McQuay products at the time of publication and McQuay reserves the right to make changes in design and construction at anytime without notice. -
Page 3: Checking For Damage
3. Inspect the carton for any specific tagging numbers located accordingly, making sure the piping will fit into indicated by McQuay International per a request from the confines of the subbase and cabinet. the installing contractor. At this time, the voltage, capacity and model should be checked against the plans. - Page 4 Figure 1. Cabinet backwrap &-subbase *Total unit is 10 3 /4" (273mm) deep. The cabinet extends beyond the subbase 1 /4" (6mm) in the back and 1 /2" (14mm) in the front. Dimensions in inches Unit Type Unit Size Standard 007 –...
-
Page 5: Electrical Connections
Electrical Connections Standard Electrical Connection Note: Check the local code concerning correct electri- Each chassis comes with a junction box mounted on the cal connection. side of the chassis and contains the field electrical connection. Cord & plug electrical connection (field installed) Note: If electrical wiring or conduit comes through the floor, all wires or conduit should be sealed at this point. -
Page 6: Water Connections
Water Connections Next, using the specified hose kit, screw the fixed end All piping connections should be made using good plumbing into the shut-off/balancing valve. Remove the " adapter practices and in accordance with any and all local codes from the other end of the hose. Insert the adapter into the that may apply. -
Page 7: Piping
9. No point of the drain system may be above the drain kit, for making the connection. This elbow is sweat on one end – female 1/2" FPT on the other end. McQuay pan of any unit. 10. Automatic flow control devices must not be installed Part No. -
Page 8: Operating Limits
Operating Limits Environment Air and Water Limits This equipment is designed for indoor installation only. Cooling Heating Sheltered locations such as attics, garages, etc., generally Min. Ent. Air 65˚F (18˚C) 55˚F (14˚C) will not provide sufficient protection against extremes in Normal Ent. -
Page 9: Wiring Diagrams - Mark Iv/Ac-Units
Figure 7. heat exchanger. After 60 seconds, the compressor is locked LED’s Fault Indication Yellow Green Output out. If the condensate sensor detects a filled drain pan, the Normal Mode compressor operation will be suspended only in the cooling High Pressure Fault Flash mode. - Page 10 Typical Wiring Diagrams for Units with Mark IV/AC Controls 50 Hertz Mark IV MCO Boilerless Constant Fan Component Layout Notes Tap-Touch Switch Terminal block on PC board Thermostat provides 24 VAC at terminals Terminal Block C and R. All other terminals are PC Board 24 VDC output.
-
Page 11: Control Options
Motorized Valve & Relay for Unit Sizes 007 to 019 Wired as shown below the motorized valve will open on a call Note: The wiring shown below can only be used when the “P” terminal is not being used as a pump restart signal to other for compressor operation. -
Page 12: Thermostats - Mark Iv/Ac-Units
Thermostat Connection Diagrams Mark IV/AC Units – Unit Sizes 007 to 019 7-Day Programmable Electronic Thermostat (P/N 107095901) WSHP Mark IV/AC Board Low Voltage Terminal Strip (Circuit1) O W2 G W1 Y1 F Includes Thermostat and Wall Plate. Refer to the installation, operation & application guide (LIA217) for thermostat 107095901 installation details Non-Programmable Electronic Thermostat (P/N 668054201) -
Page 13: Pump Restart Relay
Pump Restart Relay Kit P/N 061419001 Used as an option with the Mark IV/AC board, the pump will change state causing a contact closure between terminal restart relay kit provides a means to alert the loop water 58 and 64 signaling the loop water control (LWC) panel to controller that water flow is required by a WSHP so that the restart the loop pump if Off. -
Page 14: Microtech Control Units
Multiple Unit Control Panel for Mark IV Up to 3 Units (Part No. 056794201) that require VDC connections to the "G", "W1", or "Y1" terminals (i.e. Boilerless System Kit). The multiple unit control board is an accessory used when you The multiple unit control board provides the components nec- need to control up to 3-units from a single thermostat. - Page 15 MicroTech Network Control System In addition, the following unique operation and Each Console Heat Pump Unit is available with a MicroTech maintenance parameters can be displayed for each unit: Unit Controller. The unit controller is a factory mounted, • Leaving water temperature preprogrammed and pre-tested stand-alone microprocessor •...
-
Page 16: Field Installed Options
™ Field Installed Options on MicroTech 2000 Units MicroTech 2000 units can provide up to 4-outputs, that can 4) Motorized Water Valve be configured for any of the following output control signals: These outputs provide control for a motorized water valve that can be used to stop or divert flow away from the 1) Scheduled Output WSHP when compressor operation is not needed. - Page 17 Field Connections G N L1 60 Hertz Legend Ribbed Symbol Description Setpoint Lead Capacitor GN/YE Cordset (OPT) Condensate Sensor WH 115V Switch - High Pressure RD 208V Heater - Electric OR 230V BR 265V Motor - Fan Motor - Compressor Controller - MicroTech PO11 Potentiometer - Tenant Set Point...
-
Page 18: Optional Outside Air Damper
Field Installed Optional Outside Air Damper Unit Size 004 - 012 46 (1168) 45 (1143) 21.09 (536) 11.38 (289) 12.53 (318) 2.25 (57) 013 - 019 54 (1372) 53 (1346) 22.25 (565) 22.25 (565) 12.53 (318) 2.25 (57) Caution: 10.75" Filter 1. -
Page 19: Maintenance
Compressor attempts to start but doesn’t: Insufficient water flow through condenser: Check capacitor. Check to see that valves are open all the way. Check for defective compressor by making resistance Check for air in lines. check on winding. Check circulating pump. Check run capacitor. - Page 20 Warranty All McQuay equipment is sold pursuant to its standard terms and conditions of sale, including Limited Product Warranty. Consult your local McQuay Representative for warranty details. Refer to Form 933-43285Y. To find your local McQuay Representative, go to www.mcquay.com.
Need help?
Do you have a question about the WDA series and is the answer not in the manual?
Questions and answers