
Subscribe to Our Youtube Channel
Summary of Contents for Aardvark Direct Pro Q10
- Page 1 Aardvark USA 202 East Washington Suite 306 Ann Arbor, Michigan 48104 Web: http://www.aardvark-pro.com E-mail: info@aardvark-pro.com Voice: 734-665-8899 Fax: 734-665-0694...
- Page 2 MANUAL REVISION 1.5...
-
Page 4: Table Of Contents
WHAT’S INCLUDED ........... . .2 INSTALLING THE DIRECT PRO Q10 INTERFACE ......3 SOFTWARE INSTALLATION WINDOWS XP/2000 DRIVER &... -
Page 6: Introduction
WELCOME TO THE WONDERFUL WORLD OF COMPUTER RECORDING THE AARDVARK STORY Aardvark has over a decade’s worth of experience in designing digital audio master clocks that make the world’s best recording studios sound even better. We’ve incorporated that expertise into the new Direct Pro Series to give you all the quality of a professional studio, at a fraction of the cost. -
Page 7: What's Included
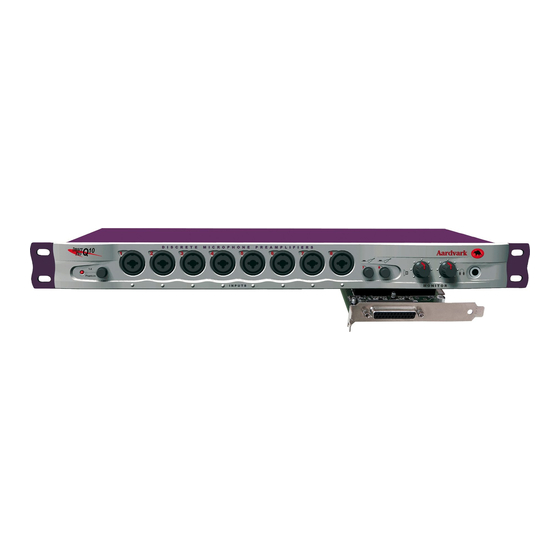
BOX CONTENTS WHAT’S INCLUDED The Direct Pro Q10 box should contain all of the following items: 1- Direct Pro Q10 PCI host card Connects directly to the motherboard of your computer 1- Direct Pro Q10 Interface Box 1- 6’ shielded 25-pin cable... -
Page 8: Installing The Direct Pro Q10 Interface
Replace the computer ’s cover. 8. Connect one end of the 6-ft shielded cable to the 25 pin connector on the Direct Pro Q10 Host Card, and the other end on the back of the Direct Pro Q10 interface box labelled To Host. -
Page 9: Software Installation Windows Xp/2000 Driver & Control Panel Installation
Cancel out of this and proceed into windows. 3. Put the Aardvark Driver CD in your CD-ROM drive. Once the CD is in the drive, one of three things may occur, depending on your Windows setup. - Page 10 CONTINUE ANYWAY again 8. Finally, the installer will ask you to reboot the computer. Click FINISH to reboot. Once you have rebooted, the Aardvark drivers and control panel will be installed on your computer. PAGE DIRECT PRO Q10...
-
Page 11: Macintosh Os X Driver & Control Panel Installation
3. Double click "AARKHOST.dmg" on the CD then double click "Q10_install.pkg" to start the installer 4. The installer will begin with the “Welcome to the Aardvark CoreAudio Installer” screen. Click CONTINUE 5. Next, a “Read Me” section will appear with information regarding the driver you’re about to install. - Page 12 11.To access the Q10 control panel, browse the main hard drive, choose the Applications folder, then the Aardvark Control Panels Sub folder. A file named Q10 is located in this folder. Double click it to access the Q10 control panel.
-
Page 13: Windows 95 Driver & Control Panel Installation
Windows will indicate detecting the hardware with these dialogs: 2. Insert the Driver CD-ROM packaged with the Direct Pro Q10 , and click Next. The Following dialog should appear: 3. Click Next. Windows may now ask for the location of the drivers. If this is the case, specify the CD-ROM drive (usually D:). - Page 14 6. Click Next when you see the welcome screen: 7 . Setup will allow you to select the Destination Directory. Otherwise, it will put the Direct Pro Q10 software and drivers in the “C:\Program Files\Aark manager” directory. If you would like the files elsewhere, simply type the new destination or select Browse to put the files in another directory.
-
Page 15: Windows 98 Driver & Control Panel Installation
Next again. 3. Insert the driver CD-ROM that came with the Direct Pro Q10. Place a check mark beside CD-ROM drive by clicking on it. All other boxes must be cleared. Click Next. - Page 16 7 . Click Next when you see the Welcome Screen. 8. Setup will allow you to select the Destination Directory. Otherwise, it will put the Direct Pro Q10 software and drivers in the C:\Program Files\Aark Manager Control Panel directory. If you would like...
-
Page 17: Front Panel
NOTE: You may use any combination of 1/4” line level or XLR mic for any of the 8 inputs. Each DIRECT PRO Q10 input is mono. If you want to connect a stereo device such as a synthesizer or CD player, you must use two inputs. -
Page 18: Additional Features Of Specific Inputs
7-8 provide direct guitar inputs, they do not have to be used this way. They can also be used for standard XLR microphone and 1/4" line operation. PAGE DIRECT PRO Q10 O W N E R S M A N U A L... -
Page 19: Phantom Power Button
7 and 8. No preamps, DI boxes or pedals needed. Just plug the guitar right into the Q10! This is done using Aardvark’s exclusive E.F.R.™ (Enhanced Frequency Response). technology. E.F.R.™ optimizes for direct guitar recording by altering the impedance and frequency response of the input. -
Page 20: Monitor Volume Knob
PC speakers with one 1/8" connection. Simply connect a stereo 1/8" to 1/4" adapter, and plug the speakers into the headphone jack! PAGE DIRECT PRO Q10 O W N E R S M A N U A L... -
Page 21: Rear Panel
The volume of these outputs can be adjusted with the Monitor Volume Knob on the front of the Q10 (discussed earlier). PAGE DIRECT PRO Q10 O W N E R S M A N U A L... -
Page 22: S/Pdif Digital Inputs/Outputs
However, S/PDIF is not listed as a choice in Routing. Instead, the S/PDIF output will carry the same signal as Analog outputs 7 & 8. PAGE DIRECT PRO Q10 O W N E R S M A N U A L... -
Page 23: Midi Inputs/Outputs
In the first units control panel, you will need to set the synchronization to INT. On all the slave units, you need to set synchronizzation to WC (Word Clock). PAGE DIRECT PRO Q10 O W N E R S M A N U A L... -
Page 24: Host Attachment And Pci Host Card
Q10 unit or you may damage your Q10 interface, host card or computer. NOTE: The extra shielding on the PCI card is to protect the card and keep out harmful computer interference. PAGE DIRECT PRO Q10 O W N E R S M A N U A L... -
Page 25: Inserts
REMEMBER: If an insert is connected to an effect that is not turned on, no signal will pass through that input. PAGE DIRECT PRO Q10 O W N E R S M A N U A L... -
Page 26: Connection Diagram
CONNECTION DIAGRAM PAGE DIRECT PRO Q10 O W N E R S M A N U A L... - Page 27 CONNECTION NOTES PAGE DIRECT PRO Q10 O W N E R S M A N U A L...
-
Page 28: Control Panel
If no skins are listed, choose "Browse For Skin". The default location for skins is MAIN HARD DRIVE> APPLICATIONS>AARDVARK CONTROL PANELS>SKINS PAGE DIRECT PRO Q10 O W N E R S M A N U A L... -
Page 29: Input Controls
NOTE: All the gain applied with MC2, MC1, L, and the trim knob is done in the analog stage before the A/D converter. This lets you monitor your audio levels and ultimately get better sound. PAGE DIRECT PRO Q10 O W N E R S M A N U A L... - Page 30 You’ll notice that if Link is pressed on channel 1, and you adjust the channel 1 volume, channel 2 will change as well. PAGE DIRECT PRO Q10 O W N E R S M A N U A L...
- Page 31 S/PDIF signal. You may notice that the “Link” light for S/PDIF is always lit. This is because S/PDIF is a stereo format. PAGE DIRECT PRO Q10 O W N E R S M A N U A L...
-
Page 32: Playback Controls
Mute silences a channel in the monitor mix, while solo will solo an output channel, and will mute all other channels, both input and output. PAGE DIRECT PRO Q10 O W N E R S M A N U A L... - Page 33 Brightness This knob allows you to control the brightness of the appealing Aardvark logo on the front of the Q10. Turn it up high to show off your Q10, or dim it down, to make the Q10 less noticeable in darker studios.
-
Page 34: Routing
Q10 allowing you to send the signals from these outputs to any outboard analog gear for processing or mixing. PAGE DIRECT PRO Q10 O W N E R S M A N U A L... -
Page 35: Presets
• To recall a preset, double click a name from the box on the left, and it should appear on the upper right, click recall, then close the window. PAGE DIRECT PRO Q10 O W N E R S M A N U A L... -
Page 36: Advanced
Q10 • If Monitor is selected, software inputs 9,10 will record the full Q10 monitor mix, which consists of all inputs and playback. PAGE DIRECT PRO Q10 O W N E R S M A N U A L... - Page 37 1/4" channel outputs on the back of the Q10. This is not required for the inputs, because the adjustments can be made by using the monitor volume knob. PAGE DIRECT PRO Q10 O W N E R S M A N U A L...
- Page 38 ASIO configuration: Provides the option for selecting a master Aardvark Aark card. This is for when multiple Aardvark cards are on the same computer. It is also possible in this menu to limit the number of ASIO inputs and outputs a program can see.
-
Page 39: Recording Software Quickstart
RECORD DEVICE drop down menu is where you choose what input gets recorded to the track. For additional instructions in Magix, hit the F1 key to access instructions, help menus and tutorials. PAGE DIRECT PRO Q10 O W N E R S M A N U A L... - Page 40 SYSTEM | CONFIGURE HARDWARE DRIVER. In the first dropdown menu, choose ASIO. In the second dropdown menu, choose Aardvark as your ASIO driver. Please note: If Aardvark is not listed as an available driver, you probably need to copy the Aardvark ASIO driver to Digital Performer's ASIO DRIVERS folder.
- Page 41 Go to DEVICES | VST INPUTS, and make sure all Aardvark inputs are enabled. Mac Users Please note: If Aardvark is not listed as an available driver, you probably need to copy the Aardvark ASIO driver to Cubase/Nuendo's ASIO DRIVERS folder.
- Page 42 CAKEWALK PRO AUDIO (PC only) Go to OPTIONS | AUDIO | ADVANCED (tab) Playback and record timing master should be 9,10 Direct Pro Q10 There should be no Checkmark in MONO Set Buffers in playback Queue to 4 and the Buffer Size slider to the middle...
-
Page 43: Cakewalk Sonar
· All other settings can be set to what you prefer. On the DRIVERS tab: · This allows you to select which Aardvark inputs/outputs are seen by SONAR. Unless you plan on using additional audio programs while Sonar is running, simply highlight every Aardvark channel listed. - Page 44 Go to OPTIONS | AUDIO | again On the GENERAL tab: · Playback and record timing master should be 9,10 Direct Pro Q10, · Number of Aux Buses, Number of Virtual mains, Sample Rate and bit depth can be set to whatever you prefer ·...
- Page 45 On the GENERAL tab: · Playback and Record Timing Master should be (depending on what product you own): 9,10 Direct Pro Q10, 9,10 Aark 24, 5,6 Direct Pro LX6 or 5,6 Direct Pro 24/96 · Aux Bus, Virtual Mains, Sampling rate, Audio Driver and File bit Depth can be whatever you prefer.
- Page 46 · No checkmark in "Share Drivers with other programs" · "Play effect tails after stopping" can be whatever you prefer. On the INPUT MONITORING tab: · No Aardvark device should be highlighted, since we already have zero latency hardware monitoring of inputs. On the DRIVERS tab: ·...
- Page 47 PROPELLERHEAD REASON (Mac & PC) Go to EDIT | PREFERENCES, and on the PAGE menu, select AUDIO. Go to the AUDIO CARD Menu, PC users should select the Aardvark ASIO driver, Mac users select the Aardvark Q10 driver. MAC USERS PLEASE NOTE: If Aardvark is not listed as an available driver, you probably need to copy the Aardvark ASIO driver to Cubase/Nuendo’s ASIO DRIVERS folder.
- Page 48 PROPELLERHEAD REASON™ QUICKSTART NEMESYS GIGASTUDIO™: Go to the SETTINGS menu On the Hardware Routing Tab the hardware choice is Aardvark Pro Q10 Multichannel Sample rate 44.1 (or whatever sample rate you prefer), and bit depth 32 You can enable as many outputs as you wish. Keep in mind, though, that if you plan on using other software at the same time as Gigastudio, they will not be able to use these outputs.
-
Page 49: Frequently Asked Questions
The total number of tracks available depends on a number of factors. Bit depth, sample rate, (higher ones mean less tracks), installed RAM, hard drive speed and processor speed, are among the most significant. PAGE DIRECT PRO Q10 O W N E R S M A N U A L... - Page 50 ANSWER: Your microphones will not be damaged. Phantom power is designed to go to only microphones that need it. QUESTION: Is the Direct Pro Q10 full duplex (can it record audio while playing previously recorded tracks back)? ANSWER: Yes, the Direct Pro Q10 is a full duplex device.
- Page 51 SUPPORT FREQUENTLY ASKED QUESTIONS QUESTION: What is the Latency of the Direct Pro Q10? ANSWER: This is not as simple a question as it seems. There are different types of latency that can occur on a system, and latency itself can vary a great deal depending on what audio software is used, and how powerful the computer is.
-
Page 52: Troubleshooting
SOLUTION: Most often, this is due to miswiring of the channel inserts in back. Remove cables from all inserts, and the inputs will probably work. PAGE DIRECT PRO Q10 O W N E R S M A N U A L... - Page 53 CD audio for this CD-ROM device” . If this box is grayed out, then your CD- ROM does not support this feature, and is unable to play CDs through the Q10. PAGE DIRECT PRO Q10 O W N E R S M A N U A L...
- Page 54 PROBLEM: I’m a Macintosh user, and the Q10 does not appear in Sound Manager SOLUTION: This is normal, as the Q10 Macintosh driver supports ASIO only. PAGE DIRECT PRO Q10 O W N E R S M A N U A L...
- Page 55 24 bit format in order for it to work. Depending on the program, it may also be referred to as "24 bit unpacked", "24 bit left-justified" or "24 bit alternate". PAGE DIRECT PRO Q10 O W N E R S M A N U A L...
- Page 56 Q10. It’s best to simply disable system sounds. You can do this by going to START | SETTINGS | CONTROL PANEL, select SOUNDS PAGE DIRECT PRO Q10 O W N E R S M A N U A L...
-
Page 57: Software Specific Troubleshooting
• To record Input 6 to a track, choose “Right 5,6 Direct Pro Q10” as the SOURCE • To record Input 7 to a track, choose “Left 7 ,8 Direct Pro Q10” as the SOURCE • To record Input 8 to a track, choose “Right 7 ,8 Direct Pro Q10” as the SOURCE •... - Page 58 SOLUTION: First, make sure that all Q10 outputs are enabled in OPTIONS | AUDIO | DRIVERS (tab). After verifying this, go to the GENERAL tab, and set the number of virtual mains to 5. PAGE DIRECT PRO Q10 O W N E R S M A N U A L...
- Page 59 SOURCE for your track, you’ll be able to pan it anywhere in the stereo image. • To record Input 1 to a track, choose “Left ASIO Aardvark Cards Driver 1 1 Direct Pro Q10” as the track input •...
- Page 60 You may need to boost the ASIO buffer size. To do this, go to the Q10 control panel, click ADVANCED, go to the ASIO and DIRECTX tab, and use the slider to boost the ASIO buffer PAGE DIRECT PRO Q10 O W N E R S M A N U A L...
-
Page 61: Configuring Windows For Audio
MSCONFIG utility, but it is available as a free download. Online, use a search engine to look up “msconfig2k” to find several sites hosting this program. PAGE DIRECT PRO Q10 O W N E R S M A N U A L... - Page 62 Audio software. Go to the windows control panel, select SYSTEM, and select the ADVANCED tab. Under PERFORMANCE, click SETTINGS. Select “Adjust for best performance” . PAGE DIRECT PRO Q10 O W N E R S M A N U A L...
-
Page 63: Using Multiple Q10S
ADDENDUM USING MULTIPLE Q10s Up to four Aardvark cards can be used on the same computer. Each unit requires its own PCI card and Breakout box. After installing additional Q10s, your recording software will automatically recognize additional inputs and outputs available for use. When multiple Q10s are installed on the PC, the CARD SELECT menu in the Q10 control panel allows you to switch between control panels for Q10 #1, Q10 #2, etc. - Page 64 BOX-Connect the Word clock output of Box #3 to The Word clock input of Box #4 In the Panel for Q10 #4, set “source select to WC PAGE DIRECT PRO Q10 O W N E R S M A N U A L...
Need help?
Do you have a question about the Direct Pro Q10 and is the answer not in the manual?
Questions and answers