Table of Contents
Advertisement
Quick Links
Advertisement
Table of Contents

Subscribe to Our Youtube Channel
Related Manuals for IDTECH minimag RS-232


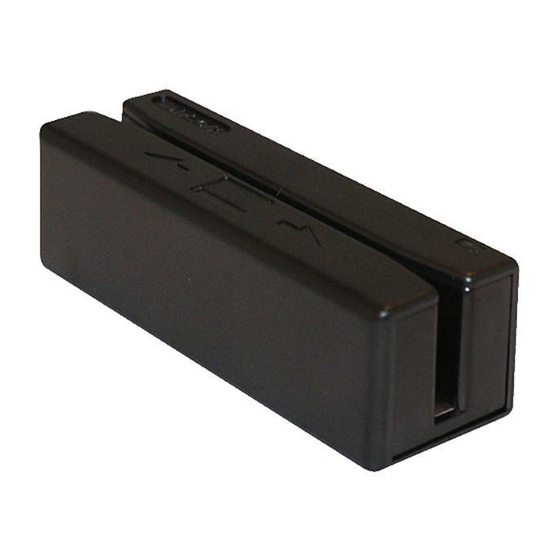
Summary of Contents for IDTECH minimag RS-232
- Page 1 MINIMAG RS-232 User’s Manual...
-
Page 2: Table Of Contents
Table of Contents Agency Approved Section 1. Introduction Specifications for subpart B of part 15 of FCC rule for a Class A Description computing device. Section 2. Installation Host Connections Section 3. Configuration Limited Warranty Setup Commands Structure Communication Protocol Communication Timing ID TECH warrants this product to be in good working order for a Default Settings... -
Page 3: Section 1. Introduction
Section 1 Section 2 INTRODUCTION INSTALLATION Description Host Connections The MiniMag™ compact magnetic stripe reader can read 1, 2, or 3 The MiniMag is connected to the host computer’s RS-232 communi- tracks of magnetic stripe information. In addition, it has full data cations port. -
Page 4: Section 3. Configuration
Section 3 <FuncID> is a one byte Function ID identifies the particular function or settings affected. CONFIGURATION <Len> is a one byte length count for the following data The MiniMag reader must be appropriately configured to your block<FuncData> application. Configuration settings enable the reader to work with the host system. -
Page 5: Communication Timing
Communication Timing Default Settings The MiniMag takes time to process a command. During that pro- The MiniMag reader is shipped from the factory with the default cessing time, it will not respond to a new command. settings already programmed. In the following sections, the default settings are shown in boldface. - Page 6 MSR Reading Settings Review Settings Turn the MiniMag on or off. If the reader is disabled, no data will be <STX><R><1Fh><ETX><CheckSum> sent out to the host. This command does not have any <FuncData>. It activates the <STX><S><1Ah><01h><MSR Reading review settings command. MiniMag sends back an <ACK> and Settings><ETX><CheckSum>...
-
Page 7: Message Formatting Selections
Message Formatting Selections Magnetic Track Selections Track Selection Terminator Setting There are up to three tracks of encoded data on a magnetic stripe. Terminator characters are used to end a string of data in some This option selects the tracks that will be read and decoded. applications. -
Page 8: Communication Parameter Selections
Start/End Sentinel And Track 2 Account Number Only Communication Parameter Selections The MiniMag can be set to either send, or not send, the Start/End Baud Rate Setting sentinel, and to send either the Track 2 account number only, or all the encoded data on Track 2. -
Page 9: Output Format Selection
Handshaking Setting Output Format Selection <STX><S><44h><01h>< Handshaking The MiniMag reader supports three different output formats. The Setting><ETX><CheckSum> first is ID TECH Format, the second is UIC RS-232 Format, and the third is Mag-Tek Format. <Handshaking Setting>: Data Formats “0” X-On/X-Off “1”... -
Page 10: Section 4. Data Editing
Section 4 ES = End Sentinel All Tracks = ? (ISO, AAMVA, CA-DMV) DATA EDITING LRC = Longitudinal Redundancy Character DLE = Data Link Escape The MiniMag has a data editing feature incorporated into its firm- Output Format Settings ware. This feature allows the data read from the magnetic stripe to be sent to the host in the exact format expected by the host soft- <STX><15h><01h><Output Format Setting><ETX><CheckSum>... -
Page 11: Fields
Fields Formulas By separating the input data record into smaller blocks (called The set of instructions programmed into the MiniMag to edit data is “fields”), each block can be edited individually. Additional fields can referred to as the data editing “formula.” More than one formula (to also be added to the record, allowing specific functions, such as a maximum of four) can be resident in the reader at one time. -
Page 12: Data Editing Setup Commands
Data Editing Setup Commands Send Sequence Sends out the field in a user-defined order. The following commands are used to set the operating parameters of Data Edit Setting the Data Editing feature. These commands are designed for maxi- mum flexibility, but some of the details can be complicated. We <STX><S><1Bh><01h><... - Page 13 dmvsmd = {field_len}{Hex E1}{field}[{field}...,]{Hex FF} default search_before = is {Hex 00}{Hex FF} {hex F2}{track_no|field_no}{times}{string_len}{string} aamvasmd = {field_len}{Hex E2}{field}[{field}...,]{Hex FF} search_between = default is {Hex 00}{Hex FF} {hex F3}{track_no|field_no}{times1}{string1_len}{string1} {times2}{string2_len}{string2} flexsmd = {field_len}{Hex E3}{field}[{field}...,]{Hex FF} default is {Hex 00}{Hex FF} search_after = {hex F4}{track_no|field_no}{times1}{offset}{length2} field_len is the number of bytes from {Hex Ex} to the {field} {length1}{string1}...
-
Page 14: Section 5. Operation
Section 5 With Search Between, all the data in the new generated field comes between the two specified strings for the specified track. OPERATION For example, a new field can be defined in which the data comes between the first searched separator ^ and the first searched $. The MiniMag reader is easy to operate. -
Page 15: Section 6. Troubleshooting
Section 6 Appendix A. Default Settings TROUBLESHOOTING The MiniMag reader is shipped from the factory with the following The MiniMag reader is easy to install and use. Most problems default settings already programmed: encountered can be attributed to: Magnetic Track Basic Data Format Track 1: <SS1><T Data><ES><CR>* ·... - Page 16 Appendix B. Function Code Table Default Setting Table Character Keystroke Character Keystroke Setting Default Beep Volume High \end Right \right MSR Reading Enable Decoding Method Both Swiping Direction Left \left Terminator Settings Preamble Settings None Down \down Postamble Settings None PgUp \pgup Track_Selected Settings...
- Page 17 Appendix C. Non-printable ASCII Characters Appendix D. Magnetic Stripe Standard Data Formats Character Keystroke International Standards Organization (ISO) Credit Card NULL \nul Format \soh Track 1 \stx \etx Field ID Contents Length \eot Character \enq \ack Start Sentinel \bel Format Code “B” Account Number 13 or 16 Separator “^”...
-
Page 18: California Driver's License
California Driver’s License Format Track 3 Start Sentinel Track 1 Class Endorsements Start Sentinel State Code Format Code Type: Zip Code C = Commercial S = Salesperson Hair D = Driver Eyes I = Identification Height R = Senior Citizen Weight Name Line 1 Restrictions... -
Page 19: Aamva Driver's License
AAMVA Driver’s License Format Track 3 Track 1 Start Sentinel Template Version # Start Sentinel Security Version # State or Province Postal Code City Class Name Restrictions Address Endorsements End Sentinel Linear Redundancy Check Height (LRC) Character Weight Hair Color Eye Color Track 2 ID #... -
Page 20: Commands
Appendix E. Minimag Configuration Utility Commands FILE menu commands Introduction The MiniMag Configuration Utility is a Windows-based program that NEW - Creates a new configuration file. makes it easy to configure the reader. Operation OPEN - Opens an existing configuration file. To install the MiniMag Configuration Utility, please follow these RECEIVE - Sends the current settings of a MiniMag reader to steps:... - Page 21 MOVE command (in the Control menu) CONTEXT HELP - Use the “Context Help” command to obtain help on any aspect of the MiniMag Configuration Utility. The Use this command to display a four-headed arrow you can use to move the active window or dialog box with the arrow keys. HELP topic will be shown for the item you clicked.
- Page 22 Appendix F. Pin Out Information SEND button (MiniMag Configuration Utility properties) Use this button to send all current selected settings to the MiniMag reader. DB9 Female Connector DEFAULT ALL button (MiniMag Configuration Utility properties) Use this button to set all configuration settings at their default values. FILE SAVE AS dialog box The following three options allow you to specify the name and location of the file you are about to save:...
- Page 23 ID TECH 10721 Walker Street Cypress, California 90630-4720 (714) 761-6368 www.id-tech.net 80030501-004 R8/00 #420...
Need help?
Do you have a question about the minimag RS-232 and is the answer not in the manual?
Questions and answers