Table of Contents
Advertisement
Quick Links
User Manual
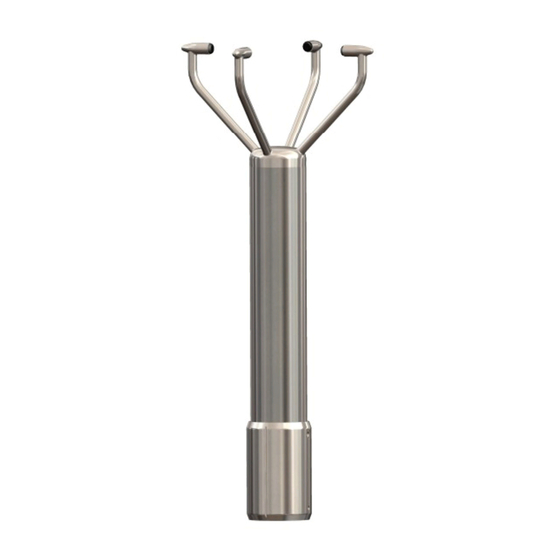
Ultrasonic Anemometer
(
Parts 1390-65-X-XXX)
Doc No: 1390-PS-0039
Issue 4 (Applies to firmware 2387 6.04 onwards).
Gill Instruments Limited
Saltmarsh Park, 67 Gosport Street, Lymington,
Hampshire, SO41 9EG, UK
Tel: +44 1590 613500, Fax: +44 1590 613555
Email:
anem@gillinstruments.com
Website:
www.gillinstruments.com
Advertisement
Table of Contents

Subscribe to Our Youtube Channel
Related Manuals for Gill Instruments Windobserver 65


Summary of Contents for Gill Instruments Windobserver 65
- Page 1 User Manual Ultrasonic Anemometer Parts 1390-65-X-XXX) Doc No: 1390-PS-0039 Issue 4 (Applies to firmware 2387 6.04 onwards). Gill Instruments Limited Saltmarsh Park, 67 Gosport Street, Lymington, Hampshire, SO41 9EG, UK Tel: +44 1590 613500, Fax: +44 1590 613555 Email: anem@gillinstruments.com Website: www.gillinstruments.com...
-
Page 2: Table Of Contents
Analogue Connections ..................20 Analogue Voltage Output Connections (5v or 2.5v) ........... 20 Analogue Connections for 4-20mA output ............20 6.8. Using the WindObserver 65 with the Gill WindDisplay ........21 6.9. Mechanical installation ..................23 Location ......................23 Orientation ...................... - Page 3 Gill Instruments Ltd _____________________________________________________________________________________________________________ 7.6.1 G Command Averaging................31 7.6.2 Modes 14 and 15 Road Weather Averaging (RWA)........32 7.7. Options ......................35 Speed of Sound (SOS) and Temperature ............35 Heating (If fitted) ....................35 45 Offset ......................35 Vertical Output Padding ..................
- Page 4 Gill Instruments Ltd _____________________________________________________________________________________________________________ Yx – Analogue Output, Channel 3 (if fitted)............51 Zx – Analogue Output Scaling (if analogue outputs fitted)........51 VIEW AND LOG DATA WITH WINDVIEW SOFTWARE ...... 52 9.1. Introduction ..................... 52 9.2. Connect to an Instrument using Gill WindView Software ......... 52 9.3.
-
Page 5: Foreword
Section 8 Message Formats & Options. 3. FAST TRACK SET-UP If you are in a hurry to try out the WindObserver 65, are familiar with Gill equipment, and coupling to a PC using RS422, go to the following sections: Section 6 Installation Section 7 Message Formats &... -
Page 6: Specification
Gill Instruments Ltd _____________________________________________________________________________________________________________ 4. SPECIFICATION Measurement Output 1, 2, 4, 5, 8, 10Hz Parameters UV, Polar, NMEA, Tunnel Units m/s, Knots, MPH, KPH ft/min Averaging Flexible 1-3600 seconds or Adjustable Averaging for Road Weather applications Wind Speed Range 0 - 65m/s (0-145mph) Accuracy ±2%@12m/s... -
Page 7: Pre-Installation
1390-30-156 5.2. Packaging Whilst the WindObserver 65 is being moved to its installation site, the unit should be kept in its packaging. Retain the packaging for use if the unit has to be moved or returned to Gill Instruments. ________________________________________________________________________________________________... -
Page 8: Installation Requirements
Mounting Bracket The WindObserver 65 can be supplied with a short or long base mount to use with a mounting bracket (not provided). The WindObserver 65 can be attached to the bracket via the four tapped holes in the base mount fitted to the unit. The gasket supplied can be fitted between the sensor and its mounting bracket when it is important to minimise the effects of corrosion should two dissimilar metals be used. -
Page 9: Connector And Cable Assembly
_____________________________________________________________________________________________________________ 5.4. Connector and Cable Assembly. The WindObserver 65 variant with a connector base is supplied with a mating 19 way connector. Open the pack of connector parts supplied (Gill Part 1390-10-163). A set of assembly instructions are supplied with the connector together with:-. - Page 10 Gill Instruments Ltd _____________________________________________________________________________________________________________ Assemble Connector to the Cable. Referring to Page 9 push connector contacts through the red connector head seal into the appropriate location, when in place there should be a click as the contact locks into position.
-
Page 11: Installation
Warranty is void if the unit case is removed. 6.1. Installation Guidelines The WindObserver 65 has been designed to meet and exceed the stringent standards listed in its specification. Operating in diverse environments all over the world, WindObserver 65 requires no calibration or adjustment whatsoever. -
Page 12: Bench System Test
Cabling and junction box If the WindObserver 65 unit is fitted with a flying 9 pair cable attached this must be terminated in a suitable terminal box to IP66 or better, fitted with glands to prevent moisture ingress. -
Page 13: Power Supplies
30mA Average. 50mA Max @12v dc (non-analogue unit) Current 50mA Average, 65mA Max @ 12v dc (analogue unit 0-5v setting). The WindObserver 65 has reverse polarity protection. Wind Observer II Units with Heating Heater Supply: - Voltage 22V to 30V (max) AC RMS or DC. - Page 14 Gill Instruments Ltd _____________________________________________________________________________________________________________ View of the WindObserver 65 base connector variant Supplied Plug Anemometer Socket Contact A Table 2 - 19 way connector and cable connections 19 Way Connector Cable Gland Option Signal Designation Terminal Letter Conductor Colour Pair 1...
-
Page 15: Default Settings
Gill Instruments Ltd _____________________________________________________________________________________________________________ Default Settings The factory default settings are: Non - heated units A0 B3 C1 E1 F1 G0000 J1 K1 L1 M2 NA O1 P1 T1 U1 V1 X1 Y1 Z1 Plus RWASHORT 10 and RWALONG 60. -
Page 16: Networking Units
Gill Instruments Ltd _____________________________________________________________________________________________________________ Networking units Before coupling units into a network: Each device must be configured with a unique Unit Identifier (letter A to Z) however in multi drop systems it could be advised to avoid using letters A-F, KMN and P as they could appear in the data string. -
Page 17: Indoor Power And Communications Interface (Part 1189-Pk-021)
Gill Instruments Ltd _____________________________________________________________________________________________________________ 6.6. Indoor Power and Communications Interface (Part 1189-PK-021) The desktop PCI is intended for use in a protected environment and provides interfacing and power to a single anemometer (Note a separate supply is required for heating). -
Page 18: Pci Connector Pin And Cable Assignments
Gill Instruments Ltd _____________________________________________________________________________________________________________ PCI Connector Pin and Cable assignments Anemometer connector – 15 way Designation (Example Plug MH Connectors MHDM15-DM15P-K) Chassis (e.g. RS Components 765-9494) RS422_RXB (+) RS422_TXB (+) Digital 0V, Signal ground Supply V+ Analogue output V1 Not used... -
Page 19: Rs 232 Output - 9 Way Skt
Gill Instruments Ltd _____________________________________________________________________________________________________________ RS 232 Output – 9 way Skt Designation (Example Plug MH Connectors MHDM9-DM9P-K) (e.g. RS Components 765-9485) RX data TX data Signal Ground RS422 Network In – 9 way Skt Designation (Example Plug MH Connectors MHDM9-DM9P-K) Not connected (e.g. -
Page 20: Analogue Connections
Gill Instruments Ltd _____________________________________________________________________________________________________________ 6.7. Analogue Connections When using the analogue outputs it is advisable to use a low pass filter to remove any high frequency noise present. The analogue signals can be susceptible to external interference if unprotected. The anemometer cable has individual screens covering each channel’s signal wires. -
Page 21: Using The Windobserver 65 With The Gill Winddisplay
When coupled to a WindDisplay, the WindObserver 65 can be used as supplied, however if a fault occurs the WindDisplay may lock into the last valid reading. Re-configuring the WindObserver 65 to Fixed Field output (O2) will ensure that any fault is flagged on the WindDisplay. - Page 22 Gill Instruments Ltd _____________________________________________________________________________________________________________ Connecting to a Gill WindDisplay Refer to the WindDisplay User Manual for the method of operation. WindObserver 65 WindDisplay 19 Way Cable Gland Connector Signal Names Pin No. Colour Terminal Pair Signal Names TXB (+) Green...
-
Page 23: Mechanical Installation
Location It is important to ensure that the WindObserver 65 is mounted in a position clear of any structure, which may obstruct the airflow or induce turbulence. Do NOT mount the WindObserver 65 in close proximity of high-powered radar or radio transmitters. - Page 24 The example shows a long mount fitted to a cable gland unit, a similar Earthing/ mounting arrangement can be used with short mounts and connector based units. A mounting kit (1390-10-164) is supplied with the WindObserver 65 to allow assembly of the mount to the base of the WindObserver.
-
Page 25: Pipe Mounting (Use With Pipe Mount)
_____________________________________________________________________________________________________________ Pipe Mounting (use with Pipe Mount) The Pipe Mount base for the WindObserver 65 has the following dimensions. Included in the supplied mounting kit is an O Ring Seal which must be fitted inside of the Pipe Mount Base. -
Page 26: Alignment
Gill Instruments Ltd _____________________________________________________________________________________________________________ Alignment The anemometer should be set to point North (or to another known reference direction), using the North Spar, which can be identified from the red dot alignment indicator on the base of the instrument. See Figure 2a. -
Page 27: Figure 2B Windobserver 65 Outline Dimensions
Gill Instruments Ltd _____________________________________________________________________________________________________________ Figure 2b WindObserver 65 outline dimensions Short Base Mount Unit Dimensions Long Base Mount Unit Dimensions ________________________________________________________________________________________________ WindObserver 65 Page 27 Issue 4 Doc. No. 1390-PS-0039 June 2016... - Page 28 Gill Instruments Ltd _____________________________________________________________________________________________________________ Pipe Mount Unit Dimensions ________________________________________________________________________________________________ WindObserver 65 Page 28 Issue 4 Doc. No. 1390-PS-0039 June 2016...
-
Page 29: Message Formats & Options
Gill Instruments Ltd _____________________________________________________________________________________________________________ 7. MESSAGE FORMATS & OPTIONS On first applying power to the WindObserver 65, it will be in ‘Measurement Mode’, and it will output wind measurement information within 3 seconds in one of the formats as described below. -
Page 30: Networking
If used in a multi drop system then it is recommended that Unit Identifiers A, B, C, D, E, F, K, M, N and P are not used. Configuring WindObserver 65 for Half Duplex Operation. 1) Set up Two Terminals: One for RS485 Half Duplex and the other for RS422 Full Duplex. -
Page 31: Units
Gill Instruments Ltd _____________________________________________________________________________________________________________ 7.4. Units The wind speed can be set to any of the following units: Unit Abbreviation Metres per sec Knots knots Miles per hour Kilometres per hour Feet per minute 7.5. Output rate The output frequency can be set between 1 and 10 per second. The wind speed is sampled every 25ms, each axis being sampled sequentially. -
Page 32: Modes 14 And 15 Road Weather Averaging (Rwa)
Gill Instruments Ltd _____________________________________________________________________________________________________________ 7.6.2 Modes 14 and 15 Road Weather Averaging (RWA). The averaging is implemented with reference to the following standard: • Guide to Meteorological Instruments and Methods of Observation – World Meterological Organization WMO-No8 seventh edition 2008 ISBN 978-92-63-... - Page 33 Gill Instruments Ltd _____________________________________________________________________________________________________________ Principle set up commands associated with this averaging mode are:- Px:- Measurement Rate, (P1) this command sets the underlying measurement rate 1Hz. RWASHORT xx: - Short Term Number, where xx is a number from 10 to 60.
- Page 34 Gill Instruments Ltd _____________________________________________________________________________________________________________ Mode 14 – Averaging Polled Mode See Mode 15 for data output format and command explanations. For ease of use before changing to this Mode set all other WindObserver parameters first including:- Px:- Measurement Rate, (P1) this command sets the underlying measurement rate of 1Hz.
-
Page 35: Options
Gill Instruments Ltd _____________________________________________________________________________________________________________ Notes Non Heat Enabled Units. If the unit is powered up and polled before the unit has reached its minimum averaging interval the status code will read 51 (Measurement Average Building, non heat enabled units only). -
Page 36: Ascii Message Format (Uv, Polar And Tunnel)
Gill Instruments Ltd _____________________________________________________________________________________________________________ 7.8. ASCII message format (UV, Polar and Tunnel) ASCII UV format U axis wind speed V axis wind speed Units <STX>A,+000.04,-000.02,M,+345.01,+022.36,00,<ETX>25 Start of Unit Speed of Temperature Status End of Check string identification sound string Where U axis wind speed In increments of 0.01 units (UUU.UU) -
Page 37: Ascii Polar Format
Gill Instruments Ltd _____________________________________________________________________________________________________________ ASCII Polar format Wind direction Wind speed Units <STX>A,121,000.08,M,+344.66,+021.76,00,<ETX>06 Start of Unit Speed of Temperature Status End of Check string identification sound string Where Wind direction In degrees relative to N (DDD) Wind speed In increments of 0.01 units (MMM.MM) All other parameters See Section 7.8 ASCII UV format... -
Page 38: Ascii Format - Tunnel Mode
Gill Instruments Ltd _____________________________________________________________________________________________________________ ASCII format – Tunnel Mode In this mode, the output is given as signed (i.e. positive or negative) speeds along the ‘U’ (= South – North) axis and direction as a 1 or 0. STX> A, 001.59, 1, 00, M, <ETX> 2D... -
Page 39: Binary Message Format (Uv, Polar And Tunnel)
Gill Instruments Ltd _____________________________________________________________________________________________________________ 7.9. Binary message format (UV, Polar and Tunnel) Binary UV format V axis wind speed U axis wind speed Units 0x81 0x81 000.04 -000.02 +345.01 +022.36 00 1 Start of string Speed of sound Temperature Status... -
Page 40: Binary Tunnel Format
Gill Instruments Ltd _____________________________________________________________________________________________________________ Binary Tunnel format Units U axis wind speed Direction 0x81 0x81 +000.04 1 00 1 Start of string Status U axis Wind speed In increments of 0.01 units (MMM.MM) Direction (along U axis) Value Polarity Other parameters See Section 7.9 Binary UV format... -
Page 41: Nmea Format
Exclusive OR of all characters between ‘$’ and ‘*’ reported as ASCII hex. A typical WindObserver 65 configuration suitable for NMEA would be: B2, E1, F1, G0, K1, L1, M5, O1, P1, U1. Consult specification NMEA 0183 version 3 (available on the web) www.nmea.org... -
Page 42: Averaging Format (Modes 14 And 15)
Gill Instruments Ltd _____________________________________________________________________________________________________________ 7.11. Averaging Format (Modes 14 and 15) See also Para 7.6.2. Max Gust Max Gust Start of Unit Direction Speed String Identification <STX>A,M15,270,002.02,M,253,002.83,00,<ETX>4D End of Check Wind Wind Status Mode Units String Direction Speed ASCII value 2... -
Page 43: Analogue Outputs And Options
Gill Instruments Ltd _____________________________________________________________________________________________________________ 7.12. Analogue outputs and options Analogue outputs are available as an option on the WindObserver 65. See Section 6.5 for connection details, and Section 8.5 for configuring the analogue outputs. Output modes There are three analogue output channels which can be configured as either voltage (0 to 5v, or 2.5v), or current outputs (4 to 20mA). -
Page 44: Polar Mode Direction Wraparound
Gill Instruments Ltd _____________________________________________________________________________________________________________ Polar mode direction wraparound The Wind Direction in Polar mode can be configured for either Standard (0 - 359) or Wraparound (0 - 539) options. If the Standard mode is used with a chart recorder, large swings of the recorder pen will be experienced each time the wind direction passes between 0 and 359. -
Page 45: Configuring
Gill Instruments Ltd _____________________________________________________________________________________________________________ 8. CONFIGURING The WindObserver 65 can be configured using Terminal emulator software such as HyperTerminal. Alternatively it is possible to use Gill Wind Software as a Terminal program only (Wizard and Sync Comms not applicable). Wind will run on PC’s up to and including Windows 10 and can be downloaded from:-http://www.gillinstruments.com/main/software.html. -
Page 46: Checking The Configuration
Enter the Configuration code of the new setting required, followed by ENTER If successful, the new setting will be echoed back as a message by the WindObserver 65. For example, to change the message format to NMEA, Type M5 and press ENTER The WindObserver 65 will reply with . -
Page 47: Configuration Settings
Gill Instruments Ltd _____________________________________________________________________________________________________________ 8.6. Configuration Settings Ax - Speed of Sound (SOS) and Temperature Setting Configuration code Disable both Report SOS Report Sonic temperature Report SOS and Sonic temperature Note that neither of these parameters is available in Tunnel or NMEA formats. -
Page 48: Dx- Diagnostic And Configuration Command (See Also Section 10.6)
Gill Instruments Ltd _____________________________________________________________________________________________________________ Dx- Diagnostic and Configuration Command (see also Section 10.6) Each of these commands causes a response from the WindObserver 65. Command Item Typical response code *12400001 (where * = E (Unheated unit), F = (Heated Type and serial No. -
Page 49: Jx - Analogue Power-Up Tests
Gill Instruments Ltd _____________________________________________________________________________________________________________ Jx - Analogue Power-up Tests Setting Configuration code Disable analogue power-up tests on switch on Enable single analogue power-up test on Switch on Enable continual cycling of analogue power-up tests Disable continual cycling of analogue power-up tests Analogue Power up tests cycle: - Analogue Output Voltage connections between 0v, 1.25v, 2.5v, 3.75v and 5v. -
Page 50: Ox - Ascii Output Format (Output String Padding)
Gill Instruments Ltd _____________________________________________________________________________________________________________ Ox – ASCII Output Format (Output String Padding) Setting Configuration code Comma Separated Variable (CSV) Fixed Field Example data strings:- POLAR NMEA CSV data changing to error status code CSV data changing to error status code condition. -
Page 51: Vx- Vertical Output Padding
Gill Instruments Ltd _____________________________________________________________________________________________________________ Vx- Vertical Output Padding Setting Configuration code Disable vertical output padding Enable vertical output padding Xx - 45 Alignment Offset/Inverted Operation Setting Configuration Notes code Align U axis with X1. Aligns U axis with North/South axis. -
Page 52: View And Log Data With Windview Software
Gill Instruments Ltd _____________________________________________________________________________________________________________ 9. VIEW AND LOG DATA WITH WINDVIEW SOFTWARE 9.1. Introduction Gill WindView Software is supplied on the CD with the WindObserver. Alternatively it can be downloaded from http://gillinstruments.com/main/software.html Gill Wind View will run on PC’s with Windows XP onwards operating systems. -
Page 53: Doc. No. 1390-Ps-0039 June
Gill Instruments Ltd _____________________________________________________________________________________________________________ The default connection name is Anemometer 1, it can be re-named if required. Select the Output Format to match the Sensor format i.e. the WindObserver default format is Gill Polar (2 axis). If the WindObserver were set for UV or NMEA output then choose the appropriate format setting from the drop down menu. -
Page 54: Windsock Function
Gill Instruments Ltd _____________________________________________________________________________________________________________ The Data button screen will show the WindObserver data scrolling on screen updated at the WindObserver Output rate. 9.3. WindSock Function Click on the WindSock button to give a Direction display and digital readout of Direction... -
Page 55: Logging Data
Gill Instruments Ltd _____________________________________________________________________________________________________________ 9.4. Logging Data. To Log WindObserver data, from the WindView top menu select Settings/Logging. If Segmented log files are required tick the Enable box and select the length of each log file. Tick the Record Formatting box options for Appending PC Time and Date Stamp and sequential line numbering as required. - Page 56 Gill Instruments Ltd _____________________________________________________________________________________________________________ Click on Apply gives the following screen, click on OK:- To Start Logging. From the top menu select Log. Click on Log/Start to commence logging. To Stop Logging. From the top menu select Log. Click on Log/Stop to stop logging.
-
Page 57: Maintenance & Fault-Finding
Gill Instruments Ltd _____________________________________________________________________________________________________________ The logged Wind Data .txt file can be imported into Microsoft Excel if it is required to manipulate the data or graph plot the data. 10. MAINTENANCE & FAULT-FINDING 10.1. Cleaning and Handling When installing the unit handle with lint free gloves and degrease the unit to reduce the build-up of deposits. -
Page 58: Servicing
Initial Set Up. The WindObserver 65 RS422 Pair 1 and Pair 2 TX and RX output connections (4 wires) are connected to a PC via an RS422 to RS232/USB Converter. Open a Terminal program e.g. Windows HyperTerminal (or use Gill Wind Software as a Terminal program). -
Page 59: Status (Error) Codes
Turn off the WindObserver 65. Ensure the Terminal program is set for 19200 baud, Hold down the PC keyboard * key and turn on the WindObserver 65 Power Supply. The words SAFE MODE should appear on the terminal screen. If not then power down the WindObserver 65, hold the * key and re-power sensor. -
Page 60: Bench Test
Invalid data output 10.6. Bench Test Data Tests 1. Couple the WindObserver 65 to the host system and power supply, using a known working test cable. 2. Check that the unit is correctly configured by going into Configuration mode and using See Section 8.4 Checking the Configuration. -
Page 61: Use Of An Integrity Check Chamber (Optional Item)
Zero Wind Check Configure your PC to run HyperTerminal and assemble the ICC by inserting the reflector cases and the two halves of the ICC onto the WindObserver 65. The ICC must be retained using the strips provided. Then: 1. Ensure that the WindObserver 65 is set in factory default mode. For Factory default settings see section 8.4. -
Page 62: Appendices
Gill Instruments Ltd _____________________________________________________________________________________________________________ 11. APPENDICES 11.1. Glossary & Abbreviations Item Meaning Calibration Carriage Return CRLF Carriage Return Line Feed Comma Separated Variable Engineering ESCape key on keyboard used to stop any process that is being executed End of string character... -
Page 63: Guarantee
Transmitted Data Positive Negative WindCom Gill software used to configure WindObserver 65 With Respect To 11.2. Guarantee For terms of guarantee contact your supplier. Warranty is void if the green security seal covering base nuts is damaged or broken, or the transducer caps have been damaged. -
Page 64: Principle Of Operation
_____________________________________________________________________________________________________________ 11.3. Principle of operation The WindObserver 65 measures the times taken for an ultrasonic pulse of sound to travel from the North transducer to the South transducer, and compares it with the time for a pulse to travel from S to N transducer. Likewise times are compared between West and East, and E and W transducer. -
Page 65: Windobserver
Gill Instruments Ltd _____________________________________________________________________________________________________________ 11.4. Electrical Conformity ________________________________________________________________________________________________ WindObserver 65 Page 65 Issue 4 Doc. No. 1390-PS-0039 June 2016...
Need help?
Do you have a question about the Windobserver 65 and is the answer not in the manual?
Questions and answers