Table of Contents
Advertisement
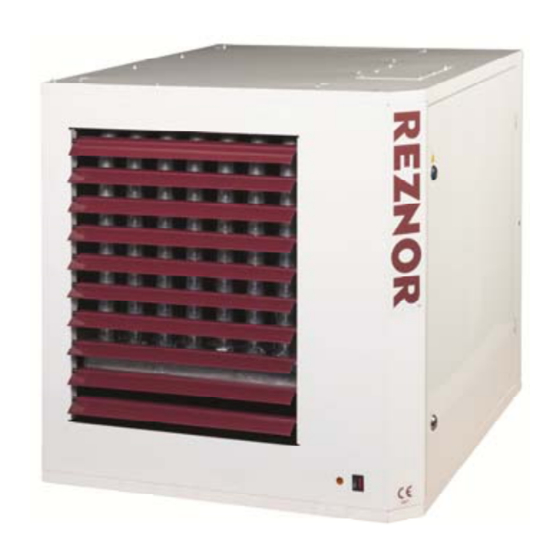
Condensing low‐emission gas‐fired air heater
ULSA
025(EC), 035(EC), 050(EC),
075(EC), 100(EC)
INSTALLATION – COMMISSIONING – SERVICING – USER ‐ INSTRUCTIONS
Belarus, Bulgaria, China, Czech Republic, Croatia, Cyprus, Denmark, Estonia, Finland, Greece, Hungary, Iceland,
Latvia, Lithuania, Montenegro, New Zealand, Norway, Poland, Portugal, Romania, Russian Federation, Serbia,
Please read this document carefully before commencing the installation and leave it with
the user or attached to the appliance or gas service meter after installation!
The manufacturer does not take any responsibility in the event of non‐observance of the
regulation concerning the connection of the apparatus causing a harmful operation
possibly resulting in damage to the apparatus and/or environment in which the unit is
installed.
Subject to modifications
This appliance meets the following EC Directives
DIR 2009/142/EC : GAD
DIR 2014/30/EU : EMC
DIR 2014/35/EU : LVD
DIR 2006/42/EC : MD
Slovakia, Slovenia, South Africa, Spain, Sweden, Turkey, Ukraine
size 050
Applies to :
ATTENTION
1701ULSA(EC)‐‐EN
1701ULSA(EC)--EN, p. 1/30
Advertisement
Table of Contents

Related Manuals for Reznor ULSA 035(EC)


Summary of Contents for Reznor ULSA 035(EC)
- Page 1 1701ULSA(EC)‐‐EN Condensing low‐emission gas‐fired air heater ULSA 025(EC), 035(EC), 050(EC), 075(EC), 100(EC) size 050 This appliance meets the following EC Directives DIR 2009/142/EC : GAD DIR 2014/30/EU : EMC DIR 2014/35/EU : LVD DIR 2006/42/EC : MD INSTALLATION – COMMISSIONING – SERVICING – USER ‐ INSTRUCTIONS Applies to : Belarus, Bulgaria, China, Czech Republic, Croatia, Cyprus, Denmark, Estonia, Finland, Greece, Hungary, Iceland, Latvia, Lithuania, Montenegro, New Zealand, Norway, Poland, Portugal, Romania, Russian Federation, Serbia, Slovakia, Slovenia, South Africa, Spain, Sweden, Turkey, Ukraine Please read this document carefully before commencing the installation and leave it with the user or attached to the appliance or gas service meter after installation! ATTENTION The manufacturer does not take any responsibility in the event of non‐observance of the regulation concerning the connection of the apparatus causing a harmful operation possibly resulting in damage to the apparatus and/or environment in which the unit is installed. ...
-
Page 2: Table Of Contents
TABLE OF CONTENTS 1 Hazard intensity levels 2 2 General 3 Warnings 3 General ... -
Page 3: General
2. GENERAL 2.1 WARNINGS For your safety, if you smell gas : Do not try to light any appliance Do not touch any electrical switch, do not use any phone in your building WARNINGS Evacuate all personnel Contact your gas supplier immediately Do not store or use petrol or other flammable vapours and liquids in the vicinity of the appliance. Improper installation, adjustment, alteration, service or maintenance can cause property damage, injury or death. Read the installation, operation and maintenance instructions thoroughly before installing or servicing this equipment. Do not use this appliance if any part has been immersed in water. Immediately call a qualified service technician to inspect the appliance and replace any gas control that has been immersed in water. ... -
Page 4: General
2.2 GENERAL The instructions in this manual apply to the condensing gas‐fired air heater model ULSA/ULSA EC. All models and sizes are available for use with either natural, propane or butane gas within operating temperatures between ‐15°C and 40°C. These heaters are designed for use in domestic, industrial and commercial premises, suitable only for indoor installation The type of gas, the input rate and the electrical supply requirements are shown on the heater rating plate. The instructions are only valid for the country of use indicated on the appliance. If not correct contact your supplier. Installation should be done by a suitably qualified installer in accordance with these instructions and with all rules in force. The installation manual is shipped with the heater. Verify that the literature is correct for the heater being installed. If the manual is incorrect for the heater, contact the supplier before beginning installation. Ensure the environment in which the air heater will be installed will not create a hazard i.e. where excessive dust, flammable or corrosive substances and/or vapours and combustible materials may be present. 2.3 WARRANTY Warranty is void if : Heaters are used in atmospheres containing flammable vapours or atmospheres containing chlorinated or halogenated hydrocarbons or any contaminant (silicone, aluminium oxide, etc ...). The installation is not in accordance with these instructions. Wiring is not in accordance with the diagram furnished with the heater. Unit is installed without proper clearance to combustible materials or without proper ventilation and air for combustion. ... -
Page 5: Heater Location
2.5 HEATER LOCATION Attention Flue requirements may affect location. Consult section 7 before making a final determination. Use the minimum clearances as illustrated in figure 2 and the throw data mentioned in table 1 (Technical Data) to define where to locate the heater. Also respect the recommended minimum height as given in table 1. For best results, the heater should be placed with certain rules in mind. Always ensure that minimum clearances are maintained. Locating a unit heater above the maximum recommended height can result in significant air stratification. When possible, heaters should be arranged to blow toward or along exposed wall surfaces. Suspended heaters are most effective when located as close to the working zone as possible, but care should be exercised to avoid directing the discharged air directly on to the room occupants. Partitions, columns, counters or other obstructions should be taken into consideration when locating the unit heater so that a minimum quantity of airflow will be deflected by such obstacles. When units are located in the centre of the space to be heated, the air should be discharged toward the exposed walls. In large areas, units should be located to discharge air along exposed walls with extra units provided to discharge air towards the centre of the area. For optimum results heaters are best used in conjunction with recirculating air fans suspended at high level. At those points where infiltration of cold air is excessive, such as entrance doors ... it is desirable to locate the unit so that it will discharge directly towards the source of cold air, typically from a distance of 4.5m to 6m or install a downflown unit over the door opening. If touched, the vent pipe and Do not locate the internal heater surfaces that are heater where it may accessible from outside the heater ... -
Page 6: Technical Data
3. TECHNICAL DATA Table 1b ULSA/ULSA EC Gas category Cat. See table 1b Comb. air & flue, type B instal (1) B22p Comb. air & flue, type c instal (1) C12, C32, C42, C52, C62, C82 Maximum heat input (Hs) 28,3 37,0 56,0... - Page 7 Table 1b : Gas category & inlet pressures gas cat inlet pressure gas cat inlet pressure (mm) (mm) country Belarus Bulgaria China Czech Republic Croatia Cyprus I3B/P Denmark I3B/P Estonia I3B/P Finland I3B/P Greece Hungary I3B/P Iceland latvia Lithuania Montenegro New Zeeland Norway I3B/P Poland I3B/P Portugal Romania I3B/P Russian Federation Serbia Slovakia Slovenia South Africa Spain...
-
Page 8: Dimensions & Clearances
4. DIMENSIONS & CLEARANCES 4.1 DIMENSIONS Figure 1a :ULSA/ULSA EC 025, 035, 050 & 075 (all dimensions in mm, tolerance 3mm) ... - Page 9 Figure 1b : ULSA/ULSA EC 100 (all dimensions in mm, tolerance 3mm) Combustion air inlet ( 100mm) 4. Electrical connections Flue connection ( 100mm) 5. Service panel External gas connection (3/4”G) 6. Condensate drain 1701ULSA(EC)--EN, p. 9/30...
-
Page 10: Internal Layout
4.2 CLEARANCES Figure 2 : ULSA/ULSA EC Z(*) (*) Heaters can be mounted on suitable non‐combustible supports. 5. INTERNAL LAYOUT Figure 3 : Metal mesh burner Zero pressure regulator Venturi Differential pressure switch Burner controller Flue gas extraction fan Inspection window + ignitor+ionisation electrode Limit control LC3 Limit control LC1 1701ULSA(EC)--EN, p. 10/30... -
Page 11: Installing
6 INSTALLING Check the supporting structure to verify that it has sufficient load‐carrying capacity to support the unit weight. WARNING Suspend the heater only from the threaded nut inserts. Do not suspend from the heater cabinet panels. Do not place or add additional weight to the suspended heater. The location where the air heater is to be installed must provide sufficient space around the heater for servicing and clearances for safety (see figure 2). When the unit is lifted for suspension, leave the unit on the pallet. Before hanging verify that all screws originally used to fix the shipping supports are re‐screwed into the cabinet. Ensure that the heater is installed in a level plane and vibration free. The air heater must be fastened securely to any base mounting arrangement. The heater is supplied with four point suspension. All points must be used. Threaded nut inserts are provided on each side of the top of the heater. See figure 4. After suspension the air heater should be rigid so as to avoid placing a strain on the flue system, gas services, electrical wiring and duct work. 1” BSP mounting cap nuts are optional. In case of a type C installation, the distance between the floor and the underside of the air heater must be at least 1.70m. Combustion air should be taken from a height that exceeds the above mentioned height of 1.70m. Also thermostats and switches which are not sparkless have to be installed at a minimum height of 1.70m. Figure 4 Be sure that the threaded hanger rods are locked to the heater as illustrated in ... -
Page 12: Air Supply & Flue Systems
7 AIR SUPPLY & FLUE SYSTEM 7.1 GENERAL The flue must be in accordance with all international and national rules and regulations in force. Local requirements may apply in addition to national requirements. WARNING Failure to provide proper flueing could result in death, serious injury and/or property damage. The products of combustion must be flued to outside atmosphere. Common flues (for more than one appliance) must not be used. Single wall flue pipe exposed to cold air or run through unheated areas should be insulated to avoid condensation. If the flue passes through a combustible element of the building it must be enclosed by a sleeve of non‐combustible material and separated from the sleeve by at least a 25mm air break. The temperature of any combustible material near to the flue must not exceed 65°C when the heater is in operation. The flue must be at least 50mm away from any combustible material. Provision must be made for condensation to flow freely to a point to which it can be released, i.e. drain. Model ULSA/ULSA EC heaters may be installed as type B or type C installations. The unit heaters are designed to operate safely and efficiently with either a horizontal or vertical flue system when installed according to the specific requirements and instructions. If this heater is replacing an existing heater, be sure that the flue is of the correct size and that the existing flue is in good condition. A correctly sized flue system is required for safe operation of the heater. An improper sized flue system can cause unsafe conditions and/or create condensation. The units may be installed as a balanced flue type C heater requiring both a combustion air inlet pipe and a flue pipe or as a power vented heater type B where the combustion air is taken from the space where heater is installed and which requires only a flue pipe exhausting to outdoors. All products of combustion must be flued to outdoor atmosphere. Each heater installed as a type B appliance must be fitted with an individual flue pipe and the combustion air inlet opening must be provided with a protection grill. Each heater installed as a type C appliance must be fitted with an individual combustion air/flue pipe system. Type ... - Page 13 Condense drain A condensation drain must be fitted to both the unit and the flue outlet to properly drain all Attention condensation. The condensation drain from the flue must be constructed from non‐corrodible material not less than 20mm diameter. Copper or copper based alloys must not be used for condensation drain. Consult section 8 : Condensation drain pipe connections 7.2 POWER VENTED INSTALLATIONS (type B appliances) If the air heater is to be installed as a type B Figure 6 : appliance, air for combustion will be taken from Approved appliances type B within the space where the heater is installed. Ensure that an adequate air supply for combustion B22p and ventilation is provided within the building in roof accordance with BS6230 or BS5440 plus all other relevant regulations & rules in force. Single wall flue pipe seamless aluminium/stainless steel pipes are required. All joints must be sealed to prevent products of combustion from leaking into the building. Do not install vent piping near any source of heat A protection grill type IP20 must be mounted on the combustion air intake. Table 2 shows the flue pipe sizes and maximum pipe lengths. B22p ...
- Page 14 Figure 7 : Type C appliances : combustion air and flue pipe sockets Vertical flue kit, option 302 Horizontal flue kit, option 301 1701ULSA(EC)--EN, p. 14/30...
- Page 15 Figure 8 :Approved appliances type C C12 C42 wall roof roof C52 roof roof 7.4 DIAMETER & MAXIMUM FLUE PIPE LENGTHS Flue pipe diameters and maximum pipe lengths in table 2 apply to both horizontal and vertical systems. Add all straight sections and equivalent lengths for elbow. The total combined length must not exceed the maximum flue length. Model ULSA/ULSA EC Table 2 : Heater socket & pipe dia flue/inlet pipe ...
-
Page 16: Condensation Drain Pipe Connection
Proper combustion air supply for a power vented type B installation requires ventilation of the heated space. Natural infiltration of air may not be adequate. Use of exhaust fans aggravates this situation. It is important to ensure that there is adequate combustion air supply at all times. Reliance on doors and windows is not permitted. Always ensure that en adequate inlet for fresh air for combustion is provided sized to suit the total installation of any combustion apparatus. 8 CONDENSATION DRAIN PIPE CONNECTIONS All ULSA/ULSA EC units are designed with a built‐in siphon (PN 70 61761) (figure 9). Attention : in case replacement of siphon is necessary, ensure that siphon is correctly installed. (see figure 10). Figure 9 ... -
Page 17: Gas Connection/Gas Supply
9 GAS SUPPLY & GAS CONNECTION We refer to table 1 of section 3 for all gas specifications Connection to a gas service installation may only be carried out by suitably qualified persons. The gas installation must comply with all rules in force. Only materials appropriate for gas service installation may be used. Do not rely on the heater to support the gas pipe. NEVER USE A FLAME TO TEST FOR GAS SOUNDNESS. ALL COMPONENTS OF A GAS SUPPLY WARNING SYSTEM MUST BE LEAK TESTED PRIOR TO PLACING EQUIPMENT IN SERVICE. FAILURE TO COMPLY COULD RESULT IN PERSONAL INJURY, PROPERTY DAMAGE OR DEATH! 9.1 GENERAL ULSA/ULSA EC heaters are designed to operate on either natural gas (G20), propane (G31) or butane (G30) gas. Check that gas supply, gas category & gas inlet pressure is in accordance with the data described on the air heater .To let the unit function at maximal heat output, the gas supply pipe MUST be correctly sized. Close to the air heater a gas tap with coupling must be mounted for servicing (see figure 11). It is strongly recommended to place a gas filter and clean the gas tube with nitrogen. The whole of the gas service installation including the meter must be inspected, tested for soundness and purged in accordance with appropriate requirements by a qualified person. Figure 11 9.2 GAS CONNECTION REMARK : Do not over tighten and do not rotate the ... - Page 18 9.4 GAS CONVERSION The ULSA/ULSA EC heaters are designed to operate on natural, propane or butane gas and will be supplied for the gas type ordered. In the event a site conversion is required, it is necessary to change the burner jet and gas valve. Affix new data plate and gas type label. Upon completion of conversion recommission the heater. We hereto refer to the section ‘Ignition system’ Figure 13 Changes to carry out : From natural gas to propane : Gas valve A propane conversion kit [part number 03 49950 ‐‐‐‐‐‐] will have to be purchased in order to perform the conversion. The conversion kit consists of the propane restrictor and the connector (see item 3 for more details) ...
-
Page 19: Electrical Connections
10 ELECTRICAL SUPPLY & CONNECTIONS 10.1 ELECTRICAL SUPPLY THIS APPLIANCE MUST BE EARTHED. The electrical installation may only be carried out by suitably qualified persons observing the rules in force. DANGER Check that the electrical specifications are in accordance with the data on the air heater. All electrical connections should be in accordance with the terminal markings and the wiring diagram affixed to the air heater. The minimum external controls required for the air heater are a room thermostat. It is essential that the main input line and neutral to terminals L and N remains live at all times even when the appliance is switched off, this is to ensure correct operation of the unit. The minimum clearance distance between the contacts must be more than 3mm. Check that the air heater is well earthed and that an earth leakage test is carried out. The electrical supply line to the heater should include a main isolating switch. An external orange indicator light is fitted on the heater to signify when the burner is ON. An external burner reset switch with red indicator light is fitted on the heater. To add a remote reset button, make connections to the terminals in the electric box as indicated on the wiring diagram. Ensure that all cables and installers wiring are appropriately fixed and that they do not touch the flue combustion collector box. To ensure that the unit is airtight, all unused cable couplings must be hermetically sealed. ‐ Permanent damage can occur to the burner relay when faulty/incorrect connections to the thermostat, reset switch or burner failure lamp are made! Attention ‐ Switching of wires for reset switch and flame failure will destroy the burner relay. ‐ ... - Page 20 Possible control systems By means of option 954 = Individual on/off control (0% or 100% functioning) By means of option 952 = weekly programming digital chronothermostat (GA11) used for remote control of several units (consult option 952 instruction for more details) Example By means of 0‐10V power signal (to be performed by customer) Example 1701ULSA(EC)--EN, p. 20/30...
-
Page 21: Commissioning, Lighting & Operation
COMMISSIONING, LIGHTING & OPERATION Final testing after production ensures that, if the installation has been carried out strictly in accordance with this document, the appliance is ready to be taken into service. 11.1 LIGHTING 1. Ensure that the air discharge louvres are open. 2. Turn on the gas supply. 3. Switch on the electrical supply. 4. Set the room thermostat to ‘ON’ position. 5. If the indicator light on the burner relay glows and/or the room thermostat display flashes, press the reset button. 6. The burner will now automatically light after about 15 sec and within 60 sec the air circulation fan will run. 7. If the installation is new, 3 start‐up cycles may be necessary due to air still being present in the gas pipe. Should the air heater still not light, refer to section 12 : ‘Fault Finding’. 8. The gas pressure must correspond to the data in table 1. If the gas pressure (G20) is higher than 60mbar, a pressure regulator with constant terminal pressure must be installed. If the gas pressure is lower than 20mbar/17.50mbar, check the supply pipework to ensure it is correctly sized. 11.2 OPERATION During start up all gas services (up to the gas meter) must be checked again for gas soundness to Attention ensure no leaks are present. The condensation drain pipe and siphon, both already filled with water, must be visually tested for water tightness. 1. If, for any reason, the burner flame is extinguished during a run cycle, an automatic attempt for re‐ignition will take place. If the burner does not relight, safety shut down and lockout will occur. Manual intervention to reset ... - Page 22 Ignition system – time table Definitions Start position The system is not in lock‐out position and can proceed with the start‐up sequence upon a demand for heat. Pre‐purge time This is a period of 20 sec during which the combustion fan operates prior to activation of the ignition device. Safety time The safety time is the delay between the gas valve being energised and the flame sensor checking for the presence of a flame. This is a period of 5 seconds. Note : if no flame is sensed, the burner relay will attempt ignition 5 times before going into lock‐out mode. Post‐purge time This is the time of 10 seconds between burner shut‐down and the moment the combustion fan (venter) is de‐energized. 1701ULSA(EC)--EN, p. 22/30...
-
Page 23: Maintenance
MAINTENANCE It is recommended that maintenance is carried out at least once a year. More frequent servicing Attention may be required dependent upon the environmental circumstances where the air heater is installed. Regular inspection is necessary, especially in dirty areas, to assess the servicing frequency. Removal of service panel 1. Remove door lock at upper and underside. 2. Lift the panel holding it at the bottom. Substitution of combustion air fan 1. Turn off the main gas supply. 2. Set the room thermostat so there is no heat demand. 3. Wait until the air circulation fan has stopped running. 4. Check that the electrical supply is turned off. 5. Remove the service panel (see ‘removal of service panel’). 6. Disconnect the plugs from the combustion air fan. 7. Remove the bolts between the combustion air fan and the (bent) gas supply tube. Remove the gasket. 8. Remove the fixing screws (or the assembly in case of a ULSA 075/100 EC) connecting the air intake restriction and the combustion air fan. 9. The combustion air fan can now be removed. 10. Remove all the dust from the combustion air fan with a soft cloth or brush. 11. Check that the motor and the turbine are undamaged. 12. - Page 24 Substitution of gas valve (differs according to the application and has to be ordered at your distributor) 1. Check that the air circulation fan has stopped running. 2. Before starting ensure that the electrical supply is turned off and locked. 3. Check that the gas supply is turned off. 4. Remove the service panel (see ‘removal of the service panel’). . 5. Disconnect the burner relay from the gas valve unscrewing the fixing screw. 6. Take a short screw driver and remove the screws connecting the gas valve and the air intake restriction. 7. Disconnect the gas valve from the gas connection. 8. Replace the gas valve in reverse order. Substitution of one of the relays 1. Check that the air circulation fan has stopped running. 2. Before starting, ensure that the electricity supply is turned off and locked. 3. Remove the service panel (see ‘removal of the service panel’). 4. Disconnect all the relay connections. 5. Remove the fixing screws of the contactor. 6. Replace the relay in reverse order. Substitution of air circulation fan (entirety) 1. Check that the air circulation fan has stopped running. 2. Before starting, ensure that the electricity supply is turned off and locked. 3. Remove the service panel (see ‘removal of the service panel’). 4.
-
Page 25: Fault Finding
FAULT FINDING Fault finding may only be carried out by appropriately qualified persons! In case of a Check if the Check LL net, swap Call for heat igniter presence of sparks! flame! the 2 lines Check if the Check if the Check if control flame sensor Replace flame ionisation probe module reads the is not sensor! registers the min measured value! - Page 26 Check if the Check Call for heat igniter presence of sparks! flame! Check if flame is maintained and unit goes past the stabilisation time! Check copper Check if the pipe inside the pressure switch Unclog and blow dry! Replace Pressure switch! unit is not works within its clogged!
-
Page 27: Spare Parts List
14. PARTS LIST Description Part number Reference Application motor+ventilator 01 26060 FN040-4EW.0F.A7P1 025 ULSA AC motor+ventilator 01 26061 FN040-4EW.0F.A7P2 035 ULSA AC motor+ventilator 01 26040 FN045-4EW.4I.A7P1 050 ULSA AC motor+ventilator 01 26063 FN063-6EW.4I.A7P1 075 ULSA AC motor+ventilator 01 26040 (2x) FN045-4EW.4I.A7P1 100 ULSA AC motor+ventilator... - Page 28 3. In case of any damage to the appliance, it must be shutdown completely and checked by an appropriately qualified person. 4. In the event of difficulties in resolving any of these matters, please do not hesitate to contact Reznor or their official distributor. 1701ULSA(EC)--EN, p. 28/30...
-
Page 29: Declaration Of Conformity
16. DECLARATION OF CONFORMITY 1701ULSA(EC)--EN, p. 29/30... - Page 30 NORTEK GLOBAL HVAC Belgium nv J&M Sabbestraat 130/A000 B 8930 Menen, Belgium Tel. +32(0)56 52 95 11 www.reznor.eu 1701ULSA(EC)--EN, p. 30/30...
Need help?
Do you have a question about the ULSA 035(EC) and is the answer not in the manual?
Questions and answers