
Related Manuals for REMKO MVV 1200 Dc


Summary of Contents for REMKO MVV 1200 Dc
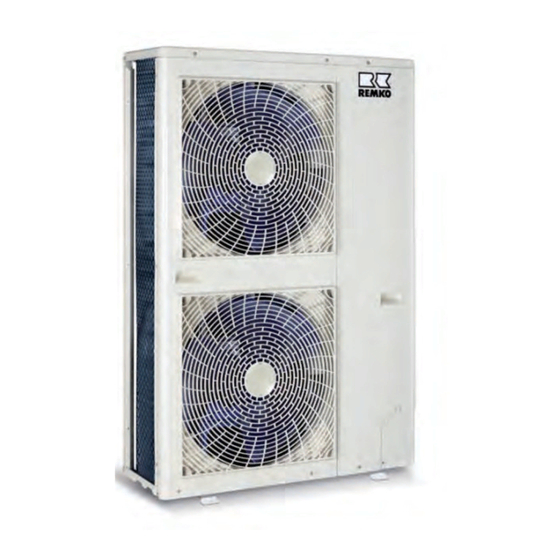
- Page 1 Assembly and operating instructions REMKO MVV...DC MVV 1200 DC, MVV 1600 DC, MVV 2000 DC Inverter outdoor units Read the instructions prior to performing any task! 0030-2015-04 Edition 6, en_GB...
- Page 2 Read these operating instructions carefully before commis- sioning / using this device! These instructions are an integral part of the system and must always be kept near or on the device. Subject to modifications; No liability accepted for errors or mis- prints! Installation and operating instructions (translation of the orig- inal)
-
Page 3: Table Of Contents
Table of contents Safety and usage instructions......................5 1.1 General safety notes........................5 1.2 Identification of notes........................5 1.3 Personnel qualifications........................5 1.4 Dangers of failure to observe the safety notes................5 1.5 Safety-conscious working....................... 5 1.6 Safety notes for the operator......................6 1.7 Safety notes for installation, maintenance and inspection.............. - Page 4 REMKO MVV...DC Shutdown............................. 62 Exploded view of the unit and spare parts list................. 63 14.1 Exploded view of the unit ......................63 14.2 Spare parts list ........................... 64 Index..............................66...
-
Page 5: Safety And Usage Instructions
Safety and usage instructions CAUTION! This combination of symbol and signal word 1.1 General safety notes warns of a potentially hazardous situation, which if not avoided may cause injury or mate- Carefully read the operating manual before com- rial and environmental damage. missioning the units for the first time. -
Page 6: Safety Notes For The Operator
"certificate of warranty" to conditions stipulated in this manual and comply REMKO GmbH & Co. KG at the time when the with all applicable regional regulations. units are purchased and commissioned. -
Page 7: Transport And Packaging
1.11 Transport and packaging The devices are supplied in a sturdy shipping con- tainer. Please check the equipment immediately upon delivery and note any damage or missing parts on the delivery and inform the shipper and your contractual partner. For later complaints can not be guaranteed. -
Page 8: Technical Data
REMKO MVV...DC Technical data 2.1 Unit data Series MVV 1200 DC MVV 1600 DC MVV 2000 DC Operating mode Inverter outdoor units for cooling and heating Number of outdoor units 12.0 15.5 20.0 Nominal cooling output (5.76-12.43) (7.75-16.33) (9.23-21.53) 13.5 18.6... -
Page 9: Unit Dimensions Mvv 1200-2000 Dc
Series MVV 1200 DC MVV 1600 DC MVV 2000 DC Inches Refrigerant connection, suction pipe OU 5/8" (15.9) 3/4" (19.05) 3/4" (19.05) (mm) Refrigerant piping, total length liquid pipe, max. Refrigerant piping, height difference bottom IU to top IU Refrigerant piping,... -
Page 10: Power Data, Cooling Or Heating Mode
1,16 kW 35°C 4,84 kW 0,99 kW 6 kW 1,26 kW 7,16 kW 1,58 kW 44°C 4,84 kW 1,23 kW 6 kW 1,59 kW 7,16 kW 2,03 kW Leistungsdaten unter Normnennbedingungen Fig. 1: Power table MVV 1200 DC - cooling mode... - Page 11 1,69 kW 7°C 7,44 kW 1,84 kW 6,6 kW 1,63 kW 5,72 kW 1,42 kW 15°C 7,44 kW 1,5 kW 6,6 kW 1,34 kW 5,72 kW 1,18 kW Leistungsdaten unter Normnennbedingungen Fig. 2: Power table MVV 1200 DC - heating mode...
- Page 12 REMKO MVV...DC Power table MVV 1600 DC - cooling mode Luftansaugtemperatur Innengerät 16°C Luftansaugtemperatur Innengerät 19°C Luftansaugtemperatur Innengerät 22°C Anschlussleistung Außentemperatur Kälteleistung Leistungsaufnahme Kälteleistung Leistungsaufnahme Kälteleistung Leistungsaufnahme 10°C 16,22 kW 2,55 kW 19,54 kW 3,09 kW 20,26 kW 2,91 kW 20°C...
- Page 13 Power table MVV 1600 DC - heating mode Luftansaugtemperatur Innengerät 16°C Luftansaugtemperatur Innengerät 20°C Luftansaugtemperatur Innengerät 24°C Anschlussleistung Außentemperatur Heizleistung Leistungsaufnahme Heizleistung Leistungsaufnahme Heizleistung Leistungsaufnahme -20°C 11,01 kW 3,37 kW 10,9 kW 3,85 kW 10,85 kW 4,32 kW -10°C 13,17 kW 4,11 kW 13,06 kW 4,51 kW...
- Page 14 REMKO MVV...DC Power table MVV 2000 DC - cooling mode Luftansaugtemperatur Innengerät 16°C Luftansaugtemperatur Innengerät 19°C Luftansaugtemperatur Innengerät 22°C Anschlussleistung Außentemperatur Kälteleistung Leistungsaufnahme Kälteleistung Leistungsaufnahme Kälteleistung Leistungsaufnahme 10°C 20,93 kW 3,74 kW 25,21 kW 4,54 kW 26,14 kW 4,26 kW 20°C...
- Page 15 Power table MVV 2000 DC - heating mode Luftansaugtemperatur Innengerät 16°C Luftansaugtemperatur Innengerät 20°C Luftansaugtemperatur Innengerät 24°C Anschlussleistung Außentemperatur Heizleistung Leistungsaufnahme Heizleistung Leistungsaufnahme Heizleistung Leistungsaufnahme -19,8°C 14,25 kW 4,2 kW 14,11 kW 4,8 kW 14,04 kW 5,39 kW -9,8°C 17,04 kW 5,13 kW 16,9 kW 5,63 kW...
-
Page 16: Design And Function
(MVW) or for installation in suspended ceilings (MVD) and are equipped with an electronic flow regulator. The outdoor unit can be combined with Fig. 7: System layout REMKO indoor units from the series MVW and Outdoor area MVD that provide sufficient cooling capacity (see Indoor area Ä... - Page 17 Fig. 8: Cooling cycle schematic MVV 1200 DC (see next page for legend) Fig. 9: Cooling cycle schematic MVV 1600 DC (see next page for legend)
- Page 18 REMKO MVV...DC Fig. 10: Cooling cycle schematic MVV 2000 DC 1a: Rotary piston condenser 18: Heat gas bypass valve SV5/SV4 (t >105°C) 1b: Scroll condenser 19: ND collector Condenser, outdoor unit 20: Liquid separator Elec. expansion valve, heating 21: Crankcase heating Elec.
-
Page 19: Combinations
MVV 1600 DC 15.5 kW 130 % 20.2 kW MVV 2000 DC 20.0 kW 130 % 26.0 kW MVV 1200 DC Duo 2x12.0 KW 130 % 2 x 15.6 kW MVV 1600 DC Duo 2x15.5 kW 130 % 2 x 20.2 kW MVV 2000 DC Duo 2x20.0 kW... - Page 20 REMKO MVV...DC Fig. 12: Connection possibilities on multiple levels A: Outdoor area 3: Distributor B: Indoor area 4: Y-distributor 1: Outdoor unit 5: Main line 2: Indoor units of the series MVD or MVW 6: Ancillary line...
-
Page 21: Operation
Operation The compressor in the outdoor unit is operated by means of regulating the control board in the out- door unit. The chapter on "Regulation" in the manual for the outdoor unit must therefore be observed. Help save on energy consumption in stand-by mode! If the device, system or component is not in use, we recommend disconnecting the power supply. -
Page 22: Wall Openings
REMKO MVV...DC 5.2 Wall openings 5.4 Selection of installation location A wall opening of at least 70mm diameter and 10mm incline from the inside to the outside Indoor units must be created. The indoor units from the MVW series are... - Page 23 Wind If the unit is being installed in windy areas, ensure that the warm outlet air is discharged in the pre- vailing wind direction. If this is not the possible, it may be necessary to install a windbreak (to be pro- vided by the customer).
-
Page 24: Minimum Clearances
REMKO MVV...DC 5.5 Minimum clearances Observe the minimum clearances to allow access for maintenance and repair work and facilitate optimum air distribution. 1000 1000 1500 1000 1000 Fig. 17: Minimum clearances, outdoor units and indoor units (all measurements in mm) -
Page 25: Installation
Installation The following instructions describe the installation of the cooling cycle and the assembly of the indoor 6.1 Connection of refrigerant unit and the outdoor unit. piping The required pipe diameters are given in the table "Technical data". The refrigerant piping connection is established by the customer on the front side of the units. - Page 26 REMKO MVV...DC Fig. 18: Deburring the refrigerant piping 1: Refrigerant piping 2: Deburrer Fig. 20: Correct flange shape Fig. 19: Flanging the refrigerant piping 1: Flanging tool Fig. 21: Tightening the fitting 1: Tighten with the first open-ended spanner 2: Counter with the second open-ended spanner...
-
Page 27: Leak Testing
6.2 Leak testing 6.4 Adding refrigerant Once all the connections have been made, the The unit contains a basic quantity of refrigerant. pressure gauge station is attached to the Schrader Furthermore, an additional amount of refrigerant valve as follows (if fitted): must be added, in accordance with the following table: red = small valve = high pressure... - Page 28 REMKO MVV...DC Calculation of the supplementary refrigerant to be added The refrigerant quantity to be added is dependent on the dimensioning and length of all liquid pipes, as well as the number of Y-pieces and distribution units used. In the following you will find an example and a blank drawing for calculating the refrigerant quantity to be added.
- Page 29 The following sketch and the empty table are provided for calculating the refrigerant quantity to be added and must be completed by the installer. Fig. 23: Sketch for determining the refrigerant quantity to be added Component Number Fill factor Additional fill quantity Length of the liquid pipe 1/4"...
-
Page 30: Condensate Drainage Connection And Safe Drainage
REMKO MVV...DC Condensate drainage NOTICE! connection and safe drainage When configuring and topping up the system with refrigerant, observe the practical limit value for refrigerants according to DIN EN 378-1! Practical limit value R410A: 0.44 kg/m room volume of the smallest room. If this is... - Page 31 Fig. 24 line is durably leak tight. Safe drainage in the event of leakages The REMKO oil separator OA 2.2 fulfils the fol- lowing list of requirements from regional regula- tions and laws. NOTICE!
-
Page 32: Electrical Wiring
REMKO MVV...DC Electrical wiring 8.1 General connection Details concerning the electrical protection of the system are provided in the technical data. and safety instructions Observe the required diameters! For the MVV 1200-2000 DC units, an electrical If the outdoor unit is installed on a roof, ensure supply cable must be laid as a power supply to the it is protected against lightning strikes. - Page 33 Fig. 28: Electrical wiring of the lines to the outdoor units MVV 1200-1600 DC A: Terminal block supply line B: Terminal block communication 1: Power supply 2: Not connected 3: Control line Fig. 29: Electrical wiring of the lines to the outdoor unit MVV 2000 DC A: Terminal block supply line B: Terminal block communication 1: Power supply...
-
Page 34: Electrical Wiring Diagram
REMKO MVV...DC 8.3 Electrical wiring diagram MCC-1 MVV 1200-2000 DC Controller X Y E Off Co. On L1 L2 L3 N P Q E 230V/1~/50 Hz Ext. On/Off 400 V/3~/50 Hz MXD/MVW MXD/MVW MXD/MVW MXD/MVW C…D…E…F X Y E P Q E... -
Page 35: Electrical Drawings
CN11 CN22 CN201 12 13 Fig. 31: Electrical drawings MVV 1200 DC - control board Connection to the power pcb (contact: CN 19) Connection to the contactor K1 (contact: A1) Low pressure switch, high pressure switch 10: Connection to the contactor K1 (contact: A2) - Page 36 CN37 CN30 CN36 CN19 CN39 CN18 Fig. 32: Electrical drawings MVV 1200 DC - inverter and power pcb A: Inverter board Connection to the three-phase inverter B: Power pcb (contact 2) Connection to the control board Connection to the three-phase inverter...
- Page 37 MVV 1600 DC 202302100810 CN10 CE-MDV160W/SN1-610.D.1.1.1.1-1 CN11 CN22 CN201 13 14 Fig. 33: Electrical drawings MVV 1600 DC - control board Connection to the power pcb (contact: CN 19) Low pressure switch, high pressure switch Heat gas probe Probe, condenser, register, probe, ambient air Connection with the terminal block, control line Connection to the inverter board (contact: CN 5) Connection to the inverter board (contact: CN 1)
- Page 38 REMKO MVV...DC Electrical drawings MVV 1600 DC ME-POWER-35A(PS22A78).D.2.1.1-1 201319902209 CE-MDV160W/SN1-611.D.2.2-2 202302100629 CN32 CN38 CN31 CN37 CN30 CN36 CN19 CN39 CN18 Fig. 34: Electrical drawings MVV 1600 DC - inverter and power pcb A: Inverter board Connection to the three-phase inverter (contact...
- Page 39 MVV 2000 DC MDV-280W/DSN1-8R0.D.1.1.1-1 UPD78F0537 202302100876 CN12 CN24 CN27 CN47 CN45 CN201 CN48 CN46 CN44 POWER-C STF1 11 11 11 11 Fig. 35: Electrical drawings MVV 2000 DC - control board Connection to the filter board (contact: CN 207) DIP switch Heat gas probe Connection with the communication terminal block (contact CN 4)
- Page 40 REMKO MVV...DC Electrical drawings MVV 2000 DC FILTER-8R0.D.1.1-1 202302141048 (1.5) 2012-10-10 CN214 CN206 CN202 CN205 CN201 CN204 CN213 CN200 CN209 CN210 CN203 CN212 CN211 CN208 CN207 CN150 FUSE1 / T250V/8A Fig. 36: Electrical drawings MVV 2000 DC power pcb Connection with the three-phase inverter...
-
Page 41: Before Commissioning
Before commissioning Function of the DIP switches MVV 1200-1600 DC After leak testing has been successfully com- pleted, connect the vacuum pump via the pressure DIP switch SW 3 / SW 7 gauge station to the valve connections on the out- door unit (see chapter "Leak testing") and create a ON: Automatic addressing vacuum. -
Page 42: Commissioning
REMKO MVV...DC Commissioning Function test of cooling operating mode Remove the protective caps from the valves. Start the commissioning procedure after NOTICE! evacuating the pipe system by briefly opening the shut-off valves on the outdoor Commissioning should only be performed by... - Page 43 Force Cool key NOTICE! This key enables a test run of the outdoor unit. If this key is pressed then the system runs for Check that the shut-off valves and valve caps approx. 35 minutes with a compressor frequency are tight after carrying out any work on the of 43 Hz.
- Page 44 REMKO MVV...DC Switch all indoor units on and select cooling mode and the highest fan stage. The following parameters are shown on the display: Item Display Indicator value Rated frequency of the compressor Current value 0=Off 2=Cooling Operating mode 3=Heating...
-
Page 45: Troubleshooting And Customer Service
Troubleshooting and customer service 11.1 Troubleshooting The unit and components are manufactured using state-of-the-art production methods and tested several times to verify their correct function. However, if malfunctions should occur, please check the functions as detailed in the list below. For systems with an indoor unit and outdoor unit, refer to the chapter "Trouble- shooting and customer service"... - Page 46 REMKO MVV...DC Malfunction indicated by display MVV 1200-1600 DC Display Description Cause Details Ä on page 48 EEPROM error EEPROM contact problem Power supply faulty, Communication error between IU and OU communication line faulty Ä on page 49 Communication error of board in the OU...
- Page 47 Malfunction indicated by display MVV 2000 DC Display Description Error Ir341 and motherboard Communication error 3x P6 within 30 minutes 3x P2 within 30 minutes Number of indoor units has reduced Non functional "M-Home" error Non functional Communication error indoor unit and outdoor unit Probe T3 or T4 defective Overload protection Condenser fan fault...
-
Page 48: Fault Analysis
REMKO MVV...DC 11.2 Fault analysis Error code E0: EEPROM error Is the EEPROM correctly mounted on the cir- Correctly mount the EEPROM on the circuit cuit board? board Replace indoor unit circuit board Error code E2: Communication error between indoor unit and outdoor unit... - Page 49 Error code E3: Communication error of board in the outdoor unit Switch off power to the system for 1 minute, re- establish power supply, start system Are the LEDs on the control board flashing? Replace the control board Is the connection between the control board Establish the connection correctly and inverter board (CN1) established correctly? Are 3.3.
- Page 50 REMKO MVV...DC Error code E5: Voltage monitoring has tripped Is the power supply to the outdoor unit 220 – Ensure the correct power supply 230 Volt? Replace power pcb. Is the fault still present? Replace the control board Error code E6: Fan motor fault...
- Page 51 Error code E7: Excessive temperature heat exchanger outdoor unit in heating mode Is the outside temperature in heating mode System protection, heating not possible higher than 24°C? Is the probe T3 correctly mounted on the Correctly mount the probe on the circuit board board? Is the probe visibly damaged? Replace probe...
- Page 52 REMKO MVV...DC Error code P1: High pressure fault Is the heat exchanger of the outdoor unit Carefully clean the register heavily soiled? Ä on page 50) Are the fan motors working? (See Is the ambient temperature of the outdoor unit...
- Page 53 Error code P2: Low pressure alarm Is the heat exchanger of the indoor unit heavily Carefully clean the register soiled? Ä on page 50) Are the fan motors working? (See Is the ambient temperature of the indoor unit Switch off unit and wait until the unit is back above the usable limit? inside the usable limits Is the plug of the pressure switch correctly...
- Page 54 REMKO MVV...DC Error code P3: Overcurrent protection, compressor Is the total current consumption of the system Replace the control board greater than 30 ampere? Is the heat exchanger of the outdoor unit Carefully clean the register heavily soiled? Ä on page 50)
- Page 55 Error code P4: Excessive temperature compressor outlet Is the compressor outlet temperature higher Replace probe T5 than 115°C? Is too little refrigerant in the cooling cycle? Fix leak, top up refrigerant Is the probe T5 correctly mounted on the Correctly mount the probe on the circuit board board? Is the probe visibly damaged? Replace probe...
- Page 56 REMKO MVV...DC Error code P5: Excessive temperature in condenser Is the condenser temperature higher than Replace probe T5 65°C? Is the probe T5 correctly mounted on the Correctly mount the probe on the circuit board board? Is the probe visibly damaged?
- Page 57 Error code P6: Inverter module fault Switch off power to the system for 1 minute, re- establish power supply, start system Measure resistances of the motor windings of the compressor U - V: 0.5 - 5.0 Ohm Replace compressor V - W: 0.5 - 5.0 Ohm W - U: 0.5 - 5.0 Ohm ? Is the voltage between the capacitors of the Replace defective capacitor...
- Page 58 REMKO MVV...DC Error code P7: Excessive temperature evaporator heating mode Is the temperature at the evaporator of an indoor unit higher than 63°C for over 50 sec- Replace probe T2 onds? Is the heat exchanger of the indoor unit heavily...
-
Page 59: Resistances Of The Temperature Probes
11.3 Resistances of the Temp. Resistance Temp. Resistance temperature probes (°C) (Ohm) (°C) (Ohm) 4.39 1.21 Probe T3, T4 4.21 1.17 Temp. Resistance Temp. Resistance (°C) (Ohm) (°C) (Ohm) 4.05 1.14 115.27 18.72 3.89 1.10 108.15 17.80 3.73 1.06 101.52 16.93 3.59 1.03... - Page 60 REMKO MVV...DC Temp. Resistance Temp. Resistance Temp. Resistance Temp. Resistance (°C) (Ohm) (°C) (Ohm) (°C) (Ohm) (°C) (Ohm) 0.42 0.30 82.54 18.96 0.41 0.29 78.79 18.26 0.40 0.28 75.24 17.58 0.39 0.28 71.86 16.94 0.38 0.27 68.66 16.32 0.37 0.26 65.62...
-
Page 61: Care And Maintenance
Care and maintenance Temp. Resistance Temp. Resistance (°C) (Ohm) (°C) (Ohm) Regular care and observation of some basic points 5.66 2.86 will ensure trouble-free operation and a long service life. 5.49 2.78 5.32 2.70 5.16 2.63 DANGER! 5.00 2.56 Prior to performing any work, ensure the equip- ment is disconnected from the voltage supply 4.85 2.49... -
Page 62: Remko Mvv
Ensure that units and components are disposed of in accordance with local regulations, e.g. through authorised disposal and recycling specialists or at collection points. REMKO GmbH & Co. KG or your contractual partner will be pleased to provide a list of certified firms in your area. -
Page 63: Exploded View Of The Unit And Spare Parts List
Exploded view of the unit and spare parts list 14.1 Exploded view of the unit Fig. 39: Exploded view of the unit MVV 1200-2000 DC We reserve the right to modify the dimensions and design as part of the ongoing technical development process. -
Page 64: Spare Parts List
REMKO MVV...DC 14.2 Spare parts list Designation MVV 1200 DC MVV 1600 DC MVV 2000 DC Front panel Fan blade, condenser Fan motor, condenser Condenser Cover panel Side panel, right front Side panel, right rear Cover, right rear Compressor, cpl. incl. capacitor... - Page 65 Spare parts not illustrated Designation MVV 1200 DC MVV 1600 DC MVV 2000 DC Cover, right front Electrical crankcase heating Temperature probe, ambient air Temperature probe outlet, condenser Temperature probe, heat gas Solenoid valve SV2, SV4, SV7 On request by providing the serial number...
-
Page 66: Index
REMKO MVV...DC Index Assembly Ordering spare parts ....64, 65 Strip foundation ..... . 30 Propellant in accordance with Kyoto Protocol . - Page 68 SFlb Customer Service Our equipment operates precisely and reliably. However, in the event of a fault, REMKO customer service is quickly at the scene. Our comprehensive network of experienced dealers always guarantees quick and REMKO GmbH & Co. KG reliable service.
Need help?
Do you have a question about the MVV 1200 Dc and is the answer not in the manual?
Questions and answers