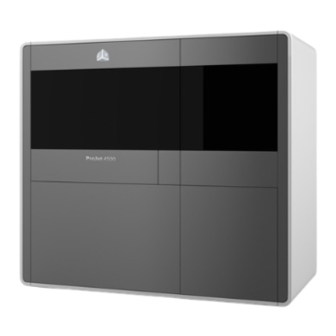
3D Systems ProJet 4500 Post Processing Manual
Professional 3d printer
Hide thumbs
Also See for ProJet 4500:
- User manual (44 pages) ,
- Installation manual (44 pages) ,
- Quick reference manual (19 pages)
Table of Contents
Advertisement
Quick Links
Advertisement
Table of Contents

Summary of Contents for 3D Systems ProJet 4500
- Page 1 ProJet 4500 ® Professional 3D Printer Post Processing Guide Original Instructions...
-
Page 2: Table Of Contents
Method 2: Paraffin Wax Dip . . . . . . . . . . . . . . . . . . . . . . . . . . . . . . . . . . . . . . . . . . . . . . . . . . . . . . . . . . . . . . . . . . . . . . . . 10 3D Systems, Inc. -
Page 3: Introduction
NOTE: For Material Safety Data Sheets, please reference: www .3dsystems .com/materials/visijet-c4-spectrum Parts right out of the ProJet 4500 printer are ready to use and require no additional post-processing for strength . Depending on the part’s application, additional processing steps can be performed to enhance color . This document provides processing instructions for two methods to enhance color on ProJet 4500 parts . -
Page 4: Safety And Supplies
• Finishing Oven is used to heat/melt the wax . We used a ProJet Finisher, which can be purchased through 3D Systems . • If you do not have a finishing oven, use a Paraffin Wax Heater; this can be found at beauty salons, spas, and spa supply stores . -
Page 5: Cleaning The Part
Cleaning Use the machine’s compressed air wand to blow off the part in the ProJet 4500’s cleaning station Cleaning with machine’s air wand Use the paint brush included in the accessory kit in conjunction with the air wand to gross de-powder as much core off the part as possible . -
Page 6: Advanced Cleaning
Be very careful when brushing fine features. Brush them extremely gently with the nylon brush. Features below 3mm thickness risk breaking when brushed, do so cautiously if you choose. Support any fine features with your fingers while brushing . Nylon Brush Cleaning Standard Cleaning 3D Systems, Inc. - Page 7 • DO NOT use the air wand from the printer’s cleaning station to dust . This will contaminate the core powder in the ma- chine . Blow any dust off with external compressed air 3D Systems, Inc.
-
Page 8: Color Enhancement
Wearing gloves, submerge you model in the solvent to cover all of the surface area for just a few seconds . Dip the part in IPA 99% . Fully submerge the part, covering all surfaces evenly with IPA 99% 3D Systems, Inc. - Page 9 For moving/interconnected parts, keep the connections moving while drying . This will prevent connections from fusing together . Clean surface for drying Keep interconnected parts moving parts to prevent the part from binding. Repeat the dipping process if desired . 3D Systems, Inc.
-
Page 10: Method 2: Paraffin Wax Dip
Set Oven Temperature, place wax in Sterilite tub, use thermometer to check wax temperature With the oven at 50°C place the part in the oven to warm up for 10-15 minutes . Preheat part in the oven for 10-15 minutes before waxing . 3D Systems, Inc. - Page 11 Large robust parts (all cross-sections ≥ 15mm) can be subjected to temperatures up to 60°C to speed the process . 1 Hour After dipping parts are covered in wax. Keep in oven to let excess wax drip off. 3D Systems, Inc.
- Page 12 5-10 min to allow the wax smooth out along the surface . Remove any leftover wax . Place the part back in oven for 5-10 minutes . Left – Standard cleaning; Middle – IPA dipped; Right – Wax Dipped 3D Systems, Inc.
- Page 13 3D Systems, Inc . 333 Three D Systems Circle | Rock Hill, SC | 29730 www .3dsystems .com ©2014 3D Systems, Inc . All rights reserved . pn 305671-00, Rev. K...


Need help?
Do you have a question about the ProJet 4500 and is the answer not in the manual?
Questions and answers