Table of Contents

Related Manuals for Vaillant VRC 700/2


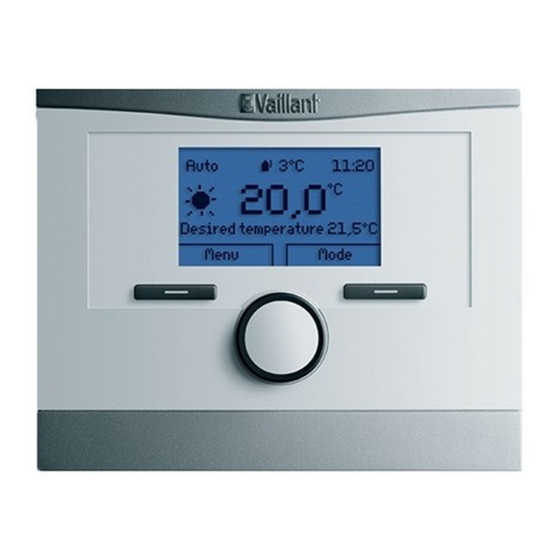
Summary of Contents for Vaillant VRC 700/2
- Page 1 Installation instructions For the competent person Installation instructions VRC 700/2 VRC 700/2 GB, IE Publisher/manufacturer Vaillant GmbH Berghauser Str. 40 D-42859 Remscheid Tel. +49 21 91 18‑0 Fax +49 21 91 18‑28 10 info@vaillant.de www.vaillant.de...
-
Page 2: Table Of Contents
Activating the screed-drying function....18 8.16 Changing the code for Installer level ....19 Fault messages and faults........ 19 Fault messages ........... 19 Decommissioning..........19 10.1 Replacing the product.......... 19 Customer service..........19 Appendix ................20 Installation instructions VRC 700/2 0020200781_01... -
Page 3: Safety
The product controls a heating installation product, to proceed in accordance with the with a Vaillant heat generator with an eBUS current state of the art, and to comply with interface in a way that is weather-controlled all applicable directives, standards, laws and and time-dependent. -
Page 4: Notes On The Documentation
Operating voltage Opening slot Current consumption Screw in the wall socket in accordance with the illustra- Product complies with tion. European standards and Connect the eBUS line. (→ Page 6) directives Proper disposal of the product Installation instructions VRC 700/2 0020200781_01... -
Page 5: Installing The Controller In The Heat Generator
Controller PCB with horizontally connec- ted 3‑pin header ▶ Carefully push the controller with the connected 3- pin header connector into the plug-in connection of the electronics box. Connect the outside temperature sensor. (→ Page 6) 0020200781_01 VRC 700/2 Installation instructions... -
Page 6: Electrical Installation
Connect the eBUS line to the eBUS terminals on the ventilation unit. Conditions: Ventilation unit connected to the eBUS with VR 32, Ventila- tion unit with one or more Vaillant heat generators ▶ Connect the eBUS line to the eBUS terminals in the con- troller's wall socket. -
Page 7: Start-Up
Note The functions described in this section are not 8.2.3 Reading the system status available for all system configurations. Menu → Installer level → System configuration [System -- --] → System status 0020200781_01 VRC 700/2 Installation instructions... - Page 8 8.2.8 Configuring the heating circuit room temperature sensor and room air humidity sensor. Menu → Installer level → System configuration [System -- --] → Heating circuit conf. Installation instructions VRC 700/2 0020200781_01...
- Page 9 To avoid high heating costs due to the auxili- You cannot use this function with the hybrid heat pump and it ary heater, set a low flow temperature. therefore does not appear in the listbox. 0020200781_01 VRC 700/2 Installation instructions...
-
Page 10: Configuring The System Diagram
----] → MA VR70, addr. 1 – You can use this function to set which functions are to be assigned to the multi-function output. Configuring the inputs and outputs of the VR 70 (→ Page 25) Installation instructions VRC 700/2 0020200781_01... -
Page 11: Heat Exchanger 1
Depending on the Type of circuit that is selected, only the flow value for the Cooling function. corresponding functions appear on the display as list entries. 0020200781_01 VRC 700/2 Installation instructions... - Page 12 0.4 is selected, a flow temperature of 40 °C is – maintained at an outside temperature of -15 °C. This function enables you to specify, for each heating circuit separately, the controller functions in automatic mode outside active time periods. Default setting: Eco Installation instructions VRC 700/2 0020200781_01...
- Page 13 (Opening, Closing, Stationary) of the heating circuit to optimum control of the heating installation. mixer for HEATING2. 8.6.17 Activating "Cooling possible" Menu → Installer level → System configuration → [HEAT- ING1 ----] → Cooling possible 0020200781_01 VRC 700/2 Installation instructions...
-
Page 14: Zone1
You can use this function to read the current status of the tion pump (On, Off). zone valve (Open, Closed). 8.8.7 Defining the day for the Anti-legionella function Menu → Installer level → System configuration [Domestic hot water ----] → Anti-legionella day Installation instructions VRC 700/2 0020200781_01... - Page 15 Desired temperature Hot water and this offset value. 8.8.11 Setting the maximum cylinder charging time Menu → Installer level → System configuration [Domestic hot water ----] → Max. cyl. charg. time 0020200781_01 VRC 700/2 Installation instructions...
-
Page 16: Buffer Cylinder
With the Solar pump boost function, you generator to go into heating mode. can reduce the time delay. When this function is activated, Installation instructions VRC 700/2 0020200781_01... -
Page 17: Solar Cylinder 1
The solar cylinder is charging. The differential value can be defined separately for two con- Menu → Installer level → System configuration → [2nd nected solar cylinders. temperature difference control ----] → Switch-off diff. 0020200781_01 VRC 700/2 Installation instructions... -
Page 18: Ventilation
The controller controls the flow tem- perature of the controlled heating circuit according to a pre- set program, regardless of the outside temperature. Days after starting the func- Target flow temperature for tion this day [°C] Installation instructions VRC 700/2 0020200781_01... -
Page 19: Changing The Code For Installer Level
Maintenance Agreement. – This function allows you to change the access code for Please contact Vaillant Service Solutions for further details. the "Installer level" operating level. Vaillant Service Solutions: 03 30 100‑31 43 If the code is no longer available, you must reset the control- ler to the factory setting in order to obtain access to Installer level again. -
Page 20: Appendix
Electric Calorific value * If there are no faults, the status is No fault. If there is a fault, Fault list appears and you can read the fault message in the "Fault mes- sages" section. Installation instructions VRC 700/2 0020200781_01... - Page 21 ℃ Day temperature * If there are no faults, the status is No fault. If there is a fault, Fault list appears and you can read the fault message in the "Fault mes- sages" section. 0020200781_01 VRC 700/2 Installation instructions...
- Page 22 2nd temperature difference control ---- * If there are no faults, the status is No fault. If there is a fault, Fault list appears and you can read the fault message in the "Fault mes- sages" section. Installation instructions VRC 700/2 0020200781_01...
-
Page 23: Functions For The Heating Circuit
– Setting the hot water – – Reading the current temperature – – – – – Reading the current cylinder temperature – – – Setting the excess temperature – – Setting the max limit outs.temp. 0020200781_01 VRC 700/2 Installation instructions... -
Page 24: B Overview Of The Configuration And Sensor Assignment For The Vr 70 And Vr 71
TD2: Temperature difference sensor 2 TDO: Output for the temperature difference control function LP/3WV: Charging pump or 3-way valve for switching to hot water generation COLP: Solar pump COL: Collector temperature sensor 3WV: 3-way valve Installation instructions VRC 700/2 0020200781_01... -
Page 25: Configuring The Inputs And Outputs Of The Vr 70
VR 10 VR 11 VR 10 VR 10 VR 10 VR 10 VR 10 VR 11 VR 10 VR 71 sensor assignment Set value VR 10 VR 10 VR 10 VR 10 VR 10 VR 10 0020200781_01 VRC 700/2 Installation instructions... -
Page 26: C Overview Of The Fault Messages And Faults
Connect the hot water temperature sensor to the VR 70. S1 not connected S1 not connected Incorrect configuration: Incorrectly connected VR 70 Connect the VR 70 module to the appropriate system dia- MA2 VWZ‑AI module gram. Installation instructions VRC 700/2 0020200781_01... -
Page 27: Faults
Heating circuits inactive Activate the required heating circuit by defining its functions displayed in the Type of circuit function. Zone deactivated Activate the required zone by setting the value to Yes in the Zone activated function. 0020200781_01 VRC 700/2 Installation instructions... -
Page 28: Index
Domestic hot water cylinder charging, defining the offset ... 15 Reading the room air humidity ..........8 Domestic hot water cylinder, reading the current Reading the room temperature ........... 14 temperature ................. 14 Reading the running time, solar pump ........ 16 Installation instructions VRC 700/2 0020200781_01... - Page 29 Setting the limp home mode temperature ......9 Setting the maximum charging time, cylinder...... 15 Setting the maximum target flow temperature..... 12 Setting the maximum temperature ........18 Setting the minimum target flow temperature...... 12 Setting the minimum temperature ........18 0020200781_01 VRC 700/2 Installation instructions...
- Page 32 Vaillant Ltd. Nottingham Road Belper Derbyshire DE56 1JT Telephone 03 30 100‑34 61 Telephone (renewables) 02 07 022‑09 28 Vaillant Service Solutions 03 30 100‑31 43 Spares Technical Enquiries 177 359 66 15 info@vaillant.co.uk technicalspares@groupservice.co.uk www.vaillant.co.uk © These instructions, or parts thereof, are protected by copyright and may be reproduced or distributed only with...
Need help?
Do you have a question about the VRC 700/2 and is the answer not in the manual?
Questions and answers