
Subscribe to Our Youtube Channel
Related Manuals for Mircom flexnet


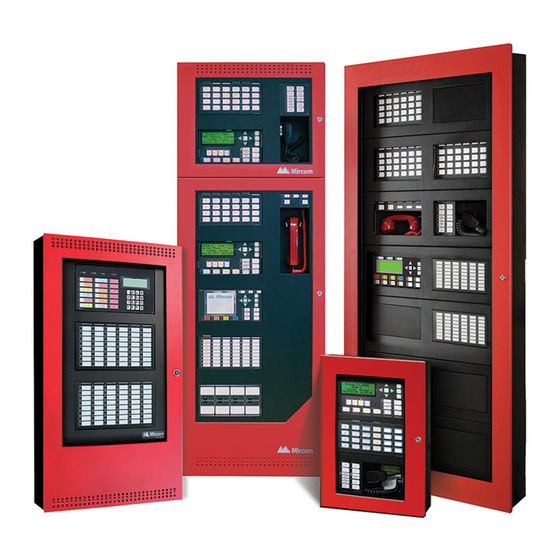
Summary of Contents for Mircom flexnet
- Page 1 Network Intelligent Analog Fire Alarm and Audio System LT-894 Rev Installation and Operation Manual...
-
Page 3: Table Of Contents
FleX-Net Installation and Operation Manual Table of Contents Introduction ..........................1 Additional Features........................3 Document Conventions......................3 System Components ....................... 6 Mechanical Installation and Dimensions ................14 Module Mounting Locations ....................22 Display and Adder Modules Mounting Locations..............24 Module Settings ........................27 Field Wiring.......................... - Page 4 Table of Contents Audio Network Card and Telephone Network Card ............. 90 Audio Amplifier Wiring ......................91 QAA-5230-70/25 Amplifier Wiring ..................91 QAA-5230S-70/25 Amplifier Wiring..................92 QAA-5415-70 and QAA-5415-25 Amplifier Wiring ............... 93 QAA-5160-70/25 ........................97 Backup Amplifier ........................99 Displays &...
-
Page 5: Introduction
• Fault isolators are present on all in-panel addressable loops. • Configurable Signal Silence Inhibit, Auto Signal Silence, Two-Stage Operation, One-Man Walk Test. • Outputs for 4 Wire resettable Smoke Power Supply, Auxiliary Power Supply, and an interface to the Mircom RTI-1 Remote Trouble Indicator. - Page 6 Introduction • RS-485 Interface for Remote Annunciators. Remote Annunciators do not occupy a node on the network. Up to seven annunciators can be connected per node. • Three Level Password Protection with field settable definition which enables the installer to determine what functions are accessible for each level of password •...
-
Page 7: Additional Features
ARCnet only or fiber optics (if used). The QBC-5000N charger provides a dual voltage transformer for audio. The RAXN-LCDG is a graphical display remote annunciator. The FleXNet is compatible with Coptir, Pinnacle, Acclimate and 4-20mA devices. Configuration options are provided for grouping inputs. - Page 8 Document Conventions...
- Page 9 FleX-Net Installation and Operation Manual...
-
Page 10: System Components
Mircom System Components Chassis Types Model Description 12 Amp Compact Main Chassis. This compact main chassis comes Mircom FX-2000 MENU complete with one Analog Loop Controller (99 Analog Sensors and 99 Fire Alarm Control Panel Normal Condition ENTER CANCEL December 31, 1999 Addressable Modules), 4 Class A/B (Style Z/Y) NACs (1.7 Amp each), a... - Page 11 Analog Loop Controller (99 Analog Sensors and 99 Addressable Modules), 4 Class A/B (Style Z/Y) NACs (1.7 Amp each), a 4 line by 20 character back-lit LCD display, 16 zone LED annunciator and Mircom FX-2000 MENU Fire Alarm Control Panel...
- Page 12 System Components Network Controller Modules Model Description Provides network capability for the FX-2000N Fire Alarm panel. One module is required per one FNC-2000 network node panel. The FNC-2000 Fire Network Controller module is mounted in position 2 over the FX-2000N main board. Audio Network Controller module.
- Page 13 4 line by 20 charactor display which can be mounted into backboxes BBX-1072A(RA), DSPL-420 BBX-1072ADS(ARDS), BB-5008(R), BB-5014 and the BBX-FXMNS Backbox. Graphic display which can be mounted in backboxes BBX-1072A(RA), Flexnet Flexnet DSPL-2440 System Normal System Normal BBX-1072ADS(ARDS), BB-5008(R), BB-5014 and the BBX-FXMNS Backbox...
- Page 14 System Components Model Description ZONE ZONE ZONE ZONE ZONE ZONE BYPASS BYPASS BYPASS BYPASS BYPASS BYPASS Programmable Input Switches Module (mounts ZONE ZONE ZONE ZONE ZONE ZONE BYPASS BYPASS BYPASS BYPASS BYPASS BYPASS ZONE ZONE IPS-2424/DS with the FX-2009-12N and can also be part of ZONE ZONE ZONE...
- Page 15 FleX-Net Installation and Operation Manual Model Description CALL CONTROL TROUBLE ACTIVE INCOMING CALL DESELECT ALL CALL CONTROL Network Master Telephone Control Panel QMT-5302NV (Vertical Mount) mounts within the BBX-FXMNS enclosure. Telephone Telephone Telephone Telephone Telephone Telephone Telephone Telephone Telephone Telephone Telephone Telephone QAZT-5302/DS...
- Page 16 Description Black flush trim ring for BBX-1024(R) FA-UNIV-TRB Black flush trim ring for BBX-1072A/RA/DS/ FA-1072TR RDS. Remote Annunciators Model Description Mircom FX-2000N MENU Fire Control System - System Normal - ENTER CANCEL Jan 01, 2011 12:21 AM Remote Shared Display Annunciator. Please INFO A.C.
- Page 17 Description FX-LOC(R) consists The FX-LOC(R) Local Operating Console along FX-LOC Enclosure includes backbox, inner with the Mircom FleX-Net Network Fire Alarm door and outer white door. system facilitates a Mass Notification System. FX-LOCR, the R suffix The FX-LOC(R) provides critical emergency (as represents a red door.
-
Page 18: Mechanical Installation And Dimensions
Mircom Mechanical Installation and Dimensions Install the enclosure as shown for the BBX-1024 in Figure 1 below. The BBX-1024DS install information is in Figure 2. For the BBX-1072A and BBX-1072ADS see Figure 3 and 4, on the following pages. Figure 5 demonstrate the BB-5008 backbox installaltion. - Page 19 FleX-Net Installation and Operation Manual Figure 2: BBX-1024DS Flush and Surface Enclosure Installation and Dimensions BBX-1024DS BACKBOX AND DOOR 5 3/4” 12” 14 1/2” 23 1/2” 17” 26 ” 28 ” BACKBOX 4 1/4” 1 1/2” BACKBOX FRONT VIEW LEFT SIDE VIEW DOOR KNOCKOUT LOCATIONS 1 3/4”...
- Page 20 Mechanical Installation and Dimensions Figure 3: BBX-1072A Flush or Surface Enclosure Installation and Dimensions Material: Cold rolled steel 16GA (0.059”) thick for backbox 14GA (0.075”) thick for door Finish: Painted except for hinges Note: Leave bottom of box conduit free for batteries.
- Page 21 FleX-Net Installation and Operation Manual Figure 4: BBX-1072ADS Flush and Surface Installation and Dimensions Material: Cold rolled steel 16GA (0.059”) thick for backbox 14GA (0.075”) thick for door Finish: Painted except for hinges...
- Page 22 Mechanical Installation and Dimensions Figure 5: BB-5008 Enclosure Installation Instructions and Dimensions Material: Cold rolled steel BB-5008 Backbox Backbox 16GA (0.059”) thick for backbox 14GA (0.075”) thick for door Finish: Painted except for hinges Backbox with DOX-5008M Door DOX-5008M Metal Door Note: Leave bottom of box conduit free for batteries.
-
Page 23: Chassis Installation
4. Mount chassis FX-2003-12N into backbox BBX-1024 using the supplied hexnuts as shown in Figure 6 below. Figure 6: Chassis Installation into BBX-1024 14 1/2” BACKBOX 26” CHA SSIS GR OUND 4 1/2” Mircom FX-2000N MENU Fire Alarm Control Panel Normal Condition ENTER December 31, 2009 CANCEL INFO ALARM SUPV. - Page 24 Mechanical Installation and Dimensions Figure 7: Chassis Installation into BBX-1072A Mount chassis FX-2017-12N into backbox BBX-1072A using the supplied hexnuts as shown below. 2012...
- Page 25 FleX-Net Installation and Operation Manual Figure 8: Installation Instructions and Dimensions for BB-5014 BB-5014 Backbox Backbox Material: Cold rolled steel 16GA (0.059”) thick for backbox 14GA (0.075”) thick for door Finish: Painted except for hinges Backbox with DOX-5014M Door DOX-5014M Metal Door Note: Mount the power supply in the same manner as shown in Figure 7...
-
Page 26: Module Mounting Locations
Mircom Module Mounting Locations The FX-2003-12N or FX-2017-12N Main Chassis come pre-assembled with a main panel, display components and boards. Install the adder modules of different types as shown in the diagrams on the following pages. Notes: For many adder modules to enable communication from the main module to all of the adder modules, it is necessary to add a continuity jumper on the last adder module in a chain (see the appropriate module settings section to verify the location of the continuity jumper on a particular circuit adder module). - Page 27 FleX-Net Installation and Operation Manual Figure 10: Module Mounting Locations View #2 Provision for PR-300 or Main Chassis UDACT-300A FX-20XX-12N/DS FNC-2000 in position 2 and other Adder Module in position 1 MD-579 MD-575 Long Ribbon Cable MD-579 Short Power Cable MD-580 Long Power Cable FNC-2000 Fire Network Controller Module This module is required in the main lobby and one per node.
-
Page 28: Display And Adder Modules Mounting Locations
Mircom Display and Adder Modules Mounting Locations FX-2003-12N Compact Main Chassis Mounts in the BBX-1024 Enclosure and supports three adder modules. Exterior View Interior View Slot 3 is reserved for PR-300 or Mircom FX-2000N MENU Fire Alarm Control Panel UDACT-300A. If... - Page 29 Mounts and occupies four display positions in BB-5008 or BB-5014 Enclosures, and supports two display modules and nine adder modules. This large chassis size can hold the integrated audio and/or telephone modules. Exterior View Interior View Mircom FX-2000N MENU Fire Alarm Control Panel...
- Page 30 Programmable Input Annunciator Module (3 Frames) Switches Module (2 Frames) DSPL-2440 RAX-1048TZ/DS FDX-008/KI Graphic Display Control(3 Frames) Programmable Zone/Trouble LED Fan Damper Module (1 Frame) Annunciator Module (3 Frames) Flexnet Flexnet AUTO TROUBLE AUTO TROUBLE AUTO TROUBLE AUTO TROUBLE System Normal...
-
Page 31: Module Settings
FleX-Net Installation and Operation Manual Module Settings Main Fire Alarm Module (MD-871A “N” Version Main Chassis) This main board has one addressable loop and network capability. Jumper is removed if a PR-300 or UDACT-300A is installed. Jumpers are Factory Set and should not be changed. JW2,JW4 Normally un-installed, add jumper to silence on-board buzzer. - Page 32 Module Settings SW2 DIP Switch Node Address Setting on Main Fire Alarm Module Refer to table in Appendix for Node Address Setting. Available addresses are 1 to 63. DIP Switch SW2-1 is the least significant digit. DSPL-420 Main Display Module The DSPL-420 mounts into backboxes BB-5008(R), BB-5014(R) and BBX-FXMNS.
- Page 33 FleX-Net Installation and Operation Manual DSPL-2440 Graphical Main Display Module The DSPL-2440 is a separate item. It can be mounted into backboxes BB-5008(R), BB-5014(R) and BBX-FXMNS. It can replace the DSPL-420 found with the following models: FX-2003-12NDS, FX-2003-12XTDS, FX-2009- 12NDS, FX-2017-NDS, and FX-2000NDS. Figure 13: DSPL-2440 Graphical Main Display Module MGC Network Fire Control System...
- Page 34 Module Settings Main Display Module The display module shown in Figure 14 is part of the following chassis: FX-2003-12N, FX-2009-12N, FX-2017-12N and FX-2000ND. Figure 14: Main Display Module (Part of Main Chassis) MGC Network MENU Fire Control System System Normal ENTER CANCEL March 7, 2013...
- Page 35 FleX-Net Installation and Operation Manual FNC-2000 Fire Network Controller Module An FNC-2000 Fire Network Controller module is required in each fire alarm node in the system. The FNC-2000 also provides a connection for an optional FOM-2000-SP Fiber Optics Module. Figure 15: FNC-2000 Fire Network Controller Module This cable connects to P19 on the...
- Page 36 Module Settings Figure 16: FOM-2000-SP Fiber Optic Network Module One of these modules is required at each panel where fiber optics will be used between them. The FOM-2000-SP will be mounted over the FNC-2000 Network board (over the field wiring terminals) with two #6 Phillips screws and two Hex spacers.
- Page 37 FleX-Net Installation and Operation Manual Figure 18: IPS-2424/DS Programmable Input Switches Module ZONE ZONE ZONE ZONE ZONE ZONE BYPASS BYPASS BYPASS BYPASS BYPASS BYPASS ZONE ZONE ZONE ZONE ZONE ZONE BYPASS BYPASS BYPASS BYPASS BYPASS BYPASS ZONE ZONE ZONE ZONE ZONE ZONE BYPASS...
- Page 38 Module Settings Figure 19: Fan Damper Control Display Module (FDX-008/KI) There are two models of the Fan Damper Control Display modules available. The FDX-008 provides switch control and LED indication of 8 fan damper zones. The FDX-008KI provides switch control of 7 fan damper zones with the eighth zone activated by keyswitch.
- Page 39 FleX-Net Installation and Operation Manual Note: A bypass function always has priority, so that if a circuit is bypassed by moving the switch manually or by loop bypass (FX-2000N Fire Alarm Panel), no other action will operate this switch other than again moving the switch manually or by un-bypassing the loop. Figure 20: FDX-008 Block Diagram of Fan and Monitor Set-up OUTPUT MODULES FX-2000N FIRE...
- Page 40 Module Settings UUKL with FDX-008 and FDX-008KI The models FDX-008 and FDX-00KI can be effectively use to provide an automatic and manual control system for smoke. Refer to document number LT-966 for extensive instructions regarding UUKL applications. Figure 22: Hardwire Detection Adder Module (DM-1008A) Power connector to P8 of Data cable to P6 or P5 of main fire alarm module,...
-
Page 41: Basic Mode
FleX-Net Installation and Operation Manual Figure 23: Hardwire Signal Adder Module (SGM-1004A) ZONE 4 1 2 3 Power connector to P8 of Data cable to P6 or P5 of main fire alarm module main fire alarm module, or to P2 of loop controller or to P13 or P12 of loop ZONE 3 controller module, previ-... - Page 42 Module Settings Figure 24: Hardwire Relay Adder Module (RM-1008A) 3 2 1 3 2 1 3 2 1 3 2 1 3 2 1 3 2 1 3 2 1 3 2 1 P2: Data cable to P6 or P5 of main fire alarm module, or to previous adder module. P1: Data connector for next adder module.
- Page 43 Configurator Software) the UDACT-300A. Refer to Figure 26 below for location of jumpers, cable connections, pushbutton and LEDs. Table 6 following, provides a description of the user items on the UDACT-300A. Figure 26: UDACT-300A Board Layout CONNECT RIBBON CABLE FROM P1 SYSTEM NORMAL TO MIRCOM FIRE 13:21 MON 2013-02-04 ALARM CONTROL PANEL...
- Page 44 Module Settings Table 6: UDACT-300A Cable Connectors and Miscellaneous Cable Connector Function Ribbon Cable for connecting to P4 of FX-2000N main fire alarm module or to P2 header on the PR-300 if used. RS-232C/RS-485 Connection for computer configuration. Connector for CFG-300 Configuration Tool Press and hold this button to test all the UDACT-300A LEDs Lamp Test button This potentiometer is for adjustment of the CFG-300 LCD contrast.
- Page 45 FleX-Net Installation and Operation Manual ALCN-792M Quad Loop Adder Module with ALCN-792D Daughter Board The new Quad Loop Adder module provides two addressable loops plus an additional two loops as part of the daughter board ALCN-792D which is mounted over the ALCN-792M. The Quad Loop Adder module may be mounted over the main chassis of the FX-2000N Fire Alarm Panel or on any chassis that supports adder boards.
- Page 46 Module Settings The ALCN-792D Daughter Board provides another two addressable loops when connected to the ALCN-792M Quad Loop Adder Board. This daughter board is mounted over the ALCN-792M. Wire the two addressable loops on the ALCN-792D Daughter Board in the same manner the ALCN-792M addressable loops are wired. Figure 27: ALCN-792D Daughter Board Four mounting holes (mount to...
- Page 47 FleX-Net Installation and Operation Manual Wire the ALCN-792M Quad Loop Adder module as shown in Figure 28 below. Figure 28: ALCN-792M Quad Loop Adder Module DIP SWITCHES ARE FOR THIS BOARD’S ADDRESS. SW1-1 IS THE LEAST SIGNIFICANT ADDRESS LOOP 1 LOOP 2 DIGIT (BINARY).
-
Page 48: Field Wiring
Field Wiring Field Wiring Main Fire Alarm Module Terminal Connections Wire devices to terminals as shown in below. Refer to Appendix A for specifications and to LT-1023 for compatible devices. ATTENTION: Do not exceed power supply ratings: Main Chassis FX-2003-12N/DS or FX-2017-12N/DS: total current for NACs is 10A max. Main Chassis FX-2009-12N/DS total current for NACs is 10A max. - Page 49 SEE ANALOG LOOP WIRING SECTION ADDRESSES FOR FIRST 8 POWER-LIMITED, 22V DC, 400 mA MAX CARDS AND Maximum Loop Resistance 40 ohms CONNECTION TO MIRCOM RTI SECOND 8 REMOTE TROUBLE INDICATOR CARDS (SEE RTI INSTALLATION RESPECTIVELY INSTRUCTION) BLK TO TRB+ BLU POWER-LIMITED, REGULATED TO TRL-RED &...
-
Page 50: Analog Loop Wiring
Field Wiring Analog Loop Wiring Figure 31: Loop Terminal Connections - Class B TWIS TE D P AIR WIR E Conventional Heat Sensors and Manual Pull Stations FX-2000N MAIN FIRE ALARM BOARD 2 P air TWO WIR E S ANALOG LOOP CONNECTIONS 4-WIR E... - Page 51 FleX-Net Installation and Operation Manual Figure 32: Loop Terminal Connections - Style 7 TWIS TE D P AIR WIR E ADDR ESSABLE SMOKE DETECTOR WITH ISOLATOR BASE FX-2000N MAIN FIRE ALARM BOARD TWIS TE D P AIR WIR E TWIS TE D P AIR WIR E ADDR ESSABLE THER MAL SENSOR...
- Page 52 Field Wiring Figure 33: Loop Terminal Connections - Style 6 (Formerly Class A) ADDRESSABLE THERMAL SENSOR TWIS TE D P AIR WIR E FX-2000N MAIN FIRE ALARM BOARD TWIS TE D P AIR WIR E ADDRESSABLE SMOKE DETECTORS Conventional 4-Wire Smoke Detectors, Heat Sensors and Manual Pull Stations ANALOG...
- Page 53 FleX-Net Installation and Operation Manual Figure 34: Quad Loop Terminal Connections - Class B ALCN-792M QUAD LOOP ADDER MODULE TWISTED P AIR WIRE Conventional Heat Sensors ANALOG and Manual Pull Stations LOOP 1 TWISTED PAIR WIRE 2 Pair ANALOG LOOP 2 TWO WIRES FX-2000N LEGEND...
- Page 54 Field Wiring Figure 35: Quad Loop Adder Module Terminal Connections - Style 7 ALCN-792M QUAD LOOP ADDER MODULE TWISTED PAIR WIRE TWISTED PAIR WIRE ANALOG LOOP 1 ADDRESSABLE SMOKE DETECTOR WITH ISOLATOR BASE TWISTED PAIR WIRE ANALOG LOOP 2 TWISTED PAIR WIRE ADDRESSABLE THERMAL SENSOR WITH ISOLATOR...
- Page 55 FleX-Net Installation and Operation Manual Figure 36: Quad Loop Adder Module Terminal Connections - Style 6 TWISTED PAIR WIRE ADDRESSABLE THERMAL SENSOR ALCN-792M QUAD LOOP ADDER MODULE ANALOG LOOP 1 ADDRESSABLE SMOKE DETECTORS Conventional 4-Wire Smoke Detectors, Heat Sensors and Manual Pull Stations ANALOG LOOP 2 LEGEND...
-
Page 56: Fnc-2000 Fire Network Controller Module
Field Wiring FNC-2000 Fire Network Controller Module The FNC-2000 Fire Network Controller modules are wired from terminals marked Line A, positive and negative (see specific cable recommended in Figure 37) to the Line B terminals of the next FNC-2000 module. Use of shielded cable is not recommended. -
Page 57: Fom-2000-Sp Fiber Optic Network Adder Module
FleX-Net Installation and Operation Manual FOM-2000-SP Fiber Optic Network Adder Module The FOM-2000-SP Fiber Optic Network Adder Module is wired with fiber optic cable. It is wired OUT through the transmit connectors marked TX and IN through the receive connectors marked RX. Figure 38: FOM-2000-SP Fiber Optic Network Adder Module Wiring STYLE 7 WIRING TX 1... -
Page 58: Detection Module (Dm-1008A) Terminal Connections
Field Wiring Detection Module (DM-1008A) Terminal Connections Wire devices to terminals as shown below. See wiring tables, and Appendix A for electrical specifications and document LT-1023 for compatible devices. Figure 39: Hardwire Detection Module (DM-1008A) Terminal Connections INI 1+ STYLE B SUPERVISED INITIATING CIRCUIT #1 (CLASS B) (ALARM ZONE) (POWER LIMITED) -
Page 59: Signal Module (Sgm-1004A) Terminal Connections
Legend: SMOKE DETECTOR 3.9K 1/2W ELR LISTED S5434 MODEL MP-300 MANUFACTURED BY MIRCOM Notes: • The terminal blocks are “depluggable” for ease of wiring. • All power limited circuits must use type FPL, FPLR, or FPLP power limited cable. • SGM-1004A NACs are fully supervised and rated for 24 VDC special application, 1.7A max. They must... -
Page 60: Relay Module (Rm-1008(A)) Terminal Connections
Field Wiring Relay Module (RM-1008(A)) Terminal Connections Relays are available as shown below. Figure 41: Hardwire Relay Module Terminal Connections RM-1008A Relay Module AUX RELAY 1 AUX RELAY 5 CONTACTS CONTACTS RLY 1 RLY 5 28 VDC, 1 AMP 28 VDC, 1 AMP RESISTIVE LOAD RESISTIVE LOAD AUX RELAY 2... -
Page 61: Polarity Reversal And City Tie Module (Pr-300) Wiring
FleX-Net Installation and Operation Manual Polarity Reversal and City Tie Module (PR-300) Wiring Wire PR-300 Polarity Reversal and City Tie Module (if used) as shown in Figure 42 below. Power Limited cable type FPL, FPLR or FPLP must be used. For USA installation, the installer must use Atlantic Scientific (Tel: 407-725-8000), Model #24544 Protective Device, or similar UL-Listed QVRG secondary protector, as shown. -
Page 62: Udact-300A Main Board Terminal Connections
Field Wiring UDACT-300A Main Board Terminal Connections Wire the two telephone lines to RJ31X Connector terminals as shown in Figure 43 below. The UDACT-300A terminals are located on the top left hand corner of the board. If using a cellular or wireless service, use the Line 2 interface connection only. -
Page 63: Power Supply Connections
FleX-Net Installation and Operation Manual Power Supply Connections The power supply is part of the main chassis. The ratings are outlined in the table below. Power Supply Battery Fuse on Main Model Electrical Input Ratings Total Current Module FX-2003-12N/DS & FX-2017- 120 VAC, 60 Hz, 2A / 20 Amp, 1-1/4"... -
Page 64: Wiring Tables And Information
Field Wiring Wiring Tables and Information Table 9: Wiring Table for Initiating Circuits. Wire Gauge Maximum Wiring Run to Last Device (ELR) (AWG) 2990 4760 1450 7560 2300 12000 3600 19000 5800 30400 9200 Note: Maximum loop resistance should not exceed 100 Ohms. Table 10: Wiring Table for NACs ain board NACs are rated for 1.7 amps each. - Page 65 FleX-Net Installation and Operation Manual Table 11: Analog Loop Wiring Wire Gauge (use Loop Total (Out and In) Maximum twisted pair) Twisted Pair Wire Run (AWG) 10,000 3049 7971 2429 4980 1518 3132 Note: • Line capacitance shall not exceed 0.5 mF. •...
-
Page 66: System Checkout
System Checkout System Checkout Before Turning the Power On 1. To prevent sparking, do not connect the batteries. Connect the batteries after powering the system from the main AC supply. 2. Check that all modules are installed in the proper location with the proper connections. 3. -
Page 67: Indicators, Controls, And Operation
FleX-Net Installation and Operation Manual Indicators, Controls, and Operation Refer to Figure 45 below for LED indicators, control buttons, and switches locations. Figure 45: Indicators and Control Location Cursor buttons, LCD Display - four lines, 20 characters per line ENTER, MENU, CANCEL, INFO MGC Network Queue controls and MENU... -
Page 68: Common Indicators
Mircom Common Indicators Indicators Description The Buzzer is activated by any of the following Fire Alarm - Steady Supervisory Alarm - Fast Rate Trouble - Trouble Rate Buzzer Monitor - Configurable to sound at Trouble Rate If the Buzzer is turned on in response to a Non-Latching Trouble or Supervisory, it will be turned off if the condition causing it goes away and there is no other reason for it to be on. -
Page 69: Common Controls
FleX-Net Installation and Operation Manual Common Controls LCD Display: The display is a large 4 line by 20 character back-lit alphanumeric LCD. It displays information on the panel and its devices. There are cursor buttons for menu selection and control. Information provided by the LCD display is an alarm log, an event log, current levels, device information, verification and maintenance reports. - Page 70 Indicators, Controls, and Operation System Reset Button The System Reset button causes the Fire Alarm Control Panel, and all Circuits, to be reset • Resets all Latching, Trouble Conditions • Resets all Initiating Circuits • Resets 4-Wire Smoke Supply and Aux. Power Supply •...
-
Page 71: Single Stage Operation
FleX-Net Installation and Operation Manual Single Stage Operation In a single stage system, all alarm inputs are treated in a similar manner. Alarm inputs include any of the following: non-verified alarm, verified alarm, sprinkler alarm, water-flow alarm, and general alarm circuits. Any of these alarm inputs occurring when the panel is not already in alarm cause the following: •... -
Page 72: Pre-Signal Operation
Indicators, Controls, and Operation • The buzzer sounds steadily • If signals have been silenced as a result of the silence button or the Auto signal silence timer, signals are resounded as they were before signal silence, the Signal Silence LED turns off, and the Auto Signal Silence timer, if configured, is restarted •... -
Page 73: Circuit Types
FleX-Net Installation and Operation Manual Circuit Types The term circuits refers to an actual electrical interface, either initiating (detection) or indicating (signal). The term zone is a logical concept for a fire alarm protected area, and will consist of at least one circuit. Often the terms zone and circuit are used interchangeably, but in this manual the term circuit is used. - Page 74 (open-circuit). This circuit is used for monitoring a trouble condition from an external device such as a Trouble-Only Mircom Series 500 Audio System. Both open and short circuits generate a non-latching trouble condition. Indicating (Signal) Circuits Types...
- Page 75 FleX-Net Installation and Operation Manual Evacuation Codes Single stage codes On 100% of the time Continuous 3 of 0.5 second on, 0.5 second off then, 1.5 second pause Temporal Code 0.5 second on, 0.5 second off March Code 5 seconds on, 10 seconds off California Code Two-stage codes: Alert Code...
-
Page 76: Configuration
The FleX-Net network system which includes FX-2003-12N/DS, FX-2009-12N/DS, FX-2017-12N/DS, FX-2000ND/S and FX-2000MNS is configured using Mircom software MSW-025. NOTICE TO USERS, INSTALLERS, AUTHORITIES HAVING JURISDICTION, AND OTHER INVOLVED PARTIES This product incorporates field-programmable software. In order for the product to comply with the requirements in the Standard for Control Units and Accessories for Fire Alarm Systems, UL 864, certain programming features or options must be limited to specific values or not used at all as indicated below. -
Page 77: Typical Flex-Nettm System Layouts With Audio
FleX-Net Installation and Operation Manual Typical FleX-Net System Layouts with Audio The following figures show two typical applications for the FleX-Net system with audio. Figure 48 below shows a typical FleX-Net system layout with the main lobby control panel as Node 1 and the combination Fire Alarm and Audio Network systems as Node 2 and 3. - Page 78 Typical FleX-NetTM System Layouts with Audio Figure 49 below shows the FleX-Net fire alarm and audio shown within the Integrated Network Fire/Audio cabinet as Node 2 and 3. Paging and telephone devices are hooked up to Nodes 2 and 3. Figure 49: Typical FX-2000N Network System with Audio and Non-Audio Nodes CACF Node 1...
-
Page 79: System Components For The Integrated Fire/Audio Cabinet
FleX-Net Installation and Operation Manual System Components for the Integrated Fire/Audio Cabinet Network Fire Alarm Model Description 12 Amp Large Main Chassis. This large main chassis comes complete with one Analog Loop Controller (99 Analog Sensors and 99 Addressable Modules), 4 Class A/B (Style Z/Y) Indicating Circuits (1.7 Amp each), a 4 line by 20 character back-lit LCD display, 16 zone LED annunciator and a 12 FX-2000ND... -
Page 80: Fiber Optics Module
System Components for the Integrated Fire/Audio Cabinet Fiber Optics Module Model Description Connects to the FNC-2000 Fire Alarm Network FOM-2000-SP Controller Module and allows fiber optics cabling. Adder Modules Model Description DM-1008A, SGM-1004A, Loop and Circuit Adder Modules RM-1008A Auxiliary Modules Model Description PR-300... -
Page 81: Flexnettm Mass Notification System (Bbx-Fxmns) Enclosure
FleX-Net Installation and Operation Manual FleXNet Mass Notification System (BBX-FXMNS) Enclosure This enclosure can accommodate all existing modules, except the QMP-5101N Network Master Paging Control module and the QMT-5302N Master Firefighters’ Telephone. New models, QMP-5101NV vertical mounting master paging microphone and QMT-5302NV Master Telephone panels are used instead to mount within the BBX-FXMNS Enclosure. - Page 82 FleXNetTM Mass Notification System (BBX-FXMNS) Enclosure The BBX-FXMNS backbox supports the QMB-5000N amplifier backplane and card cage which holds up to four amplifiers, the FX-2000MNS Fire Alarm main board chassis and PS-2040 Power Supply. Figure 51: BBX-FXMNS Backbox Dimensions and Contents BBX-FXMNS Backbox 16.5”...
- Page 83 FleX-Net Installation and Operation Manual Figure 52: BBX-FXMNS Enclosure Complete View BBX-FXMNS FRONT DOORS AND DEADFRONT CHASSIS BBX-FXMNS BACKBOX...
- Page 84 FleXNetTM Mass Notification System (BBX-FXMNS) Enclosure Figure 53: Mounting Vertical Microphone and Telephone Modules in the BBX-FXMNS Back side of BBX-FXMNS inner door Door Hinge Modules are mounted from the backside of the middle door using the screws provided Door Hinges Door Hinge...
-
Page 85: Integrated Fire/Audio Cabinet Mechanical Installation
FleX-Net Installation and Operation Manual Integrated Fire/Audio Cabinet Mechanical Installation The Integrated Fire/Audio Cabinet is the network fire alarm and audio floor or node panel. It is mounted into the BBX-2000 backbox and door. Mount the backbox onto the wall using six #8 screws to secure the backbox to the wall. - Page 86 Integrated Fire/Audio Cabinet Mechanical Installation Each part has to be mounted into the backbox by the user. The QMB-5000N Audio Card Cage is mounted in the top left side of the backbox over the four studs with the #8 Hex nuts provided. The FX-2000ND Main Chassis is mounted below the audio card cage over the four studs provided using four #8 Hex nuts.
-
Page 87: Mechanical Installation For The Expansion Audio Cabinet
FleX-Net Installation and Operation Manual Mechanical Installation for the Expansion Audio Cabinet QBB-5001/R Expansion Audio Cabinet Installation Expansion audio cabinets are mounted as shown in Figure 56 below. The QBB-5001/R is the backbox and door. The QBB-5001/R backbox may be flush or surface mounted. The QBB-5001TR is the metal flush trim. Install all cabinets and enclosures empty. - Page 88 Mechanical Installation for the Expansion Audio Cabinet FX-2000ND Fire Alarm Chassis Layout Exterior View Interior View Slot 3 is reserved for PR-300 or Mircom FX-2000 UDACT-300A only. MENU Fir e Alarm Control Panel Normal Conditio ENTER CANCEL If not required, this...
-
Page 89: Integrated Fire/Audio Cabinet - Audio Module Placement And Internal Wiring
FleX-Net Installation and Operation Manual Integrated Fire/Audio Cabinet - Audio Module Placement and Internal Wiring The modules that mount into the Integrated Fire/Audio Cabinet audio card cage are the amplifier modules. Up to four amplifiers may be installed in each Integrated Fire/Audio Cabinet with one of the four as a backup. Slot #1 is used for the ANC-5000 and/or TNC-5000 modules. -
Page 90: Integrated Fire Alarm Connection
Integrated Fire Alarm Connection Integrated Fire Alarm Connection The FX-2000ND/S Chassis consists of the Network Fire Alarm main board and chassis. Battery Power The power cable is used to provide power from the batteries to the FX-2000ND/S Fire Alarm main board and the audio card cage motherboard. -
Page 91: Qbb-5001/R Expansion Audio Cabinet Module Placement
FleX-Net Installation and Operation Manual QBB-5001/R Expansion Audio Cabinet Module Placement The modules that mount into the QBB-5001/R expansion audio cabinet include the QPS-5000N Power Supply, the QMB-5000B Motherboard, and the QBC-5000N Battery Charger. Module interconnects are shown in Figure 58. There is no module installed into Slot #1 of the QMB-5000B Motherboard, as shown below. -
Page 92: Qps-5000N Power Supply Connection
Installing and Removing Amplifiers QPS-5000N Power Supply Connection Two jumpers are provide as shown in figure below for 120 VAC connection. For 240 VAC application, remove both jumpers and replace one jumper between the two middle terminals. The two terminals on the right are N (neutral), L (live) for AC voltage connection. -
Page 93: Multiple Qbb-5001/R Cabinet Connections
When multiple QBB-5001/R audio cabinets are used in an installation, each has its own QPS-5000N Power Supply, QBC-5000N Battery Charger, and batteries. A total of three audio cabinets may be used by simply interconnecting with Mircom MD-525 Extension Cables from the QMB-5000N "Out" Connector, to the "In" Connector on the next QMB-5000B motherboard. -
Page 94: Audio Network Card And Telephone Network Card
Audio Network Card and Telephone Network Card Audio Network Card and Telephone Network Card Each Integrated Fire/Audio Cabinet requires an ANC-5000 Audio Network Controller Card. The TNC-5000 Telephone Controller Network card is necessary only if Telephone circuits are required. Below is a diagram for mounting both audio and telephone cards into the large network fire alarm chassis, FX-2009-12N/DS. -
Page 95: Audio Amplifier Wiring
WIRING MANUFACTURED BY SPEAKER Class A or B EXAMPLE MIRCOM 30 WATTS MAX Notes: • All circuits are power limited and supervised. • Cut jumper J1 when using an isolator. • There are two fuses on this board. Both are 4A fast blow. -
Page 96: Qaa-5230S-70/25 Amplifier Wiring
MD-788. Figure 62: QAA-5230S-70/25 Wiring QAA-5230S-525-70/25 22 K, 1W ELR 1/2 OF TERMINAL BLOCK MODEL MP-302 SPEAKER MANUFACTURED BY ZONE B MIRCOM 25 Watts CLASS B 22 K, 1W ELR 30 WATTS 1/2 OF MAX EACH MODEL MP-302 SPEAKER ZONE... -
Page 97: Qaa-5415-70 And Qaa-5415-25 Amplifier Wiring
QAA-5415 but instead of 70 Volts it is 25 Volts. Figure 63: QAA-5415-70 or QAA-5415 Wiring QAA-5415-70 OR QAA-5415-25 22K, 1W ELR TERMINAL BLOCK MODEL MP-302 ZONE D SPEAKER MANUFACTURED BY MIRCOM 22K, 1W ELR MODEL MP-302 ZONE C SPEAKER MANUFACTURED CLASS B WIRING BY MIRCOM 15 WATTS... - Page 98 Audio Amplifier Wiring Figure 64: Using a Speaker Isolator with the QAA-5415-70 or QAA-5415-25 Amplifiers QAA-5415-70/25 AMPLIFIER CUT JUMPER OVER U3 WHEN USING A SPEAKER ISOLATOR JUMPER Note: When using a speaker isolator (SISA-204 or SISA-204 for use in Canada only), jumper JP1 (top left- hand corner, component side) must be cut on the QAA-5230-70/25 and on the QAA-5160-70/25.
- Page 99 FleX-Net Installation and Operation Manual Figure 65: QAA-4CLA Class A Converter For QAA-5415-70/25 Amplifier...
- Page 100 Audio Amplifier Wiring Figure 66: QAA-4CLAS Class A Converter For QAA-5230S-70/25 Amplifier...
-
Page 101: Qaa-5160-70/25
MODEL MP-301 SPEAKER MANUFACTURED 60 WATTS MAX BY MIRCOM Notes: • All circuits are power limited and supervised. • There are two fuses on this board. Both are 8A fast blow. • See speaker wiring chart for wire gauge selection. - Page 102 Audio Amplifier Wiring Table 12: Wiring Chart for 70V Speakers Maximum Wiring Run To Last Device (ELR) Total Power 18AWG 16AWG 14AWG 12AWG Watts 2500 4000 1219 6000 1828 8000 2438 1500 2500 4000 1219 6000 1828 1200 2000 3500 1066 Notes for Wiring Charts: 1.
-
Page 103: Backup Amplifier
FleX-Net Installation and Operation Manual Backup Amplifier Any amplifier may be designated as a backup amplifier when backup is required. It should be installed in any audio cabinet and in the right-most slot position of a QMB-5000B backplane. Figure 68: QAA-5160-70/25 Amplifier (Backup Application) Any amplifier may be designated as the backup amplifier and this backup amplifier must have the MD-789 molex connector... -
Page 104: Displays & Controls
Displays & Controls Displays & Controls Figure 69: Audio Cabinet Displays and Controls PAGE PAGE PAGE PAGE PAGE PAGE PAGE EVAC EVAC EVAC EVAC EVAC EVAC EVAC EVAC EVAC EVAC EVAC EVAC EVAC EVAC EVAC EVAC EVAC EVAC EVAC EVAC EVAC EVAC EVAC... -
Page 105: Setup
FleX-Net Installation and Operation Manual Setup QBB-5001/R Amplifier Installation The following instructions are based on the assumption that the fire alarm is already installed. 1. Install the QBB-5001/R Audio Backbox and door in the desired location. 2. Install the QMB-5000B Motherboard / Card-Cage into the backbox. 3. -
Page 106: Lobby Enclosures
Lobby Enclosures Lobby Enclosures The QMP-5101N paging and QMT-5302N telephone control modules fit into the BB-5008 and BB-5014 lobby backboxes. All selector panels mount into the BB-5008 and BB-5014 backboxes also. Below find the dimensions for both the backboxes. Figure 70: BB-5008 and BB-5014 Backboxes BB-5014 Lobby Backbox BB-5008 Lobby Backbox Notes:... -
Page 107: Anc-5000 Audio Network Controller Module
FleX-Net Installation and Operation Manual ANC-5000 Audio Network Controller Module Figure 71: ANC-5000 Audio Network Controller board Connects to TNC-5000 Telephone Network Controller Module P7 AMPS Interface Heartbeat RESET/CPU Fail System OK COMM RX COMM TX LEDs for Plugs into the Audio/CLASS D TX Information QMB-5000N... -
Page 108: Anc-5000 Wiring
ANC-5000 Wiring ANC-5000 Wiring Figure 72: ANC-5000 Wiring Diagram JW7 JW8 PAGING BUS + - L + - S + - S + - + - + - S + - S Alternate G.A. RS-485 Power Input Wire the Paging Bus Microphone to all other ANC-5000 and push to... - Page 109 FleX-Net Installation and Operation Manual Figure 73: Audio Paging Bus Wiring CLASS A WIRING Paging Paging Bus Out Bus In ANC-5000 ANC-5000 Paging Paging Node 4 Node 5 Bus In Bus Out Paging Paging Bus Out Bus In ANC-5000 ANC-5000 Paging Paging Node 3...
-
Page 110: Qmp-5101Nv Vertical Paging Control Module
QMP-5101NV Vertical Paging Control Module QMP-5101NV Vertical Paging Control Module The QMP-5101NV Paging Module fits into the new BBX-FXMNS Enclosure. It mounts on the inside dead chassis (part of the BBX-FXMNS). CONNECTIONS AND TERMINAL WIRING ARE THE SAME AS THE QMP-5101N, WIRE AS SHOWN IN THE FOLLOWING INSTRUCTIONS FOR QMP-5101N PAGING CONTROL MODULE. -
Page 111: Paging Modules
FleX-Net Installation and Operation Manual Paging Modules The QMP-5101N Network Master Paging Control Module mounts into the BB-5008 and BB-5014 backboxes. QMP-5101N Network Master Paging Control Module The QMP-5101N Network Master Paging Control Module connects via a ribbon cable to the first QAZT-5302/DS Zoned Selector Panel and to the previous display module. - Page 112 Paging Modules Figure 76: QMP-5101N/V Network Master Paging Control Module Connections and Terminal Blocks TO QAZT-5302/DS SELECTOR PANEL or NEXT DISPLAY MODULE WIRED TO MICROPHONE TO ANC-5000 CABLE CONNECTS TO PREVIOUS DISPLAY MODULE The interface wiring between the QMP-5101N and ANC-5000 is as follows: 18-22 AWG Twisted Shielded Pair MIC+, MIC-, SHLD: 18-22 AWG Twisted Pair...
-
Page 113: Qmp-5101N/V Network Paging Wiring
FleX-Net Installation and Operation Manual QMP-5101N/V Network Paging Wiring Figure 77: QMP-5101N/V Network Master Paging Control Module Wiring to the ANC-5000 Audio Network Controller Module QMP-5101N/V Network Master Paging Module Master microphone and push to talk button are wired by Factory to these terminals This connection to Aux Power is required when... -
Page 114: Paging Operation
Paging Operation QAZT-5302/DS Zoned Paging Selector Panel Each QAZT-5302/DS annunciates and controls up to 24 audio zones. There is one button and two LEDs per zone. The lower amber LED indicates Zone trouble. The upper green LED indicates whether that zone is PAGE PAGE PAGE... - Page 115 FleX-Net Installation and Operation Manual QMP-5101N/QMP-5101NV Pushbutton Controls Warden Page Button When depressed, the Warden Page button enables voice paging from the firefighters' telephone (if connected) to all zones selected for paging, unless page inhibit is active. Note that pressing PTT will not result in any paging activity unless there are zones selected for paging.
-
Page 116: Tnc-5000 Telephone Network Controller Module
TNC-5000 Telephone Network Controller Module TNC-5000 Telephone Network Controller Module Module Mounting Locations The TNC-5000 Telephone Network Controller board can be mounted in two places. The TNC-5000 Telephone Network Controller Board is mounted above (beside) the ANC-5000 Audio Network board, both are mounted on a black plate and the ANC-5000 plugs into slot 1 on the QMB-5000N audio backplane of the BBX-2000 or BBX- FXMNS, see Figure 78. - Page 117 FleX-Net Installation and Operation Manual Figure 79: Mechanical Installation of the TNC-5000 within the BB-5008 and BB- 5014 TNC-5000 Partial Interior View TNC-5000 board FX-2009-12N Front Door (to right of main board) mounts over ANC-5000 board Network MENU Fire Alarm Control Panel Normal Condition ENTER CANCEL...
- Page 118 Module Mounting Locations Typical Addressable Telephone Set-up The typical addressable telephone set-up is with an addressable fire alarm system using the TNC-5000 and from the TNC-5000 to the Master Telephone (QMT-5302N/V). The selector panels (QAZT-5302/DS) are connected to the Master Telephone by cable only. The MIX-M500FP(A) Control Modules are connected to the addressable loop from the FX-2000N and to each other and the Master Telephone.
- Page 119 FleX-Net Installation and Operation Manual Connectors and Terminal Locations Refer to Figure 81 for connector and terminal locations. Table 3 below shows the cable connections and jumpers required and additional wiring. Table 3: TNC-5000 Connectors and Terminals TNC-5000 Connects to Connector and Terminals P10 Cable P11 on the ANC-5000 Audio Network Controller Module.
-
Page 120: Tnc-5000 Telephone Wiring
TNC-5000 Telephone Wiring TNC-5000 Telephone Wiring Figure 82: Telephone Bus Wiring Diagram Tel. Bus Tel. Bus TNC-5000 TNC-5000 Tel. Bus Tel. Bus Tel. Bus Tel. Bus TNC-5000 TNC-5000 Tel. Bus Tel. Bus Tel. Bus Tel. Bus TNC-5000 TNC-5000 Tel. Bus Tel. - Page 121 FleX-Net Installation and Operation Manual Zones 1 to 5 are wired to telephones via MIX-M500FP(A) addressable control modules. Only Zone 1 is wired to the Master Telephone (if used) at the main fire alarm centre, otherwise Zone 1 is wired as another telephone zone when a master telephone is not required.
-
Page 122: Qmt-5302Nv Vertical Master Telephone
QMT-5302NV Vertical Master Telephone QMT-5302NV Vertical Master Telephone The QMT-5302NV Vertical Master Telephone Module fits into the new BBX-FXMNS Enclosure. The master telephone is mounted to the inside chassis and field wiring is on the BBX-FXMNS backbox. CONNECTIONS AND TERMINAL WIRING ARE THE SAME AS THE QMT-5302N, WIRE AS SHOWN IN THE FOLLOWING INSTRUCTIONS FOR QMT-5302N MASTER FIREFIGHTERS’... -
Page 123: Qmt-5302N Master Firefighters' Telephone
FleX-Net Installation and Operation Manual QMT-5302N Master Firefighters’ Telephone The QMT-5302N mounts into the BB-5008 and BB-5014. QMT-5302N Network Master Firefighters' Telephone Control Module is used in conjunction with the FleX-Net Fire Alarm system at the CACF Node. Slide-in labels (NP-6657) are supplied with the Master Telephone. -
Page 124: Qmt-5302N Connections
QMT-5302N Connections QMT-5302N Connections The connections required on the QMT-5302N Network Master Firefighters’ Telephone Control Module are the cable from the previous display module to P1 or IN connector on the bottom left of the board and the OUT connection goes to the IN connector of the next display board. -
Page 125: Qazt-5302/Ds Network Firefighters' Telephone Selector Panel
FleX-Net Installation and Operation Manual Figure 87: QAZT-5302/DS Network Firefighters' Telephone Selector Panel Each QAZT-5302/DS annunciates and controls up to 24 telephone zones. There is one button and two LEDs per zone. The lower amber LED indicates Telephone Telephone Telephone Telephone Telephone Telephone... - Page 126 QAZT-5302/DS Network Firefighters’ Telephone Selector Panel Connect the first QAZT-5302DS Network Firefighters’ Telephone Selector panel to the master telephone by connecting the Ribbon In cable into P2 on the QMT-5302N/NV Master Telephone. Ribbon Out cable to the Ribbon In of the next QAZT-5302 or P1 of the next display panel (up to six total). See diagram below. QAZT-5302DS can be used as a telephone or paging selector panel by installing a jumper, see diagram below.
-
Page 127: Telephone Operation
FleX-Net Installation and Operation Manual Telephone Operation 1. When any telephone zone rings (the local buzzer sounds intermittently, and the green zone LED and Incoming Call LED flash) press that zone's button (on the selector panel QAZT-5302/DS) once to answer. Once any one zone has been answered, calls from any other zone will cause that zone's green LED and the Incoming Call LED at the master telephone to flash and the buzzer will sound. -
Page 128: Appendix A: Specifications
Appendix A: Specifications Appendix A: Specifications Main Fire Alarm Chassis (FX-2003-12N/DS and FX-2000ND) Main Fire Alarm Chassis (FX-2017-12N/DS) General Same as FX-2009-12N/DS except: Larger Chassis has capacity for 3 display modules and 17 One Analog Loop capable of monitoring 99 Sensors and 99 adder modules. -
Page 129: Compliance
FleX-Net Installation and Operation Manual FOM-2000-SP Fiber Optic Module FNC-2000 Network Controller Module standby: 15 mA Current Consumption: standby: 190 mA Current Consumption: alarm: 15 mA alarm: 190 mA ANC-5000 Audio Controller Module RAXN-LCDG Annunciator standby: 255 mA Current Consumption: 24V DC nominal. -
Page 130: Uli/Ulc Integrated Fire Alarm And Audio Panel Specifications
Appendix A: Specifications ULI/ULC Integrated Fire Alarm and Audio Panel Specifications Note: All circuits are power limited, unless specified otherwise. Overall PS-2040 Power Supply • 0 to 49 degrees Celsius, 0 to 93 + or - 2% RH (non-condensing) operating range •... - Page 131 • Current consumption: standby: 55mA alarm: 350mA, plus 75mA/watt speaker power Model QMP-5101N or QMP-5101NV Paging Microphone • Mounts in Mircom BB-1000, BB-5000, FX-LOC, and BBX-FXMNS (for QMP-5101NV) enclosures • Current Consumption: standby: 3mA alarm: 7mA Model QAZT-5302/DS Paging Selector Panel •...
-
Page 132: Appendix B: Power Supply And Battery Calculations
Appendix B: Power Supply and Battery Calculations Appendix B: Power Supply and Battery Calculations Power Requirements (All currents are in amperes) Total Total Model Number Description Standby Alarm Standby Alarm FX-2003-12N/ND/DS Main Chassis (12 Amp) 0.310 0.733 FX-2017-12N/DS Main Chassis (12 Amp) 0.310 0.733 FX-2009-12N/DS... -
Page 133: Raxn-Lcd/Raxn-Lcdg
20 character backlit alphanumeric LCD display (or for the RAXN-LCDG a graphical display) which uses a simple menu system complete with a directional key pad and switches for Enter, Menu, Cancel and Info. For more information see Mircom documents LT-895 and LT-6033. Models: •... -
Page 134: Appendix C: Dip Switch Settings
Appendix C: DIP Switch Settings Appendix C: DIP Switch Settings FX-200X-XX Network Main Board Address Setting (DIP SWITCH SW2) SW2 DIP SWITCHES Node Address SW2-1 SW2-2 SW2-3 SW2-4 SW2-5 SW2-6 SW2-7 SW2-8... -
Page 135: Anc-5000 Board With Ethernet Port, Address Setting (Dip Switch Sw1)
FleX-Net Installation and Operation Manual ANC-5000 Board with Ethernet Port, Address Setting (DIP SWITCH SW1) ADDR SW1-1 SW1-2 SW1-3 SW1-4 SW1-5 SW1-6 SW1-7 SW1-8 ANC-5000 Board without Ethernet Port, Address Setting (DIP SWITCH SW1) ADDR SW1-1 SW1-2 SW1-3 SW1-4 SW1-5 SW1-6 SW1-7 SW1-8... -
Page 136: Appendix E: Wiring For Addressable Supervised Output Module
Appendix E: Wiring For Addressable Supervised Output Module CSIS - 202A CSIS - 202A Supervised Signal Supervised Signal BPS -1100 Isolator #1 Isolator #2 Booster Power Supply ROOM 2 ROOM1 ROOM1 ROOM 2 RETURN RETURN RETURN RETURN ROOM1 ROOM 2 ROOM1 ROOM 2 SIGNAL... -
Page 137: Appendix F: Ulc Compatible Speakers
FleX-Net Installation and Operation Manual Appendix F: ULC Compatible Speakers MIRCOM MODEL NUMBER dbA @ 10 feet Mounting and Shape 4" Speakers (70V) SP-104A-70 (4"round) IB-104 Recessed Round 1/4 watt 85 dbA 1/2 watt 86 dbA IB-204 Recessed, IB-404 SP-204A-70 (4"square) -
Page 138: Appendix G: Uli Compatible Speakers
Appendix G: ULI Compatible Speakers Appendix G: ULI Compatible Speakers COOPER-WHEELOCK MODEL NUMBER dbA @ 10 feet Mounting and Shape Square Speakers (25V or 70V) 1/8 watt 77 dBA 1/4 watt 81 dbA E50-R (red) 1/2 watt 83 dbA Standard Electrical Box, 5” square speaker E50-W (white) 1 watt 86 dbA... -
Page 139: Appendix H: Power Supply & Batteries For Audio
FleX-Net Installation and Operation Manual Appendix H: Power Supply & Batteries for Audio Use the form below to determine the required main chassis and secondary power supply (batteries). IMPORTANT NOTICE The main AC branch circuit connection for Fire Alarm Control Unit must provide a dedicated continuous power without provision of any disconnect devices. -
Page 140: Appendix I - Power-Limited Wiring Scheme
Appendix I - POWER-LIMITED WIRING SCHEME Appendix I - POWER-LIMITED WIRING SCHEME BBX-2000 Enclosure QMB-5000N Audio Card Cage Make sure wires that are connected to NON POWER-LIMITED circuits are at least 1/4 inches away from wires that are connected to POWER-LIMITED circuits Use wire ties secured to the backbox, in positions... -
Page 141: Appendix J Fxmns Used As A Mass Notification System (Acu)
Installation and Operation Manual Appendix J FXMNS Used as a Mass Notification System (ACU) The MNS portion of a complete Mircom FleX-Net Network Fire Alarm system consists of a BBX-FXMNS Enclosure (see Node 2 in figure below). The BBX-FXMNS includes a RAXN-LCD Annunciator which is designated an ACU (Autonomous Control Unit) and a Master Microphone to provide emergency audio. - Page 142 QMP-5101N Network Paging Wiring for Mass Notification QMP-5101N Network Paging Wiring for Mass Notification QMP-5101N Network Master Paging Control Module Wiring to the ANC-5000 Audio Network Controller Module MNS - ACU FX- LOC(R) TWISTED QMP-5101N Network QMP-5101N Network SHIELDED Master Paging Module Master Paging Module PAIR CABLE...
- Page 143 FleX-Net Installation and Operation Manual Configuration for Mass Notification There are two groups that can be created for the nodes; one group is the fire/central control and the second is mass notification. In order to have this distinction, all zones have to be assigned a “Zone Priority”. Priority can be high, low, normal or a percentage of + or - increments of 5.
- Page 144 Configuration for Mass Notification This screen capture shows selection of Node 2 as Mass Notification Select Node 2 as the MNS Mass Notification System.
- Page 145 FleX-Net Installation and Operation Manual This screen capture shows input zone priority settings for the Mass Notification Node 2 FX-LOC(R) Active As part of the Mass Notification requirements, an RAX-1048TZ Zone Annunciator is part of the MNS. Configure one zone of the RAX-1048TZ per each FX-LOC(R) connected to the MNS (ACU). Each LED is configured to illuminate when the respective FX-LOC(R) paging is in use.
-
Page 146: Warranty & Warning Information
Warranty & Warning Information Warranty & Warning Information Warning Please Read Carefully Note to End Users: This equipment is subject to terms and conditions of sale as follows: Note to Installers This warning contains vital information. As the only individual in contact with system users, it is your responsibility to bring each item in this warning to the attention of the users of this system. - Page 147 FleX-Net Installation and Operation Manual of closed doors; and, smoke and heat detectors may not detect smoke or heat from fires on another level of the residence or building. •Software Most MGC products contain software. With respect to those products, MGC does not warranty that the operation of the software will be uninterrupted or error-free or that the software will meet any other standard of performance, or that the functions or performance of the software will meet the user’s requirements.
-
Page 148: Limited Warranty
Warranty & Warning Information Limited Warranty Mircom Technologies Ltd., MGC Systems Corp. and MGC System International Ltd. together with their subsidiaries and affiliates (collectively, MGC) warrants the original purchaser that for a period of three years from the date of shipment, proprietary manufactured product shall be free of defects in materials and workmanship, under normal use. -
Page 149: Out Of Warranty Repairs
FleX-Net Installation and Operation Manual Out of Warranty Repairs MGC will at its option repair or replace out-of-warranty products which are returned to its factory according to the following conditions. Anyone returning goods to MGC must first obtain an authorization number. MGC will not accept any shipment whatsoever for which prior authorization has not been obtained. - Page 152 CANADA - Main Office U.S.A TECHNICAL SUPPORT © Mircom 2016 25 Interchange Way 4575 Witmer Industrial Estates North America Printed in Canada Vaughan, ON L4K 5W3 Niagara Falls, NY 14305 Tel: (888) Mircom5 Subject to change without prior notice Tel: (888) 660-4655...
Need help?
Do you have a question about the flexnet and is the answer not in the manual?
Questions and answers