
Subscribe to Our Youtube Channel
Related Manuals for Mircom Fire-Link NMC-100 Series


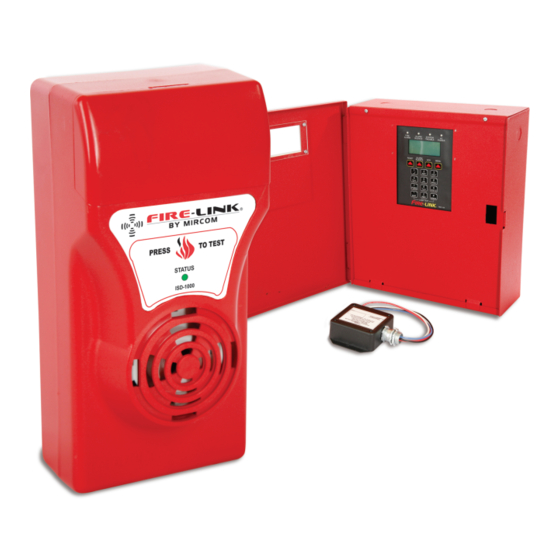
Summary of Contents for Mircom Fire-Link NMC-100 Series
- Page 1 Advanced Life Safety Solutions FIRE-LINK® LT-1034 Rev. 1 100207 Installation and Operation Manual October 2007...
-
Page 3: Table Of Contents
5.19 Setting the Auto Alarm Silence Feature ......................36 5.20 Clearing the Alarm and Trouble Logs ....................... 37 5.21 Setting the ISD Missing Trouble Notification ....................37 5.22 Setting the ISD Low/Missing Battery Trouble Notification................39 Mircom Technologies Inc All Rights Reserved LT-1034 Rev.1 Page 2 of 54... - Page 4 7.3 ISD Battery Replacement............................46 8.0 EVACUATION PLAN (Household - per NFPA) ......................47 9.0 TROUBLESHOOTING GUIDE ............................49 10.0 APPENDIX A ................................50 11.0 WARRANTY AND GOODS RETURN POLICY ......................51 Mircom Technologies Inc All Rights Reserved LT-1034 Rev.1 Page 3 of 54...
- Page 5 The rule of thumb is: one building, one transformer, one NMC-100/PPC-600. If there are multiple transformers and/or multiple electrical rooms in the building, contact Mircom Technical Support for guidance before quoting ! Multiple transformers and meter banks with no direct connection for the phase coupler(s) through a house panel will require special installation instructions if deemed feasible by Mircom Technical Support.
-
Page 6: Introduction
Signal Circuit of the FACP. In this mode, if an ‘Alarm Silence’ is initiated on the FACP, it will cause the NMC to also silence all the ISD units. No reset action is required on the NMC. Mircom Technologies Inc All Rights Reserved LT-1034 Rev.1... -
Page 7: General Features Nmc-100
This document applies to the following products and product revisions: • NMC-100 Rev 1.2A. • ISD-1000 Rev 2.0A. • PPC-600 Rev 1.0A. ISD-1000 information: Listed to UL 985: ISD-1000-MW, ISD-1000-MR Mircom Technologies Inc All Rights Reserved LT-1034 Rev.1 Page 6 of 54... -
Page 8: Relevant Codes And Standards
Installation and Programming Manual Listed to ULC S527 and ULC S545: ISD-1000-MBW, ISD-1000-MBR • M = Mircom. • B = Bilingual (English/French) label which are silenceable (Canada). • W = White, R = Red. NMC-100 Information: NMC-100-MW where: M = Mircom. -
Page 9: System Verification
Periodic inspection for damage and the batteries’ ability to support the attached equipment is strongly recommended. The ISD batteries are rated for a minimum 500 full discharge cycles over the life of each battery. Mircom Technologies Inc All Rights Reserved LT-1034 Rev.1... -
Page 10: Nmc-100 Installation
Allow wiring to be exposed or installed in a manner in which the wiring could become exposed. • Attempt to modify the unit in any way. • Install, operate or service the unit without reading and understanding this manual. Mircom Technologies Inc All Rights Reserved LT-1034 Rev.1 Page 9 of 54... -
Page 11: Installing The Nmc-100
A locking device is recommended on this service. If no spare circuit is available, power may be obtained from the FACP circuit as the NMC is considered an accessory to the FACP. Mircom Technologies Inc All Rights Reserved LT-1034 Rev.1... -
Page 12: Master Mode
Alarm Contact Relay, connect zone wires to relay’s common and normally open terminals with a 3.9K ohm, ¼ Figure 1 watt resistor in parallel (across the terminals) to supervise the wires. See below for the wiring schematic. Figure 1- NMC-Master Unit Wiring Mircom Technologies Inc All Rights Reserved LT-1034 Rev.1 Page 11 of 54... -
Page 13: Slave Mode (Preferred Method In Canada)
2.4 Alarm Zones Figure 3 below for wiring schematic. NOTE: The resettable power terminal has an output voltage range of 10.70VDC to 20.27VDC. Figure 3- 4 Wire Smoke Detector Mircom Technologies Inc All Rights Reserved LT-1034 Rev.1 Page 12 of 54... -
Page 14: Nmc-100 Trouble Contact Wiring
FACP alarm zone must be installed in parallel or in series as shown in below. Figure 4- Trouble Contact Wiring All above wiring should be verified by a third party (Installing Company). Mircom Technologies Inc All Rights Reserved LT-1034 Rev.1 Page 13 of 54... -
Page 15: Keypad And Display Operation
DWN ENT BCK The RESET becomes the ‘Scroll Up’ button. ALARM SILENCE becomes the ‘Scroll Down’ button, the ACK becomes the ‘Enter’ button and the MENU becomes the ‘Back’ button. Mircom Technologies Inc All Rights Reserved LT-1034 Rev.1 Page 14 of 54... -
Page 16: The Nmc Network
FACP (regardless of whether the NMC is installed as a Master or Slave to the FACP). The NMC acts as the Master and the ISDs are the Slaves on the NMC Network. See Figure 7 below. Figure 7- NMC Network Topology Mircom Technologies Inc All Rights Reserved LT-1034 Rev.1... -
Page 17: Panel Operation
When in the Menu forms, the Function Keys become menu navigation keys. The menu functions are displayed on the LCD display just above the Function Keys. Alpha/Numeric Keys: These keys are used to enter data into the menu fields. See Programming section. Mircom Technologies Inc All Rights Reserved LT-1034 Rev.1 Page 16 of 54... -
Page 18: System Start Up
Flickering will also occur during a yellow and red LED as well. This ‘flickering mode’ is a good Tech tool to be used during the ISD installation process, but only after the enrolment process has occurred. Mircom Technologies Inc All Rights Reserved LT-1034 Rev.1... -
Page 19: Ppc-600 Installation
NMC using a specific suite’s power and the phase coupler into any suite’s sub-panel. If 3 phase, then into any two suite’s sub-panels to insure you have connected to all three separate phases. Mircom Technologies Inc All Rights Reserved LT-1034 Rev.1... -
Page 20: Isd 1000 Installation
Once the LED has turned GREEN and flickers, push the “Press to Silence And Test” button (“Press to Test” in US) to insure that the piezo is sounding correctly. A decibel reading should be taken at this point and recorded. Mircom Technologies Inc All Rights Reserved LT-1034 Rev.1... -
Page 21: Installation Checklist (Quick-Start)
Enrolment time can take up to 2 min. for 40 ISDs, 10 min. for 120 ISD units. Any missing units should be rectified immediately. See Section 8.0, Trouble-shooting guide for Missing and Unknown devices. Mircom Technologies Inc All Rights Reserved LT-1034 Rev.1... -
Page 22: Nmc Programming
Installation and Programming Manual 5.0 NMC PROGRAMMING 5.1 The Menu Tree See Figures 8-13 below for the NMC menu tree. Mircom Technologies Inc All Rights Reserved LT-1034 Rev.1 Page 21 of 54... - Page 23 Installation and Programming Manual FIGURE 8: Access Level 1: Menu Tree Sheet 1 FIGURE 9: Access Level 2: Menu Tree Sheet 2 Mircom Technologies Inc All Rights Reserved LT-1034 Rev.1 Page 22 of 54...
- Page 24 Installation and Programming Manual FIGURE 10: Access Level 3: Menu Tree Sheet 3 Mircom Technologies Inc All Rights Reserved LT-1034 Rev.1 Page 23 of 54...
- Page 25 Installation and Programming Manual FIGURE 11: Access Level 3: Menu Tree Sheet 4 Mircom Technologies Inc All Rights Reserved LT-1034 Rev.1 Page 24 of 54...
- Page 26 Installation and Programming Manual FIGURE 12: Access Level 3: Menu Tree Sheet 5 Mircom Technologies Inc All Rights Reserved LT-1034 Rev.1 Page 25 of 54...
- Page 27 FIGURE 13: Access Level 3: Menu Tree Sheet 6 Note the pass code access levels for the various menu options. The various menu options will not be made available to the operator unless the proper access level has been entered. Mircom Technologies Inc All Rights Reserved LT-1034 Rev.1...
-
Page 28: User Pass Codes
ENTER PASS CODE >XXXX Factory Default Passcodes: Level 1 = 1111 Level 2 = 2222 Level 3 = 3333 To change factory default pass codes, see below. Mircom Technologies Inc All Rights Reserved LT-1034 Rev.1 Page 27 of 54... -
Page 29: Changing The Pass Codes
3. Demo (15 sec trouble delay, NO missing NMC battery reporting, NO ground fault reporting) Demo units should not be sold. A Firmware change by the Factory will have to be performed first! Mircom Technologies Inc All Rights Reserved LT-1034 Rev.1... -
Page 30: Entering The Date And Time
There will be a 1 second delay between displays of ‘Resetting Pass codes’, Followed by ‘Resetting System Parameters’, ‘Resetting ISD Settings’ (20 sec),‘Resetting Trouble Logs’, ‘Resetting Alarm Logs’, completing by the final acknowledgement of ‘Factory Defaults Set’. Mircom Technologies Inc All Rights Reserved LT-1034 Rev.1... -
Page 31: Retrieving The Isd's Vid Number
The message unit will stay in ‘chirp mode’ until either the Press to Silence button (Press to Test on US models) on the Message Unit ISD is pressed or the NMC ‘ACK’ button is pressed or the NMC trouble condition is corrected and restored. Mircom Technologies Inc All Rights Reserved LT-1034 Rev.1... -
Page 32: Editing An Isd's Address (Suite #)
PROCESS THE NMC WILL CREATE ‘ROUTERS’ (repeaters). THIS WILL SAVE CONSIDERABLE TIME DURING THE ENROLMENT PROCESS IF THIS ROUTING PROCESS ONLY HAS TO BE DONE ONCE BY THE NMC AND NOT EVERY TIME A NEW ISD IS INSTALLED! Mircom Technologies Inc All Rights Reserved LT-1034 Rev.1... - Page 33 Selecting <DEL> while an ISD is highlighted will result in it being added to the MISSING category. By selecting <CHG>, you will be able to edit the VID number to the correct number to enroll this device. Mircom Technologies Inc All Rights Reserved LT-1034 Rev.1...
-
Page 34: Removing An Isd From The Network
Enter the 5 digit ADDRESS of the ISD (suite number or room number) followed by ENT. The suite number should be entered such as: 00103 or 0206B. Refer to Section 5.10 if you wish to designate it as a ‘Message Unit’. Mircom Technologies Inc All Rights Reserved LT-1034 Rev.1... -
Page 35: Setting The System Parameters
ISD Battery Trouble (Low or Missing) • NMC Date/Time Loss The above conditions are factory default to put the NMC into trouble mode if any of these conditions are present. Mircom Technologies Inc All Rights Reserved LT-1034 Rev.1 Page 34 of 54... -
Page 36: Setting The Isd Signal Rate
..AUTO ALRM SIL DWN ENT BCK DWN ENT BCK DWN ENT BCK DWN ENT BCK The options are: Temporal (default), March Time and Continuous. ALARM TONE TONE: TEMPORAL ENT BCK Mircom Technologies Inc All Rights Reserved LT-1034 Rev.1 Page 35 of 54... -
Page 37: Setting The Signal Silence Inhibit
SIG SIL INHIBIT >CONFIGURE CONFIG RELAY >AUTO ALRM SIL DWN ENT BCK DWN ENT BCK DWN ENT BCK DWN ENT BCK AUTO ALRM SIL 10 MINUTES ENT BCK Mircom Technologies Inc All Rights Reserved LT-1034 Rev.1 Page 36 of 54... -
Page 38: Clearing The Alarm And Trouble Logs
CONFIG RELAY DWN ENT BCK DWN ENT BCK DWN ENT BCK ISD SIGNL RATE SIG SIL INHIBIT AUTO ALRM SIL DWN ENT BCK CLEAR LOGS >TROUBLES DWN ENT BCK Mircom Technologies Inc All Rights Reserved LT-1034 Rev.1 Page 37 of 54... - Page 39 UP DWN ENT BCK If ‘CONT’ is selected, then a ‘COMPLETE!’ notification will appear. WARNING: The NMC will NOT show a trouble condition when this option is selected. Mircom Technologies Inc All Rights Reserved LT-1034 Rev.1 Page 38 of 54...
-
Page 40: Setting The Isd Low/Missing Battery Trouble Notification
DWN ENT BCK LOW/MISSING BAT CLEAR LOGS ISD AC LOSS >TROUBLES >DATE/TIME LOSS DWN ENT BCK DWN ENT BCK Press NXT to toggle between options. Press ENT to accept option. Mircom Technologies Inc All Rights Reserved LT-1034 Rev.1 Page 39 of 54... -
Page 41: Setting The Nmc General Alarm Relay Operation
To test the NMC LEDs, LCD display and Piezo, press simultaneously on the NMC Keypad. All LEDs will turn on, each line of the LCD display will be black and the piezo will be on. Mircom Technologies Inc All Rights Reserved LT-1034 Rev.1... -
Page 42: Isd Sound Tests
ISD unit after programming and enrolling it. The failed unit will have to be removed from the network as well. A hard copy report can be generated by the NMC via the FIRELINKLOAD database program for reporting/history purposes. Mircom Technologies Inc All Rights Reserved LT-1034 Rev.1... -
Page 43: Global Isd Drill Test
PLEASE WAIT… DWN ENT BCK When the test has concluded, a ‘Passed/Failed’ message will appear. Any ISD that shows a ‘Fail” should be investigated immediately and replaced if necessary. Mircom Technologies Inc All Rights Reserved LT-1034 Rev.1 Page 42 of 54... -
Page 44: Single Isd Drill Test Access Level 1
PARAMETERS’, then ‘GETTING EVENT LOG’, then ‘GETTING DATA COMPLETE’. When ‘SEND JOB’ is pressed, the NMC will display ‘SENDING ISD LIST’, then ‘SENDING SYSTEM PARAMETERS’, then ‘SEND DATA COMPLETE’ or ‘SEND DATA FAILED’. Mircom Technologies Inc All Rights Reserved LT-1034 Rev.1... - Page 45 See FIRE-LINKload Help document for further available functions from this linked program. NOTE: If the JOB is not new, then it is recommended that the ‘GET JOB’ upload be performed before adding any new data before initiating the ‘SEND JOB’ download. Mircom Technologies Inc All Rights Reserved LT-1034 Rev.1...
-
Page 46: Final Test And Verification
Each of the two alarm initiating circuits are supervised by a 3.9K, 1/4W +5%, EOLR , Model MP-100 by Mircom Technologies and are monitored for shorts, opens and ground faults. Zone alarms have priority over all other annunciation of trouble conditions. In Canada, each wired zone should be installed per ULC S524 and verified per ULC S537, Standards for Fire Alarm Systems. -
Page 47: Maintenance
5. Reassemble the unit. Do not over tighten the assembly screws as this may cause the plastic to strip out. Mircom Technologies Inc All Rights Reserved LT-1034 Rev.1 Page 46 of 54... -
Page 48: Evacuation Plan (Household - Per Nfpa)
The objective is to practice, not to frighten, so telling children there will be a drill before they go to bed can be as effective as a surprise drill. Mircom Technologies Inc All Rights Reserved LT-1034 Rev.1... - Page 49 If possible, open your windows at the top and bottom so fresh air can get in. Mircom Technologies Inc All Rights Reserved LT-1034 Rev.1 Page 48 of 54...
-
Page 50: Troubleshooting Guide
Please keep in mind that the enrolment process usually takes about 2 minutes for a typical 40 unit install. This time will go up dramatically for a 120 unit install to 10 minutes. So, give the NMC sufficient time. The LCD screen did NOT freeze up!! Mircom Technologies Inc All Rights Reserved LT-1034 Rev.1... - Page 51 Sys Error: 3 – Indicates a problem with Detection Zone 1 on the NMC Main Controller Sys Error: 4 – Indicates a problem with Detection Zone 2 on the NMC Main Controller Mircom Technologies Inc All Rights Reserved LT-1034 Rev.1...
-
Page 52: Warranty And Goods Return Policy
In the case of the NMC-100 acting as an ‘Accessory’ to the Fire Alarm Panel, the Mircom Technologies Inc All Rights Reserved LT-1034 Rev.1... - Page 53 LIMITED WARRANTY AND RETURNED GOODS AUTHORIZATIONS Mircom Technologies Ltd. warrants the original purchaser for a period of two (2) years from the date of purchase, that the product shall be free of defects in materials and workmanship under normal use. During the warranty...
- Page 54 Installation and Programming Manual period, Mircom Technologies Ltd. shall, at its option, repair or replace any defective product upon return of the product to its factory or to its licensed Distributors, at no charge for labor and materials. Any replacement and/or repaired parts are warranted for the remainder of the original warranty or ninety (90) days, whichever is longer.
- Page 55 Products which Mircom Technologies Ltd. determines to be repairable will be repaired and returned. A set fee which Mircom Technologies Ltd. has predetermined and which may be revised from time to time, will be charged for each unit repaired.
- Page 56 Advanced Life Safety Solutions Canada U.S.A. © Mircom 2007 Printed in Canada 25 Interchange Way 60 Industrial Parkway PMB 278 Subject to change without prior notice Vaughan, ON L4K 5W3 Cheektowaga, NY 14227 Tel: 1-888-660-4655 Fax: 1-888-660-4113 www.mircom.com Tel: 905-660-4655 Fax: 905-660-4113...
Need help?
Do you have a question about the Fire-Link NMC-100 Series and is the answer not in the manual?
Questions and answers