Samsung FTQ387LWGX Service Manual
Hide thumbs
Also See for FTQ387LWGX:
- User manual (56 pages) ,
- User manual (56 pages) ,
- User manual (54 pages)
Table of Contents
Advertisement
Advertisement
Table of Contents

Related Manuals for Samsung FTQ387LWGX


Summary of Contents for Samsung FTQ387LWGX
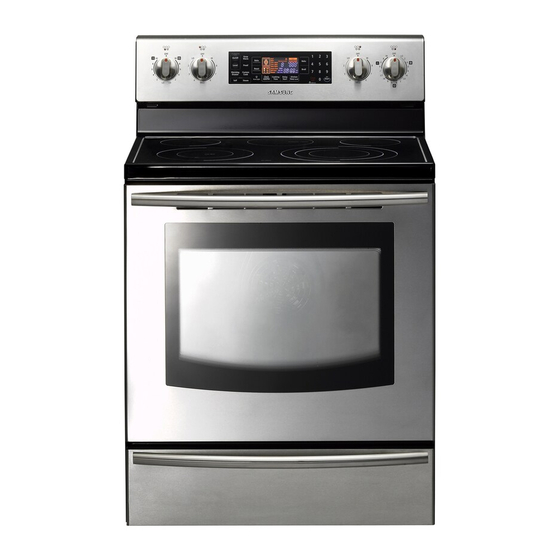
- Page 1 FREE STANDING RANGE BASIC: FTQ387LWGX MODEL: NE597R0ABSR MODEL CODE: NE597R0ABSR/AA 1. Precaution 3. Disassembly and Reassembly 4. Troubleshooting 5. PCB Diagrams 6. Wiring Diagram 7. Schematic Diagrams Refer to the service manual in the GSPN(see rear cover) for the more information.
-
Page 2: Table Of Contents
1. Precaution ................3 1-1 Forward . -
Page 3: Precaution
To avoid risk of severe personal in ury or death, disconnect power before working servicing on appliance to avoid electrical shock. When the oven operates, the interior parts will be very hot. SAMSUNG Electronices assumes no responsibility for any repairs made on our products by anyone other than Authorized Service Technicians. -
Page 4: Important Safety Instructions
1. Precaution 1-3 Important Safety Instructions Read and follow all instructions before using your oven to prevent the risk of re, electric shock, in ury to person, or damage when using the range. This guide don t cover all possible conditions that may occur. For further assistance contact your service agent or manufacturer. -
Page 5: Surface Cooking Units
1. Precaution SURFACE COOKING UNITS VENTILATING HOODS: Use Proper Pan Size – This appliance is e uipped Clean Ventilating Hoods Frequently – Grease with one or more surface units of different sizes. should not be allowed to accumulate on hood or lter. Select utensils having at bottoms large enough to cover the surface unit heating element. -
Page 6: Model & Serial Number Label And Tech Sheet Locations
1. Precaution 1-4 Model & Serial Number Label and Tech Sheet Locations This Model Serial Number label and Tech Sheet locations are shown below. Model & Serial Number Location Tech Sheet Location (On Low Rear Cover) -
Page 7: Features
Steam Cleaning Casual clean without any smell - Samsung : 3 fans More frequently - Competitors : 1 fans - Samsung : Self clean + Steam Clean Samsung Competitors - Competitors : Self clean Surround Air-vection - Main Convection Fan with 2-Sub.Fans makes complex small Swirl. - Page 8 Features Item Steam Clean - Pour the water 10oz (+detergent) - Push the steam cleaning button How to Use - In around half min, the oven will stop automatically. - Wipe it out with wet cloths. Operating (Temperature) About 70 ºC Operating Time 20 Minutes Used Heater...
-
Page 9: Table Of Speci Cations
Model Items BASIC MODEL NEW MODEL Model Name FTQ387LWGX NE597R0ABSR Category Convection Convection Overall Width 30” 30” Installation type Freestanding Freestanding Color availability Control Oven Touch Membrane Cooktop Knob Knob Display Electronic clock Control lock capability Audible preheat signal Cooktop... -
Page 10: Accessory
2-3 Accessory Item Description Code No. Q’ty Rack Flat DG75-01001B... -
Page 11: Disassembly And Reassembly
3. Disassembly and Reassembly WARNING ELECTRICAL SHOCK HAZARD Disconnect power before servicing the range. Replace all panels before operating range. Failure to do so can result in death or electrical shock. PRECAUTION When you work on the electric range, be careful when handling the sheet metal parts. Sharp edges may be present, and you can cut yourself if you are not careful. -
Page 12: Removing Pcb-Sub & L.v.trans
3. Disassembly and Reassembly 3-2 Removing PCB-Sub & L.V.Trans WARNING ELECTRICAL SHOCK HAZARD Disconnect power before servicing the range. Replace all panels before operating range. Failure to do so can result in death or electrical shock. PRECAUTION When you work on the electric range, be careful when handling the sheet metal parts. Sharp edges may be present, and you can cut yourself if you are not careful. -
Page 13: Removing Regulator-Energy
3. Disassembly and Reassembly 3-3 Removing Regulator-Energy WARNING Disconnect power before servicing the range Replace all panels before operating range. Failure to do so can result in dearh or electrical shock. PRECAUTION When you work on the electric range, be careful when handling the sheet metal parts. Sharp edges may be present, and you can cut yourself if you are not careful. -
Page 14: Removing Surface Elements And The Ceramic Glass Cooktop
3. Disassembly and Reassembly 3-4 Removing Surface elements and The Ceramic Glass Cooktop WARNING ELECTRICAL SHOCK HAZARD Disconnect power before servicing the range. Replace all panels before operating range. Failure to do so can result in death or electrical shock.. Parts Explanation Photo Explanation... -
Page 15: Glass Cooktop
3. Disassembly and Reassembly 3-4 Removing Surface elements and The Ceramic Glass Cooktop (Continued) Parts Explanation Photo Explanation To remove the surface elements a) Remove the wires from the element and limiter terminals. b) Remove the element bracket screw (shown above) for the element you are servicing. -
Page 16: Removing The Latch-Door & Switch-Door Plunger
3. Disassembly and Reassembly 3-5 Removing The Latch-Door & Switch-Door Plunger WARNING ELECTRICAL SHOCK HAZARD Disconnect power before servicing the range. Replace all panels before operating range. Failure to do so can result in death or electrical shock. CAUTION When you work on the electric range, be careful when handling the sheet metal parts. Sharp edges may be present, and you can cut yourself if you are not careful. -
Page 17: Removing Heater-Broil
3. Disassembly and Reassembly 3-6 Removing Heater-Broil WARNING Disconnect power before servicing the range. Replace all panels before operating range. Failure to do so can result in death or electrical shock. CAUTION When you work on the electric range, be careful when handling the sheet metal parts. Sharp edges may be present, and you can cut yourself if you are not careful. -
Page 18: Removing Heater-Bake
3. Disassembly and Reassembly 3-7 Removing Heater-Bake Parts Explanation Photo Explanation Unplug range or disconnect power. Pull the range out of its mounting location so that you can access the rear of the unit. Remove Cover-Back Main Wire. (See step 3~4 on page 12 for procedure) Remove Terminal-Block and Bracket-Cover Access(with Adiabatic-Terminal) by unscrew 3 points. -
Page 19: Removing Convection Element, Fan-Covnection And Motor-Convection
3. Disassembly and Reassembly Parts Explanation Photo Explanation Disconnect power and remove oven racks. Pull the range out of its mounting location so that you can access the rear of the unit. Remove Cover-Back Main Wire from the unit. (See step 3 on page 12 for procedure) Remove oven door. -
Page 20: Removing Lamp
3. Disassembly and Reassembly 3-9 Removing Lamp WARNING Disconnect power before servicing the range. Replace all panels before operating range. Failure to do so can result in death or electrical shock. CAUTION When you work on the electric range, be careful when handling the sheet metal parts. Sharp edges may be present, and you can cut yourself if you are not careful. -
Page 21: Removing Sensor-Thermistor
3. Disassembly and Reassembly 3-10 Removing Sensor-Thermistor WARNING ELECTRICAL SHOCK HAZARD Disconnect power before servicing the range. Replace all panels before operating range. Failure to do so can result in death or electrical shock. PRECAUTION When you work on the electric range, be careful when handling the sheet metal parts. Sharp edges may be present, and you can cut yourself if you are not careful. -
Page 22: Removing Assy-Drawer & Heater-Warming Drawer
3. Disassembly and Reassembly 3-11 Removing Assy-Drawer & Heater-Warming Drawer WARNING ELECTRICAL SHOCK HAZARD Disconnect power before servicing the range. Replace all panels before operating range. Failure to do so can result in death or electrical shock. PRECAUTION When you work on the electric range, be careful when handling the sheet metal parts. Sharp edges may be present, and you can cut yourself if you are not careful. - Page 23 3. Disassembly and Reassembly 3-11 Removing Assy-Drawer & Heater-Warming Drawer (Continued) Parts Explanation Photo Explanation To remove Heater-Warning Drawer: Remove a screw from Bracket- Warming Heater. Assy-Drawer & Heater- Warming Drawer Remove Cover-Warming Heater and disconnect 2 wires. Pull out the Heater-Warming Drawer. * Reassembly of All part is the reverse order of disassembly.
-
Page 24: Removing And Replacing Oven Door
3. Disassembly and Reassembly 3-12 Removing and Replacing Oven Door WARNING The door is very heavy. Be careful when removing door Do not lift door up by the Handle-Door. Parts Explanation Photo Explanation To remove Oven Door: Fully open the door Pull the hinge locks downward(Fig.1) Firmly grasp both side of the door at the top. -
Page 25: Removing Handle-Door And Glass-Inner
3. Disassembly and Reassembly 3-13 Removing Handle-Door and Glass-Inner WARNING ELECTRICAL SHOCK HAZARD Disconnect power before servicing the range. Replace all panels before operating range. Failure to do so can result in death or electrical shock. PRECAUTION When you work on the electric range, be careful when handling the sheet metal parts. Sharp edges may be present, and you can cut yourself if you are not careful. - Page 26 3. Disassembly and Reassembly 3-13 Removing Handle-Door and Glass-Inner (Continued) Parts Explanation Photo Explanation To remove Handle-Door Handle Remove 2 screws to remove Handle- Door Door To remove Glass-Inner Remove 6screws from rear side of door to remove 2 Hinge-Door. Glass-Inner Remove 4screws ro remove Glass- Inner Sub Assembly...
- Page 27 3. Disassembly and Reassembly 3-13 Removing Handle-Door and Glass-Inner (Continued) Parts Explanation Photo Explanation Remove Baf e-Door and take out the Glass-Inner assembly. Handle Door Explanation Photo Explanation Unfold 2 anges of Cover-Frame Inner Glass to taking out Glass-Inner * Reassembly of All part is the reverse order of disassembly. Screw - Terminal Block Screw : M4 X 18.
-
Page 28: Removing Gasket-Door
3. Disassembly and Reassembly 3-14 Removing Gasket-Door WARNING ELECTRICAL SHOCK HAZARD Disconnect power before servicing the range. Replace all panels before operating range. Failure to do so can result in death or electrical shock. PRECAUTION When you work on the electric range, be careful when handling the sheet metal parts. Sharp edges may be present, and you can cut yourself if you are not careful. -
Page 29: Removing The Panel-Side
3. Disassembly and Reassembly 3-15 Removing The Panel-Side WARNING ELECTRICAL SHOCK HAZARD Disconnect power before servicing the range. Replace all panels before operating range. Failure to do so can result in death or electrical shock. PRECAUTION When you work on the electric range, be careful when handling the sheet metal parts. Sharp edges may be present, and you can cut yourself if you are not careful. -
Page 30: Troubleshooting
4. Troubleshooting 4. Troubleshooting 4-1 Failure Display Codes There is a error code and two kinds of error codes. Possible error codes during use can be checked before service. 1. Press CLOCK AM/PM pad. Clock 2. Press CLOCK AM/PM pad again. 3. - Page 31 4. Troubleshooting 4-1 Failure Display Codes Safety error Failure code CAUSE SOLUTION 1. Disconnect power. Open the back cover. Disconnect sensor harness from control. Measure sensor resistance:1080 at the room temperature If there are any E-08 Oven heating error problems, replace oven sensor. 2.
- Page 32 4. Troubleshooting 4-1 Failure Display Codes “E-27” “E-28” oven sensor oven sensor Disconnect power Measure sensor resistance. Replace oven sensor (1080 at the room temperature) *reconnect Check the connecting condition of harness *repair damaged (Oven sensor and No CN02 of Main PCB) harness replace.
- Page 33 4. Troubleshooting 4-1 Failure Display Codes Safety error Failure code CAUSE SOLUTION 1. It will display “E-08” after buzzer is beeping 10 times long if it could not reach 100 F(38 c) within 10 minutes during oven is working. E-08 oven heating error 2.
- Page 34 4. Troubleshooting 4-1 Failure Display Codes Safety error “E-08” or “E-0A” or “E-0E” Disconnect power and sub PCB * DLB, Bake, Broil,convection relay * Replace Sub PCB check.(Nomal: * Solder again if pattern is damaged * Check whether there is any damaged or parts is wrong contacted.
- Page 35 4. Troubleshooting 4-1 Failure Display Codes Failure code CAUSE SOLUTION *Control lockout(press cooking time and Delay start pads at the same time for 3 seconds.) When 1 minute elapsed, It will display “E- 0E” after buzzer is beeping 10 times long, if locking is occurred continually, or door locking E-0E Door locking error...
- Page 36 4. Troubleshooting 4-1 Failure Display Codes Failure code CAUSE SOLUTION When 10 seconds elapses, It will display “-SE-” after buzzer is beeping 10 times long if between main PCB and cable connector or keypad and cable have a short circuit. -SE- short key Please make sure through the method of...
- Page 37 4. Troubleshooting 4-1 Failure Display Codes Control PCB Operation Sort of Control PCB Main PCB ( Front ) ( Back ) Sub PCB ( Front ) ( Back ) Membrane...
- Page 38 4. Troubleshooting 4-1 Failure Display Codes * Explain of primary parts of Main PCB IC02 IC02 (7812) (7812) IC03 IC03 CN06 CN06 (7805) (7805) CN10 CN10 ZNR1 ZNR1 (Varistor) (Varistor) CN03 CN03 CN04,CN05 CN04,CN05 CN02 CN02 CN01 CN01 CN08, CN09 CN08, CN09 Explatin of the function of primary parts.
- Page 39 4. Troubleshooting SYMPTOM DIAGNOSIS REMEDY Measure an input voltage. (240 120V check circuit breaker. or 208 120V) Make sure that the state of wire is Measure an input voltage of terminal connected with Terminal block. block. Measure voltage of connector(CN08,CN09) on main Replace of repair if harness has been PCB L1~N : 120V loosen or disconnected.
- Page 40 4. Troubleshooting SYMPTOM DIAGNOSIS REMEDY Check whtether temperature is risen Replace or repair it if relay on sub PCB or over 400 F(202 C) within 10 minutes main have a short circuit. in a state of room temperature. Oven temperature is risen fast.
- Page 41 4. Troubleshooting SYMPTOM DIAGNOSIS REMEDY Make sure that Radiant element or In nite switch corresponded Replace In nite switch or Radiant element. RR(Right Rear), RF(Right Front), LR(Left Rear), LF(Left Front). Check whether harness is connected with radiant element or In nite switch has been loosen or Cooktop is not disconnected.
-
Page 42: Electrical Malfunction
4. Troubleshooting 4-2 Electrical Malfunction Safety error (Terminal Block) (Terminal Block) L2 : 240V No power N : 120V (Red) (Red) N : 120V (Black) (Black) No display (White) (White) *Check terminal block voltage. * Reset the circuit breaker AC 240V/120V or AC208V/120V or check main power. - Page 43 4. Troubleshooting 4-2 Electrical Malfunction 13.5V (Red) 13.5V (Red) 8V (Yellow) 8V (Yellow) color voltage resistance Primary white 120V 75 ~ 80 (input) Secondary 1 13.5V 1.5 ~ 2.5 Secondary 2 yellow 0.8V ~ 1.5 (Input 120) (Input 120) *Thermal Fuse with built-in Low voltage Transformer will be open if resistance is more than M .
- Page 44 4. Troubleshooting 4-2 Electrical Malfunction Cooktop No heating or Abnormal working *Single element Left Right(LR) LR radiant element (No heating or Abnormal working) Disconnect power *Tighted terminal of harness by *Check the LR infinite switch compressing not to be loosen. *Check whether harness in *Check whether harness connected wire and terminal of switch has been...
- Page 45 4. Troubleshooting 4-2 Electrical Malfunction (Continued) LR radiant element (No heating or Abnormal working) *Tighted terminal of harness by compressing not to be loosen. * Check the element of LR Radiant *Check whether harness connected *Check whether harness in wire and the state of element of LR terminal of radiant has been radiant are in normal.
- Page 46 4. Troubleshooting 4-2 Electrical Malfunction (Continued) *Dual element Right Front(LF) LF radiant element (No heating or abnomal working) *Tighted terminal of harness by * Disconnect power compressing not to be loosen. * Check theLF infinite switch *Check whether harness in *Check whether harness connected terminal of switch has been wire and the state of LF infinite...
- Page 47 4. Troubleshooting 4-2 Electrical Malfunction (Continued) LF radiant element (No heating or Abnormal working) *Tighted terminal of harness by compressing not to be loosen. *check the element of LF Radiant *Check whether harness connected *Check whether harness in wire and the state of LF infinite terminal of Radiant has switch are in normal.
- Page 48 4. Troubleshooting 4-2 Electrical Malfunction *Single element Right Rear(RR) RR radiant element (No heating or abnomal working) *Tighted terminal of harness by * Disconnect power compressing not to be loosen. * Check the RR infinite switch *Check whether harness in *Check whether harness connected terminal on switch has been wire and the state of switch of RR...
- Page 49 4. Troubleshooting 4-2 Electrical Malfunction (Continued) RR radiant element (No heating or Abnormal working) *Tighted terminal of harness by compressing not to be loosen. *Check the element of RR Radiant *Check whether harness connected *Check whether harness in wire and the state of element of RR terminal of Radiant has Radiant are in normal.
- Page 50 4. Troubleshooting 4-2 Electrical Malfunction *Triple element Right Rear(RF) RF radiant element (No heating or Abnormal working) * Disconnect power *Tighten terminal of harness by compressing not to be loosen. * Check RF infinite switch *Check whether harness in *Check whether harness connected wire and the state of switch of RF terminal of switch has been infinite are in normal.
- Page 51 4. Troubleshooting 4-2 Electrical Malfunction (Continued) RF radiant element (No heating or Abnormal working) *Tighten terminal of harness by compressing not to be loosen. *check the element of RF Radiant *Check whether harness connected *Check whether harness in wire and the state of element of RF terminal of Radiant has been radiant are in normal.
- Page 52 4. Troubleshooting 4-2 Electrical Malfunction Warming center relay(RY07) Warming center relay(RY07) Warming center relay(RY07) CN04,CN05 CN04,CN05 CN01 CN01 RC radiant element (No heating or Abnormal working) * Disconnect power Sub PCB Sub PCB *Check whether PCB pattern have a short circuit or Relay *Check warming center relay on sub PCB.
- Page 53 4. Troubleshooting 4-2 Electrical Malfunction (Continued) RC radiant element (No heating or Abnormal working) *Tighten terminal of harness by compressing not to be loosen. *Check element of RC radiant. *Check whether harness connected *Check whether harness in wire and the state of element of RC terminal of radiant has been radiant are in normal.
- Page 54 4. Troubleshooting 4-2 Electrical Malfunction Hot indicator Lamp failure (cooktop) RC radiant element (No heating or Abnormal working) * Disconnect power * Get rid of lamp from harness and open cooktop. *Get rid of lamp from braker and supply extra 120V voltage. *Make sure whether lamp is lighted *Replace Hot Indicator Lamp.
- Page 55 4. Troubleshooting 4-2 Electrical Malfunction Component testing procedures WARNING ELECTRICAL SHOCK HAZARD Disconnect power before servicing the range. Replace all panels before operating range. Failure to do so can result in death or electrical shock. FIGURE TESTS MEASURE RESULTS Approx : 13 ~ 16 Measure resistance values of (at the room temperature) heater s terminal after taking off...
- Page 56 4. Troubleshooting 4-2 Electrical Malfunction FIGURE TESTS MEASURE RESULTS Lock motor Measure the state of micro switch Resistance : 1750 ~ 1850 and motor after taking off harness (at the room temperature) from the heater. voltage : 120V Check whether lock work normally Micro switch by pressing cooking time button and COM-NO...
- Page 57 4. Troubleshooting 4-2 Electrical Malfunction FIGURE TESTS MEASURE RESULTS Check whether harness is connected with switch properly. HI : orange + violet 2P : blue H2 : Yellow L2 : red+red L1 : black+black Approx Measure the voltage and resistance Resistance between terminals between terminals.
- Page 58 4. Troubleshooting 4-2 Electrical Malfunction FIGURE TESTS MEASURE RESULTS Check whether harness is connected Approx with switch properly. Resistance between terminals P1 : red+red when switch is off : 2 : gray When switch is on(HI, Max.) P2 : black+black P-2 : 0 S1 : black+brown S1-S2 : 0...
- Page 59 4. Troubleshooting 4-2 Electrical Malfunction FIGURE TESTS MEASURE RESULTS Approx Check whether harness is connected Terminal resistance : with terminal of element properly. 1b-2b= element terminal : orange or red 2a- element terminal : 45 ~ 50 1200W 1200W 2a : yellow (at the room temperature) 1b : black+brown Voltage which supply radiant...
- Page 60 4. Troubleshooting 4-2 Electrical Malfunction FIGURE TESTS MEASURE RESULTS Approx Measure resistance of Primary and Primary coil(white) : 75 ~ 80 secondary coil. secondary coil : Measure secondary voltage. Red : 1.8~2.2 , AC 13.5V Make sure whether connector or wire yellow: 0.8~1.2V, AC 8V of low voltage transformer has been Replace or repair if wire of...
- Page 61 4. Troubleshooting 4-2 Electrical Malfunction Oven sensor resistance (Temperature vs. Sensor resistance) Ro = 1000 Ohms (0 C), RP = 2757 Ohms, Up = 5V, a = 0.00375 degree F degree C ohms degree F degree C ohms -17.8 932.12 1170.17 961.86 1188.93...
-
Page 62: Pcb Diagrams
5. PCB Diagrams 5. PCB Diagrams 5-1 PCB Diagrams (Main) (This Document can not be used without Samsung’s authorization) -
Page 63: Pcb Diagrams (Sub)
5. PCB Diagrams 5-2 PCB Diagrams (Sub) (This Document can not be used without Samsung’s authorization) -
Page 64: Wiring Diagram
6. Wiring diagram 6-1 Wiring diagram (This Document can not be used without Samsung’s authorization) -
Page 65: Schematic Diagrams
7. Schematic Diagrams 7-1 Schematic Diagrams (This Document can not be used without Samsung’s authorization) -
Page 66: Schematic Diagrams (Main)
7. Schematic Diagrams 7. Schematic Diagrams 7-2 Schematic Diagrams (Main) (This Document can not be used without Samsung’s authorization) TO ASUB BOARD (RELAY BOARD) BZ01 CBE2220BA CN02 YW396-04V CN01 YW396-07V_WHT 60Hz KEY-1 KEY-2 KEY-3 KEY-4 KEY-5 LED-G8 LED-G7 D-LED-S9 D-LED-S1... -
Page 67: Schematic Diagrams (Sub)
7. Schematic Diagrams 7-3 Schematic Diagrams (Sub) (This Document can not be used without Samsung’s authorization) CN01 YW396-09AV... - Page 68 GSPN (GLOBAL SERVICE PARTNER NETWORK) Area Web Site Europe, CIS, Mideast & Africa gspn1.samsungcsportal.com Asia gspn2.samsungcsportal.com North & Latin America gspn3.samsungcsportal.com China china.samsungportal.com © Samsung Electronics Co., Ltd. February. 2012 Printed in Korea...
Need help?
Do you have a question about the FTQ387LWGX and is the answer not in the manual?
Questions and answers