
Related Manuals for REED TM-8811


Summary of Contents for REED TM-8811
- Page 1 TM-8811 Model Digital Thickness Gauge with Velocity Function Instruction Manual reedinstruments 1-877-849-2127 | info@reedinstruments.com www.reedinstruments.com...
- Page 2 Material Selection..............5 Calibration ................. 6 Measuring Sound Velocity............6 Battery Replacement ..............7 For service (repairs or calibration) on this or any other REED product or information on other REED products, contact REED Instruments at info@reedinstruments.com. 1-877-849-2127 | info@reedinstruments.com reedinstruments www.reedinstruments.com...
- Page 3 Features • Exclusive micro-computer LSI circuit & crystal time base offer high accuracy • Digital display provides exact readings without guessing or errors • Broad band receiving sensitivity means the meter can read probes of different frequencies • Auto calibration •...
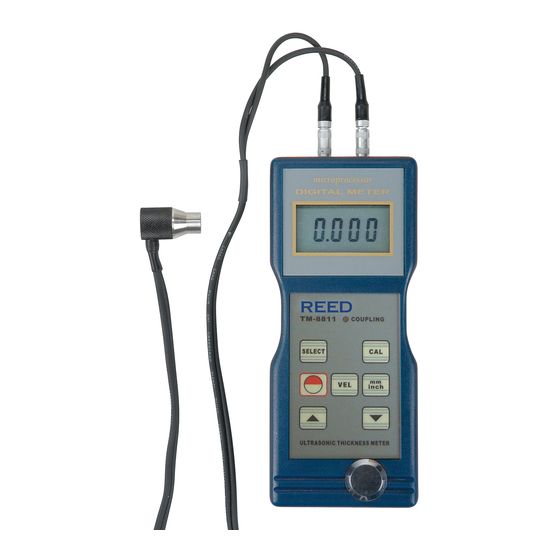
- Page 4 Meter Description 1 — Material selection button 2 — Power button 3 — Plus button 4 — Velocity button 5 — Sensor plug 6 — Coupling indicator 7 — Display 8 — Calibration button 9 — Ultrasonic sensor 10 — mm/inch button 11 —...
- Page 5 Material Selection 1) Press the Power button (#2 on page 4) to turn the unit on. 2) Press the Material Selection button (#1 on page 4) and the display (#7 on page 4) will show the code “cdxx” or “xxxx”. The “cd” is the ab- breviation for “code”...
- Page 6 Calibration Procedures 1) Drop a little oil on the 5 mm Standard block (#12 on page 4). 2) Press the Calibration button (#8 on page 4), the “CAL” symbol will be shown on the Display. “CAL” is the abbreviation for calibration. 3) Place the Ultrasonic sensor (#9 on page 4) on the Standard block (#12 on page 4).
- Page 7 2) Open the Battery cover (#13 on page 4) and remove the batteries. 3) Install 4 new AA batteries verifying you are following the correct polarity. For service (repairs or calibration) on this or any other REED product or information on other REED products, contact REED Instruments at info@reedinstruments.com.
- Page 8 Notes _________________________________________ ________________________________________________ ________________________________________________ ________________________________________________ ________________________________________________ ________________________________________________ ________________________________________________ ________________________________________________ ________________________________________________ ________________________________________________ ________________________________________________ ________________________________________________ ________________________________________________ ________________________________________________ ________________________________________________ ________________________________________________ ________________________________________________ ________________________________________________ 1-877-849-2127 | info@reedinstruments.com reedinstruments www.reedinstruments.com...
Need help?
Do you have a question about the TM-8811 and is the answer not in the manual?
Questions and answers