
Related Manuals for Gaymar MEDI-THERM II


Summary of Contents for Gaymar MEDI-THERM II
- Page 1 MEDI-THERM ® HYPER/HYPOTHERMIA MACHINE REF MTA6012CE SERVICE MANUAL P/N 100164000 05/07...
-
Page 2: Table Of Contents
Medi-Therm II System ......7 Medi-Therm II Control Panel ..... 9 Refer to section 2.0 of this Medi-Therm II Service Manual for Probe Check Well ........17 additional details. Functional Check/Inspection Form ..21 Initiating Service Mode 1 ...... -
Page 3: Safety Precautions
• Do not tip machine over without first draining the water out and unplugging the power cord. Electrical shock or damage to the machine can result. • Use only Gaymar probes (see Accessories, page 6) or probes having characteristics equivalent to YSI 400 series probes in the Patient Probe jack. -
Page 4: Repair Policy
Defective Component Replacement parts can be ordered from your local dealer. Specify the Gaymar part number; refer to the Parts Lists in section 10.0 of this manual. Defective Printed Circuit (PC) Board Defective PC boards can be exchanged for replacement boards at a fixed cost directly from your local dealer. -
Page 5: Specifications
MTA6012CE Service Manual Specifications Specifications Physical c i s i f i o i t o i s u f ( ; ) l l ) y t r i o i t a e t i s i d l l i t r e t i t a... -
Page 6: Warm-Up Rate
Specifications MTA6012CE Service Manual Thermal (continued) Figure 1—Typical warm-up rate Figure 2—Typical cooldown rate (with full size blanket) (with full size blanket) Performance o f r i f i o i t e i t ± C ° i s u p s i ±... - Page 7 MTA6012CE Service Manual Specifications Electrical c i r i f i o i t e r r h t r a r t s o l r c i l a r r c i e r r e i t a r t s o l r c i...
-
Page 8: Blankets/Accessories
(3 meters) for DP400CE Probe (56 cm x 84 cm) REF DHP813CE Adult General Use * These Gaymar probes, adapters, and hoses should be (76 cm x 163 cm) used only with Gaymar Hyper/Hypothermia Machines. Single Patient Use Blankets, All Polymer... -
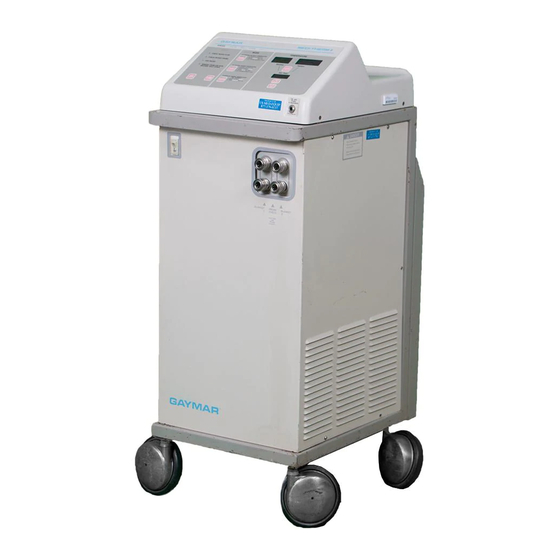
Page 9: Medi-Therm Ii System
Patient Probe Jack Lift cover. Fill unit with Accepts patient probe plug connecting patient distilled water until green probe to machine. Use only Gaymar probes band on float is fully visible. or equivalent YSI 400 series probes. ON/OFF Switch (Circuit Breaker) Controls power to Medi-Therm II. -
Page 10: Operator Control Panel
TEST LIGHTS flashes all indicator lights and REMOVE FROM USE NOW indicates digital displays, while sounding an audible alarm. the Medi-Therm II machine has shut down. Remove the machine from use. ALARM SILENCE temporarily silences the FLASHING DISPLAY indicates that the blanket... -
Page 11: Medi-Therm Ii Control Panel
“” or “” button until the chime stops to monitor patient temperature. No access the extended temperature range. therapy is provided. PATIENT PROBE JACK— Insert only a Gaymar probe or an equivalent YSI 400 series probe. [located on front of machine]... -
Page 12: Theory Of Operation
Theory of Operation MTA6012CE Service Manual Theory of Operation, System Theory, Medi-Therm II Machine The Gaymar Medi-Therm II machine provides a means of regu- Whenever the machine is on, 9 liters of water are maintained lating patient temperature by supplying temperature-controlled cold in the cold water reservoir. - Page 13 • BACKUP SYSTEM I (PIC Microcontroller and probe) The first backup system is independent of the main The Medi-Therm II machine uses three printed circuit boards (see microcontroller. It runs off its own power supply. It limits figure 14, p. 51): the temperature of water exiting the machine in the •...
- Page 14 (U39 and associated components) via multiplexor Power enters the Medi-Therm II machine through circuit breaker U50. The amplified voltage is then applied to a voltage-to- CB1 to feed the refrigeration unit (through relay K1) and the frequency converter U24.
- Page 15 MTA6012CE Service Manual Theory of Operation • The blanket display is driven by driver chip U5. The The probe presence switch within J1 will pull its buffer input line main microcontroller interfaces to it via the data bus at low when it senses the presence of the patient probe. addresses 0FFECH, 0FFEDH, 0FFEEH, 0FFEFH.
- Page 16 Theory of Operation MTA6012CE Service Manual Pin 11 of U51 on the control/display board and U8 and Q9 of the board and optical coupler U4 on the power supply board which is power supply board control the cold solenoid valve while pin 9 powered by the independent power supply of the alarm/backup of U51 on the control/display board and U7 and Q8 of the power board.
- Page 17 MTA6012CE Service Manual Theory of Operation 6.4.7.7 Other REMOVE FROM USE NOW Shutdown microcontroller. The same signal is sent to port P3.2 of the microcontroller through C1, R1, and driver U11. Conditions If during normal operation the main microcontroller senses 6.4.7.5 If The Main Microcontroller Is Nonoperational internal problems, it will cause a machine shutdown condition If the main microcontroller is nonoperational at the event of a...
-
Page 18: Functional Check, Safety Inspection, And Preventive Maintenance
Receiving Inspection Procedures 7.2.1 Machine Cleaning CONCEALED DAMAGE After unpacking the Medi-Therm II machine, inspect the machine CAUTION for concealed damage. Save all packing material and carefully describe or photograph the damage. Notify the carrier at once and ask for an inspection (in writing). Failure to do this within 15 days Users should not use cleaning or decontamination may result in loss of claim. -
Page 19: Probe Check Well
An Inspection Form is provided at the end of this section to REUSABLE PROBES facilitate and document the inspection process. Lower case letters For cleaning, disinfecting, and sterilizing reusable Gaymar probes preceding the subheadings within section 7.3 correspond to the (or equivalent YSI 400 series reusable probes), refer to the lines on the Inspection Form. - Page 20 The quick-disconnect fittings on the machine may become stiff and difficult to engage. If so, apply a silicone-base Plug in the Medi-Therm II machine and turn it on. Press and hold lubricant to the inside of the machine fittings and the outside the TEST LIGHTS button.
- Page 21 MTA6012CE Service Manual Functional Check and Safety Inspection NOTE: If the unit has been completely drained, air can be Turn machine on. Set in BLANKET CONTROL mode. trapped in the pump causing flow to be decreased. Set the Temperature Setpoint to the various settings To clear the air, turn the unit off, wait approximately specified on the Inspection Form (fig.
- Page 22 Reset the RFU Code gravity drain into a container for approximately one minute. The Medi-Therm II machine will retain the previously stored code. This will circulate cold water from the reservoir past the Before returning a machine to service, reset the RFU code to zero thermostat, causing it to reset.
-
Page 23: Functional Check/Inspection Form
MTA6012CE Service Manual Functional Check and Safety Inspection Form i t i t i d t i d c r i t i u t i d g i l c t i c t i e l l ° 3 °... -
Page 24: Service Modes And Troubleshooting
RFU code to zero to avoid basing future troubleshooting decisions on an old code. Some troubleshooting and functional checks may be aided by using the Medi-Therm II machine’s service modes of operation. * RFU = REMOVE FROM USE NOW Service Modes... -
Page 25: Rfu Codes
MTA6012CE Service Manual Service Modes t i d ° 0 ° 0 u l i t s i c r i t s i c r i t s i c r i t s i c r i c r i c r i —... - Page 26 Service Modes MTA6012CE Service Manual i v r : s s o r t d / l p s i y a l , d r i h c • c i f i i t a i s r v e l .
- Page 27 MTA6012CE Service Manual Service Modes i v r : s s t t u e l i e c i p i r e t - . t a p i r o i t • p s i y a l •...
-
Page 28: N Troubleshooting Charts
Troubleshooting Charts MTA6012CE Service Manual Troubleshooting Charts IMPORTANT Whenever possible, perform the Functional Check and Safety Inspection (see section 7.3) prior to troubleshooting the machine. Figure 10A—Accessing RFU Codes... - Page 29 MTA6012CE Service Manual Troubleshooting Charts Figure 10B—RFU Code 1...
- Page 30 Troubleshooting Charts MTA6012CE Service Manual Figure 10C—RFU Codes 2, 3, —, E, and L...
- Page 31 MTA6012CE Service Manual Troubleshooting Charts Figure 10D—RFU Codes 4, 5...
- Page 32 Troubleshooting Charts MTA6012CE Service Manual Figure 10E—RFU Codes 6, 7...
- Page 33 MTA6012CE Service Manual Troubleshooting Charts Figure 10F—RFU Code 8...
- Page 34 Troubleshooting Charts MTA6012CE Service Manual Figure 10G—RFU Code 9...
- Page 35 MTA6012CE Service Manual Troubleshooting Charts Figure 10H—RFU Code P...
- Page 36 Troubleshooting Charts MTA6012CE Service Manual Figure 10 I —Pump Motor Not Running...
- Page 37 MTA6012CE Service Manual Troubleshooting Charts Figure 10J—Machine Doesn’t Turn On...
- Page 38 MTA6012CE Service Manual Troubleshooting Charts Figure 10K—RFU Code H...
- Page 39 Troubleshooting Charts MTA6012CE Service Manual...
- Page 40 Troubleshooting Charts MTA6012CE Service Manual Figure 10L—Check Water Flow Alert Is On...
- Page 41 MTA6012CE Service Manual Troubleshooting Charts NOTES: The line voltage measured should be the same as that measured across terminals 4 and 3 of TB1. (There may be residual voltage between terminals 2 and 3 or terminals 1 and 3 of TB1 when the circuitry is in the OFF state because of the solenoid valve construction and circuit configuration.
- Page 42 Troubleshooting Charts MTA6012CE Service Manual Figure 10M—Blanket Won’t Heat in PATIENT CONTROL or BLANKET CONTROL Mode...
- Page 43 MTA6012CE Service Manual Troubleshooting Charts NOTES: The line voltage measured should be the same as that measured across terminals 4 and 3 of TB1. (There may be residual voltage between terminals 2 and 3 or terminals 1 and 3 of TB1 when the circuitry is in the OFF state because of the solenoid valve construction and circuit configuration.
- Page 44 Troubleshooting Charts MTA6012CE Service Manual Figure 10N—Blanket Will Not Cool (sheet 1 of 2)
- Page 45 MTA6012CE Service Manual...
- Page 46 Troubleshooting Charts MTA6012CE Service Manual Figure 10N—Blanket Will Not Cool (sheet 2 of 2)
-
Page 47: Repair Procedures
Before charging a unit, always verify the compressor. condenser tubing O.D. then select the appropriate weight charge. • The Medi-Therm II R-134a system uses a polyol ester oil for lubrication because conventional mineral oils do • In a properly charged unit with 7mm (9/32 inch) O.D. - Page 48 22.2°C; Install seven (7) board mounting screws. the unit is connected to a blanket, and the Medi-Therm II has been set to 4°C in BLANKET Connect the three cable harness connectors P5, P6, and P7 CONTROL mode;...
-
Page 49: Connecting Terminal Block Wires
MTA6012CE Service Manual Repair Procedures Replacing the Control/Display Board from the alarm/backup board. Disconnect the single conductor connector P9 from the CAUTION alarm/backup board. Note the polarity of the two LED wires before disconnecting Wear a static control device connected to the chassis the wires from the J3 terminal block on the alarm backup ground to prevent electrostatic discharge. -
Page 50: Flow Switch
Repair Procedures MTA6012CE Service Manual Install the standoffs through the other four (4) holes. CAUTION Insert patient probe assembly into mounting hole and fasten with hex nut. Insure patient probe assembly is oriented so Always use thermal grease on thermostats. that the bevelled corner of the probe assembly is positioned Failure to use thermal grease could raise trip as shown in figure 20, p. - Page 51 MTA6012CE Service Manual Repair Procedures Replacement Parts For base replacement parts information, see figure 19 (pp. 56-57). For head replacement parts information, see figure 20 (p. 58). Repairs should only be performed by qualified personnel familiar with repair practices for servicing medical devices. Shipping/Repackaging Instructions CAUTION Failure to install compressor shipping braces before...
-
Page 52: Service Information
Service Information MTA6012CE Service Manual 10.0 Service Information , ) 2 , ) 1 ° ( ° ( Figure 13—Temperature vs. Resistance... -
Page 53: Circuit Boards/Connectors (Head)
MTA6012CE Service Manual Service Information Figure 14—Circuit Boards and Connectors (head) -
Page 54: B Heating Flow; Cooling Flow
Service Information MTA6012CE Service Manual When the Medi-Therm II machine is heating, water flows in the path shown below. Figure 15A—Heating flow diagram When the Medi-Therm II machine is cooling, water flows in the path shown below. Figure 15B—Cooling flow diagram... -
Page 55: Refrigeration Flow Diagram
MTA6012CE Service Manual Service Information Figure 16—Refrigeration flow diagram... -
Page 56: B Test Setup; Test Setup (Alternate)
Service Information MTA6012CE Service Manual Figure 17A—Test setup [using TPT9 Tester and Mercury Thermometer] Figure 17B—Test setup [using alternate test equipment]... -
Page 57: Machine Disassembly
MTA6012CE Service Manual Service Information Figure 18—Machine disassembly... -
Page 58: Parts Diagram (Base), Parts List
Service Information MTA6012CE Service Manual Figure 19—Parts Diagram (Base) - Page 59 MTA6012CE Service Manual Service Information t l i c r i t i u t a l c r i t i u c t i t e l , t i t i n t i c t l i n i l a l l Parts List...
-
Page 60: Parts Diagram (Head), Parts List
Service Information MTA6012CE Service Manual p i l l l i , y l t i g Figure 20—Parts Diagram (Head), Parts List... -
Page 61: Thermostat Wiring Diagram
MTA6012CE Service Manual Service Information Figure 21—Thermostat Wiring Diagram... -
Page 62: Control/Display Board, Parts List
Control/Display Board MTA6012CE Service Manual Figure 22—Control/Display Board... - Page 63 MTA6012CE Service Manual Control/Display Board t p i t p i µ t s i c t i µ o l l o l l , t i , t i t s i t s i t s i t s i , l a Parts List...
-
Page 64: Power Supply Board, Parts List
Power Supply Board MTA6012CE Service Manual Figure 23—Power Supply Board... - Page 65 MTA6012CE Service Manual Power Supply Board t p i t p i µ µ µ µ µ µ µ µ µ t a i µ µ t s i Parts List...
-
Page 66: Alarm/Backup Board, Parts List
Alarm/Backup Board MTA6012CE Service Manual Figure 24—Alarm/Backup Board... - Page 67 MTA6012CE Service Manual Alarm/Backup Board t p i t p i µ µ µ Parts List...
-
Page 68: Wiring Diagram [Foldout]
MTA6012CE Service Manual... -
Page 69: Power Supply Board Schematic
MTA6012CE Service Manual... -
Page 70: Control Display Board Schematic, 2 Of 4 [Foldout]
Shipping Instructions MTA6012CE Service Manual CAUTION Failure to install the compressor shipping braces (see figure B) before shipment can result in extensive damage to the refrigeration section. -
Page 71: Control Diplay Board Schematic, 3 Of 4 [Foldout]
Shipping Instructions frame into the shipping brace; the third INSTRUCTIONS brace just fits in place. Before repacking the Medi-Therm II Step 5. Refer to figure A. Replace lower machine, perform Steps 1 & 2: wraparound and ten (10) screws. Step 1. Fill unit with distilled water to Step 6. -
Page 72: Alarm/Backup Board Schematic
MTA6012CE Service Manual... -
Page 73: Block Diagram [Foldout]
MTA6012CE Service Manual... - Page 74 MTA6012CE Service Manual ® GAYMAR INDUSTRIES, INC. 10 Centre Drive Orchard Park, NY 14127-2295 Authorized EU representative: Phone: (Europe): (716) 662-8636 INVATECH GmbH & Co. KG FAX: Königsreihe 22 (716) 662-0730 D 22041 Hamburg, Germany...
Need help?
Do you have a question about the MEDI-THERM II and is the answer not in the manual?
Questions and answers