
Related Manuals for Baumer VCXG


Summary of Contents for Baumer VCXG
- Page 1 User´s Guide VCXG (Gigabit Ethernet) / VCXU (USB 3.0) Document Version: v1.1 Release: 07.06.2016 Document Number: 11165414...
-
Page 3: Table Of Contents
1. General Information ....................6 2. General safety instructions ..................7 3. Intended Use ......................7 4. General Description ....................8 4.1 VCXG ........................9 4.2 VCXU ........................9 5. Camera Models ....................... 10 5.1 VCXG ........................10 5.2 VCXU ........................11 6. - Page 4 9.9 Factory Settings ....................57 9.10 Timestamp ......................58 9.11 Chunk ........................59 10. VCXG - Interface Functionalities ................60 10.1 Device Information ....................60 10.2 Packet Size and Maximum Transmission Unit (MTU) ......... 60 10.3 Inter Packet Gap (IPG) ..................60 10.3.1 Example 1: Multi Camera Operation –...
- Page 5 10.5 Multicast ......................65 10.6 IP Configuration ....................66 10.6.1 Persistent IP ....................66 10.6.2 DHCP (Dynamic Host Configuration Protocol) ..........66 10.6.3 LLA ....................... 67 10.6.4 Force IP ......................67 10.7 Packet Resend ....................68 10.7.1 Normal Case....................68 10.7.2 Fault 1: Lost Packet within Data Stream ............68 10.7.3 Fault 2: Lost Packet at the End of the Data Stream ........
-
Page 6: General Information
1. General Information Thanks for purchasing a camera of the Baumer family. This User´s Guide describes how to connect, set up and use the camera. Read this manual carefully and observe the notes and safety instructions! Target group for this User´s Guide This User's Guide is aimed at experienced users, which want to integrate camera(s) into a vision system. -
Page 7: General Safety Instructions
Should this happen, you must take Class A reasonable measures to eliminate the interference. 3. Intended Use The camera is used to capture images that can be transferred over a GigE interface (VCXG) or a USB 3.0 interface (VCXU) to a PC. -
Page 8: General Description
4. General Description All Baumer cameras of these families are characterized by: Best image quality ▪ Low noise and structure-free image information ▪ High quality mode with minimum noise Flexible image acquisition ▪ Industrially-compliant process interface with parameter setting capability... -
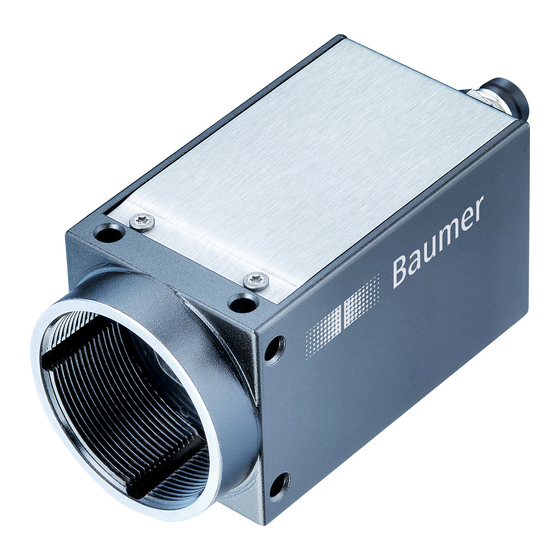
Page 9: Vcxg
4.1 VCXG No. Description No. Description Lens mount (C-Mount) Ethernet Port (PoE) / Signaling LED´s Power supply / Digital-IO 4.2 VCXU No. Description No. Description Lens mount (C-Mount) USB 3.0 port Digital-IO Signaling-LED... -
Page 10: Camera Models
5. Camera Models 5.1 VCXG Full Sensor Camera Type Resolution Frames Size [max. fps] Monochrome VCXG-53M 1" 2592 x 2048 28 32 ׀ Color VCXG-53C 1" 2592 x 2048 28 32 ׀ Burst Mode (image acquisition in the camera´s internal memory) ׀interface Dimensions 2 x M3 x 4 8 x M3 x 4... -
Page 11: Vcxu
5.2 VCXU Full Sensor Camera Type Resolution Frames Size [max. fps] Monochrome VCXU-23M 1/1.2" 1920 x 1200 VCXU-50M 2/3" 2448 x 2048 Color VCXU-23C 1/1.2" 1920 x 1200 VCXU-50C 2/3" 2448 x 2048 Dimensions 8 x M3 x 4 2 x M3 x 4 C-Mount 37,8 6,25... -
Page 12: Installation
6. Installation Lens mounting Notice Avoid contamination of the sensor and the lens by dust and airborne particles when mounting the lens to the device! Therefore the following points are very important: ▪ Install the camera in an environment that is as dust free as possible! ▪... -
Page 13: Heat Transmission
Heat can damage the camera. Provide adequate dissipation of heat, to ensure that the temperatures does not exceed the value (see Heat Trans- mission). As there are numerous possibilities for installation, Baumer recommends no specific method for proper heat dissipation, but suggest the following principles: ▪... -
Page 14: Mechanical Tests
6.3 Mechanical Tests Environmen- Standard Parameter tal Testing Vibration, IEC 60068-2-6 Frequency 10-2000 Hz sinusodial Range Amplitude under- 1.5 mm neath crossover frequencies Acceleration 10 g Test duration / 150 min Axis Vibration, IEC 60068- Frequency range 20-1000 Hz broad band 2-64 Acceleration 10 g... -
Page 15: Pin-Assignment / Led-Signaling
7. Pin-Assignment / LED-Signaling 7.1 VCXG 7.1.1 Ethernet Interface (PoE) Notice The camera supports PoE (Power over Ethernet) IEEE 802.3af Clause 33, 48V Power supply. 8P8C Modular Jack (RJ45) with LEDs green/white MX1+ (negative / positive V port green MX1-... -
Page 16: Digital Io
IO GND Digital Output: Low Active Digital Output: High Active Customer Device Camera IO GND Digital Input 7.1.5 LED Signaling Figure 2 ► LED positions on Bau- mer VCXG cameras. Signal Meaning green static link active green flash receiving yellow static error yellow flash... -
Page 17: Vcxu
7.2 VCXU 7.2.1 USB 3.0 Interface USB 3.0 Micro B 1 2 3 4 5 6 7 8 9 10 VBUS MicB_SSTX- MicB_SSTX+ GND_DRAIN MicB_SSRX- MicB_SSRX+ Caution If the camera is connected to an USB2.0 port image transmission is disabled by default. The camera consumes more than 2.5W which is the maximum allowed by the USB2.0 specification. But there is a possibility to ... -
Page 18: Digital Ios
7.2.2 Digital IOs Power Supply / Digital IOs (on camera side) wire colors of the connecting cable (ordered separately) white Power VCC OUT1 grey GPIO (Line2) brown pink not connected OUT1 (Line3) IN1 (Line0) green GND GPIO blue GND IN1 yellow GPIO (Line1) 7.2.3 GPIO (General Purpose Input/Output) -
Page 19: Led Signaling
Customer Device Camera IO GND Digital Input 7.2.5 LED Signaling ◄ Figure 3 LED position on Bau- mer VCXU camera. Signal Meaning green flash Power on green USB 3.0 connection USB 2.0 connection yellow Readout active red flash Update... -
Page 20: Product Specifications
Filter glass of color cameras wavelength in nm 6000 6000 5000 5000 4000 4000 3000 3000 2000 2000 1000 Figure 4 ► 1000 Spectral sensitivities for 1000 1100 1000 1100 Baumer cameras with VCXG-53M Wave Length [nm] VCXG-53C Wave Length [nm] 5.0 MP sensor. - Page 21 ◄ Figure 5 Spectral sensitivities for 1000 1000 Baumer cameras with VCXU-23M 2.3 MP sensor. Wave Length [nm] VCXU-23C Wave Length [nm] ◄ Figure 6 Spectral sensitivities for 1000 1000 Baumer cameras with VCXU-50C Wave Length [nm] VCXU-50M Wave Length [nm] 5.0 MP sensor.
-
Page 22: Field Of View Position
1 ± 0.1 mm cover glass of sensor thickness: D Figure 7 ► 14,5 ±0,35 Sensor accuracy of the Baumer CX series 8.2.1 VCXG Camera ± x ± y ± x ± Y ± z ± α Type... -
Page 23: Acquisition Modes And Timings
) is given by the particular sensor and image format. readout Baumer cameras can be operated with differtent acquisition modes, the Continuous Mode (Free Running Mode), the Acquisition Frame Rate Mode, the Single Frame Mode, the Multi Frame Mode and the Trigger Mode. -
Page 24: Single Frame Mode
AcquisitionFrameCount controls the number of captured frames. Then the acquisition is automatically stopped. 8.3.4 Acquisition Frame Rate Mode With this feature Baumer introduces a clever technique to the CX camera series, that enables the user to predefine a desired frame rate in continuous mode. For the employment of this mode the cameras uses an internal clock generator that cre- ates trigger pulses. -
Page 25: Trigger Mode
8.3.5 Trigger Mode After a specified external event (trigger) has occurred, image acquisition is started. De- pending on the interval of triggers used, the camera operates non-overlapped or over- lapped in this mode. With regard to timings in the trigger mode, the following basic formulas need to be taken into consideration: Case Formula... - Page 26 8.3.5.2 Overlapped Operation: t > t exposure(n+2) exposure(n+1) If the exposure time (t ) is increased from the current acquisition to the next acquisi- exposure tion, the time the camera is unable to process occurring trigger signals (t ) is scaled notready down.
- Page 27 8.3.5.3 Overlapped Operation: t < t exposure(n+2) exposure(n+1) If the exposure time (t ) is decreased from the current acquisition to the next acquisi- exposure tion, the time the camera is unable to process occurring trigger signals (t ) is scaled notready When decreasing the t such, that t...
- Page 28 8.3.5.4 Non-overlapped Operation If the frequency of the trigger signal is selected for long enough, so that the image acquisi- tions (t ) run successively, the camera operates non-overlapped. exposure readout Trigger triggerdelay exposure(n) exposure(n+1) Exposure Timings: A - exposure time frame (n) effective B - image parameters frame (n) effective...
-
Page 29: Advanced Timings For Gige Vision ® /Usb3 Vision Tm Message Channel
If the camera is unable to process incoming trigger signals, which means the camera should be triggered within the interval t , these triggers are skipped. On Baumer CX notready cameras the user will be informed about this fact by means of the event "TriggerSkipped". - Page 30 8.3.6.4 TriggerOverlapped This signal is active, as long as the sensor is exposed and read out at the same time. which means the camera is operated overlapped. Trigger exposure(n) exposure(n+1) Exposure readout(n) readout(n+1) Readout Event: TriggerOverlapped Trigger Overlapped Once a valid trigger signal occures not within a readout, the "TriggerOverlapped" signal changes to state low.
- Page 31 8.3.6.6 TransferBufferFull This event is issued only in trigger mode. It signals that no buffer is available. Trigger exposure(n) exposure(n+1) Exposure readout(n) readout(n+1) Readout notready TriggerReady Event: TransferBufferFull BufferReady 8.3.6.7 TransferBufferReady This event is issued only in trigger mode. It signals that buffer available. Trigger exposure(n) exposure(n+1)
-
Page 32: Software
C# or VB.NET. 8.4.2 3 Party Software Strict compliance with the GenICam™ standard allows Baumer to offer the use of 3 Party Software for operation with cameras of this series. You can find a current listing of 3 Party Software, which was tested successfully in com- bination with Baumer cameras, at http://www.baumer.com/?id=2851... -
Page 33: Camera Functionalities
9.1.1 Image Format A digital camera usually delivers image data in at least one format - the native resolution of the sensor. Baumer cameras are able to provide several image formats (depending on the type of camera). Compared with standard cameras, the image format on Baumer cameras not only in- cludes resolution, but a set of predefined parameter. -
Page 34: Pixel Format
9.1.2 Pixel Format On Baumer digital cameras the pixel format depends on the selected image format. 9.1.2.1 General Definitions RAW: Raw data format. Here the data are stored without processing. Bayer: Raw data format of color sensors. Color filters are placed on these sensors in a checkerboard pattern, generally in a 50% green, 25% red and 25% blue array. - Page 35 For RGB or BGR these 8 bits per channel equal 24 bits overall. Two bytes are needed for transmitting more than 8 bits per pixel - even if the second byte is not completely filled with data. In order to save bandwidth, the packed formats were introduced to Baumer CX cameras. In this formats, the unused bits of one pixel are filled with data from the next pixel. 8 bit: ◄ Figure 10...
-
Page 36: Exposure Time
The signal strength is influenced by the incoming amount of photons. It can be increased by increasing the exposure time (t exposure On Baumer CX cameras, the exposure time can be set within the following ranges (step size 1μsec): 9.1.3.1 VCXG Camera Type exposure exposure... -
Page 37: Fixed Pattern Noise Correction (Fpnc)
If other settings are used (e.g. different number of readout channels) using this correction with the default data set may degrade the image quality. In this case the user may derive a specific data set for the used setup. FPN Correction Off FPN Correction On 9.1.4.1 VCXG Camera Type Monochrome VCXG-53M ■... -
Page 38: Look-Up-Table
γ Y' = Y original ▲ Figure 14 On Baumer VCX cameras the correction factor γ is adjustable from 0.1 to 2. Non-linear perception of the human eye. The values of the calculated intensities are entered into the Look-Up-Table. Thereby pre- H - Perception of bright- viously existing values within the LUT will be overwritten. -
Page 39: Region Of Interest
9.1.7 Region of Interest With the "Region of Interest" (ROI) function it is possible to predefine a so-called Region of Interest (ROI) or Partial Scan. This ROI is an area of pixels of the sensor. On image acquisition, only the information of these pixels is sent to the PC. This function is employed, when only a region of the field of view is of interest. It is coupled to a reduction in resolution. The ROI is specified by four values: ▪... -
Page 40: Binning
Higher sensitivity enables shorter exposure times. Baumer cameras support three types of Binning - vertical, horizontal and bidirectional. In unidirectional binning, vertically or horizontally neighboring pixels are aggregated and reported to the software as one single "superpixel". - Page 41 9.1.8.2 Color Binning Color Binning is calculating on the camera (no higher frame rates) – The sensor does not support this binning operation. Color calculated pixel formats In pixel formats, which are not raw formats (e.g. RGB8), the three calculated color values (R, G, B) of a pixel will be added with those of the corresponding neighbor pixel during binning.
- Page 42 RAW pixel formats In the raw pixel formats (e.g. BayerRG8) the color values of neighboring pixels with the same color are combined. Binning Illustration without Figure 25 ► Full frame image, no binning of pixels. Figure 26 ► Vertical binning causes a vertically compressed image with doubled...
-
Page 43: Brightness Correction
9.1.9 Brightness Correction The aggregation of charge carriers may cause an overload. To prevent this, brightness correction was introduced. Brightness correction can be swiched on or off. Here, three binning modes need to be considered separately: Binninig Realization 1x2 binning is performed within the sensor, binning correction also takes place here. -
Page 44: Flip Image
9.1.10 Flip Image The Flip Image function let you flip the captured images horizontal and/or vertical before they are transmitted from the camera. Notice A defined ROI will also flipped. Notice In the RAW image formats flipping is not possible. Normal Flip vertical Figure 30 ► Flip image vertical Normal Flip horizontal Figure 31 ► Flip image horiontal Normal Flip horizontal and vertical Figure 32 ► Flip image horiontal and vertical... -
Page 45: Color Processing
9.3 Color Adjustment – White Balance This feature is available on all color cameras of the Baumer VCX series and takes place within the Bayer processor. White balance means independent adjustment of the three color channels, red, green and blue by employing of a correction factor for each channel. -
Page 46: One Push White Balance (Once)
In the Continuous mode the white balance is automatically performed once per second. 9.4 Analog Controls 9.4.1 Offset / Black Level On Baumer VCX cameras, the offset (or black level) is adjustable from 0 to 255 LSB (re- lating to 12 bit). 9.4.1.1 VCXG... -
Page 47: Gain
However, this causes low output signals from the camera and results in dark images. To solve this issue, the signals can be amplified by a user-defined gain factor within the camera. This gain factor is adjustable. Notice Increasing the gain factor causes an increase of image noise. 9.4.2.1 VCXG Camera Type Gain [dB] Monochrome VCXG-53M 0...12... -
Page 48: Pixel Correction
9.5 Pixel Correction 9.5.1 General information A certain probability for abnormal pixels - the so-called defect pixels - applies to the sen- sors of all manufacturers. The charge quantity on these pixels is not linear-dependent on the exposure time. The occurrence of these defect pixels is unavoidable and intrinsic to the manufacturing and aging process of the sensors. -
Page 49: Correction Algorithm
Corrected Pixels 9.5.3 Defectpixellist As stated previously, this list is determined within the production process of Baumer cam- eras and stored in the factory settings. Additional hot or cold pixels can develop during the lifecycle of a camera. In this case Baumer offers the possibility of adding their coordinates to the defectpixellist. -
Page 50: Process Interface
9.6 Process Interface 9.6.1 Digital IOs 9.6.1.1 User Definable Inputs The wiring of these input connectors is the responsibility of the user. The sole exception to this is the compliance with predetermined high and low levels (only the optical input IN1; 0 ... 4.5V low, 11 ... 30V high). The defined signals will have no direct effect, but can be analyzed and processed on the ... - Page 51 9.6.1.2 General Purpose Input/Output (GPIO) Lines 1 and 2 are GPIOs and can be inputs and outputs. Used as an input: (0 ..0.8 V low, 2.0 ... 30 V high). Used as an output: (0 ..0.4 V low, 2.4 ... 3.3 V high), @ 1 mA load (high) / 50 mA sink (low) Caution The General Purpose IOs (GPIOs) are not potential-free and do not have an...
- Page 52 9.6.1.3 Configurable Outputs With this feature, Baumer gives you the option to wire the output connectors to internal signals that are controlled on the software side. On CX cameras, the output connector can be wired to one of the provided internal signals:...
-
Page 53: Trigger
Trigger signals are used to synchronize the camera exposure and a machine cycle or, in case of a software trigger, to take images at predefined time intervals. Trigger (valid) high 4.5V Exposure ▲ Figure 40 Trigger signal, valid for Baumer cameras. Readout Time ◄ Figure 41 Camera in trigger Different trigger sources can be used here. mode: A - Trigger delay... -
Page 54: Debouncer
9.6.4 Debouncer The basic idea behind this feature was to seperate interfering signals (short peaks) from valid square wave signals, which can be important in industrial environments. Debouncing means that invalid signals are filtered out, and signals lasting longer than a user-defined testing time t will be recognized, and routed to the camera to induce a trigger. DebounceHigh In order to detect the end of a valid signal and filter out possible jitters within the signal, a ... -
Page 55: Timers
9.6.7 Frame Counter The frame counter is part of the Baumer image infoheader and supplied with every image, if the chunkmode is activated. It is generated by hardware and can be used to verify that every image of the camera is transmitted to the PC and received in the right order. -
Page 56: Device Reset
(e.g. the network data) of the camera. The interrupt of the power supply ist therefore no longer necessary. 9.8 User Sets Four user sets (0-3) are available for the Baumer cameras of the VCX series. User set 0 is the default set and contains the factory settings. User sets 1 to 3 are user-specific and can contain any user definable parameters. -
Page 57: Vcxu
9.8.2 VCXU Parameter AcquisitionMode LineInverter AcquisitionFrameCount LineSource AcquisitionStart UserOutputValue AcquisitionStop UserOutputValueAll AcquisitionAbort LineDebouncerHighTimeAbs AcquisitionFrameRate LineDebouncerLowTimeAbs TriggerMode EventNotification TriggerSource Width TriggerActivation Height TriggerDelay OffsetX ExposureMode OffsetY ExposureTime BinningHorizontal AcquisitionFrameRateEnable BinningVertical ReadoutMode ReverseX Gain ReverseY Gamma PixelFormat BalanceWhiteAuto TestPatternGeneratorSelector BlackLevel TestPattern BrightnessCorrection LUTEnable ChunkModeActive LUTValue... -
Page 58: Timestamp
9.10 Timestamp The Timestamp is 64 bits long and reports the current value of the device timestamp counter in nanoseconds. Any image or event includes its corresponding timestamp. The resolution is at USB cameras 10 nanoseconds and at GigE cameras 8 nanoseconds. At power on or reset (only GigE), the timestamp starts running from zero. -
Page 59: Chunk
9.11 Chunk The chunk is a data packet that is generated by the camera and integrated into the pay- load (every image), if chunk mode is activated. ◄ Figure 45 Location of the Chunk This integrated data packet can contains adjustable settings for the image. Feature Description ChunkOffsetX... -
Page 60: Vcxg - Interface Functionalities
In principle modern network hardware supports a packet size of 1500 Byte, which is specified in the GigE network standard. "Jumboframes" merely characterizes a packet size exceeding 1500 Bytes. Baumer VCXG cameras can handle a MTU of up to 16384 Bytes. 10.3 Inter Packet Gap (IPG) To achieve optimal results in image transfer, several Ethernet-specific factors need to be ... -
Page 61: Example 1: Multi Camera Operation - Minimal Ipg
10.3.1 Example 1: Multi Camera Operation – Minimal IPG Setting the IPG to minimum means every image is transfered at maximum speed. Even by using a frame rate of 1 fps this results in full load on the network. Such "bursts" can lead to an overload of several network components and a loss of packets. -
Page 62: Transmission Delay
10.4 Transmission Delay Another approach for packet sorting in multi-camera operation is the so-called Transmis- sion Delay. Due to the fact, that the currently recorded image is stored within the camera and its transmission starts with a predefined delay, complete images can be transmitted to the PC at once. The following figure should serve as an example: Figure 49 ► Principle of the trans- mission delay. -
Page 63: Configuration Example
Resolution (Pixel Depth) Data Volume Time Time Time (GigE) [Pixel] [bit] [bit] [msec] [msec] [msec] VCXG-53M 2592 x 2048 42467328 35.3 ≈ 39.55 VCXG-53M 2592 x 2048 42318976 35.3 ≈ 39.55 VCXG-53M 2592 x 2048 42318976 35.3 ≈ 39.55 ▪ The sensor resolution and the readout time (t... - Page 64 = 20 msec + 35.3 msec - 20 msec + 39.55 msec TransmissionDelay(Camera 3) = 74,85 msec = 74850000 ticks Notice In Baumer GAPI the delay is specified in ticks. How do convert microseconds into ticks? 1 tick = 1 ns 1 msec = 1000000 ns 1 tick = 0,000001 msec ticks= t [msec] / 0.000001 = t...
-
Page 65: Multicast
The data is sent out to an intelligent network node, an IGMP (Internet Group Management Protocol) capable Switch or Router and distributed to the receiver group with the specific address range. In the example on the figure below, multicast is used to process image and message data separately on two differents PC's. Multicast Addresses: For multicasting Baumer suggests an adress range from 232.0.1.0 to 232.255.255.255. ◄ Figure 52 Principle of Multicast... -
Page 66: Ip Configuration
128.0.0.0 – 191.255.255.255 255.255.0.0 192.0.0.0 – 223.255.255.255 255.255.255.0 Figure 53 ▲ These combinations are not checked by Baumer GAPI, Baumer GAPI Viewer or camera Connection pathway for Baumer Gigabit Ether- on the fly. This check is performed when restarting the camera, in case of an invalid net cameras: IP - subnet combination the camera will start in LLA mode. -
Page 67: Lla
▪ DHCP Request Once the client has received this DHCPOFFER, the transaction needs to be con- firmed. For this purpose the client sends a so called DHCPREQUEST broadcast to the network. This message contains the IP address of the offering DHCP server and informs all other possible DHCPservers that the client has obtained all the necessary information, and there is therefore no need to issue IP information to the client. -
Page 68: Packet Resend
10.7 Packet Resend Due to the fact, that the GigE Vision standard stipulates using a UDP - a stateless user ® datagram protocol - for data transfer, a mechanism for saving the "lost" data needs to be employed. Here, a resend request is initiated if one or more packets are damaged during transfer and - due to an incorrect checksum - rejected afterwards. -
Page 69: Termination Conditions
◄ Figure 59 Resending of lost pack- ets at the end of the data stream. In our example, packets from no. 3 to no. 5 are lost. This fault is detected after the predefined time has elapsed and the resend request (A) is triggered. The camera then resends packets no. 3 to no. 5 (B) to complete the image transfer. 10.7.4 Termination Conditions The resend mechanism will continue until: ▪... -
Page 70: Message Channel
10.8 Message Channel The asynchronous message channel is described in the GigE Vision standard and of- ® fers the possibility of event signaling. There is a timestamp (64 bits) for each announced event, which contains the accurate time the event occurred. Each event can be activated and deactivated separately. -
Page 71: Action Command / Trigger Over Ethernet
10.9 Action Command / Trigger over Ethernet The basic idea behind this feature was to achieve a simultaneous trigger for multiple cameras. Therefore a broadcast ethernet packet was implemented. This packet can be used to Action Command: Since hardware release 2.1 induce a trigger as well as other actions. -
Page 72: Vcxu - Interface Functionalities
11.1 Device Information This information on the device is part of the camera's USB descriptor. Included information: ▪ Product ID (PID) ▪ Vendor ID (VID) Model Name Baumer USB Vendor ID Baumer USB Product ID [Hexadecimal] [Hexadecimal] VCXU-23M 2825 0x0128... -
Page 73: Message Channel
11.2 Message Channel The asynchronous message channel is described in the USB 3.0 Vision standard and allows you to signal events. There is a timestamp (64 bits) for each announced event, which contains the accurate time at which the event occurred. Each event can be activated and deactivated separately. -
Page 74: Chunk
11.3 Chunk The chunk is a data packet that is generated by the camera and integrated into the pay- load (every image), if chunk mode is activated. Figure 61 ► Location of the chunk This integrated data packet can contains adjustable settings for the image. Feature Description ChunkOffsetX... -
Page 75: Start-Stop-Behaviour
Start-Stop-Behaviour 12.1 Start / Stop / Abort Acquisition (Camera) Once the image acquisition is started, three steps are processed within the camera: ▪ Determination of the current set of image parameters ▪ Exposure of the sensor ▪ Readout of the sensor. Afterwards a repetition of this process takes place until the camera is stopped. -
Page 76: Cleaning
Cleaning Cover glass Notice The sensor is mounted dust-proof. Remove of the cover glass for cleaning is not neces- sary. Avoid cleaning the cover glass of the sensor if possible. To prevent dust, follow the in- structions under "Install lens". If you must clean it, use compressed air or a soft, lint free cloth dampened with a small quantity of pure alcohol. -
Page 77: Warranty Notes
Warranty Notes Notice If it is obvious that the device is / was dismantled, reworked or repaired by other than Baumer technicians, Baumer Optronic will not take any responsibility for the subse- quent performance and quality of the device! Support If you have any problems with the camera, then feel free to contact our support. - Page 78 Baumer Optronic GmbH Baumer Optronic GmbH Badstrasse 30 DE-01454 Radeberg, Germany Phone +49 (0)3528 4386 0 · Fax +49 (0)3528 4386 86 sales@baumeroptronic.com · www.baumer.com DE-01454 Radeberg, Germany Phone +49 (0)3528 4386 0 · Fax +49 (0)3528 4386 86 sales@baumeroptronic.com · www.baumer.com...
Need help?
Do you have a question about the VCXG and is the answer not in the manual?
Questions and answers