Table of Contents
Advertisement
Quick Links
Advertisement
Table of Contents

Related Manuals for EBN Technology TM50-5B-VU


Summary of Contents for EBN Technology TM50-5B-VU
- Page 1 User’s Manual TM50-5B-VU...
-
Page 2: Liability Disclaimer
instructions, may cause harmful interference to radio Copyrights communications. However, there is no guarantee that interference will not occur in a particular ©2009 All rights reserved. The information in this installation. If this equipment does cause harmful document is subject to change without prior notice in interference to radio or television reception, which order to improve reliability, design and function and does can be determined by turning the equipment off and... -
Page 3: Weee Notice
WEEE Notice The WEEE mark applies only to countries within the European Union (EU) and Norway. This appliance is labeled in accordance with European Directive 2002/96/EC concerning waste electrical and electronic equipment (WEEE). The Directive determines the framework for the return and recycling of used appliances as applicable throughout the European Union. -
Page 4: Table Of Contents
Contents Copyrights ....................i Liability Disclaimer ...................i Regulatory Information................i FCC Notices......................i CE Notice ......................i WEEE Notice......................ii Contents....................iii Hardware Setup..................1 1.1. Quick Tour ....................1 Front View...................... 1 Back View ...................... 2 Back Panel I/O ....................2 Peripherals Installation................3 2.1. -
Page 5: Hardware Setup
Hardware Setup 1.1. Quick Tour Front View Refer to the diagram below to identify the components on the front panel. Power button Arrow button - & + button Menu button Menu Hardware Setup... -
Page 6: Back View
Select/Auto Select/Auto button Back View Back Panel I/O Hardware Setup... -
Page 7: Peripherals Installation
Peripherals Installation 2.1. Cable and Power cord 1. Connect the one connector of the USB cable to the USB port on the back panel, another connector to your POS device. 2. Connect the one connector of the audio cable to the Audio in jack on the back panel, another connector to the audio out of your POS device. -
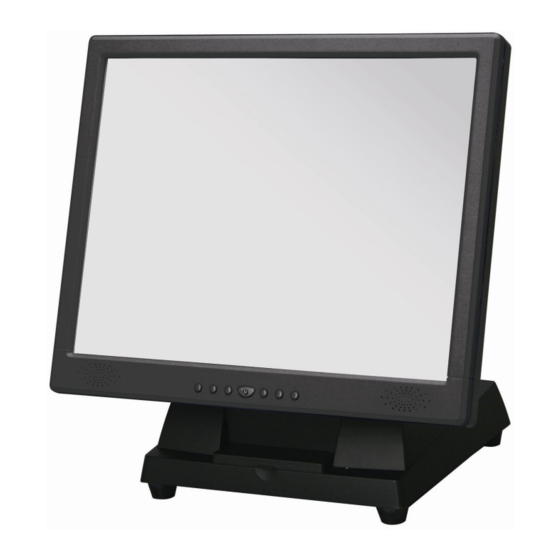
Page 8: Adjust View Angle
3. Connect the power cord to the AC inlet and the power source. 2.2. Adjust View Angle Adjust the device to the proper view angle. Peripherals Installation... -
Page 9: Turn On The Device
2.3. Turn on the Device 1. Make sure all peripherals are connected properly. 2. Press the power button. Peripherals Installation... -
Page 10: Touch Panel Driver Installation
Touch Panel Driver Installation 3.1. Before the installation Connect an external USB CDROM drive to the USB port of your POS device and insert the driver CD. And then the DRIVER BANK screen shows. 3.2. Touch Panel Driver Installation 1. Click TM515 Series. 2. - Page 11 4. Click Next. 5. Click Next. 6. Select an item according to your needs, and then click Next. 7. Click OK. Touch Panel Driver Installation...
- Page 12 8. If you want to use Multi-Monitor, check the box and click Next. 9. Click Next. 10. Click Next. Touch Panel Driver Installation...
- Page 13 11. The driver starts to install. 12. Click OK. Touch Panel Driver Installation...
-
Page 14: Basic Setup And Osd
Basic Setup and OSD 4.1. Basic Setup Automatic Image Adjustment You can adjust the image settings (such as image position, phase, etc.) manually or by using the LCD monitor’s automatic image adjustment feature. This will adjust the image parameters to their optimal settings for the current graphics mode. Press SelectAUTO to launch the automatic adjustment. -
Page 15: Image Settings Using The Osd Menu
4.2. Image Settings Using the OSD Menu The OSD menu is a window on your screen that allows you to view and change display settings. To change an OSD setting: 1. Press the MENU button to display the OSD menu on the screen. 2. - Page 16 CONTRAST/BRIGHTNESS OTHER Adjust the picture’s contrast and brightness. Displays the current graphic resolution including both horizontal and vertical frequencies as well TRACKING ADJUSTMENT as letting you choose from among the following settings: Phase: Adjusts the internal clock’s time lag Language: Selects the OSD menu language: in order to optimize the screen image.
-
Page 17: Touchkit Utility Quick Guide
TouchKit Utility Quick Guide 5.1. Launch TouchKit Utility There are two alternatives to launch TouchKit. Option 1: Under Microsoft Windows XP, click “start” menu and select “Programs”, under ”TouchKit” menu, click “Configure Utility”. Option 2: Click icon on the task bar to launch TouchKit utility. TouchKit Utility Quick Guide... -
Page 18: General
5.2. General The General tab in Touchkit utility shows all of TouchKit touchscreen controllers installed as below, including RS232, USB and PS2 interfaces. The function button is used for serial RS232 controllers only. Press this button to search the TouchKit serial controllers connected with the COM ports of EZPPC 70. -
Page 19: Settings
TouchKit PS2 driver support PS2 mouse and TouchKit touchscreen controller. It can works with both PS2 mouse and TouchKit touchscreen PS2 controller. After the TouchKit PS2 driver was installed, this utility assumes the PS2 touchscreen controller exists and is always shown in the controller list window. - Page 20 Beep Beep On Touch Check this check box to enable driver to generate a beep sound when touch touchscreen state is switched from untouched to touched state. Beep On Release Check this check box to enable driver to generate a beep sound when touchecreen state is switched from touched state to untouched state.
- Page 21 duration. Linearization Style TouchKit utility provides you with both 9 points and 25 points calibration for linearization. You can select the suitable linearization type. Double Click Time Double Click Time is used to set double click time. Change this value will affects the double click behavior for all of the mouse devices connected to EZPPC 70.
- Page 22 un-touched state to touched state. Then, the driver always generate mouse move event and is tracking the touch position until the touchscreen state switched to un-touch state. Click On Release With this Click On Release mode, the driver emulates a mouse click event when the touchscreen state was switched from touched state to un-touched state.
-
Page 23: Display
5.4. Display TouchKit driver utility supports multiple monitor and display system. To work with multiple monitor system, you need to do proper configuration to map the touchscreen working area to the correct system display area. You can do such configuration with this property page shown as below, Please follow below instructions to do the configuration: TouchKit Utility Quick Guide... - Page 24 Enable multiple monitor Check this check box to enable multiple monitor support and uncheck it to disable multiple monitor support. When this function is disabled, the touchscreen will be mapped to the primary monitor automatically. When this function is enabled, user can double click on the monitor area in the monitor geometry window to assign the monitor area where the touchscreen will be mapped.
- Page 25 The touchscreen will be mapped to the right half screen of the specified monitor. Left screen The touchscreen will be mapped to the left half screen of the specified monitor. Upper screen The touchscreen will be mapped to the upper half screen of the specified monitor.
-
Page 26: Edge Compensation
to do configuration setting again whenever the display resolution changed. 5.5. Edge Compensation Edge Compensation property page contains functions of Edge Compensation for Top, Bottom, Left, Right, X Axis and Y Axis. In some cases, if it is difficult to touch items at the edges of the touch panel, you can set adjustment to reach the edges of the screen image. - Page 27 If you set the Edge to "Smaller", TouchKit will reduce the horizontal position of the bottom edge. If you set the Edge to "Larger", TouchKit will extend the horizontal position of the bottom edge. Left If you set the Edge to "Smaller", TouchKit will reduce the vertical position of the right edge.
-
Page 28: How To Use Event Selector
If you set the Offset Y Axis to Larger, cursor will be moved a pixel of X Axis to bottom. Edge Compensation Switch You can check Support Edge Compensation check box to enable/disable this function from left corner. Edge Compensation Button Click +10% or -10% button to adjust the smaller or larger of edge. -
Page 29: Troubleshooting
Troubleshooting Blank Screen Power indicator is off - Make sure the power cable is connected properly (see section “Connecting”). - Make sure that the monitor was turned on using the power switch (see section “Startup”). Power indicator lights orange - Perhaps a power saving mode is active? Power indicator lights green - A screen saver may have activated automatically after a certain period of inactivity. - Page 30 - If the colors are off (e.g. white is not really displayed as white etc), you should adjust the color temperature (see “Color Adjustment” function in section “OSD Menu Functions”). Troubleshooting...
-
Page 31: Specification
Specification Specification... - Page 32 Model Name TM 515 TFT LCD Size 15" Brightness 250 nits Display Resolution 1024x768 Touch Screen 5-Wires Resistive Type USB Touch 1 x USB A Type 1 x Audio Jack In I/O Ports Audio w/ 2W Speaker x 2 1 x DB-15 Power Input 100VAC~240VAC Input Wall Mount...
Need help?
Do you have a question about the TM50-5B-VU and is the answer not in the manual?
Questions and answers