Table of Contents
Advertisement
Advertisement
Chapters
Table of Contents

Related Manuals for araknis AN-210-SW-R-8-POE


Summary of Contents for araknis AN-210-SW-R-8-POE
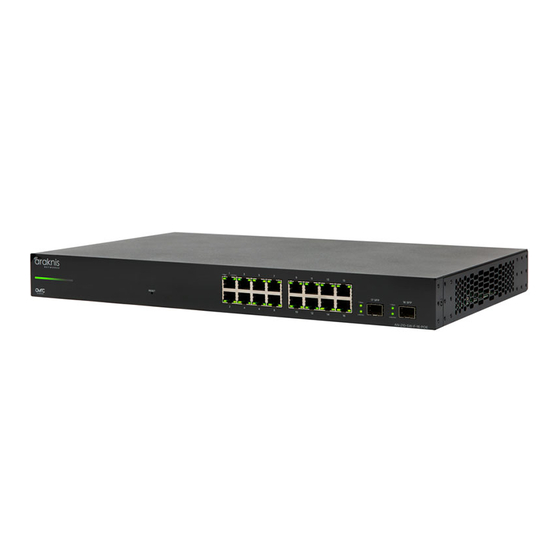
- Page 1 210/310 SERIES MANAGED NETWORK SWITCH PRODUCT MANUAL Models: AN-210-SW-F/R-8-POE AN-210-SW-F/R-16-POE AN-210-SW-F/R-24-POE AN-210-SW-F-48-POE AN-310-SW-F/R-8 AN-310-SW-F/R-16 AN-310-SW-F/R-24 AN-310-SW-F-48 AN-310-SW-F/R-8-POE AN-310-SW-F/R-16-POE AN-310-SW-F/R-24-POE...
-
Page 2: About This Manual
Product Manual About this Manual This manual was created to provide a reference for installers and end users of Araknis Networks™ products. It provides all known information regarding the installation, setup, use, and maintenance of the product. The symbols below are used to identify important information: Pro Tip –... -
Page 3: Table Of Contents
Araknis Networks AN-210/310-SW-F/R Manual Product Manual Table of Contents 1 - Welcome to Araknis Networks™ 2 - Package Contents 3 - Series Overview 4 - Device Layout Rear Facing Models Front Facing Models 5 - Hardware Installation Mounting Rack Mount... - Page 4 Araknis Networks AN-210/310-SW-F/R Manual Product Manual 13 - PoE Settings PoE Setup and Troubleshooting Checking Status of PoE Devices Configuring PoE Ports Troubleshooting PoE Issues 14 - VLAN Settings (Basic Port-Based) Access and Trunk Port Selection Creating a New VLAN...
- Page 5 Araknis Networks AN-210/310-SW-F/R Manual Product Manual 23 - Multicast – MLD Snooping Settings VLAN Settings Group List Router Settings 24 - STP – Overview STP – Global Settings Settings Root Bridge Information Basic Setting 25 - STP (Spanning Tree Protocol) Overview STP –...
- Page 6 Araknis Networks AN-210/310-SW-F/R Manual Product Manual 34 - QoS – Overview QoS – Global Settings QoS – COS Mapping QoS – DSCP Mapping QoS – Port Settings QoS – Bandwidth Control QoS – Storm Control 35 - ACL – Overview ACL –...
- Page 7 Araknis Networks AN-210/310-SW-F/R Manual Product Manual 43 - Appendix – Safety and Regulatory Information FCC Warning CE Warning UL Statement 44 - Warranty 2 Year Limited Warranty Contact Information Table of Contents © 2016 Araknis Networks ®...
-
Page 8: Figure 1. Package Contents
Araknis Networks AN-210/310-SW-F/R Manual Product Manual 1 - Welcome to Araknis Networks™ Thank you for purchasing an Araknis 210/310 series network switch. This manual details the installation and setup of the hardware and the managed interface. 2 - Package Contents Figure 1. -
Page 9: Device Layout
Araknis Networks AN-210/310-SW-F/R Manual Product Manual 4 - Device Layout 9F 10F 1 Gbps Link/Act AN-210-SW-R-8-POE AN-210-SW-R-8-POE AN-210-SW-F-8-POE 9F 10F 1 Gbps Link/Act AN-310-SW-R-8-POE AN-310-SW-R-8-POE AN-310-SW-F-8-POE AN-310-SW-F-8-POE Power LED – On: system is up. Off: system is down. 2. 1Gbps LED –... -
Page 10: Rear Facing Models
Araknis Networks AN-210/310-SW-F/R Manual Product Manual Factory Reset Reboot or default the switch configuration settings. Rear Facing Models 1 Gbps Link/Act 1 Gbps RESET Link/Act 9 SFP 10 SFP Front Facing Models AN-310-SW-F-8-POE 48 Port Models 1 Gbps/PoE Reboot – Press and hold the RESET button on the back of the switch for 5 seconds, then release. The switch will power cycle and the front status lights will flash. -
Page 11: Figure 2. Mounting Methods
Araknis Networks AN-210/310-SW-F/R Manual Product Manual 5 - Hardware Installation Mounting Figure 2. Mounting Methods Rack Mount Wall Mount Shelf Mount Note – The switch must be wall mounted with the Ethernet ports facing either the floor or the ceiling. Do not mount the switch with the ports facing to the side. -
Page 12: Rack Mounting Guidelines
Araknis Networks AN-210/310-SW-F/R Manual Product Manual Rack Mounting Guidelines Elevated Operating Ambient – If installed in a closed or multi-unit rack assembly, the operating ambient temperature of the rack environment may be greater than room ambient. Therefore, consideration should be given to installing the equipment in an environment compatible with the maximum ambient temperature of 104°F. -
Page 13: Figure 3. Connection Diagram
9 SFP 10 SFP Switch Wall Outlet Computer Note – AN-210-SW-R-8-POE shown. Connection is the same for models with both front- and rear- facing ports. Input Power Requirements AC Input Voltage: 100-240V AC, 50-60 Hz. Network Cable Requirements 568B termination is recommended (Figure 4. EIA/TIA 568B Termination Pattern) Connect a Cat5e/6 straight-through cable between the switch and other equipment. -
Page 14: Figure 5. Poe Calculation Example
Araknis Networks AN-210/310-SW-F/R Manual Product Manual PoE Budgeting The power budget for delivering Power over Ethernet limits the total number of watts available between all of the ports (limited to 30W total consumption on each port). Add the total number of watts consumed by all connected PoE devices to ensure that every thing can be powered, as illustrated in the example below. -
Page 15: Figure 6. Ovrc Operation Diagram
Araknis Networks AN-210/310-SW-F/R Manual Product Manual 6 - OvrC Setup OvrC provides remote firmware upgrades, real-time notifications, and intuitive customer management, right from your computer or mobile device. Setup is plug-and-play, with no port forwarding or DDNS address required. Figure 6. -
Page 16: Interface Access
Araknis Networks AN-210/310-SW-F/R Manual Product Manual 7 - Interface Access OvrC Web Connect Access Log into the Ovrc app and find the switch. The OvrC web interface is easier to use than mobile for Web Connect access. Popup blockers must be disabled. -
Page 17: Direct Access Using Lan Ip Address (Dhcp)
Use a network scanner (e.g. Fing) to sniff the network. The manufacturer field will display SnapAV. • See the highlighted field in the figure below for an example of an Araknis device being identified. 2. Enter the IP address in your web browser to load the login screen. Enter your username and password, then click Log In. -
Page 18: Default Ip Address Access
Araknis Networks AN-210/310-SW-F/R Manual Product Manual Default IP Address Access Access the interface using the default IP address, 192.168.20.254. Connect your PC to the switch using a network patch cable. Computer Switch 2. On your PC, open the Control Panel and left-click Network and Internet. - Page 19 Araknis Networks AN-210/310-SW-F/R Manual Product Manual 5. Right-click the icon for the wired network connection and left-click Properties. 6. Left-click to highlight Internet Protocol Version 4 (TCP/IPv4), then left-click Properties. In the General tab, left-click Use the following IP address: and enter the IP address and subnet mask.
- Page 20 Araknis Networks AN-210/310-SW-F/R Manual Product Manual 8. Left-click OK to close Internet Protocol Version 4 (TCP/IPv4) Properties, then left-click OK to close Network Connection Properties. 9. Open a web browser and navigate to http://192.168.20.254/ to load the login screen. Enter your username and password, then click Log In.
-
Page 21: Figure 7. Interface Layout
Araknis Networks AN-210/310-SW-F/R Manual Product Manual 8 - Interface Overview Page Layout Use this section to become familiar with the common parts of the interface. Figure 7. Interface Layout • A - Main Navigation Menu Use the submenus under the Status, Settings, Maintenance, and Advanced headings to configure and maintain the switch. -
Page 22: Figure 9. System Information And Port Status
MAC Address – Media Access Control (MAC) address of the switch. • IP Address – Device management IP address. • Service Tag – Internal tracking number used to track every product sold by Araknis Networks. • Gateway – Default gateway of the management VLAN. Port Status •... -
Page 23: Figure 10. Events Log
Araknis Networks AN-210/310-SW-F/R Manual Product Manual Events Log Use the Events Log to review messages about the operating state of the switch. The log can be cleared or saved to your computer in a text file (.txt). Figure 10. Events Log •... -
Page 24: Figure 11. Port Status
Araknis Networks AN-210/310-SW-F/R Manual Product Manual Port Status Page This page provides in-depth details about the status of each physical port. Path – Status, Ports Figure 11. Port Status • Port – The number of the physical switch port. •... -
Page 25: Figure 12. System Information Settings
Araknis Networks AN-210/310-SW-F/R Manual Product Manual 10 - System Settings Configure system level settings. System Information Path – Settings, System, System Figure 12. System Information Settings • System Name – Assign a name for identifying the system. • System Location – Describe the location of the switch. -
Page 26: Figure 13. Ip Address Settings Menu
Araknis Networks AN-210/310-SW-F/R Manual Product Manual IP Address Settings The switch may be addressed using either IPv4 or IPv6 addressing. Use the toggle at the top of the page to select the desired setting. Path – Settings, System, IP Address Settings Figure 13. -
Page 27: Figure 14. Date And Time Settings, Upnp
Araknis Networks AN-210/310-SW-F/R Manual Product Manual Figure 14. Date and Time Settings, UPnP Date and Time Settings Path – Settings, System, Date and Time Settings • Manually Set Date and Time – Select to manually set date and time. Date – Enter the year, month and date (four digits for year; two digits for month, two digits for date) •... -
Page 28: Figure 15. Recommended System Settings
Enter a user name and password for the administrator account (System menu at the top of the page). This will prevent unauthorized access to the interface. (Default login: araknis; araknis) Record the new settings so you can log in after applying the changes. -
Page 29: Figure 16. Jumbo Frame And Basic Port Settings
Araknis Networks AN-210/310-SW-F/R Manual Product Manual 12 - Port Configuration Settings Customize individual port settings and jumbo frame size. Path – Settings, Ports Figure 16. Jumbo Frame and Basic Port Settings Jumbo Frame Setting • Size – Sets the maximum frame size for traffic going through the switch. Received packets that exceed the maximum frame size are dropped. -
Page 30: Figure 17. Advanced Port Settings
Araknis Networks AN-210/310-SW-F/R Manual Product Manual Advanced Port Settings Path – Settings, Ports, Advanced Port Settings Figure 17. Advanced Port Settings • Port – The number of the physical switch port. • Link Status – Current operating status of the port. Link up or Link down. -
Page 31: Figure 18. Poe Settings Menu
Araknis Networks AN-210/310-SW-F/R Manual Product Manual 13 - PoE Settings The switch is designed to make PoE a plug-and-play affair for most applications. Use the PoE Settings menu to monitor, troubleshoot, and control each port. Figure 18. PoE Settings Menu •... -
Page 32: Figure 19. Poe Settings Menu
Araknis Networks AN-210/310-SW-F/R Manual Product Manual PoE Setup and Troubleshooting Figure 19. PoE Settings Menu Checking Status of PoE Devices In the image above, a PoE-powered access point is connected to port 1 on the switch. The Status, Class and Output fields tell you that PoE is functioning correctly (Delivering), as well as how much power is being consumed. -
Page 33: Figure 20. Vlan Settings
Araknis Networks AN-210/310-SW-F/R Manual Product Manual 14 - VLAN Settings (Basic Port-Based) Use this menu to configure port-based VLANs. See the Understanding and Using VLANs white paper for more information about this feature and detailed setup examples and instructions. By default, all ports are assigned to VLAN 1 as untagged ports. -
Page 34: Figure 22. Configuring Ports In A Vlan
Araknis Networks AN-210/310-SW-F/R Manual Product Manual Creating a New VLAN Click the Add button to create a new entry. 2. Enter a VLAN ID and name for the new entry. 3. Assign access and trunk ports by clicking either Port field to open the assignment window, then selecting the function of each port as it relates to that VLAN. -
Page 35: Figure 23. Link Aggregation Settings Menu
Araknis Networks AN-210/310-SW-F/R Manual Product Manual 15 - Link Aggregation Settings Link Aggregation is also known as Port Trunking. It allows using multiple ports in parallel to increase the link speed between two switches, increasing redundancy for higher availability. The switch supports both static trunking and dynamic Link Aggregation Control Protocol (LACP). Static trunks must be manually configured at both ends of the link. -
Page 36: Creating A New Link Aggregation Rule
Araknis Networks AN-210/310-SW-F/R Manual Product Manual Creating a New Link Aggregation Rule Change the name of the group as desired. 2. Select the operating mode for the group: Disabled – No Link Aggregation. • Static – All traffic is balanced evenly between the ports. -
Page 37: Figure 24. Access Management Menu Page
Araknis Networks AN-210/310-SW-F/R Manual Product Manual 16 - Access Management Settings Configure user account permissions and what access protocols may be used for access. Figure 24. Access Management Menu Page User Management User Name – Enter a user name for the account. 1-18 characters. Not case sensitive. -
Page 38: Figure 25. Ping Test Page
Araknis Networks AN-210/310-SW-F/R Manual Product Manual 17 - Maintenance Menus Ping Test Send ICMP echo request packets to another device on the network to determine if it can be reached. Use the Ping test to determine whether a device or host is communicating correctly. -
Page 39: Figure 26. Successful Ping Test Result
Araknis Networks AN-210/310-SW-F/R Manual Product Manual Understanding Ping Test Results Figure 26. Successful Ping Test Result Figure 27. Failed Ping Test Result • The first line shows the IP address pinged. If a URL was entered (example: google.com) then the IP address will be displayed also. -
Page 40: Figure 28. Trace Route Test Page
Araknis Networks AN-210/310-SW-F/R Manual Product Manual Trace Route Test The Trace Route test uses a ping to tell you what path a packet takes to travel between the switch and the target device by counting the number of hops (hops happen when a packet is forwarded from one router to another). -
Page 41: Figure 29. Trace Route Result
Araknis Networks AN-210/310-SW-F/R Manual Product Manual Understanding Trace Route Test Results Figure 29. Trace Route Result • The results window displays the parameters for the test, followed by information about each hop or hop attempt. • Each line starting with a number indicates a hop in the path to the target IP address. Only hops between routers are shown, not between switches. -
Page 42: Figure 30. File Management Menu
Araknis Networks AN-210/310-SW-F/R Manual Product Manual File Management Settings Save configuration files (of current switch settings) and upgrade firmware. Figure 30. File Management Menu Configuration File Use the Configuration File menu to back up or restore settings to the switch. -
Page 43: Figure 31. Dual Image Menu
Araknis Networks AN-210/310-SW-F/R Manual Product Manual Dual Image Select which partition the switch runs on. In the event of one partition failing, the switch will reboot and use the alternate firmware. Figure 31. Dual Image Menu • Active – Select the desired partition and click Apply to reboot the switch from the firmware on the selected partition. -
Page 44: Figure 32. Restart Page
Araknis Networks AN-210/310-SW-F/R Manual Product Manual Restart Figure 32. Restart Page • Restart Switch – Click to restart the switch. No settings will be lost, but Ethernet will drop for connected devices until the restart is complete (~ 60 seconds). The login screen will reload once the restart is complete. -
Page 45: Advanced Menus
Araknis Networks AN-210/310-SW-F/R Manual Product Manual 18 - Advanced Menus The remaining menus are meant only for advanced users. Proper setup and use of these features requires advanced networking knowledge. Table of Contents © 2016 Araknis Networks ®... -
Page 46: Figure 34. Detailed Port Statistics
Araknis Networks AN-210/310-SW-F/R Manual Product Manual 19 - Advanced Port Statistics Use the Detailed Port Statistics page to display detailed statistics for each switch port. This information can be used to identify potential problems with the switch (like a faulty port or an unusual traffic drop). - Page 47 Araknis Networks AN-210/310-SW-F/R Manual Product Manual Advanced Port Statistics, Continued • Rx Jabber – Total number of received frames that were longer than the configured maximum frame size for the particular switch port excluding framing bits, but including FCS octets, and had either an FCS or alignment error.
-
Page 48: Figure 35. Neighbors Mac Address Table
Araknis Networks AN-210/310-SW-F/R Manual Product Manual 20 - Neighbors – MAC Address Table See MAC addresses connected to ports on the switch and add static entries. Static entries are useful for: • Speeding up recovery for critical devices after a reboot or power cycle (the switch is not required to poll the port for connected static MACs) •... -
Page 49: Figure 36. Lldp Information
(i.e. VLAN). Advertised information is defined in the IEEE 802.1AB standard, and can include device details such as their identity (eg. make/model), capabilities (eg. routing/switching), and configuration settings. Information Table Araknis switch parameters shared using LLDP. Figure 36. LLDP Information Chassis ID Subtype – Method used for device identification. -
Page 50: Figure 37. Lldp Settings
Araknis Networks AN-210/310-SW-F/R Manual Product Manual Settings Customize settings for LLDP transmission. Figure 37. LLDP Settings • State– Select whether LLDP is enabled or disabled. • Transmission Interval(s) – How often LLDP information is transmitted. Range: 5-32767 seconds. Default: 30 seconds •... -
Page 51: Figure 39. Igmp Snooping Settings
Araknis Networks AN-210/310-SW-F/R Manual Product Manual 22 - Multicast – IGMP Snooping Internet Group Management Protocol (IGMP) can be used to filter multicast traffic on the switch. IGMP Snooping passively monitors exchanges between connected clients and an IGMP-enabled multicast server to discover and connect clients that want to join a multicast group. -
Page 52: Querier Settings
Araknis Networks AN-210/310-SW-F/R Manual Product Manual Querier Settings IGMP Query can be used to ask connected clients if they want to receive a specific multicast service. Then the ports containing clients requesting to join the service are identified, and multicast data is sent to only those ports. -
Page 53: Group List
Forbidden Port List – Manually select ports to be excluded from joining multicast groups on that VLAN. URC Settings Use this menu to configure multicasting devices for URC brand control systems. This feature was developed by Araknis to ease setup for these systems. Figure 44. IGMP Snooping URC Settings •... -
Page 54: Multicast – Mld Snooping
Araknis Networks AN-210/310-SW-F/R Manual Product Manual 23 - Multicast – MLD Snooping Configure settings for Multicast Listener Discovery. MLD is used by IPv6 multicast routers to detect multicast listeners. Settings Configure global settings for MLD Snooping. Figure 45. MLD Snooping Menu •... -
Page 55: Router Settings
Araknis Networks AN-210/310-SW-F/R Manual Product Manual Router Settings Configure MLD router ports on the switch. Figure 48. MLD Snooping Router Settings • VLAN ID – VLAN identifier. • Router Ports Auto-Learned – Enable to allow auto learning of router port use. -
Page 56: Stp – Overview
Araknis Networks AN-210/310-SW-F/R Manual Product Manual 24 - STP – Overview The Spanning Tree Protocol (STP) is a Layer 2 protocol primarily used to detect and eliminate network loops on redundant connections. Proper STP configuration ensures that only one route exists between any two end devices, with backup routes automatically taking over if a primary route goes down. -
Page 57: Root Bridge Information
Araknis Networks AN-210/310-SW-F/R Manual Product Manual Root Bridge Information Displays the STP parameters of the current elected root bridge device for the entire spanning tree. Figure 50. Global STP Root Bridge Information • Root Address – MAC address of the root bridge. -
Page 58: Basic Setting
Araknis Networks AN-210/310-SW-F/R Manual Product Manual Basic Setting Configure root bridge settings for the switch. This information will be used to decide if the switch should be the root bridge device. Figure 51. Global STP Basic Settings Bridge Address – MAC address of the switch. -
Page 59: Stp (Spanning Tree Protocol) Overview
Araknis Networks AN-210/310-SW-F/R Manual Product Manual 25 - STP (Spanning Tree Protocol) Overview Spanning Tree Protocol is used to prevent loops in networks where packets might have multiple possible routes. Backup routes between equipment can also be maintained and used only when the primary fails. The switch supports IEEE 802.1d STP, 802.1s RSTP (Rapid Spanning Tree Protocol), and 802.1w MSTP (Multiple... - Page 60 Araknis Networks AN-210/310-SW-F/R Manual Product Manual STP CIST Settings, Continued • P2P MAC Conf / Oper – (Configured/Operating) Options: • Auto (default) – Allow P2P ports into full duplex mode. • Yes – Force P2P ports into full duplex mode.
-
Page 61: Stp – Mst Settings
Araknis Networks AN-210/310-SW-F/R Manual Product Manual STP – MST Settings Multiple Spanning Tree Protocol (MSTP) is used to map multiple VLANs to one spanning tree topology. Since there are rarely as many unique topologies as there are VLANs in a network, using MST saves switch CPU power by reducing the number of spanning tree instances required to handle all VLANs on the device. -
Page 62: Port Settings
Araknis Networks AN-210/310-SW-F/R Manual Product Manual Port Settings Configure MSTP settings for each port. Figure 54. STP MST Port Settings Menu MST ID – Select the MST ID to configure. • Port – Switch port being configured. • Priority – Value used to prioritize the port. If all ports are left to default priority, then priority is elected •... -
Page 63: Advanced Vlans – Overview
Araknis Networks AN-210/310-SW-F/R Manual Product Manual 26 - Advanced VLANs – Overview The advanced VLAN pages contain settings for customizing VLANs beyond basic port-based settings. Advanced VLANs – 802.1Q VLANs VLAN Settings Manually configure VLAN tagging for each port. Figure 55. -
Page 64: Advanced Vlans – Private Vlans
Araknis Networks AN-210/310-SW-F/R Manual Product Manual Advanced VLANs – Private VLANs Private VLANs provide port-based security and isolation between ports within the assigned VLAN. Traffic on ports assigned to a private VLAN can only be forwarded to and from uplink ports. -
Page 65: Advanced Vlans – Voice Vlans
Araknis Networks AN-210/310-SW-F/R Manual Product Manual Advanced VLANs – Voice VLANs Cofigure VLANs for VOIP phone systems with built-in VLAN tagging abilities. The interface includes presets for quickly configuring many popular brands. The switch will examine tagged packets from phones and place them in the correct VLAN automatically. -
Page 66: Oui Settings
Araknis Networks AN-210/310-SW-F/R Manual Product Manual OUI Settings The Organizationally Unique Identifier (OUI) is the first half of a device MAC address, and is unique for every phone manufacturer. The OUI is used to automatically detect packets from the phone and send them to the Voice VLAN. -
Page 67: Security – Port Mirroring
Araknis Networks AN-210/310-SW-F/R Manual Product Manual 27 - Security – Port Mirroring Port mirroring is used to send a copy of packets received on one switch port to a network monitoring device/software on another switch port. This is commonly used for network appliances that require monitoring of network traffic. -
Page 68: Port Settings
Araknis Networks AN-210/310-SW-F/R Manual Product Manual Port Settings Configure 802.1x settings for each switch port. Figure 63. 802.1x Port Settings Menu • Port – Switch port identifier. • Mode – Options: • Disabled – 802.1x is disabled through the port. -
Page 69: Authenticated Host
Araknis Networks AN-210/310-SW-F/R Manual Product Manual Authenticated Host See currently connected authenticated hosts connected using 802.1x. Figure 64. 802.1x Authenticated Host Table • User Name – Name of the user configured in the RADIUS server. • Port – Switch port the user is authenticated on. -
Page 70: Security – Radius Server
Araknis Networks AN-210/310-SW-F/R Manual Product Manual 29 - Security – Radius Server The Remote Authentication Dial-In User Service (RADIUS) protocol provides central management for users connecting to use network services. Use this menu to configure settings for the server. Figure 65. -
Page 71: Security – Dos
Araknis Networks AN-210/310-SW-F/R Manual Product Manual 30 - Security – DOS Use Denial of Service (DOS) settings to protect from DoS attacks. The switch will block traffic that meets the configured conditions. Global Settings Figure 66. Global DOS Settings Menu •... -
Page 72: Global Dos Security Settings, Continued
Araknis Networks AN-210/310-SW-F/R Manual Product Manual Global DOS Security Settings, Continued • Ping Max Size Setting – Specify the maximum IPv6 fragment size to filter. Range: 0-65535 Bytes Default: 512 Bytes • Smurf Attack – Enable or Disable filtering of this type of attack. -
Page 73: Security – Port Security
Araknis Networks AN-210/310-SW-F/R Manual Product Manual 31 - Security – Port Security Limit the number of connected devices on a given port by limiting the total number of MAC addresses that may be identified on that port. Figure 68. Port Security Table •... -
Page 74: Rmon Overview
Araknis Networks AN-210/310-SW-F/R Manual Product Manual 33 - RMON Overview Remote Network Monitoring (RMON) allows the switch to monitor network traffic and send alarms if specified limits are reached or passed. Configure what events to monitor and how to react. Events may be logged and/or sent to other network clients using SNMP. -
Page 75: Rmon – Alarm List
Araknis Networks AN-210/310-SW-F/R Manual Product Manual RMON – Alarm List Configure alarms for RMON events. Figure 72. Alarm List • Index – Enter an identifier for the Alarm List entry. • Sample Port – Select the port to monitor from the drop down. -
Page 76: Rmon – History List
Araknis Networks AN-210/310-SW-F/R Manual Product Manual RMON – History List Configure the events to record to the RMON history log on each port. Figure 73. History List Index – History Log identifier • Sample Port – Select the port to monitor. -
Page 77: Qos – Overview
Araknis Networks AN-210/310-SW-F/R Manual Product Manual 34 - QoS – Overview Quality of Service (QoS) is used to organize and prioritize packet flow and bandwidth use on the LAN based on traffic type, source, or destination in order to help guarantee network performance for critical services. -
Page 78: Qos – Dscp Mapping
Araknis Networks AN-210/310-SW-F/R Manual Product Manual QoS – DSCP Mapping Assign traffic of different Differentiated Services Code Point (DSCP) priority levels to the desired queue. Figure 77. DSCP Mapping Table • DSCP – DSCP Priority level identifier • Queue – Select a queue from the drop down for the given priority level. The default values are standard for most applications. -
Page 79: Qos – Storm Control
Araknis Networks AN-210/310-SW-F/R Manual Product Manual QoS – Storm Control Use Storm Control to limit the amount of broadcast, unknown multicast, and unknown unicast packets coming into ports on the switch. Excessive frames are discarded when the specified limit is passed. -
Page 80: Acl – Overview
Araknis Networks AN-210/310-SW-F/R Manual Product Manual 35 - ACL – Overview Access Control Lists (ACLs) are used for preventing access between or to devices on the network, primarily for many clients to one or vice versa. MAC-based ACLs can only control incoming traffic and IPv4/IPv6 -based ACLs can control both incoming and outgoing traffic. -
Page 81: Mac Ace List Editor
Araknis Networks AN-210/310-SW-F/R Manual Product Manual MAC ACE List Editor Figure 82. MAC ACL ACE List Editor ACL Name – Select the ACL to associate the ACE with. • Sequence – Enter a value for the sequence in relation to other ACLs. The smallest value is processed first. -
Page 82: Acl – Ipv4 Acl
Araknis Networks AN-210/310-SW-F/R Manual Product Manual ACL – IPV4 ACL Create rules for controlling incoming and outgoing traffic to any device on a connected port based on its IPv4 address. Figure 83. IPv4 ACL Menu Page IPv4 ACL List •... -
Page 83: Ipv4 Ace List Editor
Araknis Networks AN-210/310-SW-F/R Manual Product Manual IPv4 ACE List Editor Figure 84. IPv4 ACL ACE Editor • ACL Name – Select the ACL to associate the ACE with. • Sequence – Enter a value for the sequence in relation to other ACLs. The smallest value is processed first. -
Page 84: Acl – Ipv6 Acl
Araknis Networks AN-210/310-SW-F/R Manual Product Manual ACL – IPV6 ACL Create rules for controlling incoming and outgoing traffic to any device on a connected port based on its IPv6 address. Figure 85. IPv6 ACL Menu Page IPv6 ACL List •... -
Page 85: Ipv6 Ace List Editor
Araknis Networks AN-210/310-SW-F/R Manual Product Manual IPv6 ACE List Editor Figure 86. IPv4 ACL ACE Editor • ACL Name – Select the ACL to associate the ACE with. • Sequence – Enter a value for the sequence in relation to other ACLs. The smallest value is processed first. -
Page 86: Acl – Acl Binding
Araknis Networks AN-210/310-SW-F/R Manual Product Manual ACL – ACL Binding Bind configured ACLs to switch ports to implement access control rules. Figure 87. ACL Binding Menu Page • Port – Switch Port identifier. • MAC/ IPv4/ IPv6 ACL – Select an ACL entry to enable on the port. You must configure a rule in the respective ACL menu before configuring this setting. -
Page 87: Snmp – Overview
These objects are defined in a Management Information Base (MIB). The Araknis switch includes an SNMP agent that supports SNMP versions 1, 2c, and 3. This agent continuously monitors the status of the switch hardware and the traffic passing through its ports. SNMP client software can access the switch SNMP agent through SNMP community strings. -
Page 88: Trap Settings
Araknis Networks AN-210/310-SW-F/R Manual Product Manual Trap Settings Configure trap servers for the switch to send SNMP trap messages to. Figure 89. SNMP Trap Settings Server IP/Hostname – Enter the address of the SNMP trap server. • SNMP Version – Select the SNMP version used by the server. Options: v1, v2c, or v3. -
Page 89: Snmp – Lists
Araknis Networks AN-210/310-SW-F/R Manual Product Manual SNMP – Lists Configure SNMP groups, events, community strings, and users. Group Lists Figure 91. SNMP Group List Group Name – Enter a name to describe the group. • Security Mode – Select the SNMP version for the group. Options: v1, v2c, or v3 •... -
Page 90: Snmp Community List
Araknis Networks AN-210/310-SW-F/R Manual Product Manual SNMP Community List Figure 93. SNMP Community List • Community Name – Enter a name to describe the community. • Community Mode – Select Basic or Advanced • Group Name – Select the group that community belongs to. You must configure a group before configuring this setting. -
Page 91: Advanced Lacp
Araknis Networks AN-210/310-SW-F/R Manual Product Manual 37 - Advanced LACP Configure advanced parameters for LACP communication between switches connected by aggregated links. Figure 95. Advanced LACP Settings Settings System Priority – Enter a priority value for the switch. The device with the lowest value has priority. -
Page 92: Advanced Log
Araknis Networks AN-210/310-SW-F/R Manual Product Manual 38 - Advanced Log Configure advanced system logging. These settings affect the log on the system status page. Settings Turn advanced logging on or off. Figure 96. Log Settings • Logging Service – Enabled or disable logging services. - Page 93 Araknis Networks AN-210/310-SW-F/R Manual Product Manual Table of Figures Figure 1. Package Contents Figure 2. Mounting Methods Figure 3. Connection Diagram Figure 4. EIA/TIA 568B Termination Pattern Figure 5. PoE Calculation Example Figure 6. OvrC Operation Diagram Figure 7. Interface Layout Figure 8.
- Page 94 Araknis Networks AN-210/310-SW-F/R Manual Product Manual Figure 41. IGMP Snooping Querier Settings Figure 42. IGMP Snooping Group List Settings Figure 43. IGMP Snooping Router Settings Figure 44. IGMP Snooping URC Settings Figure 45. MLD Snooping Menu Figure 46. MLD Snooping VLAN Settings Figure 47.
- Page 95 Araknis Networks AN-210/310-SW-F/R Manual Product Manual Figure 82. MAC ACL ACE List Editor Figure 83. IPv4 ACL Menu Page Figure 84. IPv4 ACL ACE Editor Figure 85. IPv6 ACL Menu Page Figure 86. IPv4 ACL ACE Editor Figure 87. ACL Binding Menu Page Figure 88.
-
Page 96: An-210-Sw Hardware Specifications
Araknis Networks AN-210/310-SW-F/R Manual Product Manual 39 - AN-210-SW Hardware Specifications AN-210-SW-8 AN-210-SW-16 AN-210-SW-24 AN-210-SW-48 Ethernet Ports 10/100/1000BaseT RJ-45 PoE Ports 1000BaseT SFP Ports Hardware Performance Flash Memory 16MB 16MB 16MB 32MB SDRAM 128MB 128MB 128MB 256MB Packet Buffer 524KB... -
Page 97: An-310-Sw (Non-Poe) Hardware Specifications
Araknis Networks AN-210/310-SW-F/R Manual Product Manual 40 - AN-310-SW (Non-PoE) Hardware Specifications AN-310-SW-8 AN-310-SW-16 AN-310-SW-24 AN-310-SW-48 Ethernet Ports 10/100/1000BaseT RJ-45 PoE Ports 1000BaseT SFP Ports Hardware Performance Flash Memory 16MB 16MB 16MB 32MB SDRAM 128MB 128MB 128MB 256MB Packet Buffer... -
Page 98: An-310-Sw-Poe Hardware Specifications
Araknis Networks AN-210/310-SW-F/R Manual Product Manual 41 - AN-310-SW-POE Hardware Specifications AN-310-SW-8-POE AN-310-SW-16-POE AN-310-SW-24-POE Ethernet Ports 10/100/1000BaseT RJ-45 PoE Ports 1000BaseT SFP Ports Hardware Performance Flash Memory 16MB 16MB 16MB SDRAM 128MB 128MB 128MB Packet Buffer 524KB 524KB 524KB MAC Address Table Size... -
Page 99: General Specifications (All 210/310 Models)
Araknis Networks AN-210/310-SW-F/R Manual Product Manual 42 - General Specifications (All 210/310 Models) Supported? Feature AN-210-SW AN-310-SW Layer 2 Features HOL Blocking Head-of-line blocking Flow Control 802.3x, Back Pressure Forwarding Mode Store-and-forward Energy Efficient Ethernet IEEE 802.3az Spanning Tree 802.1D (STP) 802.1w (RSTP) - Page 100 Araknis Networks AN-210/310-SW-F/R Manual Product Manual General Specifications, Continued Supported? Feature AN-210-SW AN-310-SW Security MAC-based Port Security 802.1x IP Source Guard RADIUS TACACS+ HTTPS and SSL SSH v2.0 MAC Filter IP Filter Management Management CLI, Web, Telnet Dual FW Images...
-
Page 101: Appendix – Safety And Regulatory Information
Araknis Networks AN-210/310-SW-F/R Manual Product Manual 43 - Appendix – Safety and Regulatory Information FCC Warning Changes or modifications not expressly approved by the party responsible for compliance could void the user’s authority to operate the equipment. This device complies with Part 15 of the FCC Rules. Operation is subject to the following two conditions: •... -
Page 102: Warranty
44 - Warranty 2 Year Limited Warranty Araknis Networks® products have a 2-Year Limited Warranty. This warranty includes parts and labor repairs on all components found to be defective in material or workmanship under normal conditions of use. This warranty shall not apply to products that have been abused, modified, or disassembled. Products to be repaired under this warranty must be returned to a designated service center with prior notification and an assigned return authorization (RA) number. - Page 103 160824-1500...
Need help?
Do you have a question about the AN-210-SW-R-8-POE and is the answer not in the manual?
Questions and answers