Table of Contents
Advertisement
Available languages
Available languages
Quick Links
Download this manual
See also:
Reference Manual
Advertisement
Chapters
Table of Contents

Related Manuals for Tascam us-20x20


Summary of Contents for Tascam us-20x20
- Page 1 D01249900B US-20x20 USB Audio MIDI Interface with Mic Pre/Mixer OWNER'S MANUAL ENGLISH MODE D’EMPLOI FRANÇAIS MANUAL DEL USUARIO ESPAÑOL BEDIENUNGSANLEITUNG DEUTSCH MANUALE DI ISTRUZIONI ITALIANO 取扱説明書 日本語...
- Page 2 • TASCAM is a trademark of TEAC CORPORATION, registered in the U.S. and other countries. http://tascam.jp/ • Microsoft, Windows and Windows Vista are either 〒206-8530 東京都多摩市落合1-47 registered trademarks or trademarks of Microsoft Corporation in the United States and/or other TEAC AMERICA, INC.
-
Page 3: Important Safety Precautions
Replace only 1 Read these instructions. with the same or equivalent type. 2 Keep these instructions. 3 Heed all warnings. 4 Follow all instructions. 5 Do not use this apparatus near water. 6 Clean only with dry cloth. TASCAM US-20x20... -
Page 4: Table Of Contents
Input and output channels in mic preamp mode ..14 Troubleshooting ................15 Specifications..................16 Ratings ..................16 Analog inputs .................16 Analog outputs ..............17 Digital audio input/output ratings .........17 Control input/output ratings ..........17 Audio performance ..............17 Computer system requirements ........17 Supported audio drivers ............18 General..................18 Dimensional drawings ............18 TASCAM US-20x20... -
Page 5: Introduction
Introduction Precautions for placement and use Thank you very much for purchasing the TASCAM US-20x20 USB 0 The operating temperature range of this unit is 5–35 °C. Audio MIDI Interface with Mic Pre/Mixer. 0 Do not install this unit in the following types of locations. -
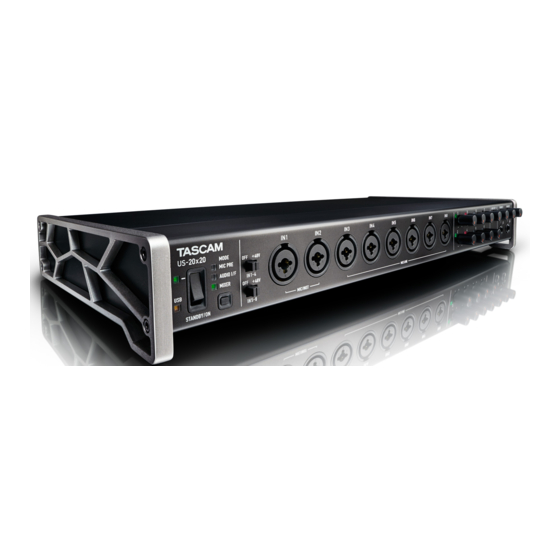
Page 6: Names And Functions Of Parts
These inputs support high impedance input, including direct guitar input. PHONES 1/2 jacks Use these standard stereo jacks to connect stereo headphones. The same signal is output from the LINE OUT 1/2 jacks. Use an adapter to connect headphones with a mini plug. TASCAM US-20x20... -
Page 7: Rear Panel
WORD output THRU/OUT setting (OUT is for WORD only) LINE IN 9-10 (BALANCED) jacks and LEVEL switch These standard TRS jacks are line inputs. Use the LEVEL switch to set the nominal level to −10dBV or +4dBu. TASCAM US-20x20... -
Page 8: Installing The Dedicated Software
If the unit is still not recognized after some time, open the software installation screen from the message area at the bottom right of the computer display, and click “Skip Obtaining Drivers From Windows Update” to cancel the search. TASCAM US-20x20... -
Page 9: Installing The Mac Settings Panel
2. Double-click “US-20x20_Installer.dmg", which is the saved disk image file for the Mac Settings Panel, and double-click “US-20x20.pkg” inside the folder that opens. The Mac Settings Panel will launch. NOTE Depending on the computer’s settings, the downloaded zip file might not have opened automatically. -
Page 10: Connecting The Power
4 M ove the latch on the AC adapter in the direction of the arrow again. 5 A ttach the outlet plug to the AC adapter. After changing the outlet plug, confirm that it is not loose or crooked and that everything is normal before plugging it into an outlet TASCAM US-20x20... -
Page 11: Making Computer Settings
From “All Apps” (All Programs), select “US-20x20 Settings Panel” under TASCAM. Mac OS X Select “US-20x20 Settings Panel” from Applications and launch it to open the Settings Panel on the computer display. Click the MIXER tab on the Settings Panel to open the MIXER page as shown below. -
Page 12: Making Settings On The Interface Screen
1. Click the “INTERFACE” tab on the Settings Panel to open the “INTERFACE” page. 2. Click the Internal Sample Rate item ( ) on the “INTERFACE” page and set the sampling frequency of the unit’s internal clock. Options: 44.1kHz, 48kHz, 88.2kHz, 96kHz, 176.4kHz, 192kHz TASCAM US-20x20... -
Page 13: Examples Of Connections With Other Equipment
(6). Computer and speakers NOTE Example using a US-20x20 Check the following if you cannot hear the input sounds. o Use the PHONES 1/2 knobs on the front panel to adjust CAUTION the output levels of the PHONES 1/2 jacks. -
Page 14: Overview Of Operation Modes
Advanced tab w Default Format The unit functions as a microphone preamp. AUDIO I/F Applications folder w Utilities folder w Audio MIDI Setup w Audio Devices window w US-20x20 w Format The unit functions as an audio interface. NOTE MIXER In mic preamp and digital mixer modes, the sampling The unit functions as a digital mixer. -
Page 15: Troubleshooting
If you are still unable to resolve your problems please contact the computer’s speakers or headphone jack. TASCAM customer support (see page 2) with the following information about the operating environment and details about Windows 10/Windows 8.1/Windows 7 the trouble. -
Page 16: Specifications
Nominal input level (gain knob at MAX): −68 dBu (0.0003 Vrms) Digital audio input/output ratings Nominal input level (gain knob at MIN): −12 dBu (0.195 Vrms) COAXIAL IN Maximum input level: +8 dBu (1.947 Vrms) Connectors: RCA pin jacks TASCAM US-20x20... -
Page 17: Digital Audio Input/Output Ratings
At 176.4/192 kHz and 20 Hz – 80 kHz: ± 5 dB (JEITA) S/N ratio 104 dB or higher (MIC/LINE IN w LINE OUT, gain knob at MIN, JEITA) Distortion 0.005% or less (MIC/LINE IN w LINE OUT, 1kHz sine wave, at nominal input level and maximum output level) TASCAM US-20x20... -
Page 18: Supported Audio Drivers
482.6mm 465mm 0 Illustrations in this manual might differ in part from the actual product. 0 Specifications and external appearance might be changed without notification to improve the product. 0 Detailed specifications are provided in the Reference Manual. TASCAM US-20x20... -
Page 19: Précautions De Sécurité Importantes
• N'exposez pas cet appareil aux gouttes ni aux éclaboussures. • Ne placez pas d'objet rempli de liquide sur l'appareil, comme par exemple un vase. • N’installez pas cet appareil dans un espace confiné comme une bibliothèque ou un meuble similaire. TASCAM US-20x20... - Page 20 Caractéristiques techniques ............32 Données ...................32 Entrées analogiques .............32 Sorties analogiques ..............33 Valeurs d'entrée/sortie audio numériques ....33 Valeurs d'entrée/sortie de commande ......33 Performances audio .............33 Configurations informatiques requises ......33 Pilotes audio pris en charge ..........34 Générales .................34 Dessins avec cotes ..............34 TASCAM US-20x20...
-
Page 21: Introduction
Précautions concernant l'emplacement et l'emploi Merci beaucoup d'avoir choisi l'interface audio MIDI USB US-20x20 de TASCAM avec préampli micro et mélangeur. 0 La plage de température de fonctionnement de cette unité Avant de connecter et d’utiliser cette unité, veuillez prendre le se situe entre 5 ºC et 35 ºC. -
Page 22: Nomenclature Et Fonctions Des Parties
Elles acceptent une entrée à haute impédance dont l'entrée Prise PHONES 1/2 directe d'une guitare. Utilisez ces prises jack stéréo standards pour brancher des casques stéréo. Le même signal sort des prises LINE OUT 1/2. Utilisez un adaptateur pour brancher un casque à fiche mini-jack. TASCAM US-20x20... -
Page 23: Face Arrière
(OUT ne produit que le signal word clock) Prises LINE IN (BALANCED) 9-10 et sélecteur LEVEL Ces prises jack 6,35 mm 3 points (TRS) sont des entrées ligne. Utilisez le sélecteur LEVEL pour régler le niveau nominal sur -10 dBV ou +4 dBu. TASCAM US-20x20... -
Page 24: Installation Du Logiciel Dédié
à droite de l'écran de l'ordinateur et cliquez sur « Ignorer la recherche de pilote dans Windows Update » pour annuler la recherche. TASCAM US-20x20... -
Page 25: Installation Du Panneau De Réglages (Settings Panel) Pour Mac
être employé avec l'unité. 2. Double-cliquez sur « US-20x20_Installer.dmg » qui est le fichier image disque sauvegardé pour le logiciel Settings Panel pour Mac, et double-cliquez sur « US-20x20.pkg » dans le dossier qui s'ouvre. 7. L'écran suivant apparaît quand l'installation est terminée. -
Page 26: Connexion De L'alimentation
5 F ixez les broches sur l'adaptateur secteur. Après avoir changé les broches, vérifiez qu'elles ne sont ni desserrées ni déformées et que tout est normal avant de brancher l'adaptateur à une prise secteur. TASCAM US-20x20... -
Page 27: Paramétrage De L'ordinateur
Dans « Toutes les applications » (Tous les programmes) », sélectionnez « US-20x20 Settings Panel » sous TASCAM. Mac OS X Sélectionnez « US-20x20 Settings Panel » dans Applications et lancez-le pour ouvrir le panneau de réglages sur l'écran de l'ordinateur. Cliquez sur l'onglet MIXER du panneau de réglages pour ouvrir la page MIXER représentée ci-dessous. -
Page 28: Réglages En Écran Interface
Réglage de la source d’horloge d’échantillonnage 1. Cliquez sur l’onglet « INTERFACE » du panneau de réglages pour ouvrir la page « INTERFACE ». Exemple en mode « AUDIO I/F » 2. Cliquez sur Sample Clock Source (1) en page « INTERFACE » pour régler la source d’horloge d’échantillonnage. TASCAM US-20x20... -
Page 29: Exemples De Branchement À D'autres Équipements
(4) pour que leur voyant de signal/saturation (3) ne s'allume pas. Exemple utilisant une US-20x20 Pour contrôler auditivement le son au casque, branchez un casque à l'une des prises PHONES 1/2 (5) et réglez le niveau ATTENTION avec les boutons PHONES 1/2 (6). -
Page 30: Présentation Des Modes De Fonctionnement
Panneau de configuration w Fenêtre Son w Haut-parleurs L’unité fonctionne comme un préampli microphone. TASCAM US-20x20 w Propriétés (p) w Onglet Statistiques avancées de Propriétés de l’US-20x20 w Format par défaut AUDIO I/F L’unité fonctionne comme une interface audio. Dossier Applications w Dossier Utilitaires w Configuration MIXER audio et MIDI w Fenêtre Périphériques audio w US-20x20... -
Page 31: Guide De Dépannage
Système » dans le menu Pomme. Si vous ne pouvez toujours pas résoudre vos problèmes, veuillez 2. Ouvrez « Son ». contacter le service après-vente TASCAM (voir page 2) avec les informations suivantes concernant l'environnement de 3. Dans l'onglet Sortie, sélectionnez « US-20x20 ». fonctionnement et des détails décrivant le problème. -
Page 32: Caractéristiques Techniques
Entrées ligne (symétriques, LINE IN 9-10) Quand le sélecteur LEVEL est réglé sur +4dBu Connecteurs : jacks 6,35 mm 3 points (TRS) standards (pointe : point chaud, bague : point froid, manchon : masse) Impédance d’entrée : 10 kΩ Niveau d'entrée nominal : +4 dBu (1,228 Vrms) Niveau d'entrée maximal : +24 dBu (12,282 Vrms) TASCAM US-20x20... -
Page 33: Sorties Analogiques
• Le câble USB fourni (USB 2.0 ou USB 3.0) et les spécifications USB exploitables dépendent de l’ordinateur et du système Impédance d'entrée : 75 Ω ±10 % d’exploitation que vous utilisez. Déviation de fréquence permise pour la synchronisation externe : ±100 ppm Commutateur de terminaison inclus TASCAM US-20x20... -
Page 34: Pilotes Audio Pris En Charge
0 Caractéristiques et aspect externe peuvent être changés sans préavis en vue d'améliorer le produit. USB Audio Classe 2.0 , ASIO 2.0 , WDM (MME), MIDI 0 Des caractéristiques détaillées sont fournies dans le manuel de référence. Core Audio, Core MIDI TASCAM US-20x20... -
Page 35: Precauciones Importantes De Seguridad
• No permita que este aparato quede expuesto a salpicaduras de ningún tipo. • No coloque objetos que contengan líquidos, como jarrones, encima de este aparato. • No instale este aparato encastrado en una librería o mueble similar. TASCAM US-20x20... - Page 36 Resolución de problemas ............47 Especificaciones técnicas ............48 Resolución audio ..............48 Entradas analógicas .............48 Salidas analógicas ..............49 Entrada/salida digital audio ..........49 Entrada/salida de control ...........49 Rendimiento audio ...............49 Requisitos del sistema informático .........49 Drivers audio admitidos .............50 General..................50 Esquema de dimensiones ..........50 TASCAM US-20x20...
-
Page 37: Introducción
Póngase en contacto con el departamento de soporte técnico Languages. de TASCAM (vea pág. 2) si echa en falta alguno de estos 3. Haga clic en el nombre de producto en la sección “Search elementos o si observa que alguno de ellos ha resultado dañado by Model Name”... -
Page 38: Nombres Y Funciones De Las Partes
Use estas tomas stereo standard para la conexión de unos auriculares stereo. El sonido emitido por estas tomas es el mismo que la señal emitida por las tomas LINE OUT 1/2. Use un adaptador si quiere conectar unos auriculares que dispongan de una clavija mini. TASCAM US-20x20... -
Page 39: Panel Trasero
Ajuste THRU/OUT de la salida WORD (OUT solo es para WORD) Tomas LINE IN 9-10 (BALANCED) e interruptor LEVEL Entradas de línea standard en TRS. Use el interruptor LEVEL para ajustar el nivel nominal a −10 dBV ó +4 dBu. TASCAM US-20x20... -
Page 40: Instalación Del Software Específico
Haga clic en “Abandonar la búsqueda del driver desde el actualizador de Windows”, para detener la búsqueda. TASCAM US-20x20... -
Page 41: Instalación Del Panel De Ajustes Para Mac
2. Haga doble clic en la imagen de disco “US-20x20_Installer. dmg" y haga doble clic en el fichero “US-20x20.pkg” que encontrará dentro de la carpeta que se abrirá. El Panel de ajustes de Mac se pondrá en marcha. -
Page 42: Encendido De La Unidad
Tras cambiar el enchufe de salida, compruebe que no esté suelto o mal encajado y que todo está correcto antes de introducirlo en la salida de corriente. CUIDADO No use el adaptador si observa cualquier anormalidad tras cambiar el enchufe. El uso del adaptador en esas TASCAM US-20x20... -
Page 43: Ajustes En El Ordenador
Mac OS X Elija “US-20x20 Settings Panel” dentro de Aplicaciones y ejecútelo para abrir el Panel de ajustes en la pantalla del ordenador. Haga clic en la pestaña MIXER del Panel de ajustes para que aparezca la pantalla MIXER que le mostramos aquí abajo. -
Page 44: Ajustes En La Pantalla Interface
Ajuste el elemento Internal Sample Rate ( ) a la frecuencia de muestreo a usar cuando ajuste Sample Clock Source ( INTERNAL. 1. Haga clic en la pestaña “INTERFACE” del Panel de ajustes para acceder a la página “INTERFACE”. TASCAM US-20x20... -
Page 45: Ejemplos De Conexión Con Otros Aparatos
Ordenador iluminen. amplificador y altavoces Para monitorizar el sonido a través de unos auriculares, conecte Ejemplo de uso de un US-20x20 unos auriculares a las tomas PHONES 1/2 (5) y ajuste su volumen con los mandos PHONES 1/2 (6). CUIDADO •... -
Page 46: Resumen De Los Modos Operativos
Se iluminará el indicador MODE correspondiente al modo operativo activo en cada momento. Windows Esta unidad le ofrece los modos operativos siguientes. Panel de control w Ventana Sonido w Altavoces TASCAM US-20x20 w Propiedades (p) w Pestaña de propiedades MIC PRE avanzadas US-20x20 w Formato predeterminado La unidad actúa como un previo de micro. -
Page 47: Resolución De Problemas
Si aún así continúa sin resolver los problemas, póngase en ordenador o su toma de auriculares. contacto con el servicio técnico de TASCAM (vea página 2). Tenga a mano la siguiente información relativa al entorno Windows 10/Windows 8.1/Windows 7 operativo y detalles respecto al problema. -
Page 48: Especificaciones Técnicas
Con interruptor LEVEL ajustado a +4dBu Conectores: TRS standard de 6.3 mm (1/4”) (punta: activo, anillo: pasivo, lateral: masa) Impedancia de entrada: 10 kΩ Nivel de entrada nominal: +4 dBu (1.228 Vrms) Nivel de entrada máximo: +24 dBu (12.282 Vrms) TASCAM US-20x20... -
Page 49: Salidas Analógicas
USB a usar dependen del ordenador y sistema Voltaje de entrada: 2.0 Vpp – 5.0 Vpp operativo que esté utilizando. Impedancia de entrada: 75 Ω ±10% Desviación de frecuencia permitida durante la sincronización externa: ±100 ppm Incluye interruptor de terminación on/off TASCAM US-20x20... -
Page 50: Drivers Audio Admitidos
USB Audio Class 2.0, ASIO 2.0, WDM (MME), MIDI técnicas como el aspecto exterior están sujetos a cambios sin previo aviso. Core Audio, Core MIDI 0 Consulte el Manual de referencia si quiere ver explicaciones más detalladas de los distintos aspectos de esta unidad. TASCAM US-20x20... -
Page 51: Wichtige Hinweise Zu Ihrer Sicherheit
Schutz vor Sach- und Personenschäden durch Handbuchs aufgeführt. falsches Zubehör Lassen Sie Wartungsarbeiten und Reparaturen nur von einem Tascam-Servicecenter ausführen. Bringen Sie das Gerät zu Verwenden Sie nur Zubehör oder einem Tascam-Servicecenter, wenn es Regen oder Feuch- Zube hörteile, die der Hersteller empfiehlt. - Page 52 Betriebsdaten ..............65 Analogeingänge..............65 Analogausgänge ..............65 Digitale Audioeingänge und -ausgänge ....65 Weitere Eingänge und Ausgänge ........66 Leistungsdaten Audio ............66 Systemanforderungen Computer .......66 Unterstützte Audiotreiber ..........67 Stromversorgung und sonstige Daten ...... 67 Maßzeichnungen ............... 67 TASCAM US-20x20 – Bedienungsanleitung...
-
Page 53: Bevor Sie Beginnen
Computer und welches Betriebssystem Sie verwenden. (Siehe Bevor Sie beginnen “Mit einem Computer verbinden” auf Seite 58.) Vielen Dank, dass Sie sich für das Tascam US-20x20 entschieden Ergänzende Sicherheitshinweise zur haben, ein Audio-/MIDI-Interface, das auch als Mikrofonvorver- stärker und Mixer verwendet werden kann. -
Page 54: Die Bedienelemente Und Ihre Funktionen
Geräte mit Instrumentenpegel wie etwa E-Gitarren. An diese Stereoklinkenbuchsen können Sie Stereokopfhörer anschließen. Hier wird das gleiche Signal ausgegeben wie an den Buchsen LINE OUT 1-2 Um Kopfhörer mit Miniklinkenstecker anzuschließen, verwenden Sie einen geeigneten Adapter. TASCAM US-20x20 – Bedienungsanleitung... -
Page 55: Geräterückseite
-Anschluss mit 75 Ohm abgeschlossen WORD IN wird ( ), oder − ob Sie den -Anschluss zum Durchschleifen WORD OUT des Eingangssignals ( ) oder für die Ausgabe eines THRU Wordclocksignals nutzen wollen ( WORD OUT TASCAM US-20x20 – Bedienungsanleitung... -
Page 56: Die Gerätesoftware Installieren
„Treibersuche mit Windows Update überspringen“, um die „Weiter“. Suche zu stoppen 7. Lesen Sie sich die Lizenzvereinbarung durch. Wenn Sie damit einverstanden sind, wählen Sie die Option „Ich nehme die Lizenzvereinbarung an.“ Klicken Sie auf „Weiter“. TASCAM US-20x20 – Bedienungsanleitung... -
Page 57: Das Mac-Einstellungsfeld Installieren
Interface verwenden wollen. 3. Doppelklicken Sie auf die Datei „US-20x20_Installer. dmg“, um das Disk-Image des Mac-Einstellungsfelds zu entpacken. Doppelklicken Sie anschließend auf die Datei „US-20x20.pkg“ in dem geöffneten Ordner. Das Mac-Einstellungsfeld startet. Anmerkung Je nach den Einstellungen auf Ihrem Computer wird die heruntergeladene Datei möglicherweise automatisch... -
Page 58: Den Stecker Des Wechselstromadapters Wechseln
Windows 7, 64 Bit, falls besteht Brand- oder Stromschlaggefahr. Wenden Sie sich im ✔ SP1 oder höher Schadensfall an Ihren Händler oder ein Tascam-Servicecenter. Nutzen Sie das mitgelieferte USB-3.0-Kabel, um die größt- mögliche Übertragungsgeschwindigkeit zu erzielen. Die Stromversorgung herstellen 1. Verbinden Sie den Gleichstrom-Stecker des mitgelieferten... -
Page 59: Einstellungen Auf Dem Computer Vornehmen
Einzelheiten zu den anderen Einstellungen finden Sie im EQ-Schaltflächen Abschnitt „Die MIXER-Seite“ im Kapitel „6 – Das Einstellungsfeld Hiermit aktivieren Sie den EQ des jeweiligen Kanals. Die nutzen“ des Referenzhandbuchs. Schaltfläche leuchtet, wenn die Funktion aktiviert ist. TASCAM US-20x20 – Bedienungsanleitung... -
Page 60: Einstellungen Auf Der Interface-Seite
Auswahlmöglichkeiten: S/PDIF, AES/EBU Signal am jeweiligen Ausgang ausgegeben werden soll. Auswahlmöglichkeiten: MASTER L/MASTER R, AUX 1 – AUX 4, COMPUTER 1 – COMPUTER 20 Die grafische Darstellung des Ausgangsroutings ( ) auf der OUTPUT SETTING-Seite ändert sich entsprechend. TASCAM US-20x20 – Bedienungsanleitung... -
Page 61: Beispiele Für Den Anschluss Anderer Geräte
Mikrofone können nur bei ausge- schalteter Phantomspeisung verwendet werden. • Ebenso werden manche Bändchenmikrofone irreparabel beschädigt, wenn sie mit Phantomspeisung versorgt werden. Wenn Sie unsicher sind, lassen Sie die Phantomspeisung für Ihr Bändchenmikrofon ausgeschaltet. TASCAM US-20x20 – Bedienungsanleitung... -
Page 62: Ein Ios-Gerät Anschließen
Analoge Audiosignale von Mikrofonen, Gitarren, Keyboards oder 1. Wählen Sie mit der -Taste auf der Gerätevorderseite MODE anderen Audiogeräten können mit dem US-20x20 in Digital- die Betriebsart AUDIO I/F signale umgewandelt und über die USB-Verbindung an Ihren Auf dem Einstellungsfeld wird oben im Anzeigefeld für die Computer geleitet werden. -
Page 63: Eingänge Und Ausgänge Im Mikrofonvorverstärker-Betrieb
Um im Mikrofonvorverstärker-Betrieb eine andere als die 1. Installieren Sie die Gerätesoftware Standard-Abtastrate zu nutzen, verbinden Sie das US-20x20 mit Wenn Sie es noch nicht getan haben, installieren Sie die einem Computer. Nehmen Sie dort die folgenden Einstellungen Gerätesoftware. - Page 64 System einstellungen im Apfel-Menü. Kontrast. 2. Wählen Sie „Ton“. b) Leistungseinstellungen 3. Wählen Sie im Bereich „Ausgabe“ den Eintrag „US-20x20“. 1 Rechtsklicken Sie auf Computer und wählen Sie „Eigen- schaften“. 2 Klicken Sie auf „Erweiterte Systemeinstellungen“. Starten Sie anschließend den Computer neu und überprüfen Sie, ob die Tonausgabe jetzt funktioniert.
-
Page 65: Technische Daten
Line-Eingänge (symmetrisch, LINE IN 9–10) LEVEL-Schalter in Stellung +4 dBu Anschlusstyp: 6,3-mm-Klinkenbuchse, 3-polig (Spitze: heiß (+), Ring: kalt (–), Hülse: Masse) Eingangsimpedanz: 10 kΩ Nominaler Eingangspegel: +4 dBu (1,228 Vrms) Maximaler Eingangspegel: +24 dBu (12,282 Vrms) TASCAM US-20x20 – Bedienungsanleitung... -
Page 66: Weitere Eingänge Und Ausgänge
(Mikrofon-/Line-Eingang bis Line-Ausgang, Eingangspegel- mögliche Übertragungsgeschwindigkeit zu erzielen. regler in Minimalstellung, JEITA) Verzerrung 0,005 % oder weniger (Mikrofon-/Line-Eingang bis Line- Ausgang, 1-kHz-Sinussignal, nominaler Eingangspegel, maximaler Ausgangspegel) Übersprechdämpfung 100 dB oder mehr (Mikrofon-/Line-Eingang bis Line- Ausgang, 1 kHz) TASCAM US-20x20 – Bedienungsanleitung... -
Page 67: Unterstützte Audiotreiber
12 W Abmessungen (B × H × T) Mit werksseitigen Seitenteilen 445 mm × 59 mm × 222 mm Mit montierten Rack-Einbauwinkeln 483 mm × 44 mm × 223 mm Gewicht 2,8 kg Zulässiger Betriebstemperaturbereich 5–35 °C TASCAM US-20x20 – Bedienungsanleitung... - Page 68 TASCAM US-20x20 – Bedienungsanleitung...
-
Page 69: Importanti Norme Di Sicurezza
è pericolo di esplosione se la batteria viene 2 Conservare queste istruzioni. sostituita con una di tipo non corretto. Sostituire solo con lo 3 Prestare attenzione agli avvertimenti. stesso tipo o equivalente. 4 Seguire tutte le istruzioni. TASCAM US-20x20... - Page 70 Risoluzione dei problemi ............81 Specifiche ..................82 Dati .....................82 Ingressi analogici ..............82 Uscite analogiche ..............83 Dati di ingresso/uscita audio digitale ......83 Controlli di ingresso/uscita ..........83 Prestazioni audio ..............83 Requisiti di sistema del computer ........83 Driver audio supportati ............84 Generali ..................84 Dimensioni ................84 TASCAM US-20x20...
-
Page 71: Introduzione
Si prega di consultare la sezione “Cambiare la spina” in “4 - Preparativi” del manuale di riferimento per le relative istruzioni. Registrazione utente I clienti negli Stati Uniti sono pregati di visitare il sito TASCAM (http://tascam.com/) per la registrazione utente online. TASCAM US-20x20... -
Page 72: Nomi E Funzioni Delle Parti
Prese PHONES 1/2 incluso l’ingresso diretto di una chitarra. Utilizzare queste prese stereo standard per collegare le cuffie stereo. Lo stesso segnale viene emesso dalle prese LINE OUT 1/2. Utilizzare un adattatore per collegare le cuffie con spinotto mini. TASCAM US-20x20... -
Page 73: Pannello Posteriore
Terminazione 75Ω ON/OFF per WORD IN. o Uscita WORD THRU/OUT (OUT è solo per WORD) Prese LINE IN 9-10 (BALANCED) e interruttore LEVEL Queste prese standard TRS sono ingressi di linea. Usare l’interruttore LEVEL per impostare il livello nominale a -10dBV o +4dBu. TASCAM US-20x20... -
Page 74: Installazione Del Software Dedicato
Fare clic su “Salta la ricerca del driver da Windows Update” per interrompere la ricerca. TASCAM US-20x20... -
Page 75: Installazione Del Settings Panel Su Mac
Fare clic sul pulsante “Close”. utilizzato con l’unità. 2. Fare doppio clic su “US-20x20_Installer.dmg”, che è il file immagine del Settings Panel e fare doppio clic su “US-20x20. pkg” all’interno della cartella che si aprirà. Verrà avviato il Settings Panel. -
Page 76: Collegamento Dell'alimentazione
4 S postare di nuovo il fermo dell’alimentatore nella direzione della freccia. 5 F issare la spina all’alimentatore. Dopo aver cambiato la spina, verificare che non sia allentata o storta e che tutto sia normale prima di inserirla in una presa di corrente. TASCAM US-20x20... -
Page 77: Effettuare Le Impostazioni Sul Computer
Da “Tutte le applicazioni” (Tutti i programmi), selezionare “US-20x20 Settings Panel” sotto TASCAM. Mac OS X Selezionare “US-20x20 Settings Panel” da applicazioni e lanciarlo per aprire Settings Panel sul monitor del computer. Fare clic sul tab MIXER del Settings Panel per aprire la pagina MIXER, come illustrato di seguito. -
Page 78: Effettuare Le Impostazioni Nella Schermata Interface
2. Cliccare sulla voce Internal Sample Rate ( ) della pagina “INTERFACE” e impostare la frequenza di campionamento su Quando l’unità è in modalità PRE MIC, non è possibile effet- quella del clock interno dell’unità. tuare impostazioni nella pagina OUTPUT SETTING. TASCAM US-20x20... -
Page 79: Esempi Di Collegamenti Con Altri Apparecchi
Computer amplificatore e altoparlanti prese PHONES 1/2 (5) e regolare le manopole PHONES 1/2 (6). Esempio di utilizzo di un US-20x20 NOTA CAUTELA Verificare quanto segue se non è possibile sentire alcun • Prima di effettuare i collegamenti, spegnere questa unità... -
Page 80: Panoramica Delle Modalità Operative
AUDIO I/F L’unità funziona come un’interfaccia audio. Cartella Applicazioni w cartella Utility w Configurazione MIXER MIDI Audio w Periferiche audio w US-20x20 w Formato L’unità funziona come un’interfaccia audio. NOTA In modalità preamplificatore microfonico e mixer digitale, Uso dell’unità come preamplificatore micro- la frequenza di campionamento può... -
Page 81: Risoluzione Dei Problemi
Se non si riesce ancora a risolvere i problemi, si prega di emesso dagli altoparlanti o la presa per cuffie del computer. contattare l’assistenza clienti TASCAM (vedere a pagina 2) con le seguenti informazioni sull’ambiente operativo e i dettagli sul Windows 10/Windows 8.1/Windows 7... -
Page 82: Specifiche
Quando l’interruttore LEVEL è impostato su +4dBu Connettori: 6,3 mm (1/4”) standard TRS (Tip: HOT, Ring: COLD, Sleeve: GND) Impedenza di ingresso: 10 kΩ Livello di ingresso nominale: +4 dBu (1,228 Vrms) Livello di ingresso massimo: +24 dBu (12,282 Vrms) TASCAM US-20x20... -
Page 83: Uscite Analogiche
Connettore: BNC sistema operativo che si sta utilizzando. Tensione di ingresso: 2,0 Vpp – 5,0 Vpp Impedenza di ingresso: 75 Ω ±10% Deviazione di frequenza ammessa durante la sincronizza- zione esterna: ±100 ppm Interruttore di terminazione on/off incluso TASCAM US-20x20... -
Page 84: Driver Audio Supportati
USB Audio Class 2.0, ASIO 2.0, WDM (MME), MIDI 0 Le specifiche e l’aspetto esterno possono essere modificati senza preavviso per migliorare il prodotto. Core Audio, Core MIDI 0 Le specifiche dettagliate sono disponibili nel manuale di riferimento. TASCAM US-20x20... -
Page 85: 安全にお使いいただくために
AC アダプターの電源プラグを抜くときは、AC アダ 源には接続しないでください。火災・感電の原因とな プターの電源コードを引っ張らない ります。 コードが傷つき、火災・感電の原因となることがあり この機器の隙間などから内部に金属類や燃えやすい物 ます。 などを差し込む、または落とさない 必ずプラグを持って抜いてください。 火災・感電の原因となります。 濡れた手で AC アダプターの電源プラグを抜き差しし この機器のカバーは絶対に外さない ない カバーを外す、または改造すると、火災・感電の原因 感電の原因となることがあります。 となります。 禁止 内部の点検・修理は販売店またはティアック修理セン 5年に1度は、 機器内部の掃除を販売店またはティアッ ター(巻末に記載)にご依頼ください。 ク修理センター(巻末に記載)にご相談ください。 分解禁止 内部にほこりがたまったまま、長い間掃除をしないと この機器を改造しない 火災や故障の原因となることがあります。特に、湿気 火災・感電の原因となります。 の多くなる梅雨期の前に行うと、より効果的です。な 注意 お、掃除費用については、ご相談ください。 この装置は、クラス B 技術情報装置です。この装置は家庭環境で使用することを目的としていますが、この装置がラジオやテレビジョン受 信機に近接して使用されると、受信障害を引き起こすことがあります。取扱説明書にしたがって正しく取り扱いをしてください。 VCCI-B TASCAM US-20x20... -
Page 86: はじめに
目次 はじめに 安全にお使いいただくために ............85 こ の た び は、TASCAM USB Audio MIDI Interface with Mic はじめに .....................86 Pre / Mixer US-20x20 をお買い上げいただきまして、誠にあり リファレンスマニュアルについて ...........86 がとうございます。 本製品の構成 ..................86 ご使用になる前に、この取扱説明書をよくお読みになり、正しい取 設置上の注意 ..................87 り扱い方法をご理解いただいた上で、末永くご愛用くださいますよ 製品のお手入れ..................87 うお願い申し上げます。お読みになった後は、いつでも見られる所 ユーザー登録について ..............87 に保管してください。 結露について ..................87 また取扱説明書は、TASCAM のウェブサイト(http://tascam. -
Page 87: 設置上の注意
場合は、お客様のご要望により有料修理致します。 0 本機をラックマウントする場合、ラック内部では、本機の上に 0 万一、故障が発生した場合は使用を中止し、必ず電源プラグを 1U 以上のスペースを空けてください。 コンセントから抜いて、お買い上げの販売店またはティアック 修理センター(巻末に記載)までご連絡ください。 製品のお手入れ 0 修理を依頼される場合は、次の内容をお知らせください。なお、 本機の故障、もしくは不具合により発生した付随的損害(録音 製品の汚れは、柔らかい乾いた布で拭いてください。化学ぞうきん、 内容などの補償)の責については、ご容赦ください。 ベンジン、シンナー、アルコールなどで拭かないでください。表面 o 型名、型番(US-20x20) を傷める、または色落ちさせる原因となります。 o 製造番号(Serial No.) o 故障の症状(できるだけ詳しく) ユーザー登録について o お買い上げ年月日 o お買い上げ販売店名 TASCAM のウェブサイトにて、オンラインでのユーザー登録をお 願い致します。 0 お問い合わせ先については、巻末をご参照ください。 http://tascam.jp/support/registration/ 0 当社は、この製品の補修用性能部分(製品の機能を維持するた めに必要な部品)を製造打ち切り後 8 年間保有しています。... -
Page 88: 各部の名称
IN1-4 端子および IN5-8 端子に+ 48V のファントム電源を供 0 USB インジケーター 給するためのスイッチです。 USB 接続が有効なときに、橙色に点灯します。 4チャンネル毎の入力単位で切り換えることができます。スイッ チが「+48V」のときにファントム電源が供給されます。 q PHONES 1 / 2 端子 ステレオヘッドホンを接続するためのステレオ標準ジャックで 4 MIC/INST IN1-2 [BALANCED/UNBALANCED] す。LINE OUT 1 / 2 端子と同じ信号が出力されます。 端子 ミニプラグのヘッドホンを接続する場合は、変換アダプターを XLR / TRS コンボジャックタイプのアナログ入力端子です。 ご使用ください。 ハイインピーダンス入力(ギターなどの直接入力)に対応して います。 TASCAM US-20x20... -
Page 89: リアパネル
注意 デジタルシステム内にワードクロックマスターが複数存在する と、機器の破損など重大な問題を引き起こす可能性があります。 i 75Ω ON/OFF / THRU/WORD OUT切り換えスイッチ スイッチの選択で、以下の設定が行えます。 o WORD IN 端子の終端抵抗(75 Ω)の有無 o WORD 出力の THRU/OUT 設定(OUT は WORD のみ) o LINE IN 9-10 (BALANCED) 端子/ LEVEL スイッチ TRS 標準ジャックタイプのライン入力端子です。 LEVEL スイッチを使って、規定レベルを「− 10dBV」または 「+4dBu」に設定することができます。 TASCAM US-20x20... -
Page 90: 専用ソフトウェアをインストールする
使用ライセンス許諾契約書の内容を確認し、内容に同意ができ たら、 《同意する(A) 》を選択します。 次に《次へ(N)>》ボタンをクリックします。 本機を使用するには、パソコンに専用ソフトウェアをインストール する必要があります。 専 用 ソ フ ト ウ ェ ア は、TASCAM の ウ ェ ブ サ イ ト(http:// tascam.jp/)から、ご使用の OS に適した最新の専用ソフトウェ アをダウンロードしてください。 0 Windows パソコンは、Windows 専用ドライバーをインストー ルします。 Windows 専 用 ド ラ イ バ ー を イ ン ス ト ー ル す る と、 同 時 に... -
Page 91: Mac 用 Settings Panel のインストール
ことがあります。Gatekeeper については、 リファレンスマニュ アルの「第 3 章 インストール」の「Gatekeeper について」を ご参照ください。 Mac 用 Settings Panel のインストール手順 次の画面が表示されたら、インストール作業は完了です。 TASCAM の ウ ェ ブ サ イ ト(http://tascam.jp/) か ら、 ご 《閉じる》ボタンをクリックします。 使用の OS に適した最新の Mac 用 Settings Panel をダウン ロードし、ご使用のパソコンに保存してください。 保存した Mac 用 Settings Panel のディスクイメージファイ... -
Page 92: 電源を接続する
本 機 に 付 属 す る USB ケ ー ブ ル は、2 種 類(USB2.0 ケ ー ブ ル、 DC プラグ GPE248-120200-Z(付属) USB3.0 ケーブル)同梱されています。 お使いのパソコンおよび OS に合わせて、本機とパソコンを接続す る USB ケーブルを選択し、本機とパソコンの USB2.0 ポートまた は USB3.0 ポートに接続してください。 最新の対応 OS 状況については、 TASCAM のウェブサイト (http:// tascam.jp/)をご確認ください。 使用中のコード抜けを防ぐため、接続するときはコードホルダーに メモ コードを巻いてください。 パソコンの USB3.0 ポートに USB2.0 ケーブルを接続すると、 USB2.0 として使用することができます。... -
Page 93: パソコンの設定をする
4 REVERB 表示部 《MIXER》タブ画面を設定する リバーブの設定状態が表示されます。 5 セレクトボタン Settings Panel ソフトウェアを起動します。 このボタンをオンにすると、 点灯したチャンネルのイコライザー 0 Windows の場合 とコンプレッサーが 1、2 に表示されます。 《すべてのプログラム》 にある 《TASCAM》 から 《US-20x20 6 PHASE ボタン Settings Panel》を選択します。 《PHASE》ボタンをオンにすると、 《PHASE》ボタンが点灯 0 Mac OS X の場合 しているチャンネルの位相が反転します。 《アプリケーション》から《US-20x20_SettingsPanel》 7 EQ ボタン... -
Page 94: Output Setting》タブ画面を設定する
Settings Panel の《INTERFACE》 タ ブ を ク リ ッ ク し、 《INTERFACE》タブ画面を表示します。 タ ブ 画 面 の 《 D i g i t a l 《 I N T E R F A C E 》 Input(176.4k/192k Hz)》項目(4)の選択肢をクリッ クし、使用するデジタル入力先を設定します。 選択肢:COAXIAL、OPTICAL 1/2 TASCAM US-20x20... -
Page 95: 外部機器の接続例
ドラムマシン MIC/INST IN1-2 端子(1)または MIC/LINE IN3-8 端子(2) からのアナログ入力レベルを、シグナル/オーバーロードインジ ケーター(3)が点灯しないように、各ゲインつまみ(4)で調節 パワードスピーカー、 パソコン します。 またはアンプとスピーカー ヘッドホンでモニター音を聴く場合は、 PHONES 1 / 2 端子(5) [US-20x20 を使った表示例 ] にヘッドホンを接続した後、PHONES 1 / 2 つまみ(6)で調節 します。 注意 メモ i 接続する前に、本機および接続する機器の電源を全てオフまた 入力音が聴こえない場合には、以下をご確認ください。 はスタンバイ状態にしてください。 o PHONES 1 / 2 端子からの出力レベルは、フロントパネル... -
Page 96: 動作モードについて
以下の設定方法で、マイクプリアンプモード時およびデジタルミキ 本機は、次の 3 つの動作モードで動作します。 サーモード時のサンプリング周波数を変更することができます(初 期値:44.1kHz) 。 0 MIC PRE Windows 本機がマイクプリアンプとして動作します。 《コントロールパネル》w《サウンド》画面 w《スピーカー 0 AUDIO I/F TASCAM US-20x20》w《プロパティ (p)》ww《US- 本機がオーディオインターフェースとして動作します。 20x20 のプロパティ》 《詳細》 タブ画面 w 《既定の形式》 で変更。 0 MIXER 本機がデジタルミキサーとして動作します。 《アプリケーション》フォルダー w《ユーティリティ》フォル マイクプリアンプとして使うには ダー w《オーディオ MIDI 設定》w《オーディオ装置》画面 w《US-20x20》w《フォーマット》で変更。 フロントパネルの MODE ボタンを押して、本機の動作モード... -
Page 97: トラブルシューティング
定を大きくしてください(Windows のみ) 。 USB ポートの差し替え メモ o 本 機 は、USB1.1 で は 動 作 し ま せ ん。USB3.0 ま た は オーディオアプリケーション側でパソコンへの負荷を減らす方 USB2.0 のポートをご使用ください。 法を、オーディオアプリケーションのメーカー様にお問い合わ o 本機の接続は、USB ハブはご使用にならず、必ずパソコン せください。 本体の USB ポートに接続してください。 o 上記の方法で解決しない場合、 パソコン本体の別の USB ポー トに接続してください。 TASCAM US-20x20... -
Page 98: アナログオーディオ入力定格
:+4dBu(1.228Vrms) すので、パソコン本体の別の USB ポートに接続してください。 最大入力レベル :+24dBu(12.282Vrms) メモ ライン入力(アンバランス、LINE IN9-10) i その他のUSB機器は、 接続せずにお試しください (USBキーボー LEVEL スイッチを「− 10dBV」に設定時 ド・USB マウスは、接続しても構いません) 。 コネクター :6.3mm(1/4")TS 標準ジャック i USB ハブはご使用にならず、 必ずパソコン本体の (オンボードの) (Tip:HOT、Sleeve:GND) USB ポートに接続してください。 入力インピーダンス :10k Ω 規定入力レベル :− 10dBV(0.3162Vrms) 最大入力レベル :+10dBV(3.162Vrms) TASCAM US-20x20... -
Page 99: アナログオーディオ出力定格
100dB 以上(マイク/ LINE IN w LINE OUT、1kHz) o Settings Panel の《INTERFACE》タブ画面で切り換え 出力インピーダンス :75 Ω 動作条件 出力レベル :0.5Vp − p / 75 Ω OPTICAL(S/MUX)IN / OUT 最新の対応 OS 状況については、 TASCAM のウェブサイト (http:// tascam.jp/)ご確認ください。 コネクター :OPTICAL(JEITA RC-5720C) 信号フォーマット:Multi-channel optical format Windows (88.2k/96k/176.4k/192kHz 時は S/MUX に対応) 対応 OS Windows 10 32 ビット... -
Page 100: 対応オーディオドライバー
482.6mm OS X Mavericks 465mm ○ USB2.0 ケーブル × (10.9.5) OS X Mountain Lion ○ USB2.0 ケーブル × (10.8.5) ※ USB3.0 にて使用する場合は、付属の USB3.0 ケーブルを 0 取扱説明書のイラストが一部製品と異なる場合があります。 接続してください。 0 製品の改善により、仕様および外観が予告なく変更することが iOS デバイス あります。 iOS7 以降の Apple 社製品 0 詳細仕様は、リファレンスマニュアルに掲載しています。 TASCAM US-20x20... - Page 101 TASCAM US-20x20...
- Page 102 受付時間は、10:00 〜 12:00 / 13:00 〜 17:00 です。 (土・日・祝日・弊社指定休日を除く) 0 ナビダイヤルがご利用いただけない場合 電話:042-356-9137 / FAX:042-356-9185 故障・修理や保守についてのお問い合わせは ティアック修理センター 〒 358-0026 埼玉県入間市小谷田 858 0570-000-501 一般電話・公衆電話からは市内通話料金でご利用いただけます。 受付時間は、9:30 〜 17:00 です。 (土・日・祝日・弊社指定休日を除く) 0 ナビダイヤルがご利用いただけない場合 電話:04-2901-1033 / FAX:04-2901-1036 ■ 住所や電話番号は、予告なく変更する場合があります。あらかじめご了承ください。 リファレンスマニュアルに関して 取扱説明書(本書)では、本機の各機能について解説しています。各機能の詳細については、リ ファレンスマニュアルをご覧ください。 リファレンスマニュアルは、TASCAM のウェブサイト(http://tascam.jp/)からダウンロー ドすることができます。 TASCAM US-20x20...
- Page 103 En caso de garantía, debe dirigirse al of shipping charges is discussed in the next establecimiento donde adquirió el aparato. section of this warranty. If you require repair services for your TASCAM equipment, please contact the dealer where <日本> HOW YOU CAN GET WARRANTY SERVICE...
- Page 104 WARRANTY / 保証書 Model / 型名 Owner’s name / お名前 US-20x20 Serial No. / 機番 Address / ご住所 Date of purchase / お買い上げ日 Dealer’s name / 販売店 Dealer’s address / 住所 http://teac-global.com/ Memo / 修理メモ...
Need help?
Do you have a question about the us-20x20 and is the answer not in the manual?
Questions and answers