Table of Contents
Advertisement
Quick Links
Download this manual
See also:
Owner's Manual
Advertisement
Table of Contents

Related Manuals for Tascam Celesonic us-20x20


Summary of Contents for Tascam Celesonic us-20x20
- Page 1 D01268420A US-20x20 USB Audio MIDI Interface with Mic Pre/Mixer REFERENCE MANUAL Before connecting this unit to a computer, you must download and install dedicated software on the computer.
-
Page 2: Table Of Contents
Mic preamp mode .............40 INTERFACE page ..............21 Audio interface mode ..........41 Status display area .............21 Digital mixer mode ............42 Setting area ..............21 Level diagrams ..............43 OUTPUT SETTING page ...........22 Using the Settings Panel View menu ......23 Initializing the Settings Panel ........23 TASCAM US-20x20... -
Page 3: Introduction
• AC adapter included Note about computer operation If you are unsure about anything related to the basic operation of a computer when it is mentioned in an explanation in this manual, please refer to the computer operation manual. TASCAM US-20x20... -
Page 4: Names And Functions Of Parts
• Set the LINE OUT 1–2 and PHONES 1/2 knobs to their minimum values before changing a phantom power Use an adapter to connect headphones with a mini plug. switch setting. Failure to do so could cause sudden loud TASCAM US-20x20... -
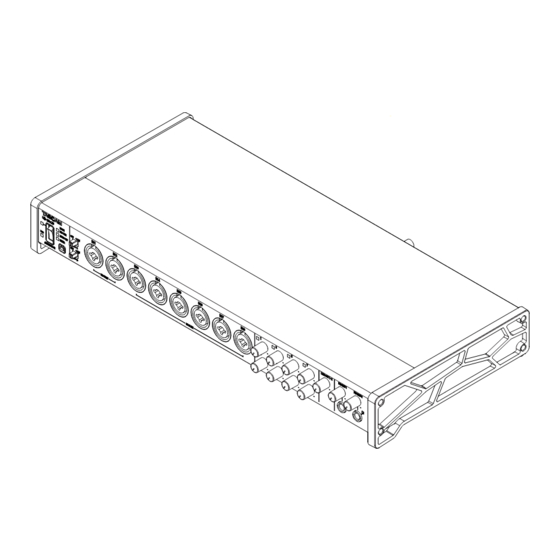
Page 5: Rear Panel
75Ω ON/OFF/THRU/WORD OUT switch Use this switch to make the following settings. • Whether or not the WORD IN connector has 75Ω termination • WORD output THRU/OUT setting (OUT is for WORD only) TASCAM US-20x20... -
Page 6: Installation
The standard OS driver will be used. • When using this unit with an iOS device, the standard OS driver will be used, so there is no need to install dedicated software. CAUTION Before starting to install software, quit other applications. TASCAM US-20x20... -
Page 7: Installing The Windows Driver
“Skip 6. Read the contents of the License Agreement, and select Obtaining Drivers From Windows Update” to cancel the “Agree (A)” if you agree to the terms. Then, click the “Next search. (N)” button. TASCAM US-20x20... -
Page 8: Installing The Mac Settings Panel
Software License Agreement. If you agree to the contents, click “Agree”. In this case, click the OK button to close the message. Then, Then, click the “Next” button. control-click (or right-click) the file and click “Open”. TASCAM US-20x20... -
Page 9: Uninstalling The Dedicated Software
If “View by:” is set to “Large icons” or “Small icons", click “Programs and Features”. 3. Double-click “TASCAM US-20x20 version X.XX” ("X.XX” is the In this case, copy the file from the folder where it is to the driver software version) in the list. -
Page 10: Preparation
Do not use the adapter if there is anything abnormal about the plug after changing it. Use when the plug is abnormal could cause fire or electric shock. Contact the retailer where you purchased the unit or a TEAC service center (on the back cover) to request repair. TASCAM US-20x20... -
Page 11: Connections
• Supplying phantom power to some ribbon mics will break them. If you are unsure, do not supply phantom power to a ribbon mic. TASCAM US-20x20... -
Page 12: Computer Connections
Unbalanced dynamic mics cannot be used when phantom power is enabled. • Supplying phantom power to some ribbon mics will break them. If you are unsure, do not supply phantom power to a ribbon mic. TASCAM US-20x20... -
Page 13: Guitar
• iOS does not support 176.4/192kHz sampling frequencies. CAUTION Before connecting headphones, minimize the volumes with the PHONES 1 and PHONES 2 knobs. Failure to do so might cause sudden loud noises, which could harm your hearing or result in other trouble. TASCAM US-20x20... -
Page 14: Using The Settings Panel
Start button w All Programs w select “US-20x20 will be the same as when last closed, but they have not Settings Panel” under TASCAM and open the Settings Panel. been saved in a scene memory. To save settings in a scene memory, use the Scene Memory menu. -
Page 15: Mixer Page
EQ) display area overview” on page 18.) Click the Select ( ) button of a channel to make equalizer settings for it. Equalizer settings are shown here for the channel selected using its Select ( ) button. “MIXER” page channels 1–2 TASCAM US-20x20... - Page 16 ) display area • The MASTER L/R channel MUTE button will not turn on will show the active equalizer settings. automatically when the unit enters solo mode. NOTE The equalizer cannot be turned on if the sampling frequency is 176.4/192kHz. TASCAM US-20x20...
- Page 17 The indicator lights blue at levels of 0 dB or less and yellow by the faders. Level meters are not affected by fader adjust- at levels from 0 dB to 6 dB. ments or even their channels being muted. TASCAM US-20x20...
-
Page 18: Equalizer (4-Band Parametric Eq) Display Area Overview
HIGH MID: 0.25 – 16.00 (default: 1.00) LOW MID: 0.25 – 16.00 (default: 1.00) LCF button Click the LCF button to enable a low cut filter that cuts noise and other sounds at low frequencies. The LCF button lights when enabled. (Default: off ) TASCAM US-20x20... -
Page 19: Compressor Display Area Overview
• When the compressor is off, the compressor curve will appear but the meters will not be active. TASCAM US-20x20... -
Page 20: Link Button Overview
When a LINK button is turned on (lit), the select button name changes to a name used when the stereo link is active. Examples When the “M/INST 1” and “M/INST 2” buttons are linked, the name of the button changes to “M/INST 1-2”. TASCAM US-20x20... -
Page 21: Interface Page
An image of the rear panel of the unit is shown at the bottom If the connected device is a TASCAM device, the input of the page so you can check the layout of connectors, for clock signal will be automatically identified and set. -
Page 22: Output Setting Page
Output the signals from an AUX BUS (1–4) COMPUTER 1–COMPUTER 20 When the operation mode is AUDIO I/F, signals are output from Computer BUS (1–20) SOLO L/SOLO R: When the operation mode is MIXER, signals are output from SOLO BUS (L/R). TASCAM US-20x20... -
Page 23: Using The Settings Panel View Menu
LINE OUT 9: COMPUTER 9 o LINE OUT 10: COMPUTER 10 o COAX L: COMPUTER 11 o COAX R: COMPUTER 12 o OPT 1: COMPUTER 13 o OPT 2: COMPUTER 14 o OPT 3: COMPUTER 15 o OPT 4: COMPUTER 16 TASCAM US-20x20... -
Page 24: Resetting The Reverb Settings
“OUTPUT SETTING” page will be Click the “Cancel” button to return to the Settings Panel used for the input and output settings. without resetting. • There is no iOS device Settings Panel, so the unit will operate using the default values. TASCAM US-20x20... -
Page 25: Using The Scenememory Menu
USB. See “Saving Settings Panel settings to the unit” on page 27 for details. NOTE The Buffer Size item on the “INTERFACE” page is not saved. TASCAM US-20x20... -
Page 26: Loading Settings Panel Settings
A scene memory that has never been saved contains no 4. Input a new name for the scene memory, and click the “OK” Settings Panel settings. If you try to load such a scene, the button to confirm the change. following message will appear. Windows version TASCAM US-20x20... -
Page 27: Resetting All Scene Memories
3. Click the “OK” button to initialize all the scene memories. NOTE NOTE The Buffer Size item on the “INTERFACE” page is not saved. Click the “Cancel” button to return to the Settings Panel without initializing the 10 scene memories. TASCAM US-20x20... -
Page 28: Operation Modes
This unit has the following three operating modes. • MIC PRE Windows The unit operates as a microphone preamp. Control Panel w Sound window w Speakers TASCAM • AUDIO I/F US-20x20 w Properties (p) w US-20x20 Properties Advanced tab w Default Format The unit operates as an audio interface. -
Page 29: Input And Output Channels In Mic Preamp Mode
You can change the sampling frequency (44.1 kHz by default) in digital mixer mode in the following manner. Windows Control Panel w Sound window w Speakers TASCAM US-20x20 w Properties (p) w US-20x20 Properties Advanced tab w Default Format Applications folder w Utilities folder w Audio MIDI Setup... -
Page 30: Application Guide
2. Click Control Panel. 3. Click “Hardware and Sound", and then open the “Sound” Windows Media Player window. 4. On the Playback page, right-click “Speakers TASCAM US-20x20", and click “Set as Default Device” in the pop-up menu that appears. Windows 10 When you do this, the green check mark (ü) appears next to... -
Page 31: Windows 7
If you do not see this item, click Hardware and Sound. menu. The speaker mark appears next to “US-20x20”. 3. On the Playback page, right-click “Speakers TASCAM US-20x20", and click “Set as Default Device” in the pop-up menu that appears. -
Page 32: Midi Implementation Chart
All notes off × × Other Thru Active sense × × Reset × × Notes Mode 1: OMNI ON, POLY Mode 2: OMNI ON, MONO –: YES Mode 3: OMNI OFF, POLY Mode 4: OMNI OFF, MONO ×: NO TASCAM US-20x20... -
Page 33: Troubleshooting
If you are still unable to resolve your problems please contact Please confirm the following while the unit is connected to the TASCAM customer support (see the end of this manual) with the computer. Moreover, if you make the following settings, sound... - Page 34 1. Right-click “Computer” and select “Properties”. 2. Click “Advanced system settings”. 3. Click “Settings” in the “Performance” section of the “Advanced” tab of the “System Properties” window. 4. In the “Visual Effects” tab of the “Performance Options” window, select “Adjust for best performance”. TASCAM US-20x20...
- Page 35 10 – Troubleshooting I am using SONAR and the performance with my I see that the US-20x20 recommends that I change TASCAM US-20x20 interface is not very good. How the Windows Power Management settings. How do I do I fix this?
-
Page 36: Specifications
Connectors: OPTICAL (JEITA RC-5720C) Connectors: 6.3mm (1/4") standard TS jacks (Tip: HOT, Signal format: Multi-channel optical (supports S/MUX when Sleeve: GND) 88.2/96/176.4/192kHz) Input impedance: 10 kΩ Nominal input level: −10 dBV (0.3162 Vrms) Maximum input level: +10 dBV (3.162 Vrms) TASCAM US-20x20... -
Page 37: Control Input/Output Ratings
Crosstalk above requirements. Even computers that meet the same system requirements might have processing capabilities 100 dB or more (MIC/LINE IN w LINE OUT, 1 kHz) that differ according to their settings and other operating conditions TASCAM US-20x20... -
Page 38: Mac Os X
OS X Mountain Lion USB 2.0 cable ü (10.8.5) iOS devices Device made by Apple Inc. running iOS 7 or later Supported audio drivers Windows USB Audio Class 2.0, ASIO 2.0, WDM (MME), MIDI Core Audio, Core MIDI TASCAM US-20x20... -
Page 39: Dimensional Drawings
445mm 59mm With rack mount adapters attached 432.6mm 44mm 482.6mm 465mm • Illustrations in this reference manual might differ in part from the actual product. • The external appearance might be changed without notification to improve the product. TASCAM US-20x20... -
Page 40: Block Diagrams
11 – Specifications Block diagrams Mic preamp mode TASCAM US-20x20... -
Page 41: Audio Interface Mode
11 – Specifications Audio interface mode TASCAM US-20x20... -
Page 42: Digital Mixer Mode
11 – Specifications Digital mixer mode TASCAM US-20x20... -
Page 43: Level Diagrams
11 – Specifications Level diagrams TASCAM US-20x20... - Page 44 TEAC CORPORATION http://tascam.jp/ Phone: +81-42-356-9143 1-47 Ochiai, Tama-shi, Tokyo 206-8530 Japan TEAC AMERICA, INC. http://tascam.com/ Phone: +1-323-726-0303 1834 Gage Road, Montebello, California 90640 USA TEAC MEXICO, S.A. de C.V. http://teacmexico.net/ Phone: +52-55-5010-6000 Río Churubusco 364, Colonia Del Carmen, Delegación Coyoacán, CP 04100, México DF, México TEAC UK Ltd.
Need help?
Do you have a question about the Celesonic us-20x20 and is the answer not in the manual?
Questions and answers