
Subscribe to Our Youtube Channel
Related Manuals for Uniden CMX760


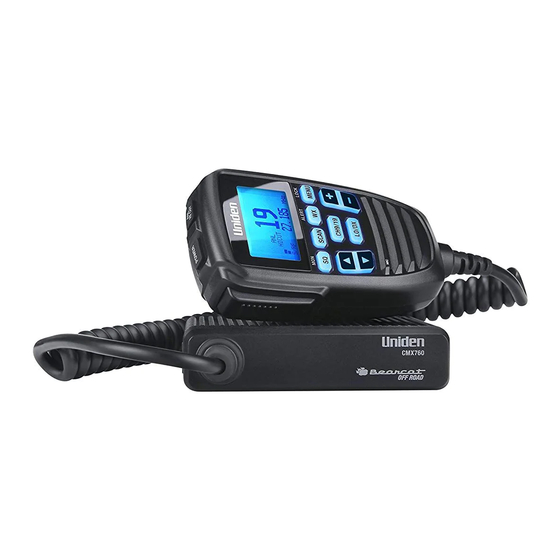
Summary of Contents for Uniden CMX760
- Page 1 CMX760 PROFESSIONAL MOBILE CB RADIO Owner’s Manual © 2017 Uniden America Corporation U01UT417ZZZ(0) Irving, Texas Printed in Vietnam...
-
Page 3: Table Of Contents
Disconnect the Microphone ..........15 INSTALL RADIO BRACKET/INSTALL RADIO ....15 Attach Side Rails ............15 Attach Bracket/Install Radio .........16 EMERGENCY OPERATION ........ 17 USING YOUR CMX760 ........17 SPEAKER/MICROPHONE LCD DISPLAY ......17 BASIC OPERATIONS ............21 Turn On/Off ..............21 Transmit/Receive ............22 Adjust Volume ..............22... - Page 4 Adjust Squelch ..............22 Set Monitor Mode ............23 Automatic Noise Limiter (ANL/HI CUT) ......23 Adjust Radio Sensitivity (LO/DX) ........24 Set Key Lock ..............24 CHANNEL SCAN..............25 WEATHER MODE (WX MODE) .......... 25 Set Weather Scan ............26 Set Weather Alert Mode ..........26 MENU OPERATION ............
-
Page 5: Description
40 AM frequencies authorized by the Federal Communications Commission (FCC). The CMX760 is designed to provide years of trouble-free service. Its slim profile can fit easily under the seat to free up space in the vehicle’s cabin. - Page 6 Replacement or substitution of crystal, transistors, ICs, regulator diodes, or any other part of a unique nature, with parts other than those recommend by Uniden, may cause violations of the technical regulations in Part 95 of the FCC Rules or in violation of type acceptance requirements in Part 2 of the rules.
-
Page 7: What's In The Box
WHAT’S IN THE BOX CMX760 Radio Remote LCD Microphone Speaker Hanger with Microphone Hardware CMX760 CMX760 Slide CMX760 DC Extension Mount Bracket Power Cord with Cable with Hardware Fuse Not Shown: Printed Materials... -
Page 8: Controls And Connectors
CONTROLS AND CONNECTORS Radio (Front and Back) FRONT BACK NUMBER NAME MIC Jack Antenna Connection Power Input Connection (13.8VDC) EXT SP - Exterior Speaker Jack... -
Page 9: Remote Lcd Speaker Mic
Remote LCD Speaker MIC NAME Microphone Hanger PTT - Push to Talk Button Power Button ANL / HI CUT Button LCD Screen SCAN Button SQ/MON Button... -
Page 10: Installation
MENU/LOCK Button WX/ALERT Button INSTALLATION You can install the CMX760 either on top/ underneath a flat surface like a dashboard or under the driver’s seat in a vehicle. Select a location that is convenient for operating the radio but does not interfere with the driver or passenger. -
Page 11: Connect Power
If in doubt, contact your vehicle dealer for information. The CMX760 can operate on 12VDC power supply. Ground Information This radio may be installed and used in any 12- volt DC negative ground system vehicle. -
Page 12: Connect Power
Because the maximum power output of the transmitter is limited by the FCC, the quality of your antenna is very important. To achieve the maximum transmission distance, Uniden strongly recommends that you install only a high quality antenna. You have just purchased a superior radio;... -
Page 13: Safety Notice
Only a properly matched antenna system will allow maximum power transfer from the 50-ohm transmission line to the radiating element. Your Uniden dealer is qualified to help you select the proper antenna for your requirements. A whip style antenna may be used for automobile installation. -
Page 14: Install Microphone Hanger/Connect Microphone
Note that Uniden does not specify or supply any antenna with this radio. While a 0 dBi gain antenna is normal for a typical installation, the above limit applies to any antenna with up to 3 dBi gain. INSTALL MICROPHONE HANGER/CONNECT MI-... -
Page 15: Disconnect The Microphone
MIC from the other end of the extension cable. INSTALL RADIO BRACKET/INSTALL RADIO The CMX760 uses a slide mount assembly to mount the unit onto a surface. It can be mounted either below or on top of a surface. -
Page 16: Attach Bracket/Install Radio
slots. Be sure the slide mount latches face outward. L-Tab (2 on each rail) L-Tab Slot (2 on each side) Slide Mount Latch (1 on each rail) 2. Use the screws provided to fasten the guide rails into position on the radio. Attach Bracket/Install Radio Using the screws provided, screw the bracket into a stable, level surface. -
Page 17: Emergency Operation
Use Channel 9 to render assistance to a motorist. This is an FCC rule and applies to all CB radio operators. USING YOUR CMX760 SPEAKER/MICROPHONE LCD DISPLAY BUSY SCAN ALERT LOCAL1 HICUT 27.185... -
Page 18: Mon Monitor
ITEM BLINKING TX * Receiving Transmitting Transmit error Busy • No signal/ • Receiving signal signal is too weak strong to open enough Squelch to open Squelch • Monitor function is active Monitor Monitor function is function is inactive. active. •... - Page 19 ITEM BLINKING ANL / • ANL / Press once - HICUT HICUT displays functions (active). Press once inactive. again - goes away (inactive). Press and HICUT hold - displays (active) Press and hold again HICUT goes away (inactive). Local 1 Local Local setting setting is...
- Page 20 ITEM BLINKING Channel Backlight Channel TX error Indicator color number Menu setting displays. mode in Menu In Menu mode. mode, menu selection displays. Frequency WX mode. In Menu Volume Indicator mode, Menu setting displays. mode (EX: 27.185) In CB mode, Squelch Frequency setting...
-
Page 21: Basic Operations
The CMX760 remembers its power condition when it is turned off or powered down. For example: if the CMX760 is on when you disconnect power to the unit, when you reconnect power it remembers that it was on and returns to the ON state. You do not have to press POWER again. -
Page 22: Transmit/Receive
Transmit/Receive Press and hold the PTT key to transmit. displays. 2. Release PTT to receive. goes away. Adjust Volume Press the +/- keys to turn the volume up and down. VOL. There are 8 volume levels, from 00 (Off) to 07. displays. -
Page 23: Set Monitor Mode
Set Monitor Mode Turn on Monitor to have the radio search for transmissions on the current channel. Press and hold SQ/MON. blinks on the BUSY screen and displays. 2. To stop monitoring, press and hold SQ/MON. BUSY Monitor function stops and not display on the screen. -
Page 24: Adjust Radio Sensitivity (Lo/Dx)
Adjust Radio Sensitivity (LO/DX) Noise caused by strong signals from nearby channels may be heard. The LO/DX settings (LOCAL 1 and LOCAL 2) will reduce this noise by LOCAL 1 LOCAL 2 reducing the radio’s sensitivity. If do not display, noise levels are not reduced. LOCAL 1 Press LO/DX. -
Page 25: Channel Scan
CHANNEL SCAN When Channel Scan is on, the radio scans channels until it receives a signal. It will move to the next channel if no signal is received after 3 seconds. SCAN Press SCAN. displays and the radio begins scanning upward through the channels. -
Page 26: Set Weather Scan
Set Weather Scan Weather Scan mode allows the radio to move to the next weather channel if no signal is detected. Press WX/ALERT to enter Weather mode. The icon displays and the radio tunes to the last weather channel. 2. Press SCAN to scan weather channels. 3. -
Page 27: Menu Operation
MENU OPERATION Press MENU/LOCK to access the 6 CMX760 menus: ƒ Backlight Color ƒ Dimmer ƒ Contrast ƒ Key Beep ƒ Roger Beep ƒ Battery Check Menus will time out after about 10 seconds. Select Backlight Color Press MENU/LOCK to activate the menus. -
Page 28: Set Contrast
DIMMER Press MENU/LOCK until displays on the screen and the dimmer level displays and blinks. 2. Press ▲ or ▼ to scroll through the options [oF (OFF), 1, 2, or 3]. 3. When you have selected a dimmer level, press and hold MENU/LOCK to save the selection and exit the menus. -
Page 29: Set Roger Beep
KEY BEEP Press MENU/LOCK until displays on the screen and the volume level displays and blinks. 2. Press ▲ or ▼ to scroll through the options [oF (OFF), 1 - 7]. 3. When you have selected a Key Beep volume level, press and hold MENU/LOCK to save the selection and exit the menus. -
Page 30: Preventive Maintenance
4. Be sure all screws and mounting hardware are tight. MAINTENANCE The CMX760 is designed to give you years of trouble-free service. There are no user- serviceable parts inside. Except for the fuse in the DC power cord, no maintenance is required. -
Page 31: Troubleshooting
Use only the fuse specified for your CMX760. Failure to do so may void your warranty. TROUBLESHOOTING In the event of system malfunction, perform the following procedures: PROBLEM SUGGESTION Unit does not Check power cord connections. power up Check fuse. -
Page 32: Servicing Your Radio
If you do not get satisfactory results after performing these checks, visit the Uniden website (www.uniden.com) for troubleshooting and FAQ information. SERVICING YOUR RADIO It is the user’s responsibility to see that this radio is operating at all times in accordance with the FCC Citizens Radio Service regulations. -
Page 33: Antenna Connector
Current Drain AM Full Modulation: 1.5A (max) At no signal: 400mA (max) Operating –22°F to 140°F Temperature: –30°C to 60°C Accessories: DC Power Cord with Built-In Fuse Microphone Microphone Hanger with Screws Mounting Bracket with Screws Owner’s Manual Part 95 Subpart D (FCC Rules) Size (W x D x H): 4 in. - Page 34 Frequency Toler- ±0.002% ance: Spurious Rejec- -70 dBc tion: RECEIVER Sensitivity at 10 –110 dBm dB S/N Maximum Sensi- –114 dBm tivity Squelch Sensitiv- Step 1 (Max): –107 dBm Step 7 (Max): –47 dBm Signal Meter S-9: –67 dBm Audio Output 3 watts Power (max.): Adjacent Channel...
-
Page 35: Fcc Part 15 & Ic Compliance
Distortion (0.5W output) @ 1KHz ± 3KHz DEV. Maximum Audio Output Power Alert Sense –110 Alert Frequency 1040 to 1060 Squelch Sensitiv- –110 ity (Threshold) Specifications shown are typical and subject to change without notice. FCC PART 15 & IC COMPLIANCE FCC PART 15 COMPLIANCE This device complies with Part 15 of the FCC rules. -
Page 36: Ic Compliance
Avis de conformité à la FCC : Ce dispositif a été testé et s’avère conforme à l’article 15 des règlements de la Commission fédérale des communications (FCC). Ce dispositif est soumis aux conditions suivantes: 1) Ce dispositif ne doit pas causer d’interférences nuisibles et; 2) Il doit pouvoir supporter les parasites qu’il reçoit, incluant les parasites pouvant nuire à... -
Page 37: One-Year Limited Warranty
CORPORATION (“Uniden”) ELEMENTS OF WARRANTY: Uniden warrants, for one year, to the original retail owner, this Uniden Product to be free from defects in materials and craftsmanship with only the limitations or exclusions set out below. WARRANTY DURATION: This warranty to the... - Page 38 (E) used in any conjunction with equipment or parts or as part of any system not manufactured by Uniden, or (F) installed or programmed by anyone other than as detailed by the owner’s manual for this product.
- Page 39 The Product should be shipped freight prepaid, by traceable means, to warrantor at: Uniden America Service C/O Saddle Creek 743 Henrietta Creek Rd., Suite 100 Roanoke, TX 76262...
-
Page 40: Radio Code Definitions
RADIO CODE DEFINITIONS The following list contains common “10-Codes” used by CB radio operators for faster communication and better understanding. CODE MEANING CODE MEANING 10-1 Received poorly 10-34 Trouble at this station 10-2 Receiving well 10-35 Confidential information 10-3 Stop 10-36 Correct time is transmitting... - Page 41 CODE MEANING CODE MEANING 10-11 Talking too 10-45 All units within rapidly range please report 10-12 Visitors present 10-50 Break channel 10-13 Advise Weather/ 10-60 What is next Road conditions message number 10-16 Make pickup at 10-62 Unable to copy, use phone 10-17 Urgent business 10-63...
- Page 42 CODE MEANING CODE MEANING 10-25 Can you contact 10-82 Reserve room 10-26 Disregard last 10-84 My telephone information number is 10-27 I am moving to 10-85 My address is channel 10-28 Identify your 10-91 Talk closer to station microphone 10-29 Time is up for 10-93 Check my...
Need help?
Do you have a question about the CMX760 and is the answer not in the manual?
Questions and answers