Table of Contents
Advertisement
Advertisement
Table of Contents

Related Manuals for Finnlo AUTARK 600


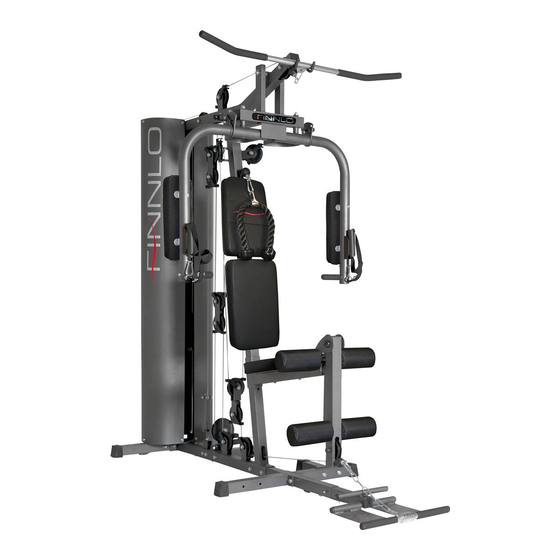
Summary of Contents for Finnlo AUTARK 600
-
Page 2: Table Of Contents
Inhaltsverzeichnis Index Seite/Page Safety instructions Sicherheitshinweise General Allgemeines Packaging Verpackung Assembly Montage Check list Checkliste Assembly Steps Montageschritte Care and Maintenance Pflege und Wartung Training manual Trainingsanleitung Trainings photos Übungsbilder Adjustments Verstellmöglichkeiten Explosion drawing Explosionszeichnung Parts list Teileliste Warranty (Germany only) Garantie Service-Hotline &... -
Page 3: Sicherheitshinweise
1. Sicherheitshinweise 1. Safety instructions WICHTIG! IMPORTANT! Es handelt sich bei diesem Kraftgerät um ein Trainings- The gym is produced according to DIN EN 957-1/2. gerät der Klasse HC, nach DIN EN 957-1/2. Max. Belastbarkeit 120 kg. ... -
Page 4: Allgemeines
2. Allgemeines 2. General Der Anwendungsbereich dieses Trainingsgerätes ist der This training equipment is for use at home. The equipment Heimbereich. Das Gerät entspricht den Anforderungen der DIN complies with the requirements of DIN EN 957-1/2 Class HC. Damage to health cannot be ruled out if this equipment is not EN 957-1/2 Klasse HC. -
Page 5: Checkliste
3. Aufbau 3. Assembly Um den Zusammenbau des Kraftgerätes für Sie so einfach wie In order to make assembly of the gym as easy as possible for möglich zu gestalten, haben wir die wichtigsten Teile bereits you, we have preassembled the most important parts. Before vormontiert. -
Page 7: Montageschritte
3.2 Montageschritte / Assembly steps Schritt / Step 1 Schritt / Step 2... - Page 8 Schritt / Step 3...
- Page 9 Schritt / Step 4...
- Page 10 Schritt / Step 5...
- Page 11 Schritt / Step 6...
- Page 12 Schritt / Step 7...
- Page 13 Schritt / Step 8...
- Page 14 Schritt / Step 9...
- Page 15 Schritt / Step 10...
- Page 16 Schritt / Step 11...
- Page 17 Schritt / Step 12...
- Page 18 Schritt / Step 13...
- Page 19 Schritt / Step 14...
- Page 20 Schritt / Step 15...
- Page 21 Schritt / Step 16...
- Page 22 Schritt / Step 17...
- Page 23 Schritt / Step 18-1...
- Page 24 Schritt / Step 18-2...
- Page 25 Schritt / Step 19-1...
- Page 26 Schritt / Step 19-2...
- Page 27 Schritt / Step 20-1...
- Page 28 Schritt / Step 20-2...
- Page 29 Schritt / Step 21-1...
- Page 30 Schritt / Step 21-2...
- Page 31 Schritt / Step 21-3...
- Page 32 Schritt / Step 22...
- Page 33 Schritt / Step 23...
-
Page 34: Care And Maintenance
4. Pflege und Wartung 4. Care and Maintenance Wartung Maintenance Grundsätzlich bedarf das Gerät keiner Wartung principle, equipment does require Kontrollieren Sie regelmäßig alle Geräteteile und den maintenance. festen Sitz aller Schrauben und Verbindungen Regularly inspect all parts of the equipment and the ... -
Page 35: Trainings Photos
5.1 Trainings photos 5.1 Übungsbilder Bizeps: Biceps: Ausgangsposition: Stellen Sie sich auf die Trittplatte. Ihre Arme Start position: Stand on the pedal. Arms are nearly complete sind fast gesteckt. straight. Endposition: Fixieren Sie die Ellenbogen am Körper und führen die Endposition: Fix the ellbow at side of your body and move the Unterarme nach oben. - Page 36 Trizeps stehend: Triceps, standing version: Ausgangsposition: Stellen Sie sich auf/hinter die Trittplatte. Ihre Start position: Stand on or behind the pedal. Ellbow is fixed at Arme sind angewinkelt. Der Ellenbogen ist am Körper fixiert. your body and the forearms are angled. Endposition: Führen Sie die Unterarme an der Seite ihres Körpers Endposition: Move your forearms downwards.
- Page 37 Lat pull: Lat-Ziehen: Start position: Arms are nearly complete straight. Fix your legs Ausgangsposition: Ellenbogen sind fast gestreckt. Schultern sind with the round cushion. in der Horizontalen fixiert. Beine mit dem Rundpolster fixieren. Endposition: Pull down the lat bar, until it nearly touch your neck. Endposition: Latissimusstange nach unten führen, bis diese fast Attention: During relaesing, please pay attention that the den Nacken erreicht.
- Page 38 Bauch: Abdominal: Ausgangsposition: Hände greifen das V-Seil und legen dieses auf Start position: Hands hold the V-rope, and put it into your neck. die Schultern. Rücken liegt am Rückenpolster an. Your back should be resting on the backrest cushion. Endposition: Oberkörper zieht nach vorne unten. Endposition: Upper body is moving downwards Achtung: Füße nicht in das Rundpolster einhängen.
- Page 39 Butterfly: Butterfly: Start position: Put your forearms on the outside of the Ausgangsposition: Legen Sie beide Unterarme auf die Außenseite butterflyarms. der Rundpolster. Endposition: Move both arms together. Endposition: Führen Sie beide Arme nach vorne zusammen. Bankdrücken: Benchpress: Ausgangsposition: Ellenbogen sind auf Schulterhöhe und Start position: Ellbows should have the same height as the abgewinkelt.
- Page 40 Leg abduction: Bein Abduktion: Start position: Fix the loop on your joint and hold yourself on the Ausgangsposition: Befestigen Sie die Schlaufe am Sprunggelenk/ gym. The leg is slightly straight moved to the inner side. Wade. Halten Sie sich am Gerät fest. Das Bein ist fast gestreckt Endposition: Move your leg to the outside und leicht nach innen geneigt.
- Page 41 Cable Cross: Cable Cross: Start position: Fix the handles in the desired lengh on the Ausgangsposition: Befestigen Sie die Handgriffe mit der butterflyarms and move them to the rear position. The lengh of gewünschten Länge am Butterflyarm und fixieren diesen in the handles is correct, if you feel a light tension in your chest.
-
Page 42: Adjustments
5.2 Verstellmöglichkeiten 5.2 Adjustments Rückenlehnenverstellung: Adjustment of Backrest cushion: Für eine bessere Effektivität bei bestimmten Übungen kann es For different exercises it can be more usefull, if you change the ratsam sein, die Rückenlehne weiter vorne zu positionieren. vertical position of the backrest cushion. Pull out the Pin and Dabei ziehen Sie den Pin heraus und führen die Rückenlehne in move the backrest cushion in the desired position. -
Page 43: Explosiondrawing 1
6. Explosionszeichnung 1 Explosiondrawing 1... - Page 44 Explosionszeichnung 2 Explosiondrawing 2...
- Page 45 Explosionszeichnung 3 Explosiondrawing...
-
Page 46: Parts List
7. Teileliste / Parts list Position Bezeichnung Description Abmessung/Dimension Menge/Quantity 3929 -1 Standfuß, hinten Rear foot tube Grundrahmen Bottom frame Seitlicher Rahmen Side frame Rahmen für Trittplatte Pedal frame Trittplatte, links Pedal, left side Trittplatte, rechts Pedal, right side Gewichteführungsstange Weight tube Gewichteauswahstab Wegiht selection rod... - Page 47 Gebrauch ausgetauscht intensive or long-term use. In this case, please contact Finnlo werden müssen. In diesem Falle wenden Sie sich bitte an den Customer Service. You can request the parts and be charged Finnlo –...
-
Page 48: Warranty (Germany Only)
8. Garantiebedingungen / Warranty (Germany only) Für unsere Geräte leisten wir Garantie gemäß nachstehenden Bedingungen: Wir beheben unentgeltlich nach Maßgabe der folgenden Bedingungen (Nummern 2-5) Schäden oder Mängel am Gerät, die nachweislich auf einem Fabrikationsfehler beruhen, wenn sie uns unverzüglich nach Feststellung und innerhalb von 36 Monaten nach Lieferung an den Endabnehmer gemeldet werden. -
Page 49: Service-Hotline
Fax: 0731-97488-64 Montag bis Donnerstag von 09.00 Uhr bis 16.00 Uhr Freitag von 09.00 Uhr bis 14.00 Uhr E-Mail: service@hammer.de Art.-Nr.:3929 Autark 600 Hammer Sport AG Serien Nr.: Abt. Kundendienst Von-Liebig-Str. 21 89231 Neu-Ulm Ort: ........Datum: ........Ersatzteilbestellung (Bitte in Druckbuchstaben ausfüllen!)
Need help?
Do you have a question about the AUTARK 600 and is the answer not in the manual?
Questions and answers