Table of Contents
Advertisement
Quick Links
Advertisement
Table of Contents

Related Manuals for Olympia Joy Plus


Summary of Contents for Olympia Joy Plus
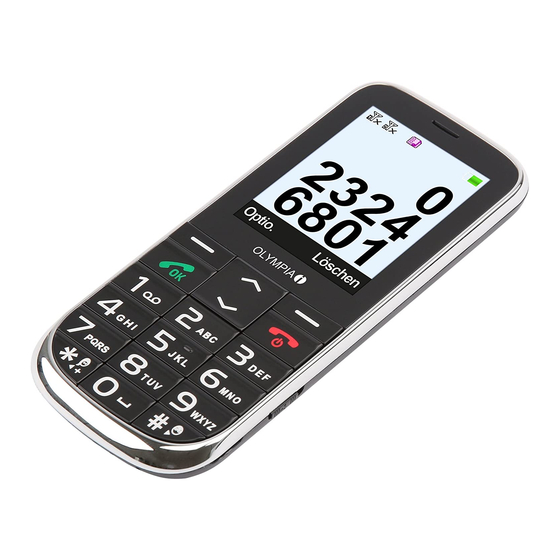
- Page 1 Mobile Phone JOY Plus...
-
Page 3: Table Of Contents
Contents ONTENTS For Your Safety ....... . . 8 Observe Safety Instructions ......9 Tips Concerning the Battery . - Page 4 Contents Using the Mobile Phone ......29 Navigating in the Menu ......29 Display Texts .
- Page 5 Contents Deleting Text Messages ........56 Saving Phone Numbers in the Phone Book .
- Page 6 Contents Emergency Call Function (SOS Key) ....73 Switching the Emergency Call Function On/Off ....73 Setting Up a Call Chain .
- Page 7 Contents Caller Picture Dialling ......98 Transferring Photos from Computer ......99 Adding Contacts to Picture Selection .
-
Page 8: For Your Safety
For Your Safety For Your Safety The information on the following pages will help to ensure you can use the mobile phone safely. Read the operating manual carefully and pay attention to the information when using your mobile phone. Keep the operating manual handy for future reference. -
Page 9: Observe Safety Instructions
For Your Safety Observe Safety Instructions Observe Safety Instructions Pay attention to the following safety instructions to protect yourself from any pos- sible personal injury. WARNING! Risk of electric shock! Never attempt to open and repair the device or accessories yourself. Never touch bare contacts with metallic objects. Never plug-in or unplug the charging adapter when your hands are wet. - Page 10 For Your Safety Observe Safety Instructions CAUTION! The ringing tone is issued via the loudspeaker. Take an incoming call fi rst and then hold the mobile phone to your ear. This prevents any possible hearing damage. CAUTION! Risk of explosion through improper replacement or removal of the lithium-ion battery! Only replace the lithium-ion battery by a type ap- proved by the manufacturer.
- Page 11 For Your Safety Observe Safety Instructions Avoid the risk of property damage to your device and observe the information! IMPORTANT! Protect the device from moisture, dust, liquids, chemicals, vapours, heat and direct sunlight. The phone is not waterproof; therefore, keep it dry. IMPORTANT! Only use original accessories.
-
Page 12: Tips Concerning The Battery
For Your Safety Observe Safety Instructions Tips Concerning the Battery The following tips and information help to ensure the mobile phone battery works properly. ■ Only use batteries and power adapters approved by the manufacturer, other- wise the batteries could be damaged. ■... -
Page 13: Intended Use
Checking the Package Contents Before starting up the mobile phone, check the package contents. The following are enclosed with the mobile phone supplied: ■ JOY Plus mobile phone ■ USB connection cable ■ Charging unit ■... -
Page 14: Mobile Phone In Detail
General Overview Keys and Operating Elements Mobile Phone in Detail Familiarise yourself with the elements on the mobile phone before actually start- ing to use the mobile phone. Keys and Operating Elements The following diagrams illustrate the keys and operating elements which you can use to exploit the functional scope of the mobile phone to the full. - Page 15 General Overview Keys and Operating Elements...
-
Page 16: Rear View And Side View
General Overview Rear View and Side View Rear View and Side View More elements are available on the sides, rear and underside of the mobile phone which provide different functions to operate the mobile phone. Loudspeaker (play music and handsfree function) Emergency call key (SOS) Camera Torch switch... - Page 17 General Overview Rear View and Side View...
-
Page 18: Putting The Mobile Phone Into Operation
Putting the Mobile Phone into Operation Inserting the SIM Cards Putting the Mobile Phone into Operation This chapter provides information on how to put your mobile phone into operation. The phone is ready for use after just a few steps. Before you start, please read the information in Section Observe Safety Instructions on page 9. -
Page 19: Inserting The Sim Cards
Putting the Mobile Phone into Operation Inserting the SIM Cards Inserting the SIM Cards Before you can start to use the mobile phone, you must insert one or more SIM cards (not included in the equipment supplied) in the phone. At certain points of this operating manual, reference is made to SIM1. -
Page 20: Inserting The Microsd Memory Card
Putting the Mobile Phone into Operation Inserting the MicroSD Memory Card Inserting the MicroSD Memory Card A microSD memory card (not included in the equipment supplied) can be inserted, as an option, in the mobile phone. This increases the quantity of data which can be stored on the mobile phone. -
Page 21: Inserting The Battery
Putting the Mobile Phone into Operation Inserting the Battery Inserting the Battery Before you can use the mobile phone, you must insert the battery in the mobile phone. Insert the battery as illustrated. The shape of the compartment ensures the battery cannot be inserted incorrectly. -
Page 22: Charging The Battery
Putting the Mobile Phone into Operation Charging the Battery Charging the Battery When charging the battery for the fi rst time, it should be charged for at least four hours. Some batteries only reach their full capacity after several complete charge/ discharge cycles. -
Page 23: Charging The Battery, Charging Adapter
Putting the Mobile Phone into Operation Charging the Battery Charging the Battery, Charging Adapter Connect the power plug to a properly installed power socket. Connect the microUSB plug to the microUSB connection port on the mobile phone. Ensure that the microUSB plug is correctly aligned to the microUSB connection port when connecting it. -
Page 24: Charging The Battery, Charging Cradle
Putting the Mobile Phone into Operation Charging the Battery Charging the Battery, Charging Cradle Connect the power plug to a properly installed power socket. Connect the microUSB plug to the USB connection port on the rear side of the charging cradle. Place the mobile phone in the charging cradle as illustrated. -
Page 25: Switching The Mobile Phone On And Off
Putting the Mobile Phone into Operation Switching the Mobile Phone On and Off Switching the Mobile Phone On and Off Press and hold the On-hook key for three seconds. Some SIM cards will require you to enter a PIN code. Follow the instructions on the screen. -
Page 26: Start Screen
Putting the Mobile Phone into Operation Start Screen Start Screen The start screen is the standard display which appears when the mobile phone is switched on. The start screen contains various useful indicators. Press any key in order to switch on the start screen on the mobile phone display. Depending on the settings defi ned, it may be necessary to deactivate the key lock. - Page 27 Putting the Mobile Phone into Operation Start Screen...
-
Page 28: Other Icons On The Start Screen
Putting the Mobile Phone into Operation Start Screen Other Icons on the Start Screen Apart from the icons permanently on the start screen, other icons appear at the top edge of the start screen according to the current settings. A selection of the most frequent icons appears below. -
Page 29: Using The Mobile Phone
Using the Mobile Phone Navigating in the Menu Using the Mobile Phone Navigating in the Menu Use the following keys to navigate through the menus provided by the mobile phone. Navigate up and down in the menu. Open submenus and confi rm entries. Navigate one menu level back or discard all your entries and settings. -
Page 30: Using The Function Keys
Using the Mobile Phone Using the Function Keys Using the Function Keys The operating elements on the sides or rear of the phone are assigned the follow- ing functions: Switch the torch on or off. Trigger an emergency call to the stored phone numbers. - Page 31 Using the Mobile Phone Using the Function Keys Entering Phone Numbers and Letters If you want to enter phone numbers or digits or delete entries, use the digit keys or softkeys provided o the mobile phone keyboard. Multi-tap When the mobile phone is initially supplied, Multitap_de (German) is set. You can change the input method (e.g.
-
Page 32: Punctuation And Special Characters
Using the Mobile Phone Using the Function Keys Punctuation and Special Characters Press the Star key when you are in Edit mode. All the punctuation marks and special characters available are displayed. Use the navigation keys to move to the required character and press the left-hand softkey to accept it. -
Page 33: Making Calls
Using the Mobile Phone Making Calls Making Calls When you want to make a call, proceed as follows: Enter the required phone number using the digit keys and then press the Call key. Taking, Ending and Rejecting Calls When you want to take, end or reject calls, use the following keys: Take an incoming call. -
Page 34: Mobile Phone Menu
Mobile Phone Menu Making Calls Mobile Phone Menu The main mobile phone menu is divided into topically organised groups (submen- us). The following descriptions always assume that the starting point for the operation is the mobile phone's start screen. ┣Phonebook┫ ┣Settings┫... -
Page 35: Overview Of The Most Important Menus
Mobile Phone Menu Overview of the Most Important Menus Overview of the Most Important Menus ┣Call center┫ ┣Call center┫ ┣Call settings┫ ┣Caller ID┫ ┣Call waiting┫ ┣Call divert┫ ┣Auto redial┫ ┣Call time reminder┫ ┣Answer mode┫ ┣Phonebook┫ ┣Phonebook┫ ┣Phonebook settings┫ ┣Preferred storage┫ ┣Speed dial┫... -
Page 36: Menu Options Available During A Call
Mobile Phone Menu Menu Options Available During a Call Menu Options Available During a Call Volume During a Call You can alter the volume of a caller while a call is in progress by pressing the navigation keys. Handsfree Function You can select whether to hear the caller via the loudspeaker. -
Page 37: Putting A Call On Hold
Mobile Phone Menu Menu Options Available During a Call Putting a Call on Hold You can select whether to put the call in progress on hold. Putting a call on hold basically means keeping the caller connected but having no direct communica- tion. -
Page 38: Call Lists
Mobile Phone Menu Call Lists Call Lists You can open the Call List menu to view the last numbers you have dialled as well as the calls taken and calls missed in separate call lists. If one of the phone numbers received matches an entry in the phone book, the associated name appears. - Page 39 Mobile Phone Menu Call Lists View This option provides more detailed information (e.g. time and date of the call and number of calls) regarding the entry selected. Press the left-hand softkey to open the main menu. ┣Call center┫ ┣Call center┫ Navigate to ...
- Page 40 Mobile Phone Menu Call Lists Save in phone book You can store entries in the call list in your phone book. Press the left-hand softkey to open the main menu. ┣Call center┫ ┣Call center┫ Navigate to Select the required call list. Select the required entry.
-
Page 41: Deleting Entries
Mobile Phone Menu Call Lists Deleting entries You can delete an entry from the call lists. Press the left-hand softkey to open the main menu. ┣Call center┫ ┣Call center┫ Navigate to Select the required call list. Select the required entry. ┣Clear┫... -
Page 42: Call Settings
Mobile Phone Menu Call Lists Call Settings You can defi ne various settings in order to specify certain telephone reactions and features for your mobile phone. Transmitting your own caller ID You can defi ne whether your own phone number is transmitted to the call partner, not transmitted or the setting should be defi ned by your mobile phone provider. -
Page 43: Call Divert
Mobile Phone Menu Call Lists Call divert Defi ne whether and in what situations incoming calls to the mobile phone should be diverted to another, specifi ed phone number. Press the left-hand softkey to open the main menu. ┣Call center┫ ┣Call settings┫... -
Page 44: Auto Redial
Mobile Phone Menu Call Lists Auto redial You can defi ne whether your mobile phone should automatically try and redial a number previously dialled but which was engaged or could not be reached at the time as soon as the mobile detects the line to the person called is no longer busy. Press the left-hand softkey to open the main menu. -
Page 45: Answer Mode
Mobile Phone Menu Call Lists Call time reminder You can defi ne whether an acoustic signal should be issued to remind you of the call time which has elapsed until that moment while a call is in progress. You can defi ne a single period or a repeated interval for the acoustic signal. -
Page 46: Phone Book
Mobile Phone Menu Phone Book Phone Book The phone book in the phone can store up to 300 contacts. In most cases, it is also possible to store further contacts on the SIM card. When the mobile phone memory or SIM card is full, the corresponding message appears in the display. - Page 47 Mobile Phone Menu Phone Book Adding a contact Save your contacts in the phone book in order to be able to access important phone numbers quickly. Press the left-hand softkey to open the main menu. ┣Phonebook┫ ┣Add new contact┫ ┣Select┫ Navigate to and confi rm it with ...
- Page 48 Mobile Phone Menu Phone Book Deleting a contact You can delete a contact from the phone book as follows: Press the left-hand softkey to open the main menu. ┣Phonebook┫ Navigate to Select the required contact. ┣Clear┫ Select and confi rm the prompt. The contact is deleted. Editing a contact You can edit a contact stored in the phone book.
-
Page 49: Phone Book Settings
Mobile Phone Menu Phone Book Phone Book Settings Advanced settings can be defi ned in the phone book settings. You can defi ne, for example, where new phone book entries should be stored. Preferred storage You can defi ne your preferred storage location for phone book entries. Depending on the setting defi ned, phone book entries are saved on the SIM card or in the mobile phone memory without any further confi rmation requests. -
Page 50: Speed Dialling
Mobile Phone Menu Phone Book Speed Dialling You can set-up speed dialling for up to eight phone book entries. If you want to be able to dial certain phone numbers even more quickly, you can assign the respec- tive phone book entries to digit keys 2 to 9. Activating speed dialling Firstly, the speed dialling function must be switched on. - Page 51 Mobile Phone Menu Phone Book Adding contacts for speed dialling Firstly, the speed dialling function must be switched on. You can only assign speed dialling numbers to contacts who are already stored in the phone book. Press the left-hand softkey to open the main menu. ┣Phonebook┫...
-
Page 52: Text Messages
Mobile Phone Menu Text Messages Text Messages ┣Messaging┫ Navigate to the menu in order to write, receive, view, reply to, forward and delete text messages (occasionally referred to to as SMS) received and sent as well as to create drafts and defi ne other settings using the mobile phone. ┣Inbox┫... -
Page 53: Writing Text Messages
Mobile Phone Menu Text Messages Writing Text Messages Use the function to write short text messages: Press the left-hand softkey to open the main menu. ┣Messaging┫ ┣Write message┫ Navigate to Enter your text. ┣Send to┫ Select ┣Add from Phonebook┫ Select and then the required phone book contact. -
Page 54: Replying To Text Messages
Mobile Phone Menu Text Messages Replying to Text Messages If you want to reply to the sender of a text message received, proceed as follows. Press the left-hand softkey to open the main menu. ┣Messaging┫ ┣Inbox┫ Navigate to Select the required text message. ┣Reply┫... -
Page 55: Forwarding Text Messages
Mobile Phone Menu Text Messages Forwarding Text Messages If you want to forward a text message, proceed as follows. Press the left-hand softkey to open the main menu. ┣Messaging┫ ┣Inbox┫ Navigate to Select the required text message. ┣Forward┫ Select Edit the selected text message, if necessary. -
Page 56: Deleting Text Messages
Mobile Phone Menu Text Messages Deleting Text Messages If you want to delete a text message, proceed as follows. Press the left-hand softkey to open the main menu. ┣Messaging┫ ┣Inbox┫ Navigate to Select the required text message. ┣Clear┫ Select and confi rm the prompt. -
Page 57: Saving A Text Message As A Draft
Mobile Phone Menu Text Messages Saving a Text Message as a Draft Write a text which you want to save as a draft. Press the left-hand softkey to open the main menu. ┣Messaging┫ ┣Write message┫ Navigate to Enter your text. ┣Save┫... -
Page 58: Settings For Text Messages
Mobile Phone Menu Text Messages Settings for Text Messages You can use this menu to defi ne further settings such as the preferred storage location for your text messages or the receipt of delivery reports for the text mes- sages you have sent. Preferred storage This defi nes whether the text messages are stored on the mobile phone or SIM card. -
Page 59: Memory Status
Mobile Phone Menu Text Messages Memory status You can check how much memory space is available for your text messages. Press the left-hand softkey to open the main menu. ┣Messaging┫ ┣SMS settings┫ ┣Memory status┫ Navigate to The memory capacity of the SIM card and mobile phone is displayed. -
Page 60: Settings
Mobile Phone Menu Settings Settings ┣Settings┫ menu is used to adapt the basic settings of the mobile phone, such as time, language, call settings, phone settings, network and security settings, to your own needs. In addition, the Settings menu also contains the emergency call (SOS key) func- tion, low battery charge alert and dual-SIM settings, for example. -
Page 61: Phone Settings
Mobile Phone Menu Phone Settings Phone Settings Setting the Time and Date Set the time and date before using the mobile phone for the fi rst time. Press the left-hand softkey to open the main menu. ┣Settings┫ ┣Phone┫ ┣Time and date┫ Navigate to ... -
Page 62: More Phone Settings
Mobile Phone Menu Phone Settings More Phone Settings Preferred input method You can defi ne the method by which you enter text. This setting affects all the op- erating modes in which text can be entered (creating phone book contacts, writing text messages, etc.). - Page 63 Mobile Phone Menu Phone Settings Setting the back-lighting You can defi ne how bright the back-lighting of the screen display should be and how long it should be active. Press the left-hand softkey to open the main menu. ┣Settings┫ ┣Phone┫ ┣Misc.
- Page 64 Mobile Phone Menu Phone Settings Setting the background image (wallpaper) You can select a picture which should appear on the start screen. Press the left-hand softkey to open the main menu. ┣Settings┫ ┣Phone┫ ┣Display┫ ┣Wallpaper┫ Navigate to Navigate to the storage location of the wallpaper (background image).
-
Page 65: Security Settings
Mobile Phone Menu Security Settings Security Settings You can defi ne your own individual PIN and phone lock password. You can de- activate the request for your PIN from the SIM card if so required. The risk here is, should you lose your mobile phone, the data stored on it could be misused by third-parties and subsequent costs could be charged to you. -
Page 66: Changing The Pin
Mobile Phone Menu Security Settings Changing the PIN You can change the preset PIN to a number combination which you can easily remember. We recommend that you choose your PIN so that it is not possible for unauthorised persons to determine the number combination simply by trial and error with easy combinations (such as 1-2-3-4 or 0-0-0-0). -
Page 67: Switching The Phone Lock On/Off
Mobile Phone Menu Security Settings Switching the Phone Lock On/Off Press the left-hand softkey to open the main menu. ┣Settings┫ ┣Security settings┫ ┣Phone security┫ ┣Phone lock┫ Navigate to Enter the phone lock password. The setting is saved. In its default setting, the phone lock password is 1234. -
Page 68: Setting Up The Automatic Key Lock
Mobile Phone Menu Security Settings Setting Up the Automatic Key Lock You can defi ne that the mobile phone key lock is automatically activated after a specifi c period of time. This helps prevent access to your mobile phone by author- ised persons and minimises the risk of activating functions inadvertently. -
Page 69: Dual Sim Settings
Mobile Phone Menu Dual SIM Settings Dual SIM Settings The Dual SIM function can be used, for example, to keep private and business calls separate without the need to use a second mobile phone. In addition, you can use two different, specifi cally chosen mobile phone rates if, for example, you are frequently abroad. -
Page 70: Network Settings
Mobile Phone Menu Network Settings Network Settings The mobile phone searches for and automatically selects the mobile network assigned to the SIM card or mobile phone provider (network operator) . The presettings in this menu are set-up by the SIM card or network operator. We recommend that you do not alter the settings in this menu. -
Page 71: Bluetooth
Mobile Phone Menu Bluetooth Bluetooth The Bluetooth function, a standard for wireless data transfer, can be used to ex- change data with other Bluetooth-capable devices free of charge. Switching Bluetooth On/Off Press the left-hand softkey to open the main menu. ┣Settings┫... -
Page 72: Connecting Devices Via Bluetooth
Mobile Phone Menu Bluetooth Connecting Devices Via Bluetooth Search for other Bluetooth-capable devices in your environment with which you want to connect your mobile phone. Press the left-hand softkey to open the main menu. ┣Settings┫ ┣Bluetooth┫ ┣My device┫ ┣Search new device┫ Navigate to ... -
Page 73: Emergency Call Function (Sos Key)
Mobile Phone Menu Emergency Call Function (SOS Key) Emergency Call Function (SOS Key) CAUTION! The acoustic alarm signal is very loud and can cause hearing damage if sounded close to the ear. Hold the mobile phone away from your ear if you press the SOS key. -
Page 74: Setting Up A Call Chain
Mobile Phone Menu Emergency Call Function (SOS Key) Setting Up a Call Chain You must defi ne whether the emergency call numbers should be called once or repeatedly. Press the left-hand softkey to open the main menu. ┣Settings┫ ┣Emergency settings┫ ┣SOS Chain┫... - Page 75 Mobile Phone Menu Emergency Call Function (SOS Key) Enter the necessary phone number. ┣Select┫ Select . The phone number stored will receive a phone call and an alert text message after triggering an alert call by pressing the SOS key on the rear of the mobile phone.
- Page 76 Mobile Phone Menu Emergency Call Function (SOS Key) Selecting the SIM card for the emergency call function Are there two SIM cards inserted in your mobile phone? In this case, it is possible to select the SIM card from which the emergency call function should be issued. Press the left-hand softkey to open the main menu.
- Page 77 Mobile Phone Menu Emergency Call Function (SOS Key) Defi ning a male contact person You can defi ne a phone number which you can call by pressing and holding the Hash key. There is a symbolic male face on the Hash key for this purpose. The function works similarly to speed dialling.
-
Page 78: Low Battery Power Alert
Mobile Phone Menu Low Battery Power Alert Low Battery Power Alert The alert function in the case of low battery power can be used to initiate the dispatch of a text message to any phone numbers informing you that the battery in your mobile phone is almost empty and must be recharged. - Page 79 Mobile Phone Menu Low Battery Power Alert Text Message for Low Battery Power Alert Defi ne the content of the text message which should be sent when the battery in the mobile phone is almost empty and must be recharged. Press the left-hand softkey to open the main menu.
-
Page 80: Automatic Handsfree Function
Mobile Phone Menu Automatic Handsfree Function Automatic Handsfree Function You can activate this function in the menu if you want to take all calls via the mo- bile phone loudspeaker automatically. CAUTION! Exposure to the receiver earpiece at full volume for a long period could cause ear damage. -
Page 81: Restoring The Default Factory Settings
Mobile Phone Menu Restoring the Default Factory Settings Restoring the Default Factory Settings You should reset the phone settings to their default factory settings before trans- ferring the device to third parties, e.g. for repair or sale. Make a copy of your personal data on your SIM card or microSD memory card prior to initiating a reset to the factory settings. -
Page 82: Organiser
Mobile Phone Menu Organiser Organiser You can arrange the most important tasks in the organiser provided on the mobile phone. The mobile phone can be used to enter tasks of which you want to be reminded, as an alarm clock or a calendar. Calendar The calendar provides an overview of the days, weeks and months of the year. - Page 83 Mobile Phone Menu Organiser Jump to date You can skip directly to a date in the future or past as necessary. This may be useful, for example, if you want to know on which weekday a birthday, marriage or other important events fall in the following year. Press the left-hand softkey to open the main menu.
-
Page 84: Alarm Clock
Mobile Phone Menu Organiser Alarm Clock You can use the mobile phone as an alarm clock. Switching the alarm clock on Press the left-hand softkey to open the main menu. ┣Organizer┫ ┣Alarm┫ Navigate to You can set up to fi ve different alarms. ┣Edit┫... - Page 85 Mobile Phone Menu Organiser Setting the time Set the time at which the alarm should ring. Enter the wake-up time. Setting the ringing tone You can defi ne the tone with which you want to be woken. ┣Alarm tone┫ ┣Select┫ Select ...
-
Page 86: Camera
Mobile Phone Menu Camera Camera Use the camera to take photos at any time and any place. Observe local regulations and respect other peoples' rights of privacy. Press the left-hand softkey to open the main menu. ┣Multimedia┫ ┣Camera┫ Navigate to ... -
Page 87: Preferred Storage
Mobile Phone Menu Camera Preferred storage In order to use the camera on the mobile phone and save the photos taken, a microSD memory card must be inserted in the mobile phone and set-up as the storage location for the photos. ┣Options┫... -
Page 88: Image Settings
Mobile Phone Menu Camera You can also use the mobile phone as a radio and camera when underway. Image settings Defi ne the settings for image size and image quality. ┣Options┫ ┣Image settings┫ Select . Adjust and defi ne the settings as required. ... -
Page 89: Radio
Mobile Phone Menu Radio Radio The mobile phone is equipped with an integrated radio with which you can receive radio stations in the FM frequency range. The radio only works when the headphone is connected. The headphone serves as the antenna. Connect the headphones (not contained in the scope of delivery) to the head- phone connection port on your mobile phone. - Page 90 Mobile Phone Menu Radio Save your radio stations in the channel list. Press the left-hand softkey to open the main menu. ┣Multimedia┫ ┣FM radio┫ ┣Options┫ ┣Channel list┫ Navigate to Select a memory location which is empty. ┣Edit┫ Select Enter the name of a channel and the transmission frequency of the channel.
-
Page 91: Volume Control
Mobile Phone Menu Radio Volume control You can increase or reduce the volume of the radio station being played to vari- ous levels. Press the Star or Hash key. The volume is raised or lowered. A change in the volume level affects the volume being played on both the loud- speaker and the headset. - Page 92 Mobile Phone Menu Radio Loudspeaker You can set the radio up so that it can be played via the telephone loudspeaker as well as the headset. Press the left-hand softkey to open the main menu. ┣Multimedia┫ ┣FM radio┫ ┣Options┫ ┣Settings┫ ┣Loudspeaker┫...
-
Page 93: File Manager
Mobile Phone Menu File Manager File Manager The fi le manager enables you to manage the memory of the mobile phone and memory of a microSD card if inserted. Press the left-hand softkey to open the main menu. ┣File manager┫ Navigate to You can manage the fi les according to your needs. -
Page 94: User Profi Les
Mobile Phone Menu User Profi les User Profi les A user profi le compiles diverse settings, such as ringing tone, ringing volume, vibration alert, text message tones, volume, switching on/off tones and other acoustic signals, together in a personalised menu. You have the option of choosing a preinstalled user profi le and/or adapting it to suit your own needs. -
Page 95: Activating The User Profi Le
Mobile Phone Menu User Profi les Activating the User Profi le Press the left-hand softkey to open the main menu. ┣Profiles┫ Navigate to Select the user profi le required. ┣Options┫ ┣Activate┫ Select . The user profi le selected is activated. ... - Page 96 Mobile Phone Menu User Profi les Setting the ringing type You can defi ne whether the mobile phone should issue a single acoustic signal (single signal ), a slowly increasingly loud signal (ascending ) or if the set signal tone should be played repeatedly (repeat ). ┣Ring type┫...
-
Page 97: Adjusting The Volume
Mobile Phone Menu User Profi les Adjusting the volume Adapt the volume of the incoming calls. ┣Ringtone volume┫ Navigate to ┣Options┫ ┣Change┫ Select ┣Select┫ Select the required setting and confi rm it with Other Settings Adapt the other settings for the various tones available in this menu ┣Message volume┫... -
Page 98: Caller Picture Dialling
58 x 68 pixels. Otherwise, pictures could be blurred or not shown at all. Only pictures in ".jpeg" format can be displayed. Use the practical image converter at www.olympia-vertrieb.de when you want to simply cut your pictures to the appropriate size. -
Page 99: Transferring Photos From Computer
Mobile Phone Menu Caller Picture Dialling Transferring Photos from Computer Connect the mobile phone to a computer using the USB cable. Select Mass storage . Transfer the pictures required to the mobile phone. Adding Contacts to Picture Selection ┣Caller picture┫ Press the right-hand softkey to open the menu. -
Page 100: Dialling Via The Caller Picture Menu
Mobile Phone Menu Caller Picture Dialling Dialling Via the Caller Picture Menu You can call the phone book entry by selecting the corresponding picture. You can then see the person to be called on the screen before actually making the call. ┣Caller picture┫... - Page 101 Mobile Phone Menu Caller Picture Dialling Editing a picture dialling contact ┣Caller picture┫ Press the right-hand softkey to open the menu. Press and hold the key to which the required caller picture contact is as- signed. ┣Edit┫ Select . Edit the name, number and picture of the selected caller picture contact.
-
Page 102: Additional Functions
Mobile Phone Menu Additional Functions Additional Functions Key Lock The key lock function is intended to prevent other functions being activated inadvertently. You can only activate the key lock when the start screen is on the mobile phone display. Press and hold the navigation key up until the corresponding message ap- pears on the display indicating that the keys on the mobile phone are locked against use. -
Page 103: Other Important Information
Other Important Information Technical Data Other Important Information Technical Data Frequency Quad band GSM 850, 900, 1800, 1900 MHz Dimensions 104 x 53 x 18 [mm] Weight 91 g incl. battery Power supply Input: 100 - 240 V, 50 - 60 Hz, 400 mA Output: 5 V, 500 mA Battery 3.7 V, 600 mAh... -
Page 104: Declaration Of Conformity
Other Important Information Declaration of Conformity Declaration of Conformity Olympia Business Systems Vertriebs GmbH, Zum Kraftwerk 1, 45527 Hattingen hereby declares that this device fulfi ls the basic require- ments and other relevant provisions stipulated in Directive 1999/5/EC. The CE mark on the device confi rms its conformity. -
Page 105: Care Instructions
Other Important Information Care Instructions Care Instructions Clean the housing surfaces with a soft, fl uff-free cloth. Do not use any solvents or cleaning agents. Disposal In order to dispose of your device, take it to a collection point provided by your local public waste authorities (e.g. -
Page 106: Frequently Asked Questions (Faq)
Other Important Information Frequently Asked Questions (FAQ) Frequently Asked Questions (FAQ) In the event of a problem, use the information on the following pages fi rst to try and identify it and implement the solutions proposed. The mobile phone cannot be switched on. There is no battery inserted or the battery is not suffi ciently charged. - Page 107 Other Important Information Frequently Asked Questions (FAQ) A message, indicating the keys are locked against use, appears in the dis- play. The key lock function is activated; switch the key lock off. Further information is provided in Section Key Lock on page 102. Neither the signal strength nor my mobile phone network are displayed on the start screen.
- Page 108 Other Important Information Frequently Asked Questions (FAQ) The keypad does not function or only reacts very slowly to my input. The operating speed of the display is reduced in the case of low temperatures, for example. Use the mobile phone within the ambient conditions specifi ed in the Technical Data.
- Page 109 Other Important Information Frequently Asked Questions (FAQ) The battery cannot be charged or is empty within a short time. Charge the mobile phone for at least 2 hours. Please note that the battery only reaches its full capacity after several full charging processes. If the problem continues, the battery may be defective and need to be changed.
- Page 110 ┣Phone lock┫ menu. If the solutions proposed above do not lead to the mobile phone working as I want, what should I do? Refer to the FAQs in the Internet under www.olympia-vertrieb.de or contact our Service department.
- Page 111 Other Important Information Making Calls...
- Page 112 Subject to change without prior notice. Art. No. 2230 (black), 2231 (red) / Version 2016.08 Operating Manual for the JOY Plus Mobile Phone...
Need help?
Do you have a question about the Joy Plus and is the answer not in the manual?
Questions and answers