
Related Manuals for Olympia NEO MINI


Summary of Contents for Olympia NEO MINI
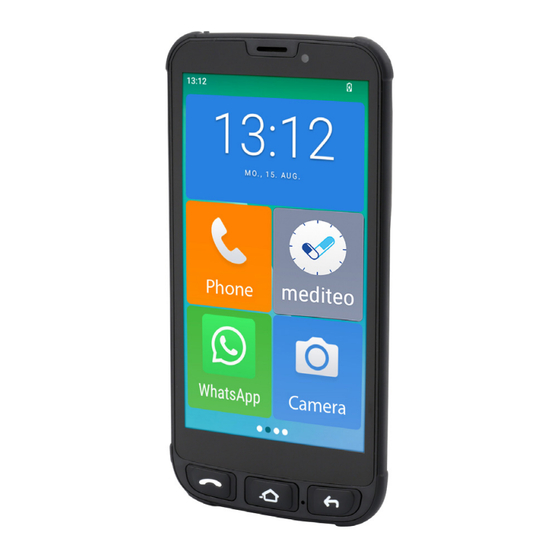
- Page 1 MINI Smartphone for Senior Citizens V 1.15.2 10/2023 Operating Manual ID: 2289...
-
Page 2: Table Of Contents
Contents Introduction Page 4 Notations Page 4 Intended Use Page 6 Safety Instructions Page 6 Other Information: Page 10 Tips Concerning the Battery Page 11 First Steps Page 12 Package Contents Page 12 Accessories Page 12 Overview - Front Side Page 14 Overview - Rear Side Page 15... - Page 3 Speed Dialling Via Picture Page 45 Messages (SMS/MMS) Page 48 Using the Camera Page 49 SOS Key (Emergency Call Function) Page 51 Smartphone Settings Page 52 Organisation of the Settings Menu Page 52 Useful Functions Page 54 Setting Up a Google Account Page 54 Blocked Numbers Page 54...
-
Page 4: Introduction
Introduction The operating manual represents a component part of the de- vice. It contains important information regarding safety, use and disposal. Familiarize yourself with all the information concerning operation and safety of the product before starting to use it. Only use the product in the way described and within the area of ap- plication specified. - Page 5 1.1.1 Display Texts In this operating manual, important functions are explained with the help of texts, illustrations and examples. You will find display texts illustrated in many sections of this oper- ating manual. These display texts correspond to the texts which appear on the smartphone.
-
Page 6: Intended Use
Intended Use The NEO MINI smartphone, subsequently referred to as the smartphone, is designed for use within a mobile phone network. The smartphone is only suitable for private use. Any other use is considered unintended use. Unauthorised modi- fication or alterations are not permitted; doing so leads to loss of rights of claims under the terms of guarantee and warranty. - Page 7 WARNING! Risk of suffocation through batteries. ● Keep batteries out of reach of children. ● Seek medical attention immediately if one is swallowed. CAUTION! There are different risks involved when dealing with batteries. ● Never attempt to recharge standard batteries, never short circuit batteries and/or open batteries.
- Page 8 ● Only use batteries of the type specified. ● Batteries of different types or new and old batteries must not be used together. ● Ensure batteries are inserted with correct polarity. ● If the device will not be used for a longer period, switch the device off and remove the batteries.
- Page 9 IMPORTANT! With regard to emergencies, do not rely on the smartphone alone! For technical reasons, it is not possible to guar- antee a reliable connection in every situation. IMPORTANT! Protect the device from moisture, dust, liquids, chemicals, vapours, heat and direct sunlight. The smartphone is only waterproof to a limited degree;...
-
Page 10: Other Information
Other Information: Observe the following information when operating the smart- phone: ● The descriptions in this operating manual are based on the smartphone being set to its default factory settings. ● The apps (applications) already installed on the smartphone are updated automatically. Under certain circumstances, up- dates can lead to apps no longer working properly. -
Page 11: Tips Concerning The Battery
Tips Concerning the Battery The following tips and information help to ensure the smartphone battery works optimally: ● Only use batteries and power adapters approved by the manu- facturer, otherwise the battery could be damaged. ● Do not short circuit the battery. Always leave the battery in the smartphone to avoid accidentally short circuiting the battery contacts. -
Page 12: First Steps
Package Contents Check the package contents of the smartphone carefully before putting the smartphone into operation. If anything is missing or damaged, please contact our Service Department. ● NEO MINI smartphone ● Battery ● USB cable ●... -
Page 14: Overview - Front Side
Overview - Front Side The illustration shows details of the front side of the smartphone. Familiarise yourself with all the operating elements before starting to use the smartphone. Display Loudspeaker Camera (front) Volume buttons On/Off button Back button Home key Charge contacts Call button... -
Page 15: Overview - Rear Side
Overview - Rear Side The illustration shows details of the rear side of the smartphone. Familiarise yourself with all the operating elements before starting to use the smartphone. Camera (rear) Headphone connection 1 2 11 SOS key 1 3 12 Battery compartment cover USB port... -
Page 16: Putting The Smartphone Into Operation
Putting the Smartphone into Operation This section provides information on how to put your smartphone into operation. Your smartphone is ready for use in just a few steps. Nano SIM Micro SIM microSD... - Page 17 2.5.1 Inserting the SIM Card Before you can use your smartphone, you must insert your SIM card (not included in the package purchased). The smartphone also offers the Dual SIM function, which means that you can install two SIM cards. The smartphone can be fitted with SIM cards of the following formats: 1 ×...
- Page 18 2.5.2 Inserting a MicroSD Memory Card (Option) If you want to increase the memory capacity of the smartphone, you can insert a microSD memory card (not included in the pack- age purchased) with a memory of up to 128 GB in the smart- phone.
- Page 19 2.5.3 Inserting the Battery Before you can use your smartphone, you must insert the re- chargeable battery supplied. Insert the battery as shown. When doing so, ensure the bat- tery is aligned correctly. Replace the battery compartment cover . The battery com- partment cover latches audibly into place.
- Page 20 2.5.4 Charging the Smartphone (Power Adapter) You can charge the smartphone using the USB cable and power adapter plug contained in the package purchased. Connect the USB cable to the power adapter. Connect the USB cable to the USB port on the smartphone.
- Page 21 2.5.5 Charging the Smartphone (Charging Cradle) You can charge the smartphone using the charging cradle con- tained in the package purchased. Connect the USB cable to the power adapter. Connect the USB cable to the charging cradle. Connect the plug on the power adapter to a properly installed power socket.
-
Page 22: Operating The Smartphone
Operating the Smartphone The smartphone is generally operated using the touch-sensitive display. Touch and swipe your fingers directly on the screen in order to navigate through the menus and start functions. Alterna- tively, you can use an appropriate stylus. The following overview indicates the finger movements to use: Tap your finger on the buttons or elements to start functions. -
Page 23: Function Keys
Function Keys The following overview indicates the function keys/buttons availa- ble. There is also an SOS key on the rear side of the smartphone. Call button Open the telephone function, take a call and end a call in progress. Home key Switch to the start screen and switch be- tween applications (keep pressed). -
Page 24: Switching The Smartphone
Switching the Smartphone On Press the On/Off button for 3 seconds. ▸ The smartphone is switched on. The start screen appears after a short time. INFO: When starting up the smartphone for the first time, please continue with the initial setup routine (see Section 3.5 Starting the Smartphone for the First Time on Page 26). -
Page 25: Screen Lock
Screen Lock The screen lock on the smartphone ensures that functions cannot be started accidentally via the elements in the display. When the screen lock is activated, only the screen is switched off, the smartphone can still be reached. The standard setting causes the screen lock to be activated automatically after 1 minute if there is no input within that time. -
Page 26: Starting The Smartphone For The First Time
Starting the Smartphone for the First Time After switching on the smartphone for the first time, you are assist- ed by a set-up wizard through all the necessary steps to configure the Android operating system. Press the On/Off button for 3 seconds. Enter the PIN for your SIM card. - Page 27 Select a method (pattern, PIN, password) to define the screen lock on your smartphone. Define the pattern or enter the required PIN or password. Alternatively, tap on the ┣Skip┫ button. Option: Adapt it in other steps provided by Google Services, such as Google Assistant, voice control or Google Play.
-
Page 28: Start Screen
Start Screen The start screen displays the following elements: All Apps Phone Status bar All Apps (applications) Apps (Applications) Time and Date Swipe with your finger on the screen from right to left to open other pages of the start screen and display more apps. - Page 29 3.6.1 Adding or Removing Apps on the Start Screen You can change the apps displayed on the start screen. Select other apps which you want to display on the start screen or delete from the start screen. Press the Home button.
-
Page 30: Status Bar
Status Bar The status bar is at the top margin of the screen and displays mes- sages and provides quick access to selected functions. The following overview indicates the icons which can appear: Mobile phone network Indicates the connection quality of the mobile phone network. More bars = better connection. - Page 31 Data transfer (Download/Upload) Indicates that data transfer is in progress via the mobile network or wifi connection. Error/Warning message Indicates that a problem has occurred. The message contains further information regarding the cause of the problem. Charge status indicator Indicates the current charge status of the battery. No SIM card Indicates that no SIM card has been installed or that the SIM card has not been detected.
- Page 32 3.7.1 Opening the Quick Access Menu You can use the status bar to open out the Quick Access menu and view further information on notifications and define more settings: Tap a finger on the status bar and swipe downwards on the screen.
- Page 33 Tap a finger on the Quick Access menu and swipe down- wards on the screen. The Quick Access menu is extended and displays even more functions.
-
Page 34: Screen Keyboard
Screen Keyboard In order to enter characters and digits, you can use the screen keyboard which appears in the display. The screen keyboard appears in the smartphone display as soon as you tap on a corresponding input field. Tap on any input field on the screen. The screen keyboard appears. -
Page 35: Smartphone Menu
Smartphone Menu The smartphone menu is divided into topically organised groups (submenus). The following descriptions always assume that the starting point for the operation is the smartphone's start screen (press the Home button). The higher level menus - e.g. Contacts, Messages or Settings - can be accessed using the ┣All Apps┫... -
Page 36: Using The Main Functions
Using the Main Functions This section explains how to use the main functions of the smart- phone. Information on other useful functions is provided in Section 6 Use- ful Functions on Page Information on the settings defined for the smartphone is provided in Section 5 Smartphone Settings on Page The sections below describe the functions and indicate the sym-... -
Page 37: Making A Call
Making a Call Press the Call button. ▸ The phone app appears. Tap on the ┣Dialpad┫ dialling keyboard. ▸ The dialling keypad (dialpad) appears. Enter the required phone number using the keys on the dial- pad. INFO: Incorrect entries can be cleared using the ┣X┫ button. Tap on the ┣Call┫... -
Page 38: Taking A Call
Taking a Call The smartphone need not be unlocked in order to receive a call. Swipe your finger from the bottom to the top of the screen. ▸ The incoming call is taken. Alternatively, press the Call button. ▸ The incoming call is taken. -
Page 39: Rejecting A Call
Rejecting a Call Swipe your finger from the middle to the bottom of the screen. ▸ The incoming call is rejected. The caller hears the busy signal. -
Page 40: Functions Available During A Call
Functions Available During a Call While a call is in progress, it is possible to change the volume, activate the handsfree function, mute the microphone and activate a conference with other call participants. 4.4.1 Adapting the Volume During a Call Adapt the volume while a call is in progress by pressing the In- crease volume or Lower volume... - Page 41 4.4.3 Muting the Microphone You can switch the microphone off while the call is in progress. Muting the phone means that the call continues to be connected, you can still hear the caller but the caller can no longer hear you. When a call is in progress, tap on the ┣Mute┫...
- Page 42 4.4.5 Conference Facility You can set up a conference call, meaning communicating with at least two other parties at the same time. When a call is in progress, tap on the ┣Add┫ button and dial the phone number of another person. Tap on the ┣Call┫...
-
Page 43: Contacts (Phone Book)
Contacts (Phone Book) You can store contacts in the phone book provided by the smart- phone. The contacts stored are arranged in alphabetical order. 4.5.1 Adding a Contact You can save your contacts in the phone book in order to be able to contact them quickly or assign them as picture dialling contacts. - Page 44 4.5.3 Assigning a Picture to the Contact You can assign a picture to the contact. The picture is then dis- played in the picture dialling list and in the phone book. Navigate to the ┣All Apps┫ > ┣Contacts┫ menu option. Select the required contact.
-
Page 45: Speed Dialling Via Picture
Speed Dialling Via Picture The speed dialling via picture function enables you to call your favourite contacts conveniently and directly. You can define up to six contacts for the speed dialling via picture function. - Page 46 4.6.1 Adding Contacts to the Picture Dialling List Press the Home button. ▸ The start screen appears. Swipe your finger from left to right on the screen. ▸ The picture dialling list appears. Tap on an empty speed dialling contact (1 - 6). Select a contact from the phone book and tap on the ┣+┫...
- Page 47 4.6.3 Writing a Text Via the Picture Dialling List Press the Home button. ▸ The start screen appears. Swipe your finger from left to right on the screen. ▸ The picture dialling list appears. Tap on the contact required. Tap on the ┣SMS┫ button. Enter the required text in the input field using the screen key- pad.
-
Page 48: Messages (Sms/Mms)
Messages (SMS/MMS) The smartphone can be used to create text messages such as SMS (Short Message Service) and MMS (Multimedia Messaging Service) using the Messages menu option. 4.7.1 Writing Messages (SMS/MMS) Tap on the ┣SMS/MMS┫ button. Tap on the ┣Write┫ button. Enter the name or phone number of the recipient using the screen keyboard. -
Page 49: Using The Camera
Using the Camera The camera in the smartphone can be used to take photos and record videos. When using the camera, observe local regulations and respect other peoples' rights of privacy. 4.8.1 Using the Camera (Photos) Tap on the ┣Camera┫ button. ▸... - Page 50 4.8.2 Using the Camera (Video) Tap on the ┣Camera┫ button. ▸ The camera app opens. The subject in front of the camera lens appears on the smartphone screen. Tap on the ┣Video┫ button. ▸ The camera activates the video mode. INFO: Tap on the Flash button in order to set the flash func- tion as required (Off / Automatic / On).
-
Page 51: Sos Key (Emergency Call Function)
SOS Key (Emergency Call Function) You can initiate an emergency call by using the SOS key. You will hear an SOS signal first of all. Then the SOS messages are sent to the phone numbers defined in succession. Following that, the numbers are dialled, in succession, via the handsfree function. -
Page 52: Smartphone Settings
Smartphone Settings This section explains which settings you can define in the smart- phone menus. Organisation of the Settings Menu Menu Description Network & Internet Settings and information regarding wifi (WLAN), mobile networks, data usage, hotspots and SIM cards Connected devices Settings for Bluetooth Apps Settings for the apps installed... - Page 53 Data protection Settings and information on permis- sions related to apps, account activi- ties, personal data Location Switching on/off position tracking, location access Security and emergency Settings for emergency SOS, medicat situations information and warnings Passwords and accounts Account overview (Email, social media etc.), switch auto- matic synchronisation of data on/off Digital wellbeing &...
-
Page 54: Useful Functions
Useful Functions Your smartphone provides other useful functions. Setting Up a Google Account You can set-up a Google account at a later date in order to receive further helpful functions and have access to other apps (applications) via Google Play. Navigate to the ┣All Apps┫... -
Page 55: Setting Up E-Mail Accounts
Setting Up E-mail Accounts You can set-up several e-mail accounts on your smartphone. Navigate to the ┣All Apps┫ > ┣Settings┫ > ┣Accounts┫ menu option. Tap on the ┣Add Account┫ button. Tap on the ┣IMAP┫ or ┣POP┫ button, depending on the e-mail protocol you use. -
Page 56: Surfing In Internet
Surfing in Internet A web browser (Chrome) is already installed on the smartphone which can be used to surf in internet and visit web sites. NOTE: To avoid extra costs, you need access to a wireless network (WIFI/WLAN) or a reasonable tariff from your mobile phone provider. -
Page 57: Torch
Torch A torch app is already installed on your smartphone. The torch app uses the flash function of the smartphone. Navigate to the ┣All Apps┫ > ┣Torch┫ menu option. Tap on the ┣ON┫ button. ▸ The torch is switched on. Tap on the ┣OFF┫... -
Page 58: Mediteo
6.10 mediteo Mediteo, a medication reminder app certified by the TÜV, is already installed on the smartphone. You can use this app to scan your medication and set-up a reminder for when to administer it. Navigate to the ┣All Apps┫ > ┣mediteo┫ menu option. NOTE: When opening mediteo for the first time, you must read the site policy and accept it, if you agree. -
Page 59: Troubleshooting
Troubleshooting Even in the case of the smartphone, it is possible that something does not work as it should. The following information should help to solve the problem. Restarting the Smartphone Press the On/Off button for 3 seconds. Tap on the ┣Restart┫ button. ▸... -
Page 60: Restoring The Default Factory Settings
Restoring the Default Factory Settings If the problem cannot be solved otherwise, it may be helpful to reset the default factory settings. Please note that after being reset the smartphone must be set-up and configured again. Navigate to the ┣All App┫ > ┣Settings┫ > ┣System┫ > ┣Reset options┫ menu option. -
Page 61: Questions And Answers (Faq)
Questions and Answers (FAQ) This chapter contains answers to frequently asked questions and possible solutions to problems. The smartphone cannot be switched on? There is no battery inserted or the battery is not sufficiently charged. Insert or charge the battery, whichever is necessary. Fur- ther information is provided in Section 2.5 Putting the Smartphone into Operation on Page... - Page 62 Why doesn't the SIM card fit in the slot in my smart- phone? The smartphone can be fitted with SIM cards of the following formats: 1 × micro SIM card, 1 × nano SIM card If your SIM card has a different format, please contact your smart- phone provider.
- Page 63 How can I install more apps (applications) on the smartphone? You can download and install other apps from Google Play. A condition for using Google Play is that you have a Google account. If you do not currently have a Google account, you can register free of charge.
- Page 64 How can I change the ringing tone of the smart- phone? Navigate to the ┣All Apps┫ > ┣Settings┫ > ┣Sounds┫ menu option. Tap on the ┣Phone ringtone┫ button and select the ringing tone required. The respective ringing tone selected plays briefly. Confirm the selection by tapping the ┣OK┫...
- Page 65 Is it possible to backup the data and apps on the smartphone? The Google account on the smartphone provides the option of backing up data and apps from the smartphone. A condition for using the data backup function is that you have a Google account.
-
Page 66: Appendix
Appendix This section contains further important information related to the smartphone. Symbols The following symbols are provided on the packaging of the smartphone. The symbols and their significance are listed below: Hearing aid compatible (HAC) SOS function Medication reminder app (mediteo) is prein- stalled Android 13 Only use the power adapter indoors. -
Page 67: Disposal
Disposal Delete any personal data on the device before disposing of it (see Section 7.2 Restoring the Default Factory Settings on Page 60). Familiarize yourself with the options available concerning the return of old equipment and used batteries free of charge through your dealer. -
Page 68: Declaration Of Conformity
Declaration of Conformity We, GO Europe GmbH, Zum Kraftwerk 1, 45527 Hattingen, DEUTSCHLAND, declare in sole responsibility, that the product is compliant with the EU Directives: 2014/53/EU and 2011/65/ EU. The full EU Declaration of Conformity is available online at the following website or by scanning the QR code: The CE mark on the devices confirm their conformity. -
Page 69: Technical Properties
Technical Properties Mobile communication frequen- WCDMA 850/900/1800/1900 MHz (B1/B5/B8) cy range LTE 900/2100 MHz (B1/B3/B7/B20) Mobile communication transmis- 100 MBps download; 50 MBps upload sion rate Mobile communication transmis- 2G: 900 MHz 31 dBm, 1800 MHz 29 dBm, sion power 3G: 2100 MHz 21dbm, 900 MHz 20 dBm LTE: BAND1 20 dBm, BAND3 20.1 dBm, BAND7 19.8 dBm, BAND8 20 dBm, BAND20 20 dBm... - Page 70 Subject to change without prior notice. Manufacturer V 1.15.2 10/2023 GO Europe GmbH ID: 2289 Zum Kraftwerk 1 D-45527 Hattingen Germany...
Need help?
Do you have a question about the NEO MINI and is the answer not in the manual?
Questions and answers