Table of Contents
Advertisement
Quick Links
Advertisement
Table of Contents

Subscribe to Our Youtube Channel
Related Manuals for Olympia HAPPY II


Summary of Contents for Olympia HAPPY II
- Page 1 Mobile Phone HAPPY II...
-
Page 3: Table Of Contents
Quick Access ......... 34 Happy II... - Page 4 Changing the phone lock password ........59 Happy II...
- Page 5 Other settings ........... 88 Happy II...
- Page 6 Disposal ..........91 Frequently Asked Questions (FAQ) ......92 Happy II...
- Page 7 Happy II...
-
Page 8: For Your Safety
Pay attention to this symbol. Texts which are highlighted by this symbol provide helpful information on handling the mobile phone. This symbol indicates warnings regarding certain situations which could lead to personal injuries or damage to the mobile phone. Happy II... -
Page 9: Observe Safety Instructions
Never plug in or unplug the charging adapter when your hands are wet. WARNING! Risk of suffocation! Risk to health through packaging material and protective foil! Keep packaging material and protective foil out of reach of children. Small children can swallow small parts. Happy II... - Page 10 This could damage the phone. Disconnect the charging cable from the mobile phone before changing or removing the battery. CAUTION! Risk of explosion through improper replacement or removal of the lithium-ion battery! Only replace the lithium-ion battery by a type approved by the manufacturer. Happy II...
- Page 11 Do not keep the mobile phone near your head. CAUTION! With regard to emergencies, do not rely on the mobile phone alone! For technical reasons, it is not possible to guarantee a reliable connection in every situation. Happy II...
- Page 12 IMPORTANT! The mobile phone may only be repaired by qualified customer service technicians. IMPORTANT! When using mobile communication equipment, interference can cause disturbances. IMPORTANT! Telephoning while driving is only permitted when the applica- ble legal regulations are observed. Happy II...
- Page 13 To prevent unnecessary power consumption via the power adapt- er plug, disconnect the power adapter plug from the power socket when the battery is not being charged. ■ The battery only reaches its full capacity after several full charging process. Happy II...
-
Page 14: Intended Use
Checking the Package Contents Before starting up the mobile phone, check the package contents. The following are enclosed with the mobile phone supplied: ■ Happy II mobile phone ■ USB connection cable ■ Charging cradle ■... - Page 15 FOR YOUR SAFETY CHECKING THE PACKAGE CONTENTS Happy II...
-
Page 16: Mobile Phone In Detail
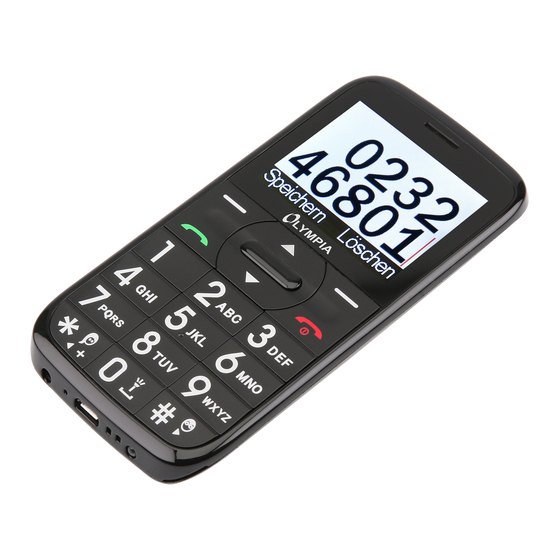
Loudspeaker Display Softkey, left Enter key Call key Keypad Star key Softkey, right Navigation key, up 10 On-hook / Reject key 11 Navigation key, down 12 Hash key Happy II... - Page 17 MOBILE PHONE IN DETAIL FRONT VIEW Happy II...
-
Page 18: View Of Rear And Underside
On the rear and underside of your mobile phone, you will find further elements which you can use to perform various functions. 13 Camera 14 Headphone connection port 15 MicroUSB connection port 16 Emergency call key (SOS) 17 Loudspeaker 18 Battery compartment cover 19 Charge contacts 20 Torch (LED) Happy II... - Page 19 MOBILE PHONE IN DETAIL VIEW OF REAR AND UNDERSIDE Happy II...
-
Page 20: Putting The Mobile Phone Into Operation
This chapter provides information on how to put your mobile phone into operation. Your mobile phone is ready for use in just a few steps. Before you start, please read the information in Section Observe Safety Instructions on Page 9. SIM 1 SIM 1 AKKU Happy II... -
Page 21: Inserting Sim Cards
Remove the battery compartment cover. To do this, use the recess in the battery compartment cover on the rear of the mobile phone. Insert the SIM card as shown. The compartment shape makes it impossible to insert the card incorrectly. Happy II... -
Page 22: Inserting A Microsd Memory Card
Before you can use your mobile phone, you must insert the battery. Insert the battery as shown. The compartment shape makes it impossible to insert the battery incorrectly. Replace the battery compartment cover. The battery compartment cover latches audibly into place. Happy II... -
Page 23: Charging The Battery
Ensure that the microUSB plug is correctly aligned to the microUSB con- nection port when connecting it. The charging process is indicated in the display by means of a charging battery icon. Happy II... -
Page 24: Charging The Battery, Charging Cradle
Charging the battery, charging cradle Connect the power plug to a properly installed power socket. Connect the microUSB plug to the USB connection port on the rear side of the charging cradle. Place the mobile phone in the charging cradle as illustrated. Happy II... -
Page 25: Switching The Mobile Phone On And Off
The display shows an animated graphic,followed by the start screen. As soon as the display shows the name of your network opera- tor, the SIM card has established a connection with the mobile phone network. Your mobile phone is now ready to use. Happy II... -
Page 26: Start Screen
You can open the start screen at any time by pressing the On-hook key. Network availability Network operator Time Display text ┣MENU┫ - changes according to the context Battery charge Date Display text ┣PICTURE┫ - changes according to the context Happy II... - Page 27 PUTTING THE MOBILE PHONE INTO OPERATION START SCREEN Happy II...
-
Page 28: Other Icons On The Start Screen
The key lock function is switched on. A text which has not yet been read is in your inbox. The roaming service (use of a different mobile network, e.g. when abroad) is active. Please note that using roaming services can result in additional charges. Happy II... -
Page 29: Using The Mobile Phone
Use the following keys to navigate through the menus provided by the mobile phone. Navigate up in the menu. Navigate down in the menu. Open submenus or confirm your entries. Navigate one menu level back or discard all your entries and settings. Happy II... -
Page 30: Entering Phone Numbers And Letters
Wait until the cursor skips to the next position and then enter the next letter. You can alter and save your preferred input method in the ┣SETTINGS┫ è ┣PHONE┫ è ┣PREF. INPUT METHOD┫ menu. Happy II... - Page 31 Other Entries and Functions Press the 0 key to enter a space. Press the right-hand softkey to delete characters. Press and hold the right-hand softkey for 2 seconds to delete all the characters. Happy II...
-
Page 32: Making Calls
Call key. Taking, Ending and Rejecting Calls When you want to take, end or reject calls, use the following keys: Take an incoming call. End a call in progress. Reject an incoming call. Happy II... -
Page 33: Making An Emergency Call
3 seconds. If you want to cancel an emergency call for any reason, press and hold the Emergency Call key (SOS) again for around 5 seconds. Further information is provided in Section Emergency Call Button (SOS) on Page 63. Happy II... -
Page 34: Quick Access
Camera Open the Camera menu. Further information is provided in Section Camera on Page 74. Phone Book Open the Phone Book menu. Further informa- tion is provided in Section Phone Book Set- tings on Page 45 Happy II... -
Page 35: Mobile Phone Menu
These display texts correspond to the texts which appear on the screen of your mobile phone. If several display texts are shown in succession, navigate with the navigation keys and the softkeys to the display texts shown. Happy II... -
Page 36: Menu Options Available During A Call
When a call is in progress, select ┣OPTIONS┫ è ┣MUTE┫. The micro- phone is muted, the caller can no longer hear you. Select ┣OPTIONS┫ è ┣UNMUTE┫. The muting function is deactivated and the caller is able to hear you again. Happy II... -
Page 37: Putting A Call On Hold
┣OPTIONS┫ è ┣CONFERENCE┫. The conference call facility is activated and you can talk to both parties (or more). Press the On-hook key to end the conference. Alternatively, select ┣OPTIONS┫ è ┣END CONF. CALL┫, if you want to end the confer- ence with one of the callers. Happy II... -
Page 38: Call Logs
You can call an entry from the call lists. Press the left-hand softkey to open the main menu. Navigate to ┣CALL CENTER┫. Select the required call list. Select the required entry. Press the Call key. The entry selected is dialled. Happy II... - Page 39 Navigate to ┣CALL CENTER┫. Select the required call list. Select the required entry. Select ┣OPTIONS┫ è ┣SEND MESSAGE┫. Enter your text. Select ┣OPTIONS┫ è ┣ADVANCED┫ è ┣INSERT NUMBER┫. Select the required contact. Select ┣OPTIONS┫ è ┣SEND┫. The text message is sent. Happy II...
- Page 40 Select ┣OPTIONS┫ è ┣CLEAR┫ and confirm the prompt. The contact is deleted. Alternatively, you can delete all the call lists in one operation. Navigate to ┣CALL CENTER┫ è ┣DELETE CALL LOGS┫. Confirm the prompt. All the entries in the call logs are deleted. Happy II...
-
Page 41: Call Settings
┣FROM PHONEBOOK┫ and select a contact from your phone book. Confirm with ┣OPTIONS┫ è ┣SAVE┫. The setting is saved. If necessary, deactivate all the call diversions you have set up. Navigate to ┣CALL CENTER┫ è ┣CALL SETTINGS┫ è ┣CALL DIVERT┫ è ┣CANCEL ALL DIVERTS┫. Happy II... -
Page 42: Call Waiting
If the mobile phone or SIM card memory is full, a corresponding message appears in the display. In order to add new entries, you must first delete old entries or select a different storage location. The contacts are arranged in alphabetical order. Happy II... - Page 43 Enter the first letters of the stored name using the keypad to jump to a specific entry. It may be necessary to press a key several times. Further information is provided in Section Entering Phone Num- bers and Letters on Page 30. Press the Call key. The phone number is dialled. Happy II...
- Page 44 Edit contacts in the phone book. Press the left-hand softkey to open the main menu. Navigate to ┣PHONEBOOK┫. Select the required contact. Select ┣OPTIONS┫ è ┣EDIT┫. Edit the contact details. Confirm with ┣OPTIONS┫ è ┣SAVE┫. The modifications are saved. Happy II...
-
Page 45: Phone Book Settings
Information appears regarding the number of contacts stored and storage locations available: Press the left-hand softkey to open the main menu. Navigate to ┣PHONEBOOK┫ è ┣OPTIONS┫ è ┣PHONEBOOK SETTINGS┫ è ┣MEMORY STATUS┫. The storage locations still available are displayed. Happy II... -
Page 46: Text Messages
Sending a text message with more than 160 characters could result in additional costs, depending on the terms of your SIM card. It is possible that not all functions described are supported by every mobile service provider. Therefore, please contact your local mobile service provider for details. Happy II... -
Page 47: Writing A Text Message
Open any text message in order to view the full content of the mes- sage. Press the left-hand softkey to open the main menu. Navigate to ┣MESSAGES┫ è ┣INBOX┫. Select the required text message. Select ┣VIEW┫. The text message is opened. Happy II... -
Page 48: Replying To A Text Message
Call the sender of a text message received. Press the left-hand softkey to open the main menu. Navigate to ┣MESSAGES┫ è ┣INBOX┫. Select the required text message. Select ┣OPTIONS┫ è ┣CALL SENDER┫. The sender of the message received is called. Happy II... -
Page 49: Forwarding A Text Message
Select ┣OPTIONS┫ è ┣ADD FROM PHONEBOOK┫ and then the required phone book contact. Alternatively, select ┣MESSAGES┫ è ┣INBOX┫ è ┣OPTIONS┫ è ┣FORWARD┫ è ┣OPTIONS┫ è ┣SEND TO┫ è ┣ENTER NUMBER┫ and enter the phone number manually. Select ┣OPTIONS┫ è ┣SEND┫. The text message is sent. Happy II... -
Page 50: Deleting A Text Message
Select ┣OPTIONS┫ è ┣SAVE TO PHONEBOOK┫. Select the storage location. Select ┣OPTIONS┫ è ┣EDIT┫ and enter a name. Confirm with ┣OPTIONS┫ è ┣SAVE┫. The phone number from which a text message was received is stored as a phone book entry. Happy II... -
Page 51: Saving A Text Message As A Draft
This defines whether the text messages are stored on the mobile phone or SIM card. Press the left-hand softkey to open the main menu. Navigate to ┣MESSAGES┫ è ┣SMS SETTINGS┫ è ┣PREFERRED STORAGE┫. Select ┣OPTIONS┫ è ┣OK┫. Select the storage location for your text messages. Confirm with ┣OK┫. Happy II... - Page 52 You can check how much memory space is available for your text messages. Press the left-hand softkey to open the main menu. Navigate to ┣MESSAGES┫ è ┣SMS SETTINGS┫ è ┣MEMORY STATUS┫. The memory capacity of the SIM card and mobile phone is displayed. Happy II...
-
Page 53: Settings
SIM card selected. If you select ┣USE BOTH SIM CARDS (DUAL SIM)┫ , you must select which SIM card should perform certain operations (e.g. making calls, writing text messages or saving phone book contacts). Happy II... -
Page 54: Setting The Time And Date
Set one of the four menu languages available on your mobile phone. Press the left-hand softkey to open the main menu. Navigate to ┣SETTINGS┫ è ┣PHONE┫ è ┣LANGUAGE┫. Select the required setting. Confirm with ┣OK┫. Your mobile phone menu will be shown in the selected language. Happy II... -
Page 55: More Phone Settings
Press the left-hand softkey to open the main menu. Navigate to ┣SETTINGS┫ è ┣PHONE┫ è ┣MISC. SETTINGS┫ è ┣LCD BACKLIGHT┫. Select the required settings. Change the settings using the Star key and Hash key. Confirm with ┣OK┫. The setting is saved. Happy II... - Page 56 Confirm with ┣OK┫. The setting is saved. The wallpaper selected appears permanently on the start screen. If you have installed a microSD memory card in your mobile phone and you have stored a suitable image on it, you can use this image as your wallpaper. Happy II...
-
Page 57: Security Settings
┣SIM 1 SECURITY┫ è ┣PIN LOCK┫. Enter the PIN. The standard PIN is contained with the docu- ments provided with the SIM card. Confirm with ┣OK┫. The setting is saved. The PIN request is switched on or off. Happy II... -
Page 58: Changing The Pin
PIN last set remains valid. If you forget your PIN, you can reset your SIM card to factory set- tings using the PUK. More detailed information on this is available from your mobile phone provider. Happy II... -
Page 59: Switching The Phone Lock On/Off
Press the left-hand softkey to open the main menu. Navigate to ┣SETTINGS┫ è ┣SECURITY SETTINGS┫ è ┣PHONE SECURITY┫ è ┣CHANGE PASSWORD┫ . Enter the phone lock password. Enter the new phone lock password. Enter the new phone lock password again. The setting is saved. Happy II... -
Page 60: Network Settings
SIM card or mobile phone provider (network operator) . The presettings in this menu are set up by the SIM card or network operator. We recommend that you do not alter the settings in this menu. Happy II... -
Page 61: Bluetooth
Bluetooth-capable devices in the environment. Press the left-hand softkey to open the main menu. Navigate to ┣SETTINGS┫ è ┣BLUETOOTH┫ è ┣VISIBILITY┫. Select ┣ON┫ or ┣0┫. The mobile phone is visible or not visible for other Bluetooth-capable devices. Happy II... -
Page 62: Connecting Devices Via Bluetooth
Press the left-hand softkey to open the main menu. Navigate to ┣SETTINGS┫ è ┣BLUETOOTH┫ è ┣MY NAME┫ . The name of the mobile phone is limited to 18 characters. Enter a name for the mobile phone. Confirm with ┣OPTIONS┫ è ┣SAVE┫. The setting is saved. Happy II... -
Page 63: Emergency Call Button (Sos)
Press and hold the Emergency Call key (SOS) for 5 seconds. Inform all the people who are to be entered in the list to receive the emergency call in advance before actually storing the list of emer- gency numbers. Happy II... -
Page 64: Switching The Emergency Call Function On/Off
Cancelling an emergency call Have you sent the emergency call successfully or do you want to stop the emergency call for other reasons? Press and hold the Emergency Call key (SOS) for about 5 seconds. The emergency call function is stopped. Happy II... -
Page 65: Emergency Call Function Settings
┣OPTIONS┫ è ┣ADD FROM PHONEBOOK┫ and select a contact from your phone book. Confirm with ┣OK┫. The phone number saved is called and re- ceives an emergency text message when you press the Emer- gency Call key (SOS) in an emergency. Happy II... - Page 66 Edit the emergency text message. Confirm with ┣OPTIONS┫ è ┣SAVE┫. The emergency text message you have saved is sent to the emergency call numbers when you press the Emergency Call key (SOS) on the rear of your mobile phone. Happy II...
-
Page 67: Low Battery Power Alert
Select a storage location which is empty. Select ┣OPTIONS┫ è ┣EDIT┫. Enter the necessary phone number. Confirm with ┣OK┫. The phone number stored is called and receives an alert text message when the battery in your mobile phone is almost empty. Happy II... -
Page 68: Restoring The Default Factory Settings
You can arrange the most important tasks which you have to com- plete in the organiser provided on the mobile phone. You can enter tasks you want to be reminded of, use your mobile phone as an alarm clock or use the calendar function. Happy II... -
Page 69: Calendar
Press the left-hand softkey to open the main menu. Navigate to ┣ORGANIZER┫ è ┣CALENDAR┫ è ┣OPTIONS┫ è ┣JUMP TO DATE┫. Enter the required date using the keypad. Confirm with ┣OK┫. The date entered is highlighted in the calendar overview on the screen. Happy II... -
Page 70: Alarm Clock
Select ┣STATUS┫ è ┣OK┫ è ┣ON┫. The selected alarm clock is set. Subsequently, you can make further settings to adapt the alarm clock to your requirements. Setting the time Set the time at which the alarm should ring. Use the keypad to enter the alarm time. Happy II... - Page 71 You can define whether and how often the alarm clock rings (once , daily or on certain days ). Select ┣REPEAT┫. Select the required entry. Confirm with ┣OK┫. Define other settings to the weekdays according to the selection or set the days on which the alarm should wake you. Happy II...
-
Page 72: Torch
You can only assign speed dialling numbers to contacts who are already stored in the phone book. Press the left-hand softkey to open the main menu. Navigate to ┣ORGANIZER┫ è ┣SPEED DIAL┫ è ┣STATUS┫. Select ┣ON┫. The ┣SPEED DIAL┫ function is activated. Happy II... - Page 73 Calling using speed dialling You can use the speed dialling function from the start screen. Press and hold one of the keys 1 to 9 for three seconds. The phone number assigned as a speed dial number is dialled. Happy II...
-
Page 74: Camera
The photos you take are automatically saved on the installed microSD memory card. The photos stored on the microSD memory card can be assigned to contacts in the picture dialling function, for example. Pay attention to the information in Section Dialling Picture Contacts on Page 84. Happy II... - Page 75 Select ┣OPTIONS┫ è ┣IMAGE INFORMATION┫ to display more information on the photos. The photos can also be used as wallpaper, sent via Bluetooth, renamed, deleted or used as an image when switching the mobile phone on and off. Happy II...
-
Page 76: Radio
Connect the headphone to the headphone connection port on the mobile phone. Press the left-hand softkey to open the main menu. Navigate to ┣MULTIMEDIA┫ è ┣FM RADIO┫. If you have not connected any earphones, the message: ┣PLEASE PLUG IN EARPHONE┫ appears in the display. Happy II... - Page 77 ┣CHANNEL LIST┫. Select a memory location which is empty. Select ┣OPTIONS┫ è ┣EDIT┫. Enter the name of a channel and the transmission frequency of the channel. Confirm with ┣SAVE┫. The radio station is saved in the channel list. Happy II...
- Page 78 Press the left-hand softkey to open the main menu. Navigate to ┣MULTIMEDIA┫ è ┣FM RADIO┫ è ┣OPTIONS┫ è ┣SETTINGS┫ è ┣LIST FULL┫. Change the status of background play to ┣ON┫. Confirm with ┣OK┫. The setting is saved. Happy II...
-
Page 79: File Manager
The file manager can be used to manage the memory of your mobile phone and the memory of an installed microSD memory card. Press the left-hand softkey to open the main menu. Navigate to ┣FILE MANAGER┫. You can manage the files according to your needs. Happy II... -
Page 80: User Profiles
Switch on any user profile. All settings that define the user profile (such as ring tones, volume etc.) are active. Press the left-hand softkey to open the main menu. Navigate to ┣PROFILES┫. Select the user profile required. Confirm with ┣OPTIONS┫ è ┣ACTIVATE┫. The user profile selected is activated. Happy II... -
Page 81: Adapting The User Profile
You can define what type of alert signal you require from the mobile phone in the event of incoming calls and text messages. Navigate to ┣ALERT TYPE┫. Select ┣OPTIONS┫ è ┣CHANGE┫. Select the required setting. Confirm with ┣OK┫. Happy II... - Page 82 Select ┣OPTIONS┫ è ┣CHANGE┫. Select the required setting. Confirm with ┣OK┫. Setting the ringing tones You can select your favourites from the different ringing tones available. Navigate to ┣INCOMING CALL┫. Select ┣OPTIONS┫ è ┣CHANGE┫. Select the required setting. Confirm with ┣OK┫. Happy II...
- Page 83 Adapt the volume of the incoming calls. Navigate to ┣RINGTONE VOLUME┫. Select ┣OPTIONS┫ è ┣CHANGE┫. Select the required setting. Confirm with ┣OK┫. Other settings Use this menu to adapt the settings of other tones (such as ┣MESSAGE┫ or ┣KEYPAD┫). Happy II...
-
Page 84: Dialling Picture Contacts
58 x 68 pixels. Otherwise, pictures could be blurred or not shown at all. Only pictures in ".jpeg" format can be displayed. If you want to alter your images to the right format, use our practical image converter at www.olympia-vertrieb.de. Happy II... -
Page 85: Transferring Photos From A Computer
Press the right-hand softkey to open the Caller Picture menu. Select a memory location which is empty. Confirm with ┣OK┫. Confirm the prompt. Select the required phone book entry. Confirm with ┣OK┫. The required phone book entry is stored in the picture selection. Happy II... -
Page 86: Adding A Picture To The Picture Contacts
You can then see the person to be called on the screen before actually making the call. Press the right-hand softkey to open the Caller Picture menu. Select the required picture contact. Select ┣OPTIONS┫ è ┣CALL┫. The picture contact is dialled. Happy II... -
Page 87: Sending Text Messages To Picture Contacts
Press the right-hand softkey to open the Caller Picture menu. Select the required picture contact. Select ┣OPTIONS┫ è ┣SEND TEXT MESSAGE┫. Enter your text. Select ┣OPTIONS┫ è ┣SEND TO┫ . Select the picture contact displayed. Select ┣OPTIONS┫ è ┣SEND┫. The text message is sent. Happy II... -
Page 88: Other Settings
Confirm with ┣OK┫. The settings are saved. Deleting a picture contact Press the right-hand softkey to open the Caller Picture menu. Select the required picture contact. Select ┣OPTIONS┫ è ┣CLEAR┫. Confirm the prompt. The picture contact is deleted. Happy II... -
Page 89: Other Important Information
2.3" LCD with back-lighting Interfaces microUSB, 3.5-mm jack Dual SIM Dimensions 118.7 x 57 x 12.1 [mm] Weight 87 g including battery Permissible ambient -10 °C to 40 °C at conditions 30 to 75% relative humidity Subject to change without notice! Happy II... -
Page 90: Declaration Of Conformity
OTHER IMPORTANT INFORMATION DECLARATION OF CONFORMITY Declaration of Conformity Olympia Business Systems Vertriebs GmbH, Zum Kraft- werk 1, 45527 Hattingen hereby declares that this device fulfils the basic requirements and other relevant provisions stipulated in the Directive 2014/53/EC. The CE mark on the devices confirm their conformity. The Declaration of Conformity for this product is available at http://productip.com/?f=5d19b... -
Page 91: Care Instructions
The symbol indicates that the batteries must not be disposed of in normal domestic waste and that they must be brought to collection points provided by local public waste authorities. Packaging materials must be disposed of according to local regulations. Happy II... -
Page 92: Frequently Asked Questions (Faq)
The emergency call function of the mobile phone uses SIM card 1. Insert the SIM card into the compartment marked SIM1. Happy II... - Page 93 Technical Data. Further information is provided in Section Technical Data on Page 89. Restart your mobile phone, if necessary. Further information is provided in Section Switching the Mobile Phone On and Off on Page 25. Happy II...
- Page 94 Charge the mobile phone for at least two hours. Please note that the battery only reaches its full capacity after several full charging pro- cesses. If the problem continues, the battery may be defective and need to be changed. Please contact our service department in such cases. Happy II...
- Page 95 Expand the memory of the mobile phone by inserting a microSD memory card. You can purchase a microSD memory card from spe- cialist retailers. Further information is provided in Sections Camera on Page 74 and Inserting a MicroSD Memory Card on Page Happy II...
- Page 96 ┣SETTINGS┫ è ┣SECURITY SETTINGS┫ è ┣PHONE SECURITY┫ è ┣PHONE LOCK┫ menu. If the proposed solutions above do not lead to the mobile phone working as expected: Refer to the FAQs in the Internet under www.olympia-vertrieb.de or contact our Service department. Happy II...
- Page 97 OTHER IMPORTANT INFORMATION FREQUENTLY ASKED QUESTIONS (FAQ) Happy II...
- Page 98 Subject to change without prior notice� Art� No� 2210 (black), 2211 (red), 2212 (gold) / version 2018�03 Operating Manual Happy II Mobile Phone...
Need help?
Do you have a question about the HAPPY II and is the answer not in the manual?
Questions and answers