Table of Contents
Advertisement
EDITORIAL
Dear Customer,
You have just acquired a new GORENJE steamer and we would like
to thank you.
Our research teams have created this new generation of appliances to let
you show off your culinary talents and create delicious meals every day.
With pure lines and modern aesthetics, your new GORENJE steamer will
blend harmoniously into your kitchen and will perfectly combine cooking
performance and ease of use.
In the GORENJE line of products, you will also fi nd a wide range of
cookers, hobs, ventilation hoods, dishwashers, microwave ovens and
built-in refrigerators, which can be coordinated with your new GORENJE
steamer.
A specialist in all things cooking-related, GORENJE helps to improve
your culinary success, providing shared pleasure and user-friendliness
with products that are ever more effective, easy to use, environmentally
friendly, attractive and reliable.
The GORENJE brand.
GB 2
Advertisement
Table of Contents

Subscribe to Our Youtube Channel
Related Manuals for Gorenje GCS131B


Summary of Contents for Gorenje GCS131B
- Page 1 In the GORENJE line of products, you will also fi nd a wide range of cookers, hobs, ventilation hoods, dishwashers, microwave ovens and built-in refrigerators, which can be coordinated with your new GORENJE steamer.
-
Page 2: Table Of Contents
Contents CONTENTS Note to user Steam cooking Description The Appliance Close-up of control panel Accessories Removable tank Installation Before connecting the steamer Electrical connections Build-in Demo mode Setting the clock Programming for immediate steaming Locking display Water tank control Using the timer Cooking chart Steaming chart Maintenance... -
Page 3: Note To User
NOTE TO USER Steam cooking Overview Steam cooking presents nothing but advantages if you follow the instructions for use. Healthy and natural, steam cooking preserves the full fl avour of foods. A delicate sauce or aromatic herb seasonings add that something extra that makes the difference. -
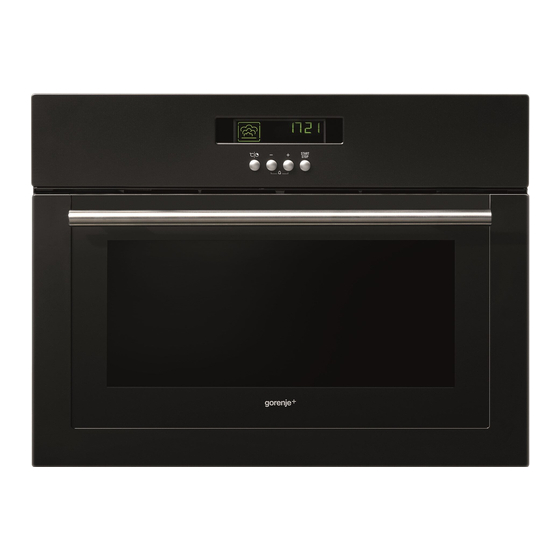
Page 4: Description
DESCRIPTION The Appliance Display Control panel Tank Water intake tube Gutter Steam generator Close-up of control panel 1. Duration and temperature selection button 2. Time and temperature adjustment button (-) 3. Time and temperature adjustment button (+) 4. Start/Stop button 5. -
Page 5: Accessories
DESCRIPTION Accessories Fig. 1 Fig. 2 Fig. 3 Perforated stainless steel dish (Fig. 1) Pierced stainless steel cooking dish to prevent contact between food and the condensation water. Stainless steel dish (Fig. 2) Stainless steel dish for recovering condensation water. Comments: When steaming vegetables, potatoes. -
Page 6: Removable Tank
DESCRIPTION Removable tank Tank that allows for independent water supply to the steamer. Its capacity is approximately one litre (maximum level). Tap water can sometimes be too hard. Lightly mineralised, still, bottled water will be more effective in cleaning your oven. Using demineralised water is prohibited (not for human consumption). -
Page 7: Installation
INSTALLATION Before connecting the steamer Warning Ensure that your appliance has not suffered any damage during transport (deformed seal or door, etc.). If you see any kind of damage, before doing anything else, contact your retailer. In order to easily locate the reference information for your appliance, we recommend that you note this information on the “After-Sales Service Department and Customer Relations”... -
Page 8: Build-In
INSTALLATION If the steamer malfunctions in any way, unplug the appliance or remove the fuse corresponding to the sector where the oven is hooked up. It is dangerous for anyone other than a qualifi ed person to perform maintenance operations or repairs. Build-in 550 mini 1. -
Page 9: Demo Mode
INSTALLATION Demo mode Activating Set the time to 00:00, see “Setting the clock” on page 11. Confi rm with button START. Fig. 1 Press the DURATION AND TEMPERATURE SELECTION and - buttons simultaneously for 10 seconds until “DEMO ON” is displayed. -
Page 10: Use
Setting the clock Press the TEMPERATURE/TIME button until the clock flashes (2 seconds). Fig. 1 Press the + or - buttons to set the time. Fig. 2 Confirm with the START button. Fig. 3 Comments: If the time is not confi rmed using the START button, it is automatically saved after one minute. -
Page 11: Programming For Immediate Steaming
Programming for immediate steaming Operating principle The water contained in the tank arrives in the cavity via a pipe. This water is transformed into steam when it comes into contact with a hot surface located in the lower part of the cavity: this is the steam generator. There is no need to add water to the cooking dish. - Page 12 Confirm using the START button (Fig. 3). Fig. 3 The symbol STEAM COOKING symbol and °C light up. When the temperature has been reached (appr. 10 minutes), the 100°C display stops fl ashing and a beep is emitted. Programming for immediate steaming with temperature change After setting the cooking duration (Fig.
- Page 13 When the temperature has been reached, the 80°C display stops flashing (Fig. 4) and a beep is emitted. Fig. 4 Comments: To avoid compromising steaming results, do not open the appliance door during cooking. Changing steaming temperature During steaming, you can adjust the steaming temperature as follows. Press the TEMPERATURE/TIME button until the temperature fl...
-
Page 14: Locking Display
Locking display It is possible to lock the display. The lock can only be used after steaming, when the time of day is displayed. Open your steamer door, press the START/STOP button and hold for several seconds. A beep is emitted and a padlock appears on the screen. -
Page 15: Using The Timer
Using the timer Timer Your steamer is equipped with an electronic timer that can be used independent of the steamer functions. Press the + or - button for a few seconds. 0m00s flashes. Fig. 1 Set the duration required (max. 59 mins 50 seconds) by pressing the +/- buttons. -
Page 16: Cooking Chart
COOKING CHART Functions Steaming Examples Temperature Steaming °C Steam cooking mode most often used For cooking fragile food Delicate whole fish (trout) The meat remains iridescent, Cooking delicate fish (sardine fillets, the collagen does not appear red mullet) Cocotte eggs; stuffed tomatoes. Ramekins, custard creams, etc. -
Page 17: Steaming Chart
COOKING CHART Steaming chart Food whatever the Times °C Preparations Notes quantity Artichokes Placed upside down in the 40 to 45 min. (small) dish For tips only, decrease Asparagus 35 to 40 min. cooking time Broccoli 18 min. In small bunches •... - Page 18 COOKING CHART Food whatever the Times °C Preparations Notes quantity Apples/pears/ 10 to 15 min. Whole, peeled peaches • Times depend on Compote 25 min. Fruit in strips ripeness. Custard creams 10 min. In ramekins Northern pike 25 to 30 min. Whole (1 kg) Cod/hake 13 to 15 min.
- Page 19 COOKING CHART Food whatever the Times °C Preparations Notes quantity 7 min. 100 Boiled: placed directly on the grid. 8 min. 100 Softboiled: placed directly on the grid. Start with very fresh eggs 10 to 12 min. 100 Hard-boiled kept at room temperature Sunny side up: broken in an individual dish placed 5 to 6 min.
-
Page 20: Maintenance
MAINTENANCE Caring for your steamer Maintenance Cavity (after each use) Wipe the cavity with a dry cloth after the steam generator has cooled or let the cavity air dry by leaving the door open. Water intake tube (once a month) Remove the water intake tube by turning it toward you. -
Page 21: Changing The Interior Lighting
MAINTENANCE Changing the interior lighting The bulb is located at the back right of your steamer’s cavity. Disconnect your steamer before performing any task on the bulb to avoid the risk of electric shock. • Turn the view port a quarter turn to the left. •... -
Page 22: Handling Malfunctions
MAINTENANCE Handling malfunctions You Notice That... Possible Causes What Should You Do? Your display does not light up. Steamer is not connected to • Check that the appliance is power source. receiving electricity (good fuse). • Call the Service Electronic board is not functioning. - Page 23 NOTE GB 24...
- Page 24 CZ5700267-00 03/10...
Need help?
Do you have a question about the GCS131B and is the answer not in the manual?
Questions and answers