Table of Contents
Advertisement
Electric oven
Dear Customer!
Congratulations on your purchase. See for
yourself: our products read reliability.
These ample instructions have been compiled
in order to help you learn how to handle the
appliance. They will show you step by step
what your appliance is capable of, so please
read them carefully before you attempt to use
your cooker for the first time.
Contents
Safety precautions ................................ 4
Description of the appliance ................ 5
Control panel description .................... 5
Prior first use ........................................ 6
oven control........................................... 6
Use of oven ............................................ 7
ways ..................................................... 11
Instructions for use, installation and connection
Safety warnings are listed on page 4.
The first thing to do is to check if your
appliance has arrived undamaged. In case you
find any transport damages, please report it
immediately to your local dealer, or to the
regional warehouse which supplied the
appliance. You will find their phone numbers
on the invoice or on the delivery note.
We hope your cooker will successfully serve its
purpose for many years.
Operation mode selection ...................12
Cleaning and maintenance .................20
Troubleshooting guide ........................22
Replacement of parts ..........................23
Installation of electric oven ................25
Electric connection..............................26
Technical information.........................27
After sale service .................................27
GB IE MT
3
Advertisement
Table of Contents

Related Manuals for Gorenje EVP454-443E


Summary of Contents for Gorenje EVP454-443E
-
Page 1: Table Of Contents
Electric oven GB IE MT Safety warnings are listed on page 4. Dear Customer! The first thing to do is to check if your Congratulations on your purchase. See for appliance has arrived undamaged. In case you find any transport damages, please report it yourself: our products read reliability. -
Page 2: Safety Precautions
Safety precautions • To avoid any possible hazard, the appliance Oven door delay switch may be installed by qualified personnel only. (certain models only) • Any repairs by unqualified persons may Oven door is fitted with special delay switch result in electric shock or short circuit. In which turns the oven heating off (only in hot air order to avoid possible injuries to your body heating mode) when the oven door is opened,... -
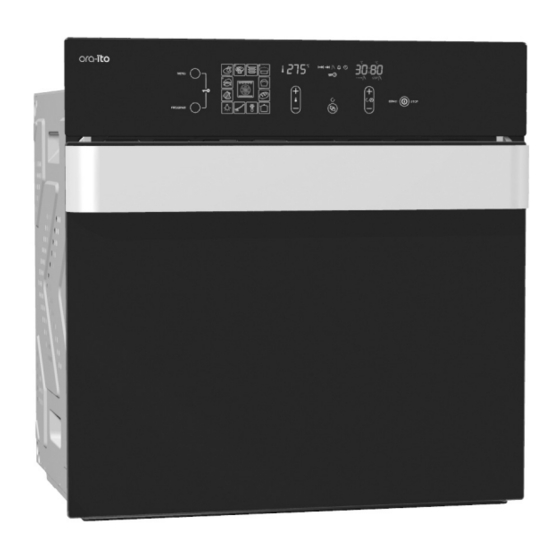
Page 3: Description Of The Appliance
Description of the appliance The figure shows one of the built-in models. they may contain certain functions and These instructions have been prepared for accessories your model might not have. models with different accessory options, so Control panel Oven door handle Oven glass door Control panel description 1 Food selection sensor;... -
Page 4: Prior First Use
Prior first use • Preheating of oven is necessary only if Oven recommended by the recipe or if written in Take all the accessories out of the oven and the chart below. clean it with warm water and your usual mild •... -
Page 5: Use Of Oven
Use of oven • Touch the selection sensor (5) (+ and -) and Alternatives with the oven on: select the current time selection mode ((4e) • Changing or setting the oven temperature is flashing). (3a) • by means of sensors (5) (+ and -) set the •... - Page 6 Table of data for operation mode (with a sensor 2) Operation mode Preset temperature (°C) Preset time (h/min) Possibillity of max. set temperature (°C) Oven thermostat signal lamp (3b) Setting the end of operation time • Signal lamp is on; oven temparture is below •...
-
Page 7: Alarm Timer
Alarm timer Programmed roasting with the meat probe This function may be applied separately, and is not in connection with the oven operation. It is This function mode requires the setting of the use whenever you wish to be warned at a pre- temperature to be developed within the center selected time. - Page 8 • Switch the oven on with the ON/OFF sensor Note (6) and the meat probe starts measuring the With the meat probe connected the display core temperature, which is increasing. always indicates the actual and the selected • Once the set temperature of the meat core is temperature (except with the oven off, when no obtained, the oven stops operating, and the function mode is selected).
-
Page 9: The Oven May Be Controlled In Two Ways
The oven may be controlled in two ways • Touch the food selection sensor and select the 1 By selecting the type of food type of food (appropriate symbol and relevant 2 By selecting the function mode function mode are lit, as well as the temperature and operation time) Switching between the two control modes •... -
Page 10: Operation Mode Selection
Operation mode selection This mode is used when you wish to prepare The appropriate function mode is selected by any unspecific type and quantity of food. You pressing the mode selection sensor (2) (the may select the function mode, oven display indicates the selected function mode). -
Page 11: Important Warnings
Important warnings! Grill with ventilator Infrared heater and ventilator operate • Never put aluminum foil to the bottom of the simultaneously. This mode is appropriate for oven, and do not place any crockery upon it. roasting and grill of larger chunks of meat or The oven enamel may be damaged by the poultry at one level. -
Page 12: Oven Guide Levels
Oven accessories Lower heater and ventilator Both the lower heater and ventilator are in (differ according to different models) operation. The mode is useful for baking low Oven grid shelf for placing pans and trays, or pastry and preparation of preserved fruit and for food to be prepared using the grill. -
Page 13: Grease Filter
Grease filter Baking with hot air • This mode of baking is especially suitable for (depending on the model). baking at multiple levels, for moist pastry Inserted grease filter at the rear panel of the and fruit cakes. oven protects the fan, the heater and the oven •... - Page 14 Pastry Baking Table Type of pastry Guide level Temp. Guide level Temp. Baking (from down (°C) (from down (°C) time upwards) upwards) (in min.) Sweet pastry Raisin cake 160-170 150-160 55-70 Ring cake 150-160 60-70 160-170 Tree cake (tart form) 160-170 45-60 150-160...
- Page 15 Roasting time largely depends upon the type of must be surveyed at all times, and liquid meat, its size and quality, so you may expect added if necessary. • At approximately the middle of the indicated some variations. • Roasting of large chunks of meat may time turn the roast round, especially if you produce excessive steaming and dew use the deep roast dish.
-
Page 16: Grilling And Browning (Barbecue)
• Pierce the prepared meat with the broach Grilling and browning (barbecue) spike and secure it from both sides with • Take extra precautions when grilling. tightening forks. • Screw the handle on the front part of the Intensive heat from infrared heater makes broach, then insert the pointed end in the the oven and the accessories extremely opening at the rear oven panel, protected... -
Page 17: Preserving Of Fruit And Vegetables
Grill table Type of meat for grill Weight Guide level Temp. Temp. Grill time (in grams) (from (°C) (°C) (in min.) bottom up) Meat and sausages 2 beefsteaks, rare 14-16 2 beefsteaks, medium 16-20 2 beefsteaks, well done 20-23 2 pork scrag fillets 19-23 2 pork chops 20-23... -
Page 18: Cleaning And Maintenance
Preserving table Type of fruit or Quantity Bottom heaterand fan, After boiling Cooling vegetables time ° C, until boiling Fruit Strawberry 6x1 liter around 30 min switch off 15 min Drupes 6x1 liter around 30 min switch off 30 min Stewed fruit 6x1 liter around 40 min... - Page 19 Rinse the cleaner thoroughly and remove To reinsert, repeat the procedure backwards: any detergent remaining before the next use. slide them into the holes and swing • Never use aggressive cleaners, like downwards. polishing agents, dish cleaning accessories, corrosion inhibitors, or any other devices that might cause scratches.
-
Page 20: Troubleshooting Guide
Close the door slowly and check if they close Removing oven door properly (fig. 4). If you have trouble closing the (differ according to different models) door, check if the hinges are properly inserted Open the door to the horizontal position. Pull into their slots. -
Page 21: Replacement Of Parts
• is the temperature regulator properly set? Program clock indicates faulty values or switches on and off intermitently… Fuses often burn out... Switch the cooker off, disconnect it from the • Call the serviceman or your electrician! mains for a few minutes (unlock the fuse or switch off the main switch), then reconnect it to Oven illumination is not on.. -
Page 22: Instructions For Installation And Connection
Instructions for installation and connection Safety precautions for installation • Installation may be carried out only by qualified personnel. • The electric installation shall be equipped with a safety device, able to disconnect the appliance from mains in all wires, with the distance between contacts of not less than 3 mm in open position. -
Page 23: Installation Of Electric Oven
Installation of electric oven • Panels and furniture lining of the kitchen • Kitchen cabinet carrying the installed cabinet receiving the hob must be treated appliance must be fixed to the adjacent with temperature resistant adhesives cabinet to ensure adequate stability. (100°C), otherwise they might be •... -
Page 24: Electric Connection
Electric connection Electric connection may be carried Connection out by qualified service personnel • Using the screwdriver open the connector only! Wrong connection may permanently cover at the rear of the appliance. Release damage parts of the appliance and render two locks located at either side of the your warranty void! connector bottom. -
Page 25: Technical Information
Technical information Type-model EVP454-443E Dimensions of the appliance 588x555x548 (heigh/width/depth) (mm) Dimensions for mounting 600x560x550 (heigh/width/depth) (mm) AC 230 V Electric connection Nominal voltage of heaters 230 V, 50 Hz Max. temperature 250°C Oven Tenperature regulator/ function mode switch Guide levels (telescopic guides in 3 levels-...
Need help?
Do you have a question about the EVP454-443E and is the answer not in the manual?
Questions and answers
Co oznacza i jak usunąć błąd F16 kuchenki elektrycznej Gorenje EVP 454-443E