Erbe VIO 200 D Service Manual
Hide thumbs
Also See for VIO 200 D:
- User manual (152 pages) ,
- Quick manual (2 pages) ,
- Service manual (84 pages)

Related Manuals for Erbe VIO 200 D


Summary of Contents for Erbe VIO 200 D
- Page 1 ERBE ERBE VIO 300 D V 1.2.x V 1.3.x V 1.4.x V 1.5.x V 1.6.x V 1.7.x VIO 200 D V 1.4.x V 1.5.x V 1.6.x V 1.7.x 04.06...
- Page 3 SERVICE MANUAL VIO 300 D VIO 200 D...
- Page 4 All rights to this Service Manual, in particular rights of duplication, dissemination and translation, are reserved. No part of this Service Manual may be reproduced in any form (by photocopying, microfilming or other methods) or processed, duplicated or disseminated by the use of electronic systems without the written consent of ERBE Ele- ktromedizin GmbH.
-
Page 5: Table Of Contents
Controls at the rear ..................16 Technical Data ................19 Circuit Descriptions ..............21 Block diagram VIO 300 D ................22 Block diagram VIO 200 D ................23 Description of the various assemblies ............24 Line input ....................24 Low voltage power supply unit (l.v. supply) .......... 24 Power supply (high-voltage power supply unit) ........ - Page 6 TABLE OF CONTENTS Test programs................39 Call up Test programs................39 Exit Test programs ..................41 Parameter inputs in Test programs............41 Description of test programs ..............42 Test program "Display test" ..............42 Test program "TP relay" ............... 43 Test program "TP valves (APC)"...
- Page 7 TABLE OF CONTENTS Maintenance and servicing ............95 Who is allowed to perform servicing and maintenance work? ....95 What is a safety check? ................95 How often does a safety check have to be performed?......95 Safety check – step by step ...............96 Safety information.................
- Page 8 TABLE OF CONTENTS / 144...
-
Page 9: Safety Information
The supply voltage must match the voltage specified on the rating plate. Connect the unit / the equipment cart to a properly installed grounded outlet. Only use the ERBE power cord or an equivalent power cord for this purpose. The power cord must bear the national test symbol. -
Page 10: Electrostatically Sensitive Components
This service manual enables the service technician to perform main- tenance work to the necessary extent. The work may only be per- formed by ERBE or persons specially trained by ERBE. The manufacturer accepts no liability and warranty rights shall be void if: •... -
Page 11: Modifications
2 • Modifications CHAPTER 2 Modifications As from VIO version 1.3.x Hardware Component affected Description of the modification APC 2 module In addition to the APC receptacle, another receptacle can be added. The second receptacle can be either a multifunctional (only in conjunction with a VIO 300 D), monopolar or bipolar receptacle. - Page 12 2 • Modifications Component affected Description of the modification Test programs New “Measured values” test program. Test program mode can also be called up when the unit is As from VIO version 1.4.x Hardware Component affected Description of the modification APC 2 module In addition to the APC receptacle, another receptacle can be added.
- Page 13 2 • Modifications As from VIO version 1.5.x Hardware Component affected Description of the modification EIP 2 module The EIP 2 irrigation pump can be attached to the VIO HF surgical unit and operated via said unit. HF generator Development of a new HF generator module which will be recognized and supported by VIO D devices from software version 1.5.x onward.
- Page 14 2 • Modifications As from VIO version 1.6.x Hardware No changes Software Component affected Description of the modification VIO module New modes: BIPOLAR CUT+ (only relevant for VIO 300 D) BIPOLAR SOFT COAG+ (only relevant for VIO 300 D) As from VIO version 1.7.x Hardware No changes Software...
-
Page 15: Controls
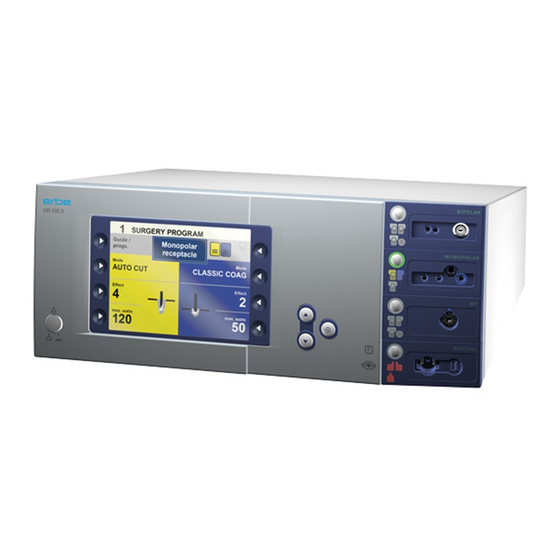
3 • Controls CHAPTER 3 Controls IMPORTANT! This chapter contains an overview of the controls of the unit(s). The relevant User Manual for the unit(s), knowledge of which is assumed for servicing work, provides detailed information about how to use the unit(s). Controls at the front Fig. -
Page 16: Controls At The Rear
Controls at the rear IMPORTANT! This unit comes with different power supply modules – plug-in or screw-in. VIO D with screw-in power supply module Fig. 3-2 Footswitch sockets ECB socket (ERBE Communication Bus) Potential equalization terminal Power supply module with fuses / 144... - Page 17 3 • Controls VIO D with plug-in power supply module Fig. 3-3 Footswitch sockets ECB socket (ERBE Communication Bus) Potential equalization terminal Power supply module with fuses / 144...
- Page 18 3 • Controls / 144...
-
Page 19: Technical Data
4 • Technical Data CHAPTER 4 Technical Data Power connection Rated supply voltage 100 V - 120 V ± 10% / 220 V - 240 V ± 10% Rated supply frequency 50 / 60 Hz Line current 8 A / 4 A Power input in standby mode 40 watts Power input with max. - Page 20 4 • Technical Data Acclimatizing If the unit has been stored or transported at temperatures below + 10 °C, in particular under 0 °C , the unit will require approx. 3 hours to acclimatize at room temperature. Standards Classification according to EC Directive 93/42/ II b Protection class as per EN 60 601-1 Type as per EN 60 601-1...
-
Page 21: Circuit Descriptions
5 • Circuit Descriptions CHAPTER 5 Circuit Descriptions / 144... -
Page 22: Block Diagram Vio 300 D
5 • Circuit Descriptions Block diagram VIO 300 D Fig. 5-1 / 144... -
Page 23: Block Diagram Vio 200 D
5 • Circuit Descriptions Block diagram VIO 200 D Fig. 5-2 / 144... -
Page 24: Description Of The Various Assemblies
5 • Circuit Descriptions Description of the various assemblies Line input The VIO system can be operated with a line voltage of either 220 – 240 V or 100 – 120 V. For this the corresponding value (230 V for a line voltage of 220 –... -
Page 25: Power Supply (High-Voltage Power Supply Unit)
5 • Circuit Descriptions Power supply (high-voltage power supply unit) The high-voltage power supply unit provides the HF generator with a DC voltage which may reach 450 V. It depends on the surgical effect selected and the alternating voltage necessary for this. WARNING! Make sure you observe the safety regulations when using line volt- age! -
Page 26: Hf Generator
5 • Circuit Descriptions HF generator The high-frequency generator consists of the "HF generator" circuit board with the power components, and the programmable logic de- vice (CPLD), which is responsible for transistor control but is located on the "CPU+Sensors" circuit board. The VIO system is only equipped with one generator module. -
Page 27: Cpu + Sensors
5 • Circuit Descriptions CPU + Sensors The "CPU + Sensors" circuit board includes the processor controlling all the hardware assemblies in the HF unit, and with the software as- semblies ensures the necessary exchange of data. All relevant sen- sors are also accommodated here. -
Page 28: User Interface (Control Panel)
It operates the display as well as the but- tons and displays on the front of the unit. It is the master unit for the ERBE Communication Bus (ECB). The control panel is used to log on all the assemblies, e.g. the HF module, APC 2, smoke evacuator, footswitches and all the sockets, and also to request the issue of sta- tus messages on a cyclical basis. -
Page 29: Iif (Instrument Interface)
5 • Circuit Descriptions IIF (Instrument Interface) The instrument interface assembly may be found up to four times in the VIO system: twice in the electrosurgical unit and twice in the APC 2 unit and VEM 2 unit respectively. The IIF is used to provide the system with the key instrument informa- tion via an electrically isolated serial interface: Activation recognition checks whether one of the activation but-... -
Page 30: Nessy2
5 • Circuit Descriptions Nessy2 The NESSY 2 assembly between measures the electrical resistance the two connections to the patient plate. In addition, the currents both connecting lines are measured. The measured values are transmitted to the "CPU + Sensors" via an electronically insulated asynchronous serial interface. -
Page 31: Set-Up
6 • SET-UP CHAPTER 6 SET-UP General information This unit has two SET-UP levels. The first level is accessible to users and service staff. The second level is only for use by the service staff. Overview of settings for SET-UP level 1 Setting Available from Description... -
Page 32: Overview Of Settings For Set-Up Level 2
6 • SET-UP Setting Available from Description AUTO V 1.2.x Input of start delay for the AUTO START function. START 2 The start delay value for AUTO START 2 depends on the value entered for AUTO START 1 but is always above the start delay value of AUTO START 1. - Page 33 6 • SET-UP Setting Avaiable from Description V 1.4.x The instrument is purged with gas automatically when it is AutoPurge plugged into the APC receptacle and an instrument that is already plugged into the APC receptacle is purged with gas auto- matically when the unit is started up.
- Page 34 6 • SET-UP Setting Avaiable from Description Decoupling V 1.5.x Setting on the decoupling capacitor. C (C = MAX: capacitor) Decoupling capacitor with maximum capacity. Available in HF generator modules 30140-804 and 30140-828. MIN: Decoupling capacitor with minimized capacity. Available only in HF generator module 30140-828. At this setting, neuromuscular stimuli are reduced in the PULSED APC mode.
- Page 35 Upgrade list: Indicates which upgrades have been installed. V 1.4.x Enable Kali (only relevant for VIO 200 D): Makes it possible to increase the HF power limitation for SWIFT COAG to 150 W. When switching off, the unit resets the increase back to the standard power limitation of 120 W automatically.
-
Page 36: Call Up Set-Up
6 • SET-UP Call up SET-UP IMPORTANT! As from Version 1.3.x there are various methods of scrolling for- wards within a menu: (a) with the Down button (b) with the selection button next to the menu item “More”. In the service manual, the variant (a) is used. Fig. -
Page 37: Change Settings
6 • SET-UP Change settings 1. Select the setting to be changed using the adjacent selection button (1...8). The setting is highlighted. 2. Change the setting with the Up/Down buttons (9/10). 3. Confirm the changed setting with the Enter button (12). / 144... - Page 38 6 • SET-UP / 144...
-
Page 39: Test Programs
7 • Test programs CHAPTER 7 Test programs Call up Test programs IMPORTANT! As from Version 1.3.x there are various methods of scrolling for- wards within a menu: (a) with the Down button (b) with the selection button next to the menu item “More”. In the service manual, the variant (a) is used. - Page 40 7 • Test programs Fig. 7-2 When the unit is ON 1. Call up "Guide" window. (only with V 1.3.x and later) 2. Select menu item "Other functions". 3. Select menu item "Setup". 4. Use the Down button (10) to scroll to the setting "Service pro- gram".
-
Page 41: Exit Test Programs
7 • Test programs Exit Test programs 1. Keep pressing the Up button (9) until "Restart" appears in the display. 2. Confirm the setting with the Enter button (12). The unit exits the test program mode. Parameter inputs in Test programs In some test programs it is possible to select or change values (e.g. -
Page 42: Description Of Test Programs
7 • Test programs Description of test programs Test program "Display test" This test program allows the brightness of the display to be changed. The current setting is displayed visually according to the color scale of red/ green/ blue and various shades of gray. On the socket covers all LEDs (focus buttons, pilot lamps for footswitches and for neutral electrodes) are switched on for control purposes. -
Page 43: Test Program "Tp Relay
7 • Test programs Test program "TP relay" With this test program all relays in the patient circuit can be controlled. The current switching position is shown by symbols and can be changed by pressing a button. For relays equipped with readback contacts (all except NE) the sig- naled circuit state is shown. -
Page 44: Test Program "Tp Valves (Apc)
7 • Test programs Test program "TP valves (APC)" In this test program the valves in the APC can be controlled. The current switching position is shown by symbols and can be changed by pressing a button. The control level for the proportional valve can be set from 0 to 100% Output valve APC receptacle 1 Output valve... -
Page 45: Test Program "Tp Power Supply Unit
7 • Test programs Test program "TP power supply unit" In this test program the high-voltage power supply unit can be param- eterized and switched on. The measurement values for voltage and current are displayed. The maximum power output is 400 W in continuous operation and 875 W in alternating operation (10/30 s). -
Page 46: Test Program "Tp Generator
7 • Test programs Test program "TP generator" ATTENTION! Never switch high voltages (FORC. / SPRAY) to a bipolar or multi- functional receptacle. ATTENTION! When there is no load the generator may produce high voltages, possibly resulting in irreparable damage to components or assem- blies. - Page 47 HF current Phase: phase angle (0...90°) Spark: value measured by spark sensor (no spark = 44 ERBE) UHF red.: value measured by redundant voltage sensor Temp.: Inside temperature of unit (measured on “CPU + Sensors” circuit board)
-
Page 48: Test Program "Burn-In Test" (Only For Production)
7 • Test programs SOFT AUTO FORC. SPRAY Voltage sensor 1000 V 1000 V 4000 V 4000 V measuring range Rel 12 Current sensor 1.0 A measuring range Rel 14 Test program "Burn-In test" (only for production) Test program "Watchdog" If the watchdog is functioning, the screen will briefly go dark after the Enter button is pressed and the unit restarts. -
Page 49: Test Program "Measured Values" (Only With V 1.3.X And Later)
HF current Phase: phase angle (0...90°) Spark: value measured by spark sensor (no spark = 44 ERBE) UHF red.: value measured by redundant voltage sensor Temp.: Inside temperature of unit (measured on “CPU + Sensors” circuit board) - Page 50 7 • Test programs / 144...
-
Page 51: Measurement And Adjustment
(This value is displayed in the test program "TP gen- erator", for example.) Test equipment IMPORTANT! The following list contains the testing and measuring equipment recommended by ERBE for servicing. Where ERBE article num- bers are specified, only original ERBE testing and measuring equipment should be used. ERBE Description Art. -
Page 52: Test Set-Up
8 • Measurement and adjustment Test set-up IMPORTANT! ERBE Elektromedizin recommends measuring HF output power with a Metron QA-ES. For this purpose the Metron must be adjusted so that it is up to date. To this end please contact a Met- ron service point. -
Page 53: Adjustment
Personnel requirements ATTENTION! Adjustments, technical tests, modifications, maintenance and repair work may only be performed by ERBE or persons trained by ERBE. If the work is not performed by trained persons, ERBE accepts no liability and warranty rights become void. -
Page 54: Test Equipment
8 • Measurement and adjustment Test equipment IMPORTANT! The following list contains the testing and measuring equipment recommended by ERBE for servicing. Where ERBE article num- bers are specified, only original ERBE testing and measuring equipment should be used. ERBE Description Art. -
Page 55: Voltage
8 • Measurement and adjustment Voltage Test set-up ATTENTION! When connecting the probe to the input of the HF power meter, make absolutely sure that minus is connected to the patient plate. ATTENTION! For adjustment steps "Voltage range 700 V" and "Voltage range 3 kV"... -
Page 56: Spark
8 • Measurement and adjustment Spark Test set-up Desktop PC Testbox 20100-019 Power S1 DC 70 V ECB connection Fig. 8-4 • The test setup is designed as shown in the illustration above. • The test specimen is connected to the power supply via the power cord. -
Page 57: Currents
SWIFT ° or from V 1.5.x onward SWIFT ° to OFF. IMPORTANT! Only relevant for VIO 200 D For the "current range 4 A" adjustment step call up the test pro- gram "Enable Kali" (SET-UP level 2) and confirm with the Enter button. - Page 58 8 • Measurement and adjustment Test procedure 1. Perform adjustment steps 7 – 8 as described in the software. / 144...
-
Page 59: Troubleshooting
ERROR list for VIO system Abbreviations used for identifying modules: Control panel CPU + Sensors Smoke evacuation system IES 2 Extension module VEM 2 2,3,5,6: IIF (Instrument Interface) of corresponding receptacle slot 4 (NE): Nessy2 ERBE Irrigation Pump EIP 2 / 144... -
Page 60: A/E-Errors
9 • Troubleshooting Status of ERROR list: 08.04 A/E-Errors Recognizing module: A = APC, E = Extension module VEM 2 Recog- Error Additional infor- nizing Description Remedy code mation module Timeout of activation sig- Ensure uninterrupted CAN nal. transmission (e.g. shielded FS cable or position of FS cable to HF cable). - Page 61 9 • Troubleshooting Recognizing module: A = APC, E = Extension module VEM 2 Recog- Error Additional infor- nizing Description Remedy code mation module IIF does not react. Serial communication with IIF not possible, check con- nections. CAN error. Information, CAN data (length) error.
- Page 62 9 • Troubleshooting Recognizing module: A = APC, E = Extension module VEM 2 Recog- Error Additional infor- nizing Description Remedy code mation module Flow specification not User error. attained. Flow specification Calibration error or sen- exceeded. sors faulty. Program CRC test. Information, reprogram.
-
Page 63: B-Errors
One-off event -> EMC prob- Occurs if the program lem => Check environment. crashes due to a software Reproducible -> Software error or malfunction (e.g. error => Inform ERBE EMC). Tübingen Technical Ser- vice. Bit combination con- Timeout monitoring: Check module given in... - Page 64 One-off event -> EMC prob- memory access: lem => Check environment. Occurs if the program Reproducible -> Software crashes due to a software error => Inform ERBE error or malfunction (e.g. Tübingen Technical Ser- EMC). vice. NE module is not available: Check NE module.
- Page 65 One-off event -> EMC prob- been enabled for over 110 lem => Check environment. ms during activation. Reproducible -> Software error => Inform ERBE Tübingen Technical Ser- vice. CAN ID of activation Activation signal during User error or faulty activa- signal (e.g.
- Page 66 APC module) fails to react 1000 or 100 HF mod- to a deactivation request for Reproducible -> Software ule (Coag) longer than 110 ms. error => Inform ERBE Tübingen Technical Ser- 2000 or 200 HF mod- vice. ule (Cut) 4000 or 400 APC...
- Page 67 (e.g. a bit flips in Replace assembly. 3: CutMode DRAM memory). 4: CutIntensity Reproducible -> Software 5: CutEffect error => Inform ERBE 6: CoagIntensity Tübingen Technical Ser- 7: CoagEffect vice. 8: CoagMode B: CutAPCFlow C: CoagAPCFlow D: CutIESFlow...
- Page 68 HF CPU. transmits an invalid status message (0X27). Occurs if an incorrect sta- Check software status of tus message is received the system components. from the IES 2. If the error is reproducible notify => Technical Service ERBE Tübingen. / 144...
- Page 69 Indication of incorrect CAN Check software version of protocol: system components. Occurs if a non ECB-speci- If reproducible => Inform fied CAN message is ERBE Tübingen Technical received. Service. Number of the Indication of a change in Check connectors. Check changed receptacle.
- Page 70 9 • Troubleshooting Recognizing module: B = Control panel Recog- Error Additional informa- nizing Description Remedy code tion module Single-pedal footswitch rec- Information. ognized: Occurs if a single-pedal footswitch is connected. Single-pedal footswitch has Information. been disconnected from the system: Occurs if a single-pedal footswitch is disconnected from the system.
- Page 71 (e.g. due to a storage cell error => Replace assembly. flipping). The setting is lost and the basic setting for Reproducible -> Software this test program is error => Inform ERBE restored. Tübingen Technical Ser- vice. Error in the program list: One-off event -> Interfer- Occurs if the checksum of a ence =>...
- Page 72 9 • Troubleshooting Recognizing module: B = Control panel Recog- Error Additional informa- nizing Description Remedy code tion module Activation type: This activation type is not User error or activation ele- available: ment (see additional infor- 1 => Dual-pedal foot- Occurs if the user assigns mation) faulty and therefore switch both pedals...
- Page 73 9 • Troubleshooting Recognizing module: B = Control panel Recog- Error Additional informa- nizing Description Remedy code tion module Number of output Instrument has been dis- Information. receptacle. connected from the system: Occurs if an instrument with instrument recognition is disconnected from the sys- tem.
- Page 74 9 • Troubleshooting Recognizing module: B = Control panel Recog- Error Additional informa- nizing Description Remedy code tion module Activation not possible until User error. settings are confirmed: Occurs if the user wants to perform activation after switching on the unit with- out confirming the settings beforehand.
- Page 75 9 • Troubleshooting Recognizing module: B = Control panel Recog- Error Additional informa- nizing Description Remedy code tion module NESSY current value. NESSY current density User error. warning: It should be certain that the Occurs if the Nessy current measured value is incorrect density monitoring signals =>...
- Page 76 9 • Troubleshooting Recognizing module: B = Control panel Recog- Error Additional informa- nizing Description Remedy code tion module Interface module has been Information. disconnected from the sys- tem: Occurs if an interface mod- ule (e.g. VIO PORTAL) is disconnected from the sys- tem.
- Page 77 9 • Troubleshooting Recognizing module: B = Control panel Recog- Error Additional informa- nizing Description Remedy code tion module Neither footswitch nor Information. AUTO START assigned: Occurs if an instrument without a fingerswitch is recognized and neither a footswitch nor AUTO START is assigned.
- Page 78 9 • Troubleshooting Recognizing module: B = Control panel Recog- Error Additional informa- nizing Description Remedy code tion module ID of CAN message CAN MESSAGE: Information. with associated data Occurs as soon as a CAN bytes. message, which is to be logged in a protocol, is transmitted by the control panel.
-
Page 79: C-Errors
CAN analysis (e.g. PCAN explorer). System error: Internal sta- One-off event: Switch unit tus. off and on again. Reproducible: Inform ERBE Tübingen Technical Ser- vice. System error: CAN mes- One-off event: Switch unit sage with wrong length. off and on again. - Page 80 9 • Troubleshooting Recognizing module: C = CPU + Sensors Recog- Error Additional infor- nizing Description Remedy code mation module Measurement values of E.g. HF power output > NT P_HF and P_NT do not power output. agree. Check power supply unit (TP power supply unit).
- Page 81 9 • Troubleshooting Recognizing module: C = CPU + Sensors Recog- Error Additional infor- nizing Description Remedy code mation module Measurement value for HF Check power supply unit current too small with OFF. (TP power supply unit). Check generator (TP generator). Check sensors.
- Page 82 9 • Troubleshooting Recognizing module: C = CPU + Sensors Recog- Error Additional infor- nizing Description Remedy code mation module Measurement value for Check generator phase too great with ON. (TP generator). Check sensors. Measurement value for Check generator phase too small with ON. (TP generator).
- Page 83 9 • Troubleshooting Recognizing module: C = CPU + Sensors Recog- Error Additional infor- nizing Description Remedy code mation module Operating voltage +24 V Check operating voltages. incorrect. Operating voltage –5 V Check operating voltages. incorrect. Relay configuration insuffi- Check IIF components cient.
- Page 84 9 • Troubleshooting Recognizing module: C = CPU + Sensors Recog- Error Additional infor- nizing Description Remedy code mation module Temperature sensor at Check sensor (display in CPU + sensors defective. TP generator or on CAN bus). EEPROM calibration values Carry out calibration.
-
Page 85: D-Errors
Software error Reinstall software. (check total). Software IMPORTANT! may only be re-installed and updated by ERBE Ele- ktromedizin Tübingen. Send unit for repair. Pressure sensor error Restart IES 2. Replace control board. / 144... -
Page 86: 2,3,5,6-Errors
9 • Troubleshooting 2,3,5,6-Errors Recognizing module: 2,3,5,6 = IIF (Instrument Interface) of corresponding receptacle slot Recog- Error Additional infor- nizing Description Remedy code mation module 2,3,5,6 Interrupt error: Reprogram µC. Replace (socket) An undefined IR vector has µC. been invoked. 2,3,5,6 CRC error: Reprogram µC. - Page 87 9 • Troubleshooting Recognizing module: 2,3,5,6 = IIF (Instrument Interface) of corresponding receptacle slot Recog- Error Additional infor- nizing Description Remedy code mation module 2,3,5,6 Undercurrent instrument Check power source IC17, (socket) recognition: voltage dividers R168, The measurement current R169 and test resistor for analysis of the instru- R126.
- Page 88 9 • Troubleshooting Recognizing module: 2,3,5,6 = IIF (Instrument Interface) of corresponding receptacle slot Recog- Error Additional infor- nizing Description Remedy code mation module 2,3,5,6 Short circuit activation rec- Check instrument and (socket) ognition R_NEU: The resis- socket module. tor value determined for the activation recognition cor- responds to a short circuit.
- Page 89 9 • Troubleshooting Recognizing module: 2,3,5,6 = IIF (Instrument Interface) of corresponding receptacle slot Recog- Error Additional infor- nizing Description Remedy code mation module 2,3,5,6 Non-permissible instru- Carry out reset. Repro- (socket) ment recognition R_S3: gram µC. Replace µC. Non-permissible value determined for resistor- coded instrument recogni- tion.
-
Page 90: Ne)-Errors
9 • Troubleshooting 4 (NE)-Errors Recognizing module: 4 (NE) = Nessy2 Recog- Error Additional infor- nizing Description Remedy code mation module 4 (NE) Interrupt error: Reprogram µC. Replace An undefined IR vector has µC. been invoked. 4 (NE) CRC error: Reprogram µC. - Page 91 9 • Troubleshooting Recognizing module: 4 (NE) = Nessy2 Recog- Error Additional infor- nizing Description Remedy code mation module 4 (NE) Stack error: Reprogram µC. Replace The stack pointer does not µC. point to Top of Stack in the main program loop (no UPR call up, no IR).
-
Page 92: 9-Errors
9 • Troubleshooting 9-Errors Recognizing module: 9 = ERBE Irrigation Pump EIP 2 Recog- Error Additional nizing Description Remedy code information module CRC Error. CRC error: Reprogram the EIP 2 main Occurs if the EIP 2 CRC board or replace the main monitoring procedure per- board. -
Page 93: Testing And Measuring Equipment
– High Voltage Differential Probe (recommended: TESTTEC TT-SI 9010, Tektronix P5210 oder Sapphire SI-9010) 29140-211 VIO HF Adjustment Tool (software, only for internal use by ERBE) 20140-002 VIO Support Hardware (software, only for internal use by ERBE) 20188-100 Single-pedal footswitch... - Page 94 9 • Troubleshooting ERBE Description Art. No 20100-019 Testbox spark monitor, 230 V 83702-016 Socket spanner for ECB socket 83702-017 Socket spanner for footswitch socket 83702-018 Torx screwdriver TX 10 / 144...
-
Page 95: Maintenance And Servicing
ATTENTION! Adjustments, tests, modifications, maintenance and repair work may only be performed by ERBE or persons trained by ERBE. If the work is not performed by trained persons, ERBE accepts no liability and warranty rights become void. It is recommended that the safety check also be performed by ERBE or persons trained by ERBE. -
Page 96: Safety Check - Step By Step
ERBE test equipment, measuring equipment, and auxiliary test equipment may be used. IMPORTANT! The test report for the safety check can be requested from ERBE Technical Service Tübingen. For the address see address sheet on last page. / 144... -
Page 97: User Manual And Visual Inspections
IMPORTANT! with the “TP relay” test program. • Patient leakage current, normal condition (N.C.). • Patient leakage current, single-fault condition (S.F.C.). DC resistance Testing and measuring equipment ERBE Description Art. No. 20192-127 Patient cable AE 20192-110 Patient cable AE, international... - Page 98 Across the measuring lines there is the DC voltage of 500 V! In order to avoid injuries, only switch on the test specimen and safety tester when all the electrical connections have been made. ERBE Fig. 10-1 • The test specimen is connected to the power supply via the power cord.
-
Page 99: Performance Tests
10 • Maintenance and servicing Performance tests Testing and measuring equipment ERBE Description Art. No. 20189-101 Dual-pedal footswitch with ReMode 20194-070 Patient cable NE 20194-075 Patient cable NE, international 20100-033 Adapter cable NE Test set-up • The test specimen is connected to the power supply via the power cord. - Page 100 10 • Maintenance and servicing Display / LEDs Display: 1. Check the backlighting of the display to make sure it is operating properly. If backlighting is faulty, no image will be visible. LEDs: 1. At system all the LEDs must light up green briefly with equal brightness.
-
Page 101: Footswitch Activation
10 • Maintenance and servicing Footswitch activation Testing and measuring equipment ERBE Description Art. No. 20188-100 Single-pedal footswitch 20189-101 Dual-pedal footswitch with ReMode Test set-up Fig. 10-2 • The test specimen is connected to the power supply via the power cord. -
Page 102: Fingerswitch Activation
1. Press ReMode button on the dual-pedal footswitch. The test pro- gram must confirm switchover by lighting up the relevant field in ReMode color in the "MF" icon. Fingerswitch activation Testing and measuring equipment ERBE Bezeichnung Art.-Nr. 20192-127 Patientenkabel AE oder... -
Page 103: Instrument Recognition Mf Receptacle
"Handpiece" icon. (only if there is an 2. Remove the VIO ReMode electrode handle. MF receptacle) Instrument recognition MF receptacle Testing and measuring equipment ERBE Description Art. No. 20100-152 BiClamp measuring cable Instrument recognition via Currently not available. -
Page 104: Automatic Start Mode
10 • Maintenance and servicing Automatic start mode Testing and measuring equipment ERBE Description Art. No. 20196-045 Bipolar cable 20196-053 Bipolar cable, international 20100-034 Adapter cable bipolar 20100-102 VIO Testbox Auto Start/Auto Stop (bipolar start/stop) Test set-up ERBE Testbox 20100-102 Fig. - Page 105 10 • Maintenance and servicing 2nd test step 1. Set test specimen to: BIPOLAR SOFT, Effect 8, 50 watts AUTO START 1 2. On the VIO Testbox press button T1. The test specimen must start activation after the set start delay. 3.
-
Page 106: Automatic Stop Mode
10 • Maintenance and servicing Automatic stop mode Testing and measuring equipment ERBE Description Art. No. 20196-045 Bipolar cable 20196-053 Bipolar cable, international 20100-034 Adapter cable bipolar 20100-102 VIO Testbox Auto Start/Auto Stop (bipolar start/stop) 20188-100 Single-pedal footswitch Test set-up... -
Page 107: Spark Monitor
10 • Maintenance and servicing Spark monitor Testing and measuring equipment ERBE Description Art. No. 20192-127 Patient cable AE 20192-110 Patient cable AE, international 20190-045 Electrode handle ICC/ACC 20194-070 Patient cable NE 20194-075 Patient cable NE, international 20100-033 Adapter cable NE... - Page 108 (in this case "Output receptacle: 2 MONOPOLAR"). Test procedure 1. On the Testbox press button S1. 2. In the test program read off the measured value for "Spark". The tolerance range is 245 to 285 ERBE. / 144...
-
Page 109: Hf Power Output Cut
10 • Maintenance and servicing HF power output CUT Testing and measuring equipment ERBE Description Art. No. 20192-127 Patient cable AE 20192-110 Patient cable AE, international 20190-045 Elektrode handle ICC/ACC 20194-070 Patient cable NE 20194-075 Patient cable NE, international 20100-033... - Page 110 1. The DRY CUT is only standard scope of supply with VIO 300 D electrosurgical units. With VIO 200 D electrosurgical units it can be purchased and installed as an upgrade. For details of how to test DRY CUT with VIO 200 D electrosurgical units see chapter "Performance test upgrades".
- Page 111 80 to 120 watts. BIPOLAR CUT+ Test set-up of the multifunctional receptacle (only if there is an MF receptacle) ERBE Bipolar HF power meter Fig. 10-10 • The test specimen is connected to the power supply via the power cord.
-
Page 112: Hf Power Output Coagulate
10 • Maintenance and servicing HF power output COAGULATE Testing and measuring equipment ERBE Description Art. No. 20192-127 Patient cable AE 20192-110 Patient cable AE, international 20190-045 Electrode handle ICC/ACC 20194-070 Patient cable NE 20194-075 Patient cable NE, international 20100-033... - Page 113 72 to 108 watts. SOFT COAG Test set-up FORCED COAG SPRAY COAG ERBE HF power meter Fig. 10-12 • The test specimen is connected to the power supply via the power cord. • The levels of power are determined with the HF power meter. The measuring cables are plugged into the HF power meter direct.
-
Page 114: Performance Test Upgrades
3. Activate test specimen via COAG button on the electrode handle. 4. Determine and document measured value. The tolerance range is 96 to 144 watts. Performance test upgrades Testing and measuring equipment ERBE Description Art. No. 20192-127 Patient cable AE... - Page 115 10 • Maintenance and servicing DRY CUT Test set-up (only to be tested as an upgrade with VIO 200 D) ERBE HF power meter Fig. 10-13 • The test specimen is connected to the power supply via the power cord.
- Page 116 For these tests in SET-UP level 2 set the Expert mode to "ON". Oscilloscope High Voltage Differential probe ERBE HF power meter Fig. 10-14 • The test setup is designed as shown in the illustration above. • The test specimen is connected to the power supply via the power cord.
- Page 117 6. Determine the duration of the cutting pulse. The tolerance range is 320 to 380 ms BI PRECISE COAG Test set-up ERBE Bipolar HF power meter Fig. 10-15 • The test specimen is connected to the power supply via the power cord.
-
Page 118: Monitor Circuits
3. Activate test specimen via COAG pedal on the footswitch. 4. Determine and document measured value. The tolerance range is 40 to 60 watts. Monitor circuits NE monitoring of critical Testing and measuring equipment resistance ERBE single surfaced Description Art. No. neutral electrodes 20194-070 Patient cable NE... - Page 119 2. Activate AUTO CUT via the footswitch. The test specimen must inhibit activation and emit or display an optical and acoustic war- ning. 2nd test step ERBE Testbox 20100-101 Fig. 10-17 • The test specimen is connected to the power supply via the power cord.
- Page 120 10 • Maintenance and servicing NE monitoring of critical Testing and measuring equipment resistance ERBE dual surfaced Description Art. No. neutral electrodes 20194-070 Patient cable NE 20194-075 Patient cable NE, international 20100-033 Adapter cable NE 20100-101 VIO Testbox Symmetry/Resistance (NE asymmetry/critical resistance)
- Page 121 10 • Maintenance and servicing 2nd test step Testbox 20100-101 ERBE Fig. 10-19 • The test specimen is connected to the power supply via the power cord. • The test is performed without a load. • The NE receptacle of the test specimen is connected to the VIO Testbox via the patient cable NE with the adapter cable.
- Page 122 2. Activate AUTO CUT via the footswitch. The test specimen must inhibit activation and display or emit an optical and acoustic war- ning. NE monitoring of asymmetry Testing and measuring equipment ERBE Description Art. No. 20192-127 Patient cable AE 20192-110...
- Page 123 10 • Maintenance and servicing • The test specimen is connected to the power supply via the power cord. • The NE receptacle of the test specimen is connected to the VIO Testbox via the patient cable NE with the adapter cable. •...
- Page 124 10 • Maintenance and servicing 3rd test step Testbox 20100-101 Fig. 10-23 • The test specimen is connected to the power supply via the power cord. • The NE receptacle of the test specimen is connected to the VIO Testbox via the patient cable NE with the adapter cable. •...
-
Page 125: Spare Parts
11 • Spare parts CHAPTER 11 Spare parts VIO D with plug-in power supply module IMPORTANT! These units come with different power supply modules – plug-in or screw-in (see chapter "Controls"). Some unit components differ, depending on the type of power supply module the unit has. 55100-003 (1) 55207-003 (1) 40140-011 (1) - Page 126 11 • Spare parts 40140-018 (1) 30140-808 (1) 55000-122 (3) Fig. 11-2 / 144...
- Page 127 11 • Spare parts 30140-811 (1) 50610-011 (1) 30140-712 (1) 40140-126 (1) 40140-076 (8) 55000-116 (4) 40140-070 (1) 55105-004 (3) 40140-061 (1) 40140-099 (2) Fig. 11-3 / 144...
- Page 128 11 • Spare parts Fig. 11-4 / 144...
- Page 129 11 • Spare parts Fig. 11-5 / 144...
- Page 130 11 • Spare parts Fig. 11-6 / 144...
-
Page 131: Vio D With Screw-In Power Supply Module
11 • Spare parts VIO D with screw-in power supply module IMPORTANT! These units come with different power supply modules – plug-in or screw-in (see chapter "Controls"). Some unit components differ, depending on the type of power supply module the unit has. 55100-003 (1) 55207-003 (1) 30140-117 (1) - Page 132 11 • Spare parts 40140-018 (1) 30140-808 (1) 55000-122 (3) Fig. 11-8 / 144...
- Page 133 11 • Spare parts 30140-811 (1) 50610-011 (1) 30140-712 (1) 40140-126 (1) 40140-076 (8) 55000-116 (4) 40140-070 (1) 55105-004 (3) 40140-061 (1) 40140-099 (2) Fig. 11-9 / 144...
- Page 134 11 • Spare parts Fig. 11-10 / 144...
- Page 135 11 • Spare parts Fig. 11-11 / 144...
- Page 136 11 • Spare parts Fig. 11-12 / 144...
-
Page 137: Wiring
11 • Spare parts Wiring Wiring for HF generator module 30140-804 Fig. 11-13 / 144... - Page 138 11 • Spare parts Fig. 11-14 / 144...
-
Page 139: Wiring For Hf Generator Module 30140-828
11 • Spare parts Wiring for HF generator module 30140-828 Fig. 11-15 / 144... - Page 140 11 • Spare parts Fig. 11-16 / 144...
-
Page 141: Circuit Boards
11 • Spare parts Circuit Boards Fig. 11-17 / 144... -
Page 142: Receptacle Modules
11 • Spare parts Receptacle modules Bipolar receptacles ERBE Art. No. 20140-610 Receptacle module BI 8/4 Fig. 11-18 ERBE Art. No. 20140-611 Receptacle module BI 2PIN 28 Fig. 11-19 ERBE Art. No. 20140-612 Receptacle module BI 2PIN 22 Fig. 11-20 Monopolar receptacles ERBE Art. -
Page 143: Mf Receptacle
11 • Spare parts ERBE Art. No. 20140-622 Receptacle module MO 3PIN-Bovie Fig. 11-23 ERBE Art. No. 20140-623 Receptacle module MO 3PIN-9/5 Fig. 11-24 MF receptacle ERBE Art. No. 20140-630 Receptacle module MF 0 Fig. 11-25 Receptacles for neutral electrode ERBE Art. - Page 144 11 • Spare parts / 144...
Need help?
Do you have a question about the VIO 200 D and is the answer not in the manual?
Questions and answers