Table of Contents
Advertisement
Quick Links
Advertisement
Table of Contents

Subscribe to Our Youtube Channel
Related Manuals for Ambir ImageScan Pro 930u


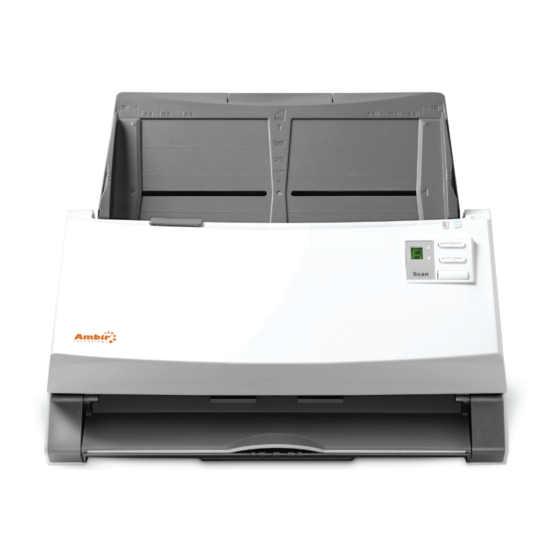
Summary of Contents for Ambir ImageScan Pro 930u
- Page 2 Trademarks ©2011 Ambir Technology, Inc. All rights are reserved. All trademarks and brand names mentioned in this publication are property of their respective owners. Liability While all efforts have been made to ensure the accuracy of all contents in this manual, we assume no liability for errors or omissions or by statements of any kind in this manual, whether such errors are omissions or statements resulting from negligence, accidents, or any other cause.
-
Page 3: Table Of Contents
Table of Contents ........................ 4 NTRODUCTION How to Use This Guide ....................4 Guide Conventions ....................5 A Note about Icons ......................5 Safety Precautions ..................... 5 Minimum System Requirements ................6 Box Contents ....................... 7 The Scanner Features ....................8 LED Indicator ...................... -
Page 4: Introduction
NTRODUCTION Thank you for purchasing an Ambir scanner. We have designed this product to provide you with an effective tool to capture, manage, and archive documents of many types. We encourage you to read this important User Guide carefully. OW TO... -
Page 5: Guide Conventions
UIDE ONVENTIONS Bold — Represents commands or contents on your computer screen. ALL CAPS — Important note or first use of an important term in a chapter. Italic — Represents buttons on your scanner OR important notes. A Note about Icons This guide uses the following icons to point out information that deserves special attention. -
Page 6: Minimum System Requirements
3. Keep the space around the AC adapter clear in case you need to quickly unplug the AC adapter during an emergency. 4. Damaged wire could cause fire or electrical shock. Keep the power cord straight and avoid placement where it could lie twisted or bent. 5. -
Page 7: Box Contents
ONTENTS 1. Scanner 2. USB Cable 3. AC Adapter 4. Paper Chute (Automatic Document Feeder or ADF) 5. Quick Guide 6. Setup/Application CD-ROM 7. Calibration Sheet 8. Memo Label 9. Cleansing Cloth 10. Pad Module Save the box and packing materials in case you need to transport this scanner in the future. -
Page 8: The Scanner Features
CANNER EATURES 1. PAPER CHUTE—Helps keep the paper in place. Install the paper chute before using the scanner. PAPER WIDTH SLIDER—Adjusts the paper width slider for the paper size you are using. 3. COVER OPEN LEVER—Opens the cover of the Automatic Document Feeder (ADF). - Page 9 3. POWER SAVING BUTTON—Press and hold about one half-second to enter the standby mode (sleep mode). You may press this button again to wake up the scanner from power saving. 4. POWER / POWER SAVING LED—Indicates the scanner status. 5. UP BUTTON—Press to move forward the scanning task number indicated in the function number display.
-
Page 10: Led Indicator
14. USB PORT—Connects the scanner to a USB port on your computer by the included USB cable. 15. POWER RECEPTOR—Connects the scanner to a standard AC power outlet by the included AC adapter. 16. POWER SWITCH—Use this to turn the scanner ON or OFF. LED I NDICATOR The Power/Power Saving LED and Warning LED indicate different scanner... -
Page 11: Ultrasonic Sensor
LTRASONIC ENSOR When scanning a stack of documents using the ADF, the Ultrasonic Sensor detects and prevents paper jams by checking paper overlap. If the Sensor detects 2 or more pages stuck together when being fed through the ADF, it halts scanning and triggers a message on your computer screen, letting you separate the sheets and continue scanning. -
Page 12: Chapter I. Installing The Scanner
HAPTER NSTALLING THE CANNER Before installing your scanner, please verify that you have all of the proper components. A list of the package contents is provided in the “Box Contents” section on Page 4 of this guide. OFTWARE NSTALLATION EQUIREMENTS Your scanner comes with the following software included: - AmbirScan ADF - OCR software (ABBYY FineReader 9.0 Sprint) -
Page 13: Installing And Setting Up The Scanner
NSTALLING AND ETTING UP THE CANNER Please follow the step-by-step procedures described below to install the Ambir ImageScan Pro™ 940u scanner. Choose the right location first! Always place your scanner on a level, smooth and strong surface before proceeding with scanner setup or any scanning task. -
Page 14: Step 1. Install The Paper Chute
Step 1. Install the Paper Chute 1. Open the ADF cover by pulling the lever, and get the paper chute ready. Cover open lever ADF cover 2. Install the paper chute by aligning and inserting the tabs of the paper chute into their slots on the scanner. -
Page 15: Step 2. Connecting The Scanner To Your Computer
Step 2. Connecting the Scanner to Your Computer Please make sure the scanner is turned OFF before you plug or unplug the scanner power adapter. Attention 1. Plug the AC adapter into the scanner’s power receptor 2. Plug the other end of the AC adapter into a standard AC power outlet. 3. -
Page 16: Step 3. Installing The Software
Step 3. Installing the Software 1. Switch on the scanner power from the rear of the scanner. 2. If the USB components on your computer are functioning correctly, they will automatically detect the scanner causing the Add New Hardware Wizard or Found New Hardware Wizard to be launched. -
Page 17: Step 4. Testing The Scanner
If you have more than one scanner or other imaging device installed on your computer: Click Select Source from the File menu of Presto! PageManager 9 and then choose the Ambir ImageScan Pro ™ 940u scanner as the default scanning source. -
Page 18: Installing Additional Software
Within Presto! PageManager 9, click Tools > Scan Settings > uncheck “Suppress TWAIN User Interface” > OK. Click File > Acquire Image Data. Select ADF (Front Side) as the Scan Type within the TWAIN window. Click the Scan button. The document in the ADF paper chute should be now loaded into the ADF and scanned. -
Page 19: Chapter Ii. Scanning
II. S HAPTER CANNING The AmbirScan ADF program seamlessly integrates the operation of your scanner with your computer and other peripherals. AmbirScan ADF provides a quick and convenient way to perform various scanning functions. With AmbirScan ADF, you don't need to adjust settings every time you scan. Simply press any button on the scanner's front panel or click any scanning menu item of AmbirScan ADF on the screen. -
Page 20: Preparing Documents
REPARING OCUMENTS Proper document preparation prior to the scan can prevent paper feed errors and damages to the scanner. Checking Document Conditions Make sure the size and ream weight of your documents are acceptable by the scanner. Refer to “Appendix A: Specifications” of this guide for more information. -
Page 21: Loosening Documents
However, don’t use the ADF to scan any of the following documents: Paper lighter than 14 lb. (50 g/m ) or heavier than 28 lb. (105 g/m Paper with clips or staples attached Paper with inconsistent thickness, e.g., envelopes ... - Page 22 For single-sided scans, load the documents face down so that the side to be scanned faces towards the paper chute. For double-sided scans, load the desired page order of documents face down so that the side to be scanned faces towards the paper chute. If you wish to scan both sides of a single page, the page need only pass through the ADF once.
-
Page 23: Placing Business Cards
DO NOT load more than 100 sheets of paper (70 g/m , 18 lb.) to the ADF. Paper scanned from the ADF must be a minimum of 5.08 x 5.08 cm (2” x 2”, W x Make sure there are no gaps between ... -
Page 24: Placing Plastic Cards
LACING LASTIC ARDS The Ambir ImageScan Pro 940u is equipped to scan plastic cards. Plastic cards can be embossed credit cards, driver licenses, ID cards, insurance cards, Medicare cards or any membership cards. Make sure to load the embossed face of the embossed card top first, face down into the scanner. -
Page 25: Scanning Documents
CANNING OCUMENTS There are three different ways to operate the scanner when scanning documents: 1. By acquiring images from the scanner into a TWAIN-compliant application through our TWAIN software interface. 2. By scanning from the buttons on the scanner front panel. 3. - Page 26 PageManager 9. From the File menu of PageManager 9, click Select Source. In the window that opens, choose Ambir ImageScan Pro 940u and then click the OK button to set this scanner as the default scanning source.
- Page 27 Front Side button to adjust the scanning settings of the document's front side and then click Rear Side button to adjust the scanning settings of document's rear side. You can enable the function of Merge Pages only when you select ADF (Duplex) as Scan type and Automatic Size as Page Size to output the scan images of both front and rear sides in one image.
-
Page 28: Scanning From The Scanner's Front Panel
Scanning from the Scanner’s Front Panel Using the Ambir ImageScan Pro™ 940u front buttons to control scanning is very easy and convenient once you set the front panel controls up. number of scanning tasks displayed on the scanner’s front panel is configured through AmbirScan ADF. -
Page 29: Scanning From The On-Screen Ambirscan Adf Execute Menu
1. Do one of the following to open the Button Configuration window: Double-click the icon in the Windows system tray. Right-click the icon in the Windows system tray, and then choose Button Configuration… in the pop-up menu that opens. 2. - Page 30 3. Right-click the icon in the Windows system tray, and then choose Button Configuration… in the pop-up menu that opens. 4. Click the desired button function item in the pop-up menu. The scanner starts to scan immediately and carry out the corresponding action according to settings you have set up in the Button Configuration window.
-
Page 31: Chapter Iii. Care And Maintenance
In business environments, monthly maintenance appropriate. more information, visit http://www.ambir.com/care Perform the following procedures to clean the scanner surface and the ADF unit. Gently wipe locations described below. Do not rub too hard. Before cleaning the scanner, turn off scanner disconnect scanner’s power cable and USB cable,... -
Page 32: Cleaning The Adf
Cleaning the ADF 1. Open the ADF cover by pulling the lever. Cover open lever ADF cover 2. Gently wipe the following areas with the cloth dampened with the cleaner. Be careful NOT to scratch their surfaces. Clean Feed Roller: Wipe the Feed Roller from side to side and then rotate it. - Page 33 Clean ADF Glass: Do not spray cleaner directly onto the scanner glass. Excess liquid residue may fog the glass or damage the scanner. Attention 3. Wait for cleaned areas to dry completely. 4. Close the ADF cover by pushing it back down until it snaps back into place.
-
Page 34: Replacing Consumables
From the Windows START menu, point to All Programs > Ambir ImageScan Pro 940u, and then click Counter Utility. Refer to the online help of Counter Utility to explorer more about Counter Utility. -
Page 35: Replacing The Feed Roller
3. Install the new pad module by inserting the tabs on the module onto their slots on the scanner. 4. Close the ADF cover by pushing it back down until it snaps back into place. Replacing the Feed Roller 1. Open the ADF cover by pulling the cover open lever. Cover open lever ADF cover... - Page 36 2. Remove the paper chute by pinching both sides of the handles on the paper chute to remove it. 3. Remove the feed roller by pinching both sides of the feed roller and pull it out.
- Page 37 4. Install the new feed roller by aligning and inserting the feed roller onto the roller assembly on the scanner.
- Page 38 5. Install the paper chute by aligning and inserting the tabs of the paper chute into their slots on the scanner. 6. Close the ADF cover by pushing it back down until it snaps back into place.
-
Page 39: Calibrating The Scanner
1. Your scanner came packaged with a special sheet with symbols printed on it called a Calibration Sheet. The Calibration Sheet is marked with an arrow on either edge at both sides and is used specifically for Ambir ImageScan Pro 940u calibration. -
Page 40: Power Save
From the Windows START menu, point to All Programs > Ambir ImageScan Pro 940u, and then click Scanner Utility. Refer to the online help of Scanner Utility to explore more about standby mode. -
Page 41: Chapter Iv. Troubleshooting
Many common use issues can be resolved by referring to the information in this chapter, or by consulting the FAQ (Frequently Asked Questions). To read the FAQ, from the Windows START menu, point to All Programs > Ambir ImageScan Pro 940u, and then click FAQ. -
Page 42: Clearing Paper Jams
LEARING APER If a paper jam in the ADF happens, please perform the following steps: 1. Remove any unjammed documents still loaded into the ADF. 2. Open the ADF cover by pulling the cover open lever. Cover open lever ADF cover 3. -
Page 43: Ppendix A: Specifications
A: S PPENDIX PECIFICATIONS Ambir ImageScan Pro™ 930u Optical Resolution 600 dpi Max. Hardware Resolution 600 x 600 dpi Color: Input 48-bit; Output 24-bit Scan Modes Grayscale: Input 16-bit; Output 8-bit Black & White: 1-bit Technology CCD Sensor 1. 100 sheets (A4/Letter, 70 g/m or 18 lb.) -
Page 44: Appendix B: Customer Service And Warranty
Technical Support by Telephone Support is available from 7:00 a.m. – 7:00 p.m. Central Time Monday-Friday by dialing (630) 530-5400 or (800) 915-9930, option 3. For all Ambir scanners you can speak directly to a technical support representative or leave a message for a call back. -
Page 45: Product Warranty Information
*Contact your place of purchase for warranty service information Warranty for Products Ambir Technology warrants our products against defects in materials and workmanship to the original purchaser for a period of one (1) year from the date of the original purchase. This warranty is limited to repair or replacement of the product, and the remedy provided to the purchaser for warranty service is the sole discretion of Ambir Technology. -
Page 46: Fcc Radio Frequency Statement
Ambir Technology 918 N. Oak Lawn Ave. Elmhurst, IL 60126 USA Toll Free: (800) 915-9930 Main Number: (630) 530-5400 Technical Support: (630) 530-5400 option 3 www.ambir.com FCC Radio Frequency Statement This equipment has been tested and found to comply with the limits for a Class B digital device, pursuant to part 15 of the FCC rules.
Need help?
Do you have a question about the ImageScan Pro 930u and is the answer not in the manual?
Questions and answers