Table of Contents
Advertisement
Quick Links
Advertisement
Table of Contents

Related Manuals for Ambir TravelScan Pro 300


Summary of Contents for Ambir TravelScan Pro 300
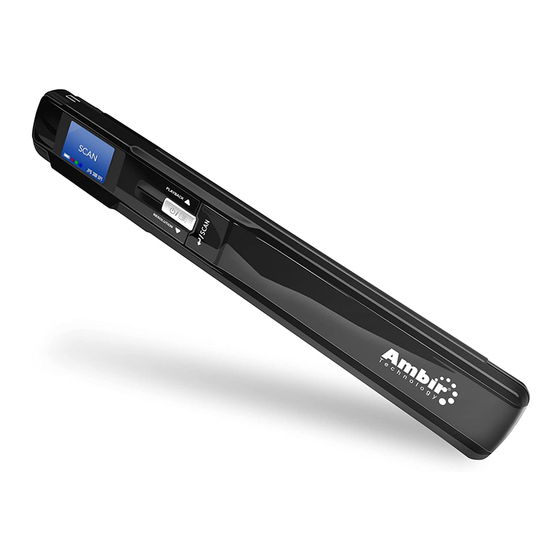
- Page 1 TravelScan Pro 300 Handheld Wand Scanner with User Guide...
-
Page 2: Table Of Contents
TravelScan Pro 300 Handheld Wand Scanner User Guide Contents Box Contents ..............................4 Product Specifications ..........................4 TravelScan Pro 300 Handheld Wand Scanner Functions ................5 Top View ..............................5 Bottom View ............................. 6 Display Settings - Modes ..........................6 Battery Powered ............................ - Page 3 TravelScan Pro 300 Handheld Wand Scanner User Guide Search ................................. 16 My Scans ..............................17 Viewing ..............................17 Deleting..............................17 Renaming ..............................17 Add/Edit/Delete Tags ..........................17 Cloud ................................18 Settings Menu............................. 19 Settings Functions ..........................20 Advanced Settings ............................21 Advanced Settings Functions .........................
-
Page 4: Box Contents
TravelScan Pro 300 Handheld Wand Scanner User Guide Box Contents 1. TravelScan Pro 300 Handheld Wand Scanner 2. Hard shell case 3. USB cable 4. 3 AAA batteries 5. Pouch 6. Micro SD card Product Specifications Dimensions 257x36x24 mm Weight 153.7g... -
Page 5: Travelscan Pro 300 Handheld Wand Scanner Functions
TravelScan Pro 300 Handheld Wand Scanner User Guide TravelScan Pro 300 Handheld Wand Scanner Functions Top View Number Name Function/Description Power/Menu Power On: Press and hold the Power button for 2 seconds to turn Power Off: Press and hold the Power button for 2 seconds to turn off. -
Page 6: Bottom View
Slide to open. Scanner uses 3 AAA batteries for operation. The scanner does not recharge batteries. Replace batteries when low on power. Display Settings - Modes The TravelScan Pro 300 Handheld Wand Scanner has 3 working modes, as displayed below: Connect USB for Power Connect with PC Battery Powered ©... -
Page 7: Display Settings - Scanning
TravelScan Pro 300 Handheld Wand Scanner User Guide Display Settings - Scanning The following section includes information on the display of the TravelScan Pro 300 Handheld Wand Scanner. Number Name Description Time Shows setting time. (hour: minutes: seconds). Scanning QTY Shows the scanning QTY in the SD card. -
Page 8: Color Settings
TravelScan Pro 300 Handheld Wand Scanner User Guide Color Settings 1. Press to enter the Menu after scanner is powered on. 2. Choose menu, then press to choose the color option: a. Color mode: b. Mono mode (black and white): 3. -
Page 9: Format Setting For Sd Card
TravelScan Pro 300 Handheld Wand Scanner User Guide Format Setting for SD card Important: After formatting, all files on the SD card will be lost. Please be sure to save your images before formatting. 1. Press to enter the Menu after scanner is powered on. -
Page 10: Scanning While Connected To Computer
TravelScan Pro 300 Handheld Wand Scanner User Guide Notes: • Confirm the SD card is in the scanner. • Do not remove the SD card before scanning is complete. • Set the correct date and time on the scanner for accuracy of file management. -
Page 11: Wand
TravelScan Pro 300 Handheld Wand Scanner User Guide Wand You can also access the images scanned with your TravelScan Pro 300 Handheld Wand Scanner in AmbirScan from the Wand tab. Save To save an image, click on the image to select it and hit Save. You can select multiple images by dragging a box or holding shift while selecting images. -
Page 12: Stitching
TravelScan Pro 300 Handheld Wand Scanner User Guide Stitching Below is a screenshot of the Stitching window. Please see the table below for explanation of the features in the software. Feature Description Scanned Horizontally Images to stitch were scanned in landscape mode. -
Page 13: Using The Settings
Save and name present Stitch Settings for easy use in future stitches. Important: Ambir does not recommend adjusting the Stitch Settings unless instructed to by Ambir Technical Support or if persistent errors occur while stitching. If adjustments are made, adjust in small increments (10% or less). -
Page 14: Stitching Images
TravelScan Pro 300 Handheld Wand Scanner User Guide Stitching Images To Stitch your images, complete the steps below: 1. Review your images and select if they were scanned vertically or horizontally in the upper left corner. 2. Arrange your images if needed by dragging and dropping in the order you wish to stitch. -
Page 15: Tagging
TravelScan Pro 300 Handheld Wand Scanner User Guide Tagging Tagging your scans allows for quick and easy organization using words or terms which are applicable to how you wish to locate your files. This feature is on by default and can be used for Searchable PDF (sPDF), Word, and Excel file types. -
Page 16: Search
TravelScan Pro 300 Handheld Wand Scanner User Guide Search AmbirScan allows users to search for words, keywords, and tags that are used within their scans. To locate a scan via keyword, simply type the word in the search box and click Search. Use commas to separate multiple keyword searches. -
Page 17: My Scans
TravelScan Pro 300 Handheld Wand Scanner User Guide My Scans The My Scans section of AmbirScan displays a list of all saved scans completed with AmbirScan. There are 3 ways to view the scans: Thumbnail, List, and Detailed List view. The default setting is Detailed List, but this can be changed at any time. -
Page 18: Cloud
TravelScan Pro 300 Handheld Wand Scanner User Guide Cloud AmbirScan allows users to conveniently save scans to several popular cloud services. Simply drag and drop your file(s) into the appropriate cloud service. Note: The files shown in the Cloud tab are also saved locally to the computer via the saved file path selected in Settings. -
Page 19: Settings Menu
See the table on the following page for detailed information on these settings. Please note that settings listed on this screen that are not applicable to the TravelScan Pro 300 Handheld Wand Scanner are not listed in the table on the following page. -
Page 20: Settings Functions
TravelScan Pro 300 Handheld Wand Scanner User Guide Settings Functions Name Default (On/Off) Description Auto Crop When enabled, AmbirScan crops the image around the scanned item, eliminating empty space. Start in Auto Scan Mode Allows users to insert card or documents and scan without clicking the Scan button. -
Page 21: Advanced Settings
TravelScan Pro 300 Handheld Wand Scanner User Guide Advanced Settings The Advanced Settings screen houses several other settings for the AmbirScan software. Each of these settings shown are the defaults and may be changed at any time to cater to user preference. See details below for more information on each function. -
Page 22: Advanced Settings Functions
TravelScan Pro 300 Handheld Wand Scanner User Guide Advanced Settings Functions Name Default (On/Off) Description Search Allows users to search for words in searchable PDF, Word or Excel files saved in the Indexed Folder locations specified. The default location is C:\Users\Public\Documents\AmbirScan. -
Page 23: Troubleshooting
This site contains detailed information, along with helpful FAQs on your product. Ambir Technical Support is available by phone and chat, Monday – Friday, 8 a.m. – 5 p.m. Central Time, excluding holidays. Phone: (630) 530 – 5400, option 3 Please have your scanner model and serial number available when contacting Support.
Need help?
Do you have a question about the TravelScan Pro 300 and is the answer not in the manual?
Questions and answers