
Subscribe to Our Youtube Channel
Related Manuals for Ambir ImageScan Pro 930u


Summary of Contents for Ambir ImageScan Pro 930u
- Page 1 Ambir ImageScan Pro 930u ® High Speed Document Scanner with UltraSonic Misfeed Detection User Guide www.ambir.com Ver 1.2 p/n UG930u-1.2...
-
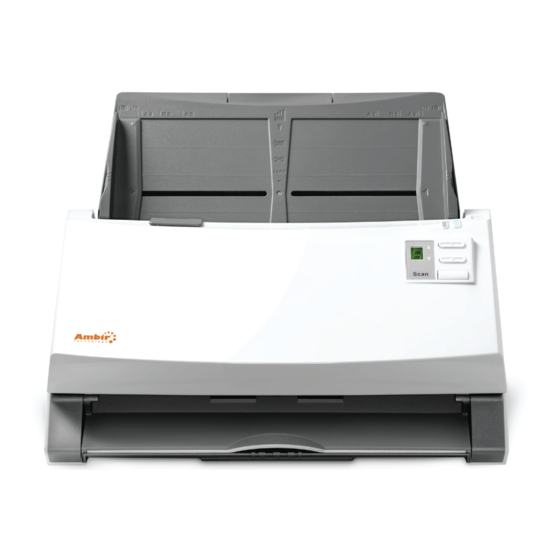
Page 2: Box Contents
User Guide Ambir ImageScan Pro 930u ® Table of Contents Box Contents Installation and Setup Loading Documents Scanning 6,7,8,9 Calibration Cleaning the ADF Replacing the Pad Module Clearing Paper Jams Scanner Connection LED Indication Ultrasonic Sensor Box Contents 1. Scanner 2. -
Page 3: Installation And Setup
Ambir ImageScan Pro 930u User Guide ® Installation and Setup Step 1. Install the Paper Chute 1. Open the ADF cover by pulling the lever. l l a g i l the tabs of the paper chute into their slots on the scanner. - Page 4 Ambir ImageScan Pro 930u User Guide ® Installation and Setup (Continued) > Step 3. Installing the Software Visit www.ambir.com/900u-series-set to download your scanner driver and AmbirScan ADF software. p/n UG930u-1.2...
- Page 5 Ambir ImageScan Pro 930u User Guide ® LOADING DOCUMENTS 1. Load the documents, and face down, toward the center of the ADF paper chute and all the way into the ADF until touching the bottom. For single-sided scans, load the documents face down so that the side to be scanned faces towards the paper chute.
- Page 6 Ambir ImageScan Pro 930u User Guide ® Scanning There are three different ways to operate the scanner: 1. By acquiring images from the scanner through our TWAIN interface within any TWAIN- compliant application programs. 2. By scanning from the buttons on the Scanner’s front panel.
- Page 7 Ambir ImageScan Pro 930u User Guide ® Scanning (Continued) Scanning from the Scanner’s Front Panel Completing scanning projects using the scanner buttons is easy and convenient. The number assigned to a scanning task displayed on the scanner’s front panel is through AmbirScan ADF.
- Page 8 Ambir ImageScan Pro 930u User Guide ® Scanning (Continued) Within the “Button window, you can a row of icons running through the left side of the window. Each icon represents a scanning task, and the number underneath corresponds to the function number displayed on the scanner front panel.
- Page 9 Ambir ImageScan Pro 930u User Guide ® Scanning (Continued) View Button Settings There are two ways to view the button settings: 1. Double-click the icon in the Windows system tray. 2. Right-click the icon in the Windows system tray, and then choose “Button in the pop-up menu that opens.
-
Page 10: Cleaning The Adf
Ambir ImageScan Pro 930u User Guide ® Calibration Calibrate the scanner if colors appear in areas that should be white, or colors of the scanned image and the original vary a lot. This allows you to adjust and compensate for variations that can occur in the optical component over time by its nature. -
Page 11: Replacing The Pad Module
Ambir ImageScan Pro 930u User Guide ® Replacing the Pad Module 1. Open the ADF cover by pulling the cover open lever. module. Pull it out. l l a module onto their slots on the scanner. l i t back into place. -
Page 12: Scanner Connection
Ambir ImageScan Pro 930u User Guide ® Scanner Connection Appearance Status troubleshooting connection The program has been successfully launched and problems with your scanner is the scanner is connected with the computer, ready to to check all physical connections. scan images. - Page 13 UG930u-1.2...
Need help?
Do you have a question about the ImageScan Pro 930u and is the answer not in the manual?
Questions and answers