Table of Contents
Advertisement
Western Products, PO Box 245038, Milwaukee, WI 53224-9538 • www.westernplows.com
September 15, 2009
Lit. No. 95748, Rev. 03
Tornado™ Hopper Spreader
Owner's Manual
CAUTION
Read this manual before installing or
operating the spreader.
This manual is for WESTERN
®
Tornado Hopper Spreaders with serial numbers
beginning with 0607–0903.
This document supersedes all editions with an earlier date.
Advertisement
Table of Contents

Related Manuals for Western tornado


Summary of Contents for Western tornado
- Page 1 Western Products, PO Box 245038, Milwaukee, WI 53224-9538 • www.westernplows.com September 15, 2009 Lit. No. 95748, Rev. 03 Tornado™ Hopper Spreader Owner's Manual CAUTION Read this manual before installing or operating the spreader. This manual is for WESTERN ® Tornado Hopper Spreaders with serial numbers beginning with 0607–0903.
-
Page 3: Table Of Contents
TABLE OF CONTENTS PREFACE ..............5 MOUNTING THE SPREADER ......... 12 Owner's Information ..........5 OPERATING THE SPREADER – CAB CONTROL . 14 SAFETY INFORMATION ..........6 Starting and Stopping the Motor ......14 Safety Defi nitions ..........6 Adjusting Spinner Speed ........14 Warning/Caution Labels ........ - Page 4 Lit. No. 95748/95749, Rev. 03 September 15, 2009...
-
Page 5: Preface
SPREADER OWNER DATA SHEET This manual has been prepared to acquaint you with When service is necessary, bring your hopper the safety information, operation and maintenance of spreader to your local outlet. They know your spreader your new hopper spreader. Please read this manual best and are interested in your complete satisfaction. -
Page 6: Safety Information
SAFETY INFORMATION SAFETY DEFINITIONS WARNING/CAUTION LABELS WARNING Please become familiar with the Warning and Caution labels on the spreader. Indicates a potentially hazardous situation that, if not avoided, could result in death or NOTE: If labels are missing or cannot be read, see serious personal injury. -
Page 7: Safety Precautions
SAFETY INFORMATION SAFETY PRECAUTIONS CAUTION • Do not operate a spreader in need of Improper installation and operation could cause maintenance. personal injury, and/or equipment and property damage. Read and understand labels and the Owner's Manual • Before operating the spreader, reassemble any parts or hardware removed for cleaning before installing, operating or making adjustments. -
Page 8: Fire And Explosion
SAFETY INFORMATION FIRE AND EXPLOSION BATTERY SAFETY CAUTION WARNING Batteries normally produce explosive gases Gasoline is highly fl ammable and gasoline which can cause personal injury. Therefore, vapor is explosive. Never smoke while do not allow fl ames, sparks or lit tobacco working on vehicle. -
Page 9: Loading
LOADING This Manual covers vehicles which have been CERTIFICATION recommended for carrying the hopper spreader. Please see your local dealer for proper vehicle WARNING applications. New untitled vehicle installation of a spreader requires National Highway Traffi c Safety WARNING Administration altered vehicle certifi cation Overloading could result in an accident or labeling. -
Page 10: Spreader Specifi Cations
LOADING Spreader Specifi cations Capacity Capacity Spreader Overall Empty Struck Rounded Overall Overall Recommended Description Length (in) Weight (lb) (cu yd) (cu yd) Width (in) Height (in) Regular Capacity 3/4 or 1 Ton Pickup 7' Hopper Body Trucks above Double-Wall Poly 8500 lb GVWR Determining Vehicle Payload 5. -
Page 11: Determining Vehicle Payload Worksheet
Determining Vehicle Payload Worksheet Material Type Example: Coarse Salt – Dry Equipment installed when vehicle 7' Poly was weighed Hopper Spreader Front Gross Axle Weight Rating (FGAWR) Rear Gross Axle Weight Rating (RGAWR) Gross Vehicle Weight Rating 8600 (GVWR) (lb) Gross Vehicle Weight (lb) –... -
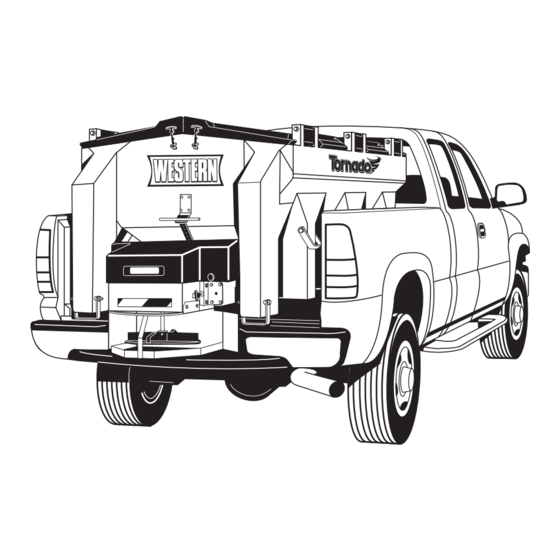
Page 12: Mounting The Spreader
MOUNTING THE SPREADER and the knobs that secure the chute cover NOTE: Periodically throughout the snow and screwed all the way in. ice control season, verify mounting devices are secure. 4. To remove the chute: 1. Remove the tailgate from the truck. a. - Page 13 MOUNTING THE SPREADER 10. Install the spacer between the end of the sill and WARNING the front of the truck bed as shown. If you do not Spreader shall be bolted to vehicle frame. Do have a spacer, refer to the installation instructions not rely on the tie-down chains alone to hold to create one.
-
Page 14: Operating The Spreader - Cab Control
OPERATING THE SPREADER – CAB CONTROL STARTING AND STOPPING MOTOR ADJUSTING SPINNER/CONVEYOR SPEED On/Maximum Diagnostic The speed setting can be adjusted when spreader is Speed Button Indicator Light either ON or OFF. 1. Turn speed dial clockwise. Speed will increase as the number of green LEDs illuminated on speed dial increases. -
Page 15: Removing The Spreader
REMOVING THE SPREADER 5. To remove the spreader without a lifting device, CAUTION two or more people are recommended. Move Before lifting, verify hopper is empty of spreader rearward until it balances at the rear of material. The lifting device must be able to the bed. -
Page 16: Maintenance
MAINTENANCE DRIVE BELT AND CHAIN TENSION CAUTION Disconnect electric power at spreader electrical NOTE: Overtightening the belt or chain may result wiring harness connection and tag out if required in damage to the motor or gearbox bearing. before servicing or performing maintenance. GREASE FITTINGS Chain deflection of 1/4"... -
Page 17: Conveyor Belt Tension
MAINTENANCE The conveyor drive roller can slip inside the conveyor or if the drive conveyor roller slips, immediately belt for a number of reasons, including (1) material turn the spreader OFF and repeat the steps above trapped/frozen between the conveyor belt and the until the load restarts and the drive conveyor roller vehicle bed surface, (2) frozen material in the hopper does not slip. -
Page 18: After Each Use
MAINTENANCE • Wash out the hopper and rinse off all external The spreader can be stored on end (on its feet) for surfaces. storage; however, steps must be taken to properly secure it. • Clean out any trapped/frozen material from between the conveyor belt and the vehicle bed 1. -
Page 19: At The End Of Each Season Or After Extended Storage
MAINTENANCE At the End of Each Season Or After RECYCLE Extended Storage When your spreader has performed its useful life, many of its components can be recycled as steel. • Wash out the hopper and rinse off all external Gear oil shall be disposed of according to local surfaces. -
Page 20: Harness Wiring Diagram
HARNESS WIRING DIAGRAM Cab Control 4-Way Connector To Vehicle Switched Accessory Connector 18 ga Red 18 ga Shielded Twisted-Pair Cable 6 ga Red 100 Amp Fuse 6 ga Red 18 ga Black 6 ga Black To Vehicle CHMSL Signal Vehicle Wiring Harness Spreader Wiring Harness... -
Page 21: Troubleshooting Guide
TROUBLESHOOTING GUIDE For control operation and use of diagnostic indicator lights, go to the section, Operating the Spreader - Cab Control. PROBLEM POSSIBLE CAUSE SUGGESTED SOLUTION 1. Control connector plug is loose. 1. Check plug connection at cab control. 2. Switched accessory connection 2a. - Page 22 TROUBLESHOOTING GUIDE PROBLEM POSSIBLE CAUSE SUGGESTED SOLUTION Unplug the spreader harness and tag out, if required, before performing any of the following repairs. 1. Obstruction is preventing rotation. 1. Clear obstruction. 2. Sprocket is not secured to motor 2. Replace cap screw and nut if missing shaft.
-
Page 23: Notes
NOTES Lit. No. 95748/95749, Rev. 03 September 15, 2009... - Page 24 Copyright © 2009 Douglas Dynamics, L.L.C. All rights reserved. This material may not be reproduced or copied, in whole or in part, in any printed, mechanical, electronic, fi lm or other distribution and storage media, without the written consent of Western Products. Authorization to photocopy items for internal or personal use by Western Products outlets or spreader owner is granted.
Need help?
Do you have a question about the tornado and is the answer not in the manual?
Questions and answers