Table of Contents
Advertisement
Quick Links
Download this manual
See also:
Reference Manual
Advertisement
Table of Contents

Related Manuals for Rosemount 848T


Summary of Contents for Rosemount 848T
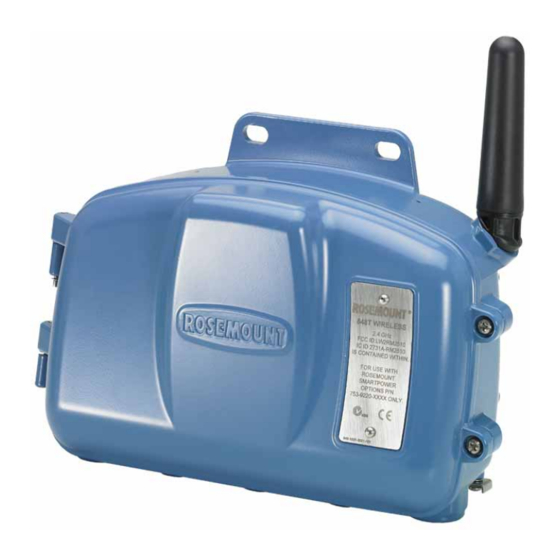
- Page 1 Quick Start Guide 00825-0100-4848, Rev EA June 2016 Rosemount 848T Wireless Temperature ™ Transmitter...
-
Page 2: Table Of Contents
June 2016 Quick Start Guide NOTICE This guide provides basic guidelines for the Rosemount 848T. It does not provide instructions for detailed configuration, diagnostics, maintenance, service, troubleshooting, or installations. Refer to the Rosemount 848T Reference Manual for more instruction. The manual and this guide are also available electronically on EmersonProcess.com/Rosemount. -
Page 3: Wireless Considerations
Quick Start Guide June 2016 1.0 Wireless considerations 1.1 Power up sequence The power module should not be installed on any wireless device until the ™ Emerson Smart Wireless Gateway (Gateway) is installed and functioning properly. Wireless devices should also be powered up in order of proximity from the Gateway, beginning with the closest. - Page 4 June 2016 Quick Start Guide Figure 2. Conduit Plug 1.4 Field Communicator connections The power module needs to be connected for the Field Communicator to interface with the Rosemount 848T Wireless. Figure 3. Connection Diagram A. Maintenance Port...
-
Page 5: Physical Installation
2,1,3 Configure Sensors 2.3 Remote mount The Rosemount 848T Wireless is designed to be installed only in the Remote Mount configuration where the sensor is mounted separate from the Rosemount 848T housing, then connected to the Rosemount 848T via conduit. - Page 6 2. To reduce sensor wiring length, mount the Rosemount 848T Wireless transmitter central to all of the measurements. When installing the Rosemount 848T Wireless, the conduit entries need to be facing downward. If using the mounting bracket (Option Code B6), mount to a 2-in. pipe.
- Page 7 2.4 Installing the optional voltage adapter The Rosemount 848T Wireless voltage adapter allows voltage measurement from 0-10 volts. Each adapter accommodates 2 voltage inputs, and can be installed interchangeably on inputs 1 and 2 or 3 and 4.
-
Page 8: Verify Operation
Smart Wireless Gateway’s integrated web interface, or via AMS Wireless Configurator. 3.1 Field Communicator ® For HART communication, an Rosemount 848T Wireless Device Dashboard (DD) is required. For connecting with a Field Communicator, refer to Figure 3 on page Function Fast Key sequence... - Page 9 Quick Start Guide June 2016 Figure 4. Smart Wireless Gateway Explorer Page 3.3 AMS Wireless Configurator When the device has joined the network, it will appear in the AMS Device Manager as illustrated below: Figure 5. AMS Wireless Configurator Explorer Page...
-
Page 10: Reference Information
June 2016 Quick Start Guide 4.0 Reference information Figure 6. Rosemount 848T Terminal Diagram Table 1. Rosemount 848T Fast Key Sequence for Field Communicator Function Fast Key sequence Menu items Manufacturer, Model, Final Assembly Number, Universal, Field Device, Software, Hardware,... - Page 11 Quick Start Guide June 2016 4.1 Wiring 0-10 volts inputs on the voltage adapter Wiring voltage 0-10 volt inputs using the adapter follows the same procedure as mV inputs and thermocouples. Figure below shows how to connect the voltage leads. 4.2 Adapter requirements 1.
-
Page 12: Product Certifications
Markings: IS CL I, DIV 1, GP A, B, C, D; NI CL I, DIV 2, GP A, B, C, D; IS CL I, Zone 0, AEx ia llC T4 (–50 °C ≤ T ≤ +70 °C), when installed per Rosemount drawing 00849-1000; Type 4X; IP66 Table 2 at the end of the Product Certifications section for entity parameters. - Page 13 Standards: CSA Std. C22.2 No. 25-1966, CSA Std. C22.2 No. 30-M1986, CAN/CSA C22.2 No. 94-M91, CSA C22.2 No. 142-M1987, CSA Std. C22.2 No. 213-M1987, CSA Std. C22.2 No 60529:05 Markings: Suitable for CL I DIV 2 GP A, B, C, D; T3C; when installed per Rosemount drawing 00849-1016; Type 4X, IP66 Europe I1 ATEX Intrinsic Safety Certificate No.: Baseefa09ATEX0022X...
- Page 14 Care must be taken during transportation to and from the point of installation to prevent electrostatic charge build-up. 3. The 848T enclosure may be made of aluminum alloy and given a protective polyurethane paint finish; however, care should be taken to protect it from impact or abrasion if located in areas that requires EPL Ga (Zone 0).
- Page 15 Quick Start Guide June 2016 6. End user is not permitted to change any components inside, but to settle the problem in conjunction with manufacturer to avoid damage to the product. 7. When installation, use and maintenance of this product, observe following standards: GB3836.13-2013 “Electrical apparatus for explosive gas atmospheres Part 13: Repair and overhaul for apparatus used in explosive gas atmospheres”...
- Page 16 June 2016 Quick Start Guide Figure 8. Rosemount 848T Wireless Declaration of Conformity...
- Page 17 Quick Start Guide June 2016...
- Page 18 June 2016 Quick Start Guide Table 1B: List of Rosemount 848T Wireless Parts with China RoHS Concentration above MCVs Rosemount 848T Wireless China RoHS Hazardous Substances Hexavalent Polybrominated Polybrominated Part Name Lead Mercury Cadmium Chromium biphenyls diphenyl ethers (Pb) (Hg)
- Page 19 Quick Start Guide June 2016...
- Page 20 +65 6777 0947 The Emerson logo is a trademark and service mark of Emerson Enquiries@AP.EmersonProcess.com Electric Co. AMS, Rosemount and Rosemount logotype are trademarks of Middle East and Africa Regional Office Emerson Process Management. Emerson Process Management HART is a registered trademark of FieldComm Group.
Need help?
Do you have a question about the 848T and is the answer not in the manual?
Questions and answers