
Related Manuals for ESP FHDV 4 R


Summary of Contents for ESP FHDV 4 R
- Page 1 4 / 8 C H A N N E L H D C C T V S Y S T E M FHDV 4 R • FHDV 8 R FHDV 4 KB • FHDV 4 KD FHDV 8 KB • FHDV 8 KD U S E R M A N U A L www.espu k.
-
Page 2: Table Of Contents
CONTENTS DVR Description..........3 System Connection Diagram . -
Page 3: Dvr Description
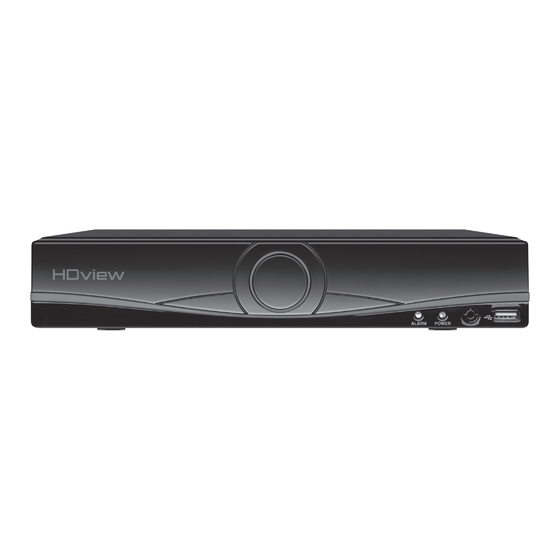
DVR DESCRIPTION FRONT PANEL 1. System indicator lights 2. USB for mouse or USB stick 1. VIDEO IN 1-4/8 for video input from camera 2. AUDIO OUT Audio output 3. VGA Output for monitor 4. HDMI Output for monitor 5. AUDIO IN Audio input 6. -
Page 4: System Connection Diagram
DVR CONNECTION DIAGRAM Monitor Mouse controller VGA / HDMI Connection Local area network DVR rear panel Camera Video Input (BNC female) Power supply / Splitter lead BNC Video (female) Video / Power cable Power Jack (female) Notes on Camera Connection: The DVR is specifically designed for High Definition cameras using AHD technology. -
Page 5: Basic Operations
BASIC OPERATIONS CONNECTION TO A MONITOR Use either HDMI or VGA output to connect to a monitor and select the correct input channel on the monitor. POWER ON Plug one lead from the 5-way power supply into the 12VDC power supply input marked on the DVR. - Page 6 START-UP WIZARD The Set-up Wizard takes the user through basic system settings. More advance options and settings are found in the Main Menu. INTRODUCTION LOG-IN An opportunity to change the password is provided within the settings menu. The default settings are: User Name: admin Password: ‘leave blank’...
- Page 7 GENERAL Set time and date: CLOUD If status is ‘Connected’ use the QR codes to download the required APP and serial number.
-
Page 8: Live Viewing
LIVE VIEWING On start up the DVR will display a divided screen. Using the Mouse Control, double click on any image to bring to full screen. Double click again to return to that main divided screen. The recording status and alarm status are indicated by the following icons: Recording Motion Detect SHORTCUT MENU... - Page 9 ACCESSING THE MAIN MENU Right click the mouse controller anywhere on screen to activate the Shortcut Menu. Selecting Main Menu option will automatically display the following screen;...
-
Page 10: Record Setup
RECORD SETUP CONTINUOUS RECORD As factory set, the unit is programmed to record all channels continuously. MOTION DETECTION RECORD Right-click on the screen to bring-up the Shortcut Menu select Main Menu and log-in • Select Record > Control • Select Channel as ALL •... -
Page 11: Recording Playback
RECORDING PLAYBACK Right click on the live camera view, login and select Record Playback directly from the Shortcut Menu. On the playback menu refer to the right hand side of the screen and enter the following; Standard Playback Operation; • Main Type: Normal Play •... - Page 12 COPY RECORDING TO USB Right click on the live camera view and select Main Menu directly from the Shortcut Menu • Insert USB stick into DVR Select Record > Backup • The details of the USB stick will be visible, Select Backup •...
-
Page 13: Main Menu Layout
MAIN MENU LAYOUT Main Menu Sub Menu Function Set the recording configuration, recording type, Control recording time section Record Detect or format backup equipment, back the Backup selective files Set motion detect alarm channel, sensitivity, Motion Detection area and linkage parameters Set camera mask alarm channel, sensitivity and Video Mask linkage parameters if sys. -
Page 14: Remote Viewing
PC/Laptop Software: HDview CMS supplied on the included CD (Windows compatible) NB. ESP are unable to guarantee that every device will be compatible with the DVR and software supplied. Specific models of phone, tablet or other device, the hardware it contains,... -
Page 15: Help Guide
HELP GUIDE In the event of trouble with the system please follow the help guide. If further problems persist please contact the installer / supplier. The DVR will not boot up normally • The power supply is not correctly connected/ switched On •... - Page 16 Elite Security Products Telephone: 01527 51 51 50 Unit 7, Target Park, Shawbank Rd Fax: 01527 51 51 43 Lakeside, Redditch B98 8YN email: info@espuk.com E&OE - Errors and omissions excepted. I16 www. espuk .c om...
Need help?
Do you have a question about the FHDV 4 R and is the answer not in the manual?
Questions and answers