Table of Contents
Advertisement
.
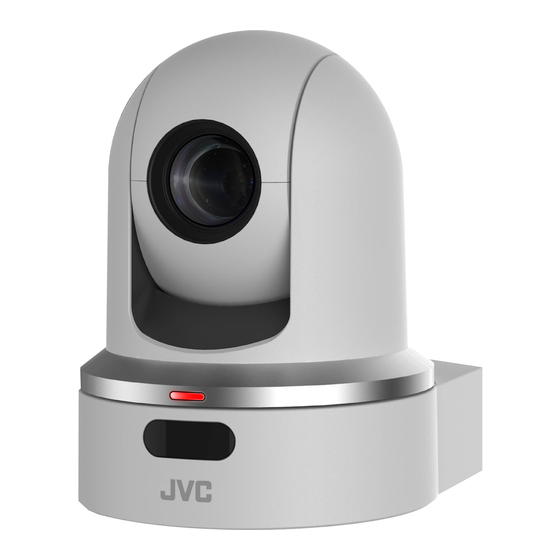
HD PTZ REMOTE CAMERA
KY-PZ100WU/KY-PZ100WE
KY-PZ100BU/KY-PZ100BE
INSTRUCTIONS
.
Specifications and appearance of this unit are subject to change for further improvement without prior
notice.
About the latest INSTRUCTIONS
Please check the latest INSTRUCTIONS, tools, etc. from the URL below.
North America:
http://pro.jvc.com/prof/main.jsp
Europe:
http://www.service.jvcpro.eu/public/
China:
http://www.jvc.com.cn/service/download/index.html
For Customer Use:
Enter below the Serial No. which is located
on the body.
Retain this information for future reference.
Model No.
KY-PZ100WU/KY-PZ100BU
Serial No.
IM 1.01
Please read the following before getting started:
Thank you for purchasing this product.
Before operating this unit, please read the
instructions carefully to ensure the best
possible performance.
In this manual, each model number is
described without the last letter (U/E) which
means the shipping destination.
(U: for USA and Canada, E: for Europe)
Only "U" models (KY-PZ100WU/KY-PZ100BU)
have been evaluated by UL.
B5A-1715-00
Advertisement
Table of Contents

Related Manuals for JVC KY-PZ100WU


Summary of Contents for JVC KY-PZ100WU
- Page 1 Retain this information for future reference. described without the last letter (U/E) which means the shipping destination. (U: for USA and Canada, E: for Europe) Model No. KY-PZ100WU/KY-PZ100BU Only “U” models (KY-PZ100WU/KY-PZ100BU) Serial No. have been evaluated by UL. B5A-1715-00 IM 1.01...
-
Page 3: Important Safeguards
FOR USA These are general IMPORTANT SAFEGUARDS and certain items may not apply to all appliances. IMPORTANT SAFEGUARDS Read these instructions. Keep these instructions. Heed all warnings. Follow all instructions. Do not use this apparatus near water. Clean only with dry cloth. Do not block any ventilation openings. -
Page 4: Safety Precautions
RISK OF ELECTRIC undesired operation. SHOCK DO NOT OPEN Changes or modifications not CAUTION: approved by JVC could void the TO REDUCE THE RISK OF user’s authority to operate the ELECTRIC SHOCK. equipment. This equipment has been DO NOT REMOVE COVER (OR tested and found to comply with the BACK). - Page 5 POUR CANADA WARNING: TO PREVENT FIRE OR SHOCK HAZARD, DO NOT EXPOSE THIS UNIT TO RAIN OR ATTENTION MOISTURE. RISQUE D’ELECTROCUTION AVERTISSEMENT : POUR EVITER NE PAS OUVRIR LES RISQUES D’INCENDIE OU ATTENTION: D’ELECTROCUTION, NE PAS POUR EVITER TOUT RISQUE EXPOSER L’APPAREIL A LA D’ELECTROCUTION NE PAS PLUIE NI A L’HUMIDITE.
- Page 6 When the equipment is installed in a When using the AC adapter in cabinet or on a shelf, make sure that it areas other than the USA has sufficient space on all sides to allow The provided AC adapter features for ventilation (10 cm (3-15/16") or more automatic voltage selection in the AC on both sides, on top and at the rear).
- Page 7 FOR EUROPE IMPORTANT (for owners in the U.K.) This equipment is in conformity with the Connection to the mains supply in provisions and protection requirements of the United Kingdom. the corresponding European Directives. DO NOT cut off the mains plug from This equipment is designed for professional this equipment.
- Page 8 European directives and standards regarding electromagnetic compatibility and electrical safety. European representative of JVC KENWOOD Corporation is: JVC Technical Services Europe GmbH Konrad-Adenauer-Allee 1-11 61118 Bad Vilbel GERMANY Sehr geehrter Kunde, sehr geehrte Kundin, dieses Gerät stimmt mit den gültigen europäischen Richtlinien und...
- Page 9 For KY-PZ100WE, KY-PZ-100BE GB4943.1-2011 GB9254-2008 GB17625.1-2012 Safety Precautions...
- Page 10 Consult your dealer as special technique is required when installing this product. Ensure that the fixing screws or nuts are tightened securely, otherwise, the unit may fall off. Mounting to a firm place As the unit contain parts rotating at high speed, mount it on a firm place with sufficient strength to support the vibration and weight of the unit.
-
Page 11: Table Of Contents
Contents Setting Time Code Generator ......48 Setting the User’s Bit ........50 Loop Recording ..........51 Getting Started Menu Display and Detailed Settings Safety Precautions ..........4 Contents ............11 Basic Operations in Menu Screen ....52 Main Features ..........13 Display and Description of the Menu Screen .............. - Page 12 Setting Distribution ........97 Content of this manual Starting Distribution ........99 All rights reserved by JVC KENWOOD Setting the FEC Matrix ....... 100 Corporation. Unauthorized duplication or Others reprinting of this manual, in whole or in part, is strictly prohibited.
-
Page 13: Main Features
Main Features 1/2.8-inch high-performance CMOS sensor This product is equipped with a 1/2.8-inch high- performance CMOS sensor with an effective Enhanced network functions resolution of approximately 2.13 megapixels. In addition to the LAN terminal, you can also attach It delivers high-quality Full HD video images with a a USB adapter that supports wireless network low level of noise. -
Page 14: Precautions
Precautions Transportation o Do not throw away the original box of the unit. Keep it and use it for transporting the unit in future. Installation Location o The camera unit is designed to be rotated easily, secure the camera unit such that it does not rotate o Be sure to install the camera horizontally. - Page 15 o Do not use a pencil or ballpoint pen to write on the microSDHC/microSDXC Cards microSD card. Always use oil-based pens. o “microSDHC/microSDXC card” is referred to as o If you format (initialize) the microSD card, all data “microSD card” in this manual. recorded on the card, including video data and o This camera recorder saves the recorded images setup files, will be deleted.
- Page 16 Encryption in Network Connection Others o Wireless LAN connections make use of an o This camera will perform the initial operation of encryption function. pan/tilt/zoom upon powering on. This encryption is designed for commercially-sold o The camera body may be captured in the equipment, and it cannot be altered.
- Page 17 o An afterimage can appear if you view a moving object on the monitor output, however this is not a malfunction. o Do not insert objects other than the memory card into the card slot. o Do not put anything into the camera unit. Metal and flammable items entering from the connectors can result in fire or electric shock.
-
Page 18: Operation Modes
Operation Modes This camera has four operation modes - Camera mode, Remote Edit mode, Maintenance mode and Video Off mode. Press the [Live View/Setting Screen Camera Mode Toggle] button to switch to the setting (Live View Screen) screen, followed by selecting “Clip List” Remote Edit Mode (Clip List Screen) Press the [Live View/Setting Screen Toggle]... - Page 19 Operation Mode Description Camera Mode This is the camera shooting mode. The camera recorder starts up in Camera mode when the power is turned on. Video images from the camera are output to a browser (Live View) screen or an externally connected monitor.
-
Page 20: Names Of Parts
Names of Parts Bottom Section A Tripod socket hole A Camera head For attaching the tripod. Rotates horizontally. B Fall prevention wire mounting hole B Lens section C Ceiling mount bracket guide slot Rotates vertically. D DIP switch C Tally lamp Use the DIP switch to configure various Turns on/off according to the menu setting and settings. - Page 21 Terminal Section H [HDMI] HDMI terminal Output terminal for HDMI video and audio signals. I [AUDIO IN] AUDIO input terminal For connecting the stereo mini plug. J [RS-422] RS-422 terminal For connecting the RS-422 cable. 4 6 8 Signal Signal Number Name Number...
-
Page 22: Infrared Remote Control
Infrared Remote Control I PRESET number button Moves the display area to the recorded pan, tilt or zoom position. J MENU button Press and hold to open the menu for the camera unit. K PRESET button To be used concurrently with the PRESET number button. -
Page 23: Dip Switch Setting
2 to 4 Select protocol For selecting protocols. Setting values when LAN is set: 0: JVC; 1: D star; 2: Standard; 3 to 7: Reserved Setting values when Serial is set: 0: Reserved; 1: D star; 2: Standard; 3 to... - Page 24 Settings Left Select Set to LAN communication (OFF). mode 2 to 4 Select protocol Set to JVC (0). KY-PZ100 KY-PZ100 KY-PZ100 Left Right LAN cable 2 3 4 5 6 7 8 2 3 4 5 6 7 8 RM-LP100...
-
Page 25: Tally Lamp
Tally Lamp Memo : This is the indicator lamp for recording and Blinking takes priority over lighting up. warning. You can adjust the brightness of the tally lamp The operation changes according to the menu in [Main Menu] B [System] B [Tally Lamp] B settings. -
Page 26: View Remote (Live View) Screen And External Monitor Connection Display
View Remote (Live View) Remote Edit Mode Screen Screen and External This is a mode for accessing the page for editing the metadata that is recorded in a clip via a web Monitor Connection browser on a PC. (A P80 [Editing Metadata] ) Display (A P83 [Uploading a Recorded Video Clip] ) (A P85 [Deleting Recorded Clips] ) -
Page 27: About Microsd Cards
About microSD Cards Memo : If the microSD card contains files recorded by devices other than this camera recorder or files Compatible microSD Cards that are saved from a PC, the recordable time may be shorter or data may not be properly Bit Rate Setting and Usable microSD Card recorded. -
Page 28: Formatting (Initializing) Microsd Cards
Formatting (Initializing) microSD Cards 5 Formatting is complete. When the following cards are inserted, [!FORMAT] When formatting is complete, “Complete” appears appears at the remaining media display area. and the camera recorder returns to the [Format Format the card using the camera recorder menu. Media] screen. -
Page 29: Clips Recorded To Microsd Cards
Clip (Recorded Data) and Clip Name Caution : [Restore Media] can only be selected in Camera When recording is stopped, the images, audio and accompanying data which are recorded mode. However, it cannot be selected while the from start to stop are recorded as one “clip” on camera recorder is recording. -
Page 30: Mounting The Camera To The Ceiling Mount Bracket
Mounting the Camera to 2 Place the supplied template against the the Ceiling Mount Bracket ceiling, and fasten the ceiling mount bracket with four screws (M4 wooden screws: Φ4.1). Be sure to put on protective glasses to protect your eyes from falling objects when mounting the camera. -
Page 31: Installing The Camera On The Ceiling
Installing the Camera on Align the cutout of the ceiling mount bracket the Ceiling and the line indicated on the camera. Press the camera unit to insert, and then turn the camera clockwise. 5 Fix the camera and the fall prevention wire 1 Set the DIP switch. -
Page 32: Installing The Camera On A Desktop
Installing the Camera on a Attaching the Camera to a Desktop Tripod Set the DIP switch prior to installing the camera. Set the DIP switch prior to installing the camera. Place the camera on a flat surface. Attach a tripod using the screw hole at the Be sure to place the base of the camera bottom of this product. -
Page 33: Connecting The Cables
Connecting the Cables 6 Remove the protective sheet attached to the infrared remote control sensor. 1 Connect the power cable. Caution : To supply power from an AC adapter, For safety reasons, turn on the power only after connect an AC adapter cable. ensuring that all the connections are in place. -
Page 34: Ip Address Settings
IP Address Settings Using the IP Setting Tool Connect the camera to be configured to the network via the LAN terminal. Download the “IPSettingTool” from the URL stated on the cover page. Connect the computer for executing the If setting is successful, the search list display “IPSettingTool”... -
Page 35: Configuring Ip Address Manually
LAN terminal: 192.168.0.10 USB terminal (Ethernet adapter): 192.168.1.10 2 Enter the user name and password. Enter the user name (jvc) and the password (initial password: 0000) on the login screen to display the Live View screen. Memo : The Live View screen is not displayed when [Main Menu] B [Network] B [Web] B [Web Access] is set to “Off”. -
Page 36: View Remote Screen
View Remote Screen J Preset number display Displays the preset number you have entered. K Preset operation button Store : Registers the preset number. Camera Operation A confirmation message appears before registration is executed. Move : Executes the preset operation. Delete : Executes the delete operation. - Page 37 T AE Level adjustment button Z White Balance adjustment panel display Adjusts the AE level. Displays the AWB paint adjustment value Enabled only when the [Exposure] selection when the [White Balance] mode selection button is not set to “Manual”. button is set to “AWB”. J : Increases brightness.
-
Page 38: Basic Shooting Procedures
Basic Shooting Selecting Video Procedures Recording Resolution, Frame Rate and Bit Rate You are recommended to operate this camera by connecting it to a PC or a controller. You can select the resolution of the recorded video, frame rate and bit rate on this camera by displaying Preparations the web browser (Live View) screen or the menu screen on an external monitor. -
Page 39: Preset Mode
Preset Mode You can store detailed preset information from 1 to 10, and simplified preset information from 11 to 100. You can store different operations of your choice Preset Detailed Simplified Refer to on this camera. Information Image (A P55 ) Storing/Recalling the Current Preset Stabilizer Information... -
Page 40: Pan/Tilt Operation
Pan/Tilt Operation Zoom Operation Adjust the direction the camera is facing by Adjusts the angle of view. pressing the [Arrows] on the Pan/Tilt Control Optical zoom ratio: 1x to 30x buttons on the web browser (Live View) screen. Digital zoom ratio: 30x to 360x Pressing the R button restores the display area Set digital zoom to “On”/“Off”... -
Page 41: Focus Operation
Focus Operation Adjusting the Brightness Adjust the brightness using Iris, Gain and Shutter Adjusting Focus Automatically speed according to the brightness of the object. Adjusting the Brightness Automatically: Automatic Brightness Adjustment (AE) Mode Iris, Gain, Shutter speed and ND filter are automatically adjusted according to the brightness of the object to maintain optimum brightness. -
Page 42: Adjusting The Iris
Adjusting the Iris Adjusting the Brightness Manually When the [Exposure] selection button is set to a value other than “Auto”, some or all of the settings Adjust the aperture of the lens iris according to the (Iris, Gain and Shutter Speed) can be manually brightness of the subject. -
Page 43: Setting The Gain
Setting the Gain 2 Press the iris adjustment button to adjust the iris manually. : Sets the iris to the Open side. This function electrically boosts the light sensitivity : Sets the iris to the Close side. when there is insufficient illumination on the object. You can set the gain of the video amplifier The open F-number of the aperture varies according to the brightness of the object. -
Page 44: Setting The Electronic Shutter
Setting the Electronic Memo : The settable shutter speed range differs Shutter according to the frame rate setting. Frame Rate 60p, 60i, 30p 50p, 50i, 25p You can change the shutter speed (time for each (Upper limit) 1/10000 1/10000 shooting frame) using the electronic shutter 1/6000 1/6000 function. -
Page 45: Adjusting The White Balance
Adjusting the White Caution : Balance Do not use highly reflective objects, such as metals. Doing so may result in improper white balance adjustment. Adjust the white balance according to the color The AWB function cannot provide optimum temperature of the lighting. You can select the white balance with an object outside the adjustment mode according to the shooting adjustment range, for example when it contains... -
Page 46: Adjusting The Camera Image
Adjusting the Camera Using the Image Stabilizer Image Reduces blur caused by camera shake in the video image. The picture quality of the camera can be set using 1 Check whether the image stabilizer feature the [Camera Process] menu. is turned ON or OFF. As the adjustments are shown on the screen, you If the image stabilizer icon (i) does not appear can adjust the values while checking the picture... -
Page 47: Audio Recording
Audio Recording Time Code and User’s Bit You can record audio from the two channels (CH1/ Time code and user’s bit data are recorded with the CH2) in synchronization with video images on this video in this camera recorder. camera recorder. During recording, the time code and user’s bit are displayed on the externally connected display screen or the Live View screen. -
Page 48: Setting Time Code Generator
Setting Time Code Time Code Operation Mode Generator Set the time code operation in [Main Menu] B [TC/ UB] B [TC Generator]. (A P58 [ TC Generator ] ) Presetting the Time Code Setting Description Time code and user’s bit data generated from the Free Run The time code operates in the run internal time code generator are recorded. - Page 49 Setting Time Code 2 Select the framing mode for the time code generator (only when the frame rate setting 1 Select [Main Menu] B [TC/UB] B [TC is “60” or “30”). Preset] and press the Set button (Set). Set using [Main Menu] B [TC/UB] B [Drop (A P58 [ TC Preset ] ) Frame].
-
Page 50: Setting The User's Bit
Setting the User’s Bit Recording Time Code in Continuation of the Recorded Time Code on microSD Card You can add the date, time or an 8-digit This camera recorder is equipped with the time hexadecimal number as the user’s bit to the code reader. -
Page 51: Loop Recording
Loop Recording 2 Select [Main Menu] B [TC/UB] B “Preset” and press the Set button (Set). The [Preset] setting screen appears. During normal recording, the camera stops recording automatically when the microSD card 3 Use the cross-shaped button (HI) to place memory is full. -
Page 52: Basic Operations In Menu Screen
Basic Operations in Menu D Operation Guide Guide for the current operation buttons. Screen E Setting Value Setting values for the menu items. For menus with sub-menus, values are not The menu screen can be displayed on the web displayed. browser (View Remote) screen or the screen of the externally connected monitor. -
Page 53: Text Input With Software Keyboard
Text Input with Software Keyboard A Character Entry Field Field for entering the title. Use the software keyboard to enter the [Setup You can enter up to 8 characters for the File] subname, [Clip Name Prefix], and the settings [Setup File] subname or up to 4 characters under [Network] B [Settings]. -
Page 54: Menu Screen Hierarchical Chart
Menu Screen Hierarchical - [Tilt Up Limit] ......... (A P 58) Chart - [Tilt Down Limit] ......(A P 58) - [TC/UB...] .......... (A P 58) [Main Menu...] ........(A P 54) - [TC Generator] ......(A P 58) - [TC Preset] ........(A P 58) - [Camera Function...] ...... -
Page 55: Camera Function Menu
Camera Function Menu AGC Limit For setting the maximum gain value of “AGC”, which electrically boosts the sensitivity level Menu screen for specifying operation settings according to the brightness automatically. during shooting. [Setting Values: R48dB, 42dB, 36dB, 30dB, 24dB, This item can only be selected in the Camera 21dB, 18dB, 15dB, 12dB, 9dB] mode. -
Page 56: Camera Process Menu
Camera Process Menu Digital Zoom For setting whether to enable the digital zoom function. Menu screen for adjusting the quality of camera Off: images. Enables only the optical zoom (1x to 30x). Detail Enables the dynamic zoom (30x to 360x) in For adjusting the contour (detail) enhancement addition to the optical zoom. -
Page 57: Pan/Tilt Menu
Pan/Tilt Menu White Balance For setting the white balance mode. FAW: Switches the camera to the Automatic White Pan/Tilt Preset Speed Balance mode. The white balance is For setting the speed for moving to the pan/tilt automatically adjusted according to the color position configured in the Preset mode. -
Page 58: Tc/Ub Menu
Tilt Up Limit/Tilt Down Limit UB Mode Sets a limit on the vertical (up/down) range of the For setting the recording mode of the user’s bit. tilt operation. Selecting Set sets the current Date: position as the tilt limit. Movement beyond this point Records the date. -
Page 59: A/V Set Menu
A/V Set Menu 9 HDMI TC For setting whether to superimpose time code to the [HDMI] terminal. Menu screen for video output and audio. [Setting Values: On, ROff] Video Set... Memo : When [Main Menu] B [A/V Set] B [Video Set] B For specifying video output-related settings. -
Page 60: Network Menu
9 Login Name (Fixed) [Setting Values: RLAN, USB] The login name is “jvc”. It cannot be changed. 9 FTP Proxy 9 Login Password For setting the FTP proxy. Changes the password for accessing via a web o Type: browser. - Page 61 o Type 9 Resolution For setting the system to transfer videos for For setting the resolution on the Live View screen. distribution. [Setting values: R640x360, 320x180] [Setting Values: RMPEG2-TS/UDP, MPEG2- TS/RTP, RTSP/RTP, ZIXI, RTMP] Live Streaming Set Memo : For specifying settings for distributing live video Use reception devices that are compatible with images.
- Page 62 o Password 9 Resolution For setting the password. For setting the resolution of the video image during There is no default value (blank). live distribution. * Enter not more than 127 characters. Enter not The selectable options vary according to the more than 31 characters for RTSP/RTP setting.
- Page 63 o Port Clip Server Enter the FTP server port number to use using For setting the server and directory for uploading an integer between 1 and 65535. recorded clips in the microSD card to the FTP The default value varies with the Protocol server.
- Page 64 o Port Metadata Server Enter the FTP server port number to use using For registering the FTP server for importing the an integer between 1 and 65535. metadata and the path of the file to be imported. The default value varies with the Protocol Up to 4 settings can be registered.
-
Page 65: System Menu
System Menu Information Display For setting whether to display information such as the camera status, microSD card information and This menu screen allows system-related settings. time code over the video image on the screen of For specifying recording settings, formatting and the externally connected monitor or the web restoring of microSD card, tally lamp setting, date/ browser (Live View) screen. - Page 66 Time Style Reset All For setting the time display on the web browser Resets all menu settings. (Live View) screen and externally connected Memo : monitor screen as well as that for time stamp [Date/Time] and [Time Zone] cannot be reset. recording.
-
Page 67: Record Set Item
Record Set Item Install Position For selecting the location to install the camera. Frame Rate Desktop: When the camera is mounted on top of a table or to a tripod. The output image is not inverted Setting Value System Mode vertically or laterally. - Page 68 Loop Rec Clip Set For setting whether to enable the loop recording 9 Clip Name Prefix mode. For setting the first four characters of the name of (A P51 [Loop Recording] ) the clip file to be recorded to the microSD card. [Setting Values: On, ROff] Enter any of the 36 characters including alphabets Memo :...
-
Page 69: Display Screen In Camera Mode
Display Screen in Camera B Audio Level Meter Set [Audio] to “On” or “Off” to display or hide Mode the level meter respectively. This screen displays the event. It is also used to 4030 20 display warnings only. C White Balance Mode O N M Displays the current white balance mode. - Page 70 F Gain K Zoom Display Displays the gain value. Displays the zoom position. (Zoom bar or An a icon is displayed to the left when value) Digital zoom off: [Exposure] is set to a value other than “Manual”. G AE Level Digital zoom on: Displayed when the AE function is activated.
- Page 71 M Live streaming mark When [Main Menu] B [Network] B [Live Streaming Set] B [Live Streaming] is set to “On”, the distribution status is displayed. (A P61 [ Live Streaming ] ) Icon Status Distribution in progress (good connection quality) (Red) Distribution in progress (poor connection quality)
-
Page 72: Status Screen
Status Screen Live Streaming Screen For viewing information related to live streaming. (A P97 [Performing Live Streaming] ) For checking the settings of the camera recorder. * These are screen examples. The contents displayed are different depending on the settings. LAN Screen For viewing information related to the network of the [LAN] terminal. -
Page 73: Connecting External Devices
Connecting External Monitor To output live video images and audio sound to an external monitor, select the output signals from the camera, and connect using an appropriate cable according to the monitor to be used. Choose the most suitable terminal according to the monitor in use. -
Page 74: Functions Of Network Connection
Functions of Network Clip Metadata You can access the page for editing the Connection metadata via a web browser on a PC, and display or rewrite the metadata that is recorded to a clip. The network feature is able to function by using (A P81 [ Clip Metadata ] ) the [LAN] terminal at the back of the unit or by connecting one of the following adapters to the... -
Page 75: Connecting To Network Via [Lan] Terminal
Connecting to Network via [LAN] Connecting to Network via [USB] Terminal Terminal 1 Connect an appropriate adapter according 1 Connect the [LAN] terminal of the camera to the intended use to the [USB] terminal at with devices such as a PC or the RM-LP100 the rear of the camera recorder. -
Page 76: Connecting Via Wireless Lan (Usb)
P2P Connection Connecting via Wireless LAN (USB) For direct access to the network feature of the Connection via Access Point camera from a PC. 1 Perform setting on the camera recorder, 1 [Wireless LAN] appears on the [Wizard] and start up the [USB Wizard] screen. screen. -
Page 77: Connecting Via Ethernet Adapter (Usb)
2 Perform setting on the camera recorder, and start up the [Wizard] screen. (A P75 [Connecting to Network via [USB] Terminal] ) 3 [Ethernet] appears on the [Wizard] screen. Available Adapter 4 From the list of PC access points, select [SSID] and enter [Passphrase]. -
Page 78: Connecting Via Cellular Adapter (Usb)
Importing Metadata Connecting via Cellular Adapter (USB) You can make use of the FTP function and live streaming function by connecting a cellular adapter You can download a metadata settings file (XML to this camera recorder. format) from the FTP server and store metadata in the camera recorder. -
Page 79: Configuring The Server For Downloading
Configuring the Server for Downloading Importing Metadata For specifying the settings (server name, user Download the metadata settings file (XML format) name, password, etc.) for connecting to the FTP from the FTP server. server for downloading the metadata as well as the 1 Select [Main Menu] B [Network] B [Import path of the file to download. -
Page 80: Editing Metadata
Editing Metadata 3 Select [Import] on the confirmation screen, and press the Set button (Set). Import starts. Planning Metadata After import is complete, the display is restored to the screen before the [Import Metadata] Access the page for editing the camera’s metadata via a web browser on a PC, and edit the metadata screen appears. -
Page 81: Clip Metadata
Clip Metadata 3 Edit the metadata. Access the page for editing the metadata via a web A Enter information for the necessary fields. browser on a PC, and display or rewrite the B After input is complete, click [Save] to overwrite metadata that is recorded to a clip. - Page 82 6 Edit the metadata of the selected clips. B Click [Change] to switch the camera to the A Edit the information for the necessary fields. Remote Edit mode. B You can click the [OK Mark] to add an OK mark to or delete it from the selected clips.
-
Page 83: Uploading A Recorded Video Clip
Uploading a Recorded A You will see a message indicating “It is Video Clip necessary to change the camera mode to "Remote Edit Mode". Change the mode.” on the web browser. You can upload clips recorded in the microSD card to a preset FTP server. You can upload selected clips, all clips, or those appended with an OK mark. - Page 84 8 Select the clip server and start uploading. Upon selecting the server to upoload clips to, an upload screen appears. The status of the transfer process is indicated by a progress bar. Memo : 7 Select a method to upload the clips. To stop transfer, click the [Stop] button.
-
Page 85: Deleting Recorded Clips
Deleting Recorded Clips If a setting other than “FTP” is specified for [Protocol], to ensure the safety of the You can delete clips that are recorded in a microSD communication path, a screen appears card. prompting you to validate the fingerprint of the public key and certificate received from the 1 Display the web setting screen. - Page 86 B Click [Change] to switch the camera to A Delete selected clips the Remote Edit mode. Deletes only the selected clips. B Delete all clips Deletes all the clips in the displayed slots. C Deselect All Clears all clip selection and returns to the [Clip list] screen.
-
Page 87: Changing Settings
Changing Settings A Connection Setup For specifying connection settings that are common between the LAN and USB terminals. You can change the network-related settings by accessing via a web browser on a PC. B Connection Setup (LAN) For changing the connection settings for the 1 Display the web setting screen. -
Page 88: Changing Common Lan/Usb Connection Settings
Changing Common LAN/USB Changing LAN Connection Settings Connection Settings You can change the settings for each of the preset items on the [LAN Wizard] screen of the camera For specifying network settings that are common between the LAN and USB terminals. recorder. -
Page 89: Changing Usb Connection Settings
Changing USB Connection Settings D For configuring information required for connecting to a wireless LAN access point. You can change the settings for each of the preset E IP Address Configuration items on the [USB Wizard] screen of the camera When “DHCP”... -
Page 90: Changing Metadata Server Settings
Changing Metadata Server Settings D Server For setting the server name (“mystation.com”, You can make direct changes to the FTP server for etc.) or the IP address (“192.168.0.1”, etc.) of importing the metadata that is specified in the FTP server. [Metadata Server] on the [Settings] screen, as well as the path of the file to import. -
Page 91: Changing Clip Server Settings
Changing Clip Server Settings ZIXI: Select this item when transferring files via the You can make direct changes to the server and ZIXI server. directory settings that are specified in [Clip [Setting Values: RFTP, SFTP, FTPS, Server] on the [Settings] screen for uploading FTPES, ZIXI] recorded clips in the microSD card to the FTP Memo :... -
Page 92: Changing Live Streaming Settings
Changing Live Streaming Settings E Address For setting details such as the host name and You can make direct changes to information on the the IP address of the live distribution destination of distribution that is specified in [Live destination. Streaming] on the [Settings] screen. -
Page 93: Managing The Network Connection Settings File
Managing the Network K Latency For setting the latency mode. Connection Settings File L Adaptive Bit Rate If “On” is selected, the bit rate setting value of live streaming is set to maximum limit, and the This camera recorder allows you to save the bit rate is changed automatically according to network connection settings on the [USB Wizard] changes in the network bandwidth. -
Page 94: Saving The Connection Settings File
Saving the Connection Settings File 5 Select [Store] and press the Set button (Set). 1 Select [Main Menu] B [Network] B [Connection Setup] and press the Set button (Set). 2 Select [Store] and press the Set button (Set). 6 Save the file. A confirmation screen appears when you choose to overwrite. -
Page 95: Reading The Connection Settings File
Reading the Connection Settings File Deleting Connection Settings 1 Select [Main Menu] B [Network] B 1 Select [Main Menu] B [Network] B [Connection Setup] and press the Set [Connection Setup] and press the Set button (Set). button (Set). 2 Select [Load] and press the Set button 2 Select [Delete] and press the Set button (Set). -
Page 96: Loading And Saving Setup Files
Loading and Saving Setup 4 Press the [OK] button. Files Pressing the button starts uploading of the file. Progress of the uploading process is shown at the bottom of the screen. You can load the setup file to the camera (upload) or save it to a PC (download) from the Maintenance page on the web browser screen. -
Page 97: Performing Live Streaming
Performing Live Setting Distribution Streaming 1 Select the terminal for live streaming. Specify the settings in [Main Menu] B [Network] B [Interface]. By combining with the decoder or PC application (A P61 [ Interface ] ) that supports live streaming, you can perform audio 2 Set the Resolution and Frame &... - Page 98 [Live Streaming Set] Combinations that Support Distribution o LAN terminal Resolution 1920 x 1080 1280 x 720 640 x 360 Frame Rate 60p, 50p 60i, 50i, 30p, 25p 60p, 50p 30p, 25p 30p, 25p Type Bitrate 20 Mbps 16 Mbps 12 Mbps c c* c c*...
-
Page 99: Starting Distribution
Starting Distribution Memo : 1 Perform the necessary setting for the You can check the status of distribution on the decoder and PC application. status screen. For details on the settings, please refer to the (A P72 [Live Streaming Screen] ) “INSTRUCTIONS”... -
Page 100: Setting The Fec Matrix
Setting the FEC Matrix Memo : Set the amount of FEC (Forward Error Correction) Increasing the amount of FEC overhead overhead for configuring SMPTE2022-1. increases the packet loss resilience but more network bandwidth is used. 1 Select [Main Menu] B [Network] B [Live Even with the same amount of overhead, Streaming Set] B [Streaming Server] B increasing the L value will increase the packet... -
Page 101: Error Messages And Actions
Error Messages and Actions Warning display on the externally-connected display screen or the Live View screen, tally lamp indication and warning tone are displayed or output according to the error status as shown in the table below. Memo : This camera recorder makes use of a microcomputer. Noise interference from external sources may prevent it from functioning properly. - Page 102 Error message Status Action Access Denied. Access is denied. Adjust the Server and Port settings for [Metadata Server] or [Clip Server]. (A P64 [ Metadata Server ] ) (A P63 [ Clip Server ] ) Invalid Username or Authentication for login to the FTP Adjust the Username and Password Password.
-
Page 103: List Of Live Streaming Error Displays
List of Live Streaming Error Displays The following error messages are displayed when the live streaming setting is incorrect, or when the connection is lost during live streaming. Error message Status Action Invalid Address The IP address format is Enter the IP address, host name incorrect. -
Page 104: Blinking Of The Tally Lamp
Blinking of the Tally Lamp The lamp appears blinking such as when the remaining level of the microSD card is running low, or when a system error occurs on the camera. * The operation changes according to the menu settings. To configure the setting, go to [Main Menu] B [System] B [Tally Lamp]. -
Page 105: Troubleshooting
Troubleshooting Problem Cause Action Power does not turn on. The AC adapter is not properly Check whether the AC adapter is properly connected. connected. There is problem in the connection Check whether connection is with the PoE+ (IEEE802.3at Type2) established using a PoE+ power supply device. - Page 106 Problem Cause Action The View Remote screen The network path is congested. Wait a while before refreshing (reloading) turns black. the web browser or initializing the cache. The screen flickers. The screen freezes. Cannot perform remote operation. The View Remote text The font size of the web browser is Reduce the font size of the web browser.
-
Page 107: Specifications
Specifications Item Description [RS-232C IN] Mini DIN 8-pin Input terminal for RS-232C terminal General remote control unit [RS-232C OUT] Mini DIN 8-pin Item Description Output terminal for RS-232C terminal Power DC 12 V (when an AC adapter is remote control unit used) (Termination function) DC 42 V to 57 V (when PoE+... - Page 108 Video/Audio Item Description Streaming Mode (When the [USB] terminal is Item Description connected) HD mode (QuickTime) Video 1920×1080 (59.94p, 50p) 12/8 Recording file QuickTime File Format Mbps format 1920×1080 (59.94i, 50i, 29.97p, Video 25p) 12/8/5/3 Mbps 50M mode MPEG-4 AVC/H.264, 50 Mbps 1280x720 (59.94p, 50p) (LPCM) (Max)
- Page 109 Dimensional Outline Drawing (Unit: mm) * The specifications and appearance of this product are subject to changes for further improvement without prior notice. Specifications...
-
Page 110: Software License Agreement
“Licensed Software”) provided by the possession of the User, and that the User shall JVC KENWOOD Corporation (hereinafter the cause the transferee to comply with this Software “Licensor”) is copyrighted to or sublicensable by License Agreement. - Page 111 Article 8 Termination In case the User falls under any of the events described in the following items, the Licensor may immediately terminate this Agreement or claim that the User compensates for the damage incurred by the Licensor due to such event: (1) when the User violated any provision of this Agreement;...
-
Page 112: Important Notice Concerning The Software
A Start up Live View. components (hereinafter the “Licensed Software”), B Open the [MENU] tab and click the [MENU] a copyright of either JVC KENWOOD Corporation button to display the camera menu. (hereinafter “JKC”) or a third party subsists. C Select [Main Menu] B [System] B [System The Product uses the software component Information] B [Open Source License]. -
Page 113: Index
Index AC adapter ..........33 SDI ............59, 73 Access point ..........76 Setup file ............ 96 AWB paint ..........45 Shooting ............ 38 Skin detail function ........56 Brightness adjustment ....... 41 Software keyboard ........53 C Camera mode ........ 19, 26, 69 Status screen ........ - Page 116 B5A-1715-00 © 2016 JVC KENWOOD Corporation...
Need help?
Do you have a question about the KY-PZ100WU and is the answer not in the manual?
Questions and answers