Table of Contents
Advertisement
Advertisement
Table of Contents

Summary of Contents for Sun Nuclear Radon 1028
- Page 1 Title Radon Monitor User’s Guide Accurate, Reliable, Economical Models 1028, 1029...
- Page 2 © Copyright 2016 by Sun Nuclear Corporation. All rights reserved. The information contained in this guide and the accompanying software program are copyrighted and all rights are reserved by Sun Nuclear Corporation. No part of this guide may be translated, reproduced, sold, or otherwise distributed without the prior written consent of Sun Nuclear Corporation.
-
Page 3: Health And Safety Instructions
Inspect all cables periodically for damage. Do not use any cable that is damaged or has broken insulation. Replace the cable immediately. If any mechanical or electrical degradation is suspected, contact Sun Nuclear Corporation for repair or replacement. Check for physical damage prior to and after each use. -
Page 4: Regulatory Information
55. Review this information thoroughly before setting up and using the device. Finding Additional Information User’s Guide: This guide is available as a PDF file on the Sun Nuclear website: https://support.sunnuclear.com/radon/. Online Help: Online help is available by selecting Help > Contents from the Radon Monitor software application menu. -
Page 5: Table Of Contents
Contents Preface ..... . iii Low Printer Battery Indication . . . 23 Efficient Use of Printer Battery . . . 23 Application . - Page 6 Service and Calibration ...53 Modifications to Equipment ..56 Contacting Sun Nuclear Support ..54 Interaction with Other Electrical Support Website ....54 Equipment .
-
Page 7: Introduction
Parts Unpack the radon monitor and identify the parts described below. Note: Save the packing material so it can be used when sending the radon monitor to Sun Nuclear Corporation for annual re-calibration. Part Number Description 1028300 Model 1028 Radon Monitor*... -
Page 8: Connections
Connections Description Function USB PC PORT (front) USB port (USB 1.1 or 2.0); for connection to a computer Serial PC PORT (front) Serial port (RS-232); for connection to a computer PRINTER PORT (front) Serial port (RS-232); for connection to the optional printer. -
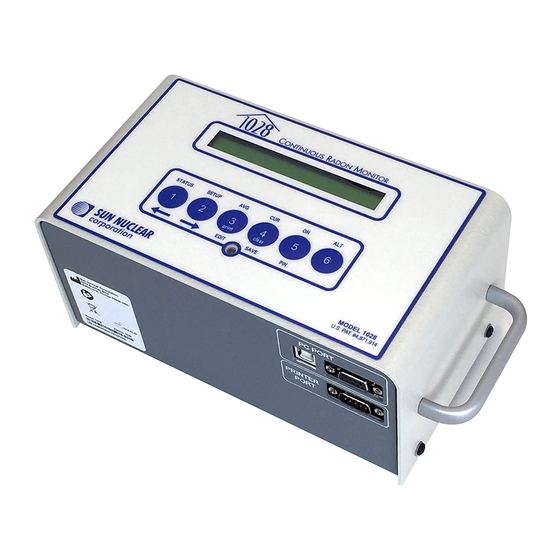
Page 9: Controls
Controls Description Function Display 16-digit LCD display shows messages to guide the operation. Buttons Six push buttons have different functions, depending on mode. Press keys to operate. Top row of labels lists main functions. Bottom row of labels are for Setup. Print and Clear functions are used after measure- ment. - Page 10 Description Function Print Sends report data to optional printer in Print/Clear mode. Mode light The green light between EDIT and SAVE has the following meaning: • Blinks once during power up, indicating that the startup test is in prog- ress. •...
-
Page 11: Standalone Operation
3V battery from discharging. The 3V battery will discharge in 15 min- utes; the battery is not user-serviceable and if discharged, the unit must be returned to Sun Nuclear for replacement. With the radon monitor disconnected from AC power, a fresh alkaline battery will operate the device for about 100 hours, or a fresh lithium-ion battery for about 300 hours. -
Page 12: Replacing The 9V Battery
The internal 3V battery will discharge in 15 minutes and if discharged, the unit must be returned to Sun Nuclear for replacement. Additionally, if the 3V internal battery is discharged, the time and date may be reset and the “Current” values may be permanently erased. -
Page 13: Connecting The Ac Adapter
Connect a fresh 9V battery to the connector, insert the battery into the battery compartment, and close the battery compartment door. Connecting the AC Adapter After verifying a battery is installed (see Figure 5 on page 6), connect the power cable to the power connector on the rear panel of the radon monitor. Figure 6. - Page 14 Figure 7. Turning on the Display When the display shows “Start Test = 5,” the user may start a new test, check AVG, check CUR, check STATUS, or change SETUP. The table below summarizes the steps to turn on the display. Press…* Display Shows…...
-
Page 15: Starting A Test
Starting a Test When the “Start Test = 5” prompt appears, press the 5 button to start a new test. Press… Display Shows… Comment A new test can be started. – Start Test = 5 Memory is rechecked. If data is found, memory must be cleared before starting a new test. -
Page 16: Displaying Average And Current
Note: A completed test cannot be interrupted. After a test is completed, pressing ON displays the normal start sequence. Displaying Average and Current Note: AVG is the average radon concentration over the total monitoring period; CUR is the average radon concentration over the last 12-hour period. -
Page 17: Clearing Memory
Press… Display Shows… Comment Displays the radon concentration in the current – Current 12-hour period. AVG or CUR reading is complete. The data for the test remains in memory and must be cleared – Start Test = 5 before starting a new test. See Starting a Test on page 9. -
Page 18: Setting Up Parameters
Press… Display Shows… Comment Embedded code (firmware) version number. – CODE VER nnnn Serial number. – nnnnnnnnnnn End of the menu. Display returns to “Start Test = – Status Menu Done 5”. Status items can also be displayed during a test by pressing the (1) button while the display shows “End Test Y=5 N=2.”... - Page 19 Press… Display Shows… Comment Press SAVE; saves the setting and advances to Duration 1.0 hr the next item. Press arrow keys to scroll through test duration times: 1.0, 12, 24, 36, 48, 60, 72, 84, 96, 100, or 999 hours. Duration 48 hr If 999 is selected, measures until memory is full or...
-
Page 20: Character Set
Press… Display Shows… Comment Select units, pCi/l or Bq/m (edit, select with UNITS pC/l arrows, and SAVE (4)). Enter a PIN number if desired in the range of 1111 to 4444 and SAVE. The number 1111 is equivalent PIN NUM 1111 to no PIN. -
Page 21: Clearing A Reset
Clearing a Reset Turn on the radon monitor to check the battery. If the system is accidentally reset, clear the reset as shown in the table below. Press… Display Shows… Comment Battery is checked. Battery System has been reset. – System has reset An alert to check the date and time and re-enter –... -
Page 22: Low Battery Without Ac Power Connected
9V battery to prevent the internal 3V battery (required for operation) from discharging. The 3V battery is not user-service- able and if discharged, the device must be returned to Sun Nuclear for replacement. The radon monitor must always be stored with a 9V battery installed or connected to AC power. -
Page 23: Portable Printer (Optional)
Portable Printer (Optional) Printer - Parts The following parts are included with the optional portable printer, P/N 1028050. Part Number Description 022005Z Power supply, 6 VDC out, 2.1 mm plug 750052 Rechargeable battery pack, 4.8 V Ni-MH 801008Z Line power cord for printer, detachable, IEC Plug to USA style, 125 V, 10 A, 2.3 m. -
Page 24: Printer Connection And Controls
Printer Connection and Controls Connect the printer cable to the PRINTER PORT on the radon monitor and the serial port on the printer’s rear panel (Figure 9). Figure 9. Connecting the Printer Cable To operate the printer on AC power, plug the power supply (P/N 022005Z) into the power connector at the back of the printer. -
Page 25: Loading The Paper
To feed paper, press the ONLINE/OFFLINE button to select off line mode (red LED illuminated), then press the FEED button. It is only possible to feed paper when the printer is OFFLINE. When complete, press the ONLINE/OFFLINE button to select on line mode (green LED illuminated). -
Page 26: Printing A Report
Press the ONLINE/OFFLINE button to select off line mode (red LED illuminated). Push the edge of the paper into the inlet slot at the bottom of the paper holder until the auto-loader catches and feeds about 10 cm of paper through the paper cutter. -
Page 27: Typical Printer Report
Typical Printer Report Figure 12. Typical Printer Report... -
Page 28: Movement
Movement The movement indicator (M) indicates if the unit was moved during the displayed time period. The movement indicator is sensitive and can be triggered by bumping or minor shifting. It could also mean that the unit was moved to a different location during the test, invalidating the test. -
Page 29: Charging The Battery Pack
Pull out the battery pack, grasp the connector between your thumb and index finger, and then pull gently to remove. Close the battery cover. Charging the Battery Pack Turn the power switch to the OFF (0) position. Connect the AC adapter to the printer. The Power LED will blink once every second while the battery is charging. -
Page 30: Printer Switch Settings
Printer Switch Settings The thermal printer (P/N 1028050) has internal DIP switches that are set at the factory. For proper operation, these switches must be set as shown in Figure 14 on page 25. To check and set the switches, perform the following steps: Slide the power switch to the OFF (0) position. - Page 31 Figure 14. DIP Switch Settings for Printer...
-
Page 32: Computer Operation
Computer Operation About the Software The Radon Monitor uses a Windows program called “1028/1029 Radon Monitor.” The software can be used to: • Enter and download setup parameters into the radon monitor • Upload report data from the radon monitor into the computer •... -
Page 33: Connecting To Computer
Connecting to Computer The radon monitor can be connected to a computer using the USB cable provided with the radon monitor. If the computer does not have a USB port, a serial cable can be used to connect the radon monitor to the computer. See Optional Serial Connection on page 50. Ensure that the radon monitor software has been installed on the computer. -
Page 34: Using Software To Retrieve Data
Using Software to Retrieve Data After launching the software, turn on the radon monitor by pressing the ON key (5). If prompted, enter the PIN and press 5. When the display shows “Start Test = 5”, click the Retrieve Data from Monitor button at the bottom of the Inspection tab on the main screen. -
Page 35: About The Main Screen
About the Main Screen The main screen has a menu bar, toolbar buttons, a status bar, and four tabs (Inspection, Chart, Pictures, and Checklist). The toolbar and status bar can be displayed, as shown below, or hidden. The appearance of the main screen will change depending on the tab that is selected. - Page 36 Group Item Description Continuous Model Number Model number, 1028 or 1029. Radon Moni- Serial Number Serial number of this unit. tor (from factory) Calibration factor—determined during calibration. Battery Battery voltage. Calibration Date Date the unit was last calibrated. Test Parame- Start Time Time the test started.
- Page 37 Group Item Description Customer Name Enter customer name to appear on printed report. Information Address 1 Enter address line 1. (usually Address 2 Enter address line 2 (if applicable). entered after retrieving test City Enter city. data from the State/Province Enter state or province.
-
Page 38: Main Screen - Chart Tab
Main Screen - Chart Tab The Chart tab shows a chart (graph) of the test results (Figure 19). The graph is included in the printed report. Group Item Description Chart Chart Title The chart title includes the model number and serial num- ber of the radon monitor. -
Page 39: Zooming In And Out
Group Item Description Chart Motion Errors If checked in the Legend Panel, and if motion was (Continued) detected during the test, a vertical line with a red circle indicates each motion event. Also, the text ‘Motion Detected’ is displayed above the Legend Panel. Action Level If checked in the Legend Panel, the Action Level horizon- tal, red line is displayed. -
Page 40: Main Screen - Pictures Tab
Main Screen - Pictures Tab The Pictures tab is used to select up to six pictures that can be printed in the report. The pictures may consist of setup photos, before and after, etc. The Print Picture checkbox above each picture allows the user to select which images will be displayed in the report. -
Page 41: Main Screen - Checklist Tab
Main Screen - Checklist Tab The Checklist tab provides a checklist that the inspector can use to verify that best practice actions were completed prior to starting the test (such as locating the radon monitor where it will not be disturbed, not locating it near drafts, etc.). Figure 21. -
Page 42: Menu Bar And Toolbar Functions
Menu Bar and Toolbar Functions The menu bar contains commands for operating the program. The toolbar (if displayed) is just beneath it. All of the toolbar commands can also be selected from the menu. Group Item Description File Retrieve Data Retrieves data from the connected radon monitor. -
Page 43: Data To/From Text File
Group Item Description View Toolbar When checked, displays the toolbar below the menu. Toolbar Label When checked, displays labels beneath the tools on the toolbar. Status Bar When checked, displays the status bar at the bottom of the main screen. View Notices Displays a screen that can be used to show all notices from the monitor, clear notices, or save notices to a log. -
Page 44: Monitor Settings Preferences
Monitor Settings Preferences The software can be used to send basic parameters to the radon monitor. Although this can also be done using the keypad on the radon monitor, it may be quicker and easier to perform from the software, especially when several radon monitors are being updated. -
Page 45: Preferences Screen - Monitor Settings Tab Details
Edit the Inspection Company and Radon Monitor information, as needed. For details about the screen options, see Preferences Screen - Monitor Settings Tab Details on page 39. Set the date, time, pin number and Radon units. If the Set Monitor Time checkbox is selected, the software automatically updates the time and date to the computer’s system clock. -
Page 46: Report Printing Preferences
Group Item Description Inspection Name Enter inspector name for the report. Company Company Name Enter the name of the inspection company. Address 1 Enter the inspection company’s address line 1. Address 2 Enter the inspection company’s address line 2. City Enter the city. - Page 47 If the report will be printed on company letterhead, select the amount of space that should be left at the top of the paper so the report does not overprint the letterhead. Select whether the report displays EPA Average, Overall Average, or both. If a signature image file is available, select it.
-
Page 48: Preferences Screen - Print Tab Details
Preferences Screen – Print Tab Details The ‘Print Preferences’ screen Print tab is used to select options for the printed report. If a checkbox is selected, the information is included in the report. Default Group Item Description Value Printing Atmospheric Selected Select atmospheric conditions at test site Preferences... - Page 49 Default Group Item Description Value Printing Pref- Select Signature Blank If selected, the signature image will appear erences Image on the last page of the report above the (Continued) ‘Inspector Signature’ line. The header Select Header Blank image will appear at the top of the first Image page of the report (not the cover page or other report pages).
-
Page 50: Printing Reports
Calibration Date: 01/10/2009 CF: 2.57, 2.57 Monitor Time: 1/8/2010 8:47 Inspection Company Billing Information Site Information Sun Nuclear Corp 425 A Pineda Court Test Melbourne, FL-32940 Phone Number: 3212596862 License Number: 1234, 5678 Site & Condition Wind: Atmospheric Condition: NA... - Page 51 Preview’ window, the user can print the report, save it to a PDF file, or view it page-by-page by clicking the buttons at the top of the screen (Figure 27). Figure 27. Print Preview Screen To save the report as an Adobe PDF file, open the ‘Print Preview’ window then click the Print to PDF button at the top of the screen.
-
Page 52: Specifications
Specifications Recommended System Requirements Characteristic Details Operating System Windows 8.1, Windows 7, or Windows XP (32-bit or 64-bit) Note: Windows XP is not recommended since Microsoft no lon- ger supports it. Computer Minimum • Processor: x486 • Total RAM: 128 MB •... - Page 53 Description Value • –22 to 122° F (–30 to 50° C) Storage Environment • 10 to 90% relative humidity, non-condensing Printer Data Port RS-232, 9-pin, D-connector allows printer data to be sent to optional thermal printer Serial Data Port RS-232, 9-pin, D-connector for two-way communication with PC USB Data Port USB-A connector allows two-way communication with PC Power Supply...
-
Page 54: Support And Maintenance
Standalone Operation on page 5. For accessory part numbers, See Accessories below. There are no user-serviceable parts inside the radon monitor. If there are problems with the device, please contact Sun Nuclear Support. See Contacting Sun Nuclear Support on page 54. Accessories Contact Sun Nuclear Corporation to order any of the following accessories: Table 2. -
Page 55: Storage
These upgrades, when available, can be downloaded from the Sun Nuclear Support website for Radon products (see Support Website on page 54). Navigate to “Support,” then select “Radon Downloads.”... -
Page 56: Verifying Software Version
Verifying Software Version The version of software may be verified as follows: Launch the Radon Monitor application. Connect to the radon monitor. Select Help > About from the menu. The About Radon Monitor message displays the version number of the application. Removing Software To remove the radon monitor software from the computer, open the Control Panel and then select Add or Remove Programs. -
Page 57: Port Selection
For serial cable part number, see Accessories on page 48. Serial cable can also be used with optional printer. If desired, plug the power supply into an AC outlet with 110 to 240 VAC, single phase, 50-60 Hz. Figure 28. Optional Serial Connection to a Computer Port Selection Normally the software tries to connect to the radon monitor on COM 1. -
Page 58: Radon Monitor Troubleshooting
Connect power and/or battery missing or replace 9V battery. discharged. Unit will not turn on with Internal 3V battery Contact Sun Nuclear Support. power or good battery discharged. Unit will need to be returned connected for internal battery replace- ment. The user should not attempt to replace this battery. -
Page 59: System Errors
The unit contains high-voltage circuits. Do not open the case. There are no user-serviceable parts inside. For service or calibration, the unit must be returned to Sun Nuclear Corporation. The recommended calibration frequency for the Model 1028 or 1029 radon... -
Page 60: Contacting Sun Nuclear Support
Sun Nuclear Support team by telephone: +1 321-259-6862. Support Website Visit the Sun Nuclear Support website to request support via an online form. Open an internet browser and navigate to https://support.sunnuclear.com/radon. In the left panel, click Contact Support. -
Page 61: Regulatory Supplement
In addition to the regulatory information contained in the body of this manual, the following supplemental regulatory information is provided. Sun Nuclear Corporation Symbols The following symbols are used in this guide and in Sun Nuclear Corporation’s product labels. WARNING: This symbol indicates a risk of electric shock. -
Page 62: Operator Responsibility
Reporting Health or Safety Related Issues or Concerns Should the need arise to report any safety or health related issues or concerns regarding the use of Sun Nuclear products, contact Sun Nuclear Support. See Contacting Sun Nuclear Support on page 54. -
Page 63: Index
Index Numerics chart tab 32 3V battery discharge warning 5 checking unit status, from keypad 11 9V battery 5 checklist tab 35 changing 15 cleaning 49 clear button (keypad) 3 clearing memory, from keypad 11 AC adapter 7 clearing reset, from keypad 7 accessories, parts 48 closing software 28 ALT button (keypad) 3... - Page 64 operator and data evaluation 56 health and safety operator responsibility operating information iii data evaluation 56 humidity (1029) 22 knowledge required 56 humidity, affects battery 6 optional portable printer 17 indoor applications only iii paper, printer 19 inserting a battery 6 part numbers 1 inspection tab 29 parts and repairs 48...
- Page 65 36 3V battery is not user-serviceable and if verifying version 50 discharged, the device must be specifications, technical 46 returned to Sun Nuclear for standalone operation 5 replacement 2 starting a test 9 always connect to AC power before...
- Page 66 This page is intentionally left blank.
- Page 68 Corporate Headquarters +1 321 259 6862 Corporate Headquarters +1 321 259 6862 3275 Suntree Boulevard sunnuclear.com 3275 Suntree Boulevard sunnuclear.com Melbourne, FL 32940 USA Melbourne, FL 32940 USA...
Need help?
Do you have a question about the Radon 1028 and is the answer not in the manual?
Questions and answers
how to clear the red reset flag on 1028-XP
To clear the red reset flag on the Sun Nuclear Radon 1028-XP:
1. Select View > View Notices, then choose Read Notices from Monitor.
2. Note the error explanation shown on the screen.
3. Select Save to Log to save the error code to a log file.
4. Select Clear Notices from Monitor to remove the error code.
5. If the error appears again after a test, the device likely needs service.
If the condition persists, the unit may require servicing by Sun Nuclear Corporation.
This answer is automatically generated